Startup Window
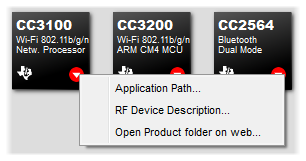
The Smart RF Studio Startup Window shows an overview of all available RF devices and indicates which of them are physically connected. Right-clicking on a device icon gives access to further information about the device as well as the possibility to launch the Device Control Panel .
A double-click on a device icon will launch the Device Control Panel. If the device is physically connected, an on-line Device Control Panel will be started. If no device connected, an off-line Device Control Panel will be started.

List of Connected Devices
The list of connected devices at the bottom of the startup panel shows the following information about each connected device: evaluation board type, USB Device Identifier, firmware revision (if applicable) and device type. The Device Control panel can also be started by clicking on one of the entries in the list of connected devices.
The list of connected devices will normally be updated automatically when a USB device is connected. It is also possible to force update of the list by clicking on the “Refresh” button on the top right corner of the list.
Note: MSP430 devices (E.g. CC430) will not appear in the list automatically. The “Refresh” button must be used to start enumeration of those devices.
Devices that Require a Separate Installation
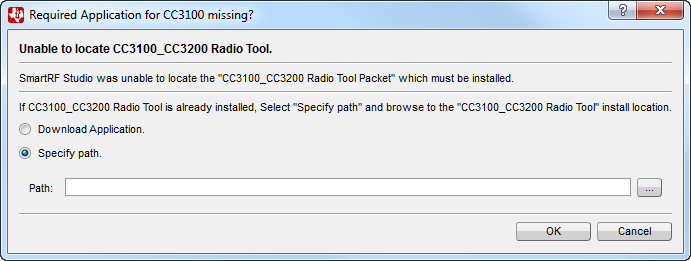
Some devices that are listed in SmartRF Studio require that the evaluation tools are installed separately from SmartRF Studio. If the tools are not installed, and the user tries to start the evaluation tools for one of these devices, a popup dialog will appear, and ask the user either to give the appropriate path to the executable of the tool, or to start downloading the tool.
Below is an example of the dialog when trying to start CC3100/CC3200.

If the tool is already installed, it is possible to specify the path from the context menu when right-click on the device icon in the startup window (or left click on the white arrow). Select “Specify application path…”

