6.5. SysConfig
SysConfig is a tool that helps simplify the configuration of your application on a device.
The basic idea of SysConfig is to allow intuitive and natural configuration of key components in an application. The SysConfig tool will generate source code to configure these components (e.g. TI Drivers, stacks, etc.) based on the settings in the SysConfig configuration file (i.e. .syscfg). This generated code is then included in the application. For example, SysConfig will create and fill in all the 'C' structures needed by the TI Driver modules.
SysConfig is not dependent on an RTOS, compiler toolchain, or IDE. Additionally SysConfig is available
- with CCS Desktop
- with CCS Cloud
- as a stand-alone desktop tool
- as a cmdline tool
6.5.1. SysConfig Features
- Peripheral configuration
- Automatic embedded code generation
- Configuration error detection
- Device level dependency identification
- Device level error detection
- PinMux tool support
- Portable configuration support
6.5.2. SysConfig GUI
Opening the .syscfg file in your project folder will open the SysConfig GUI.
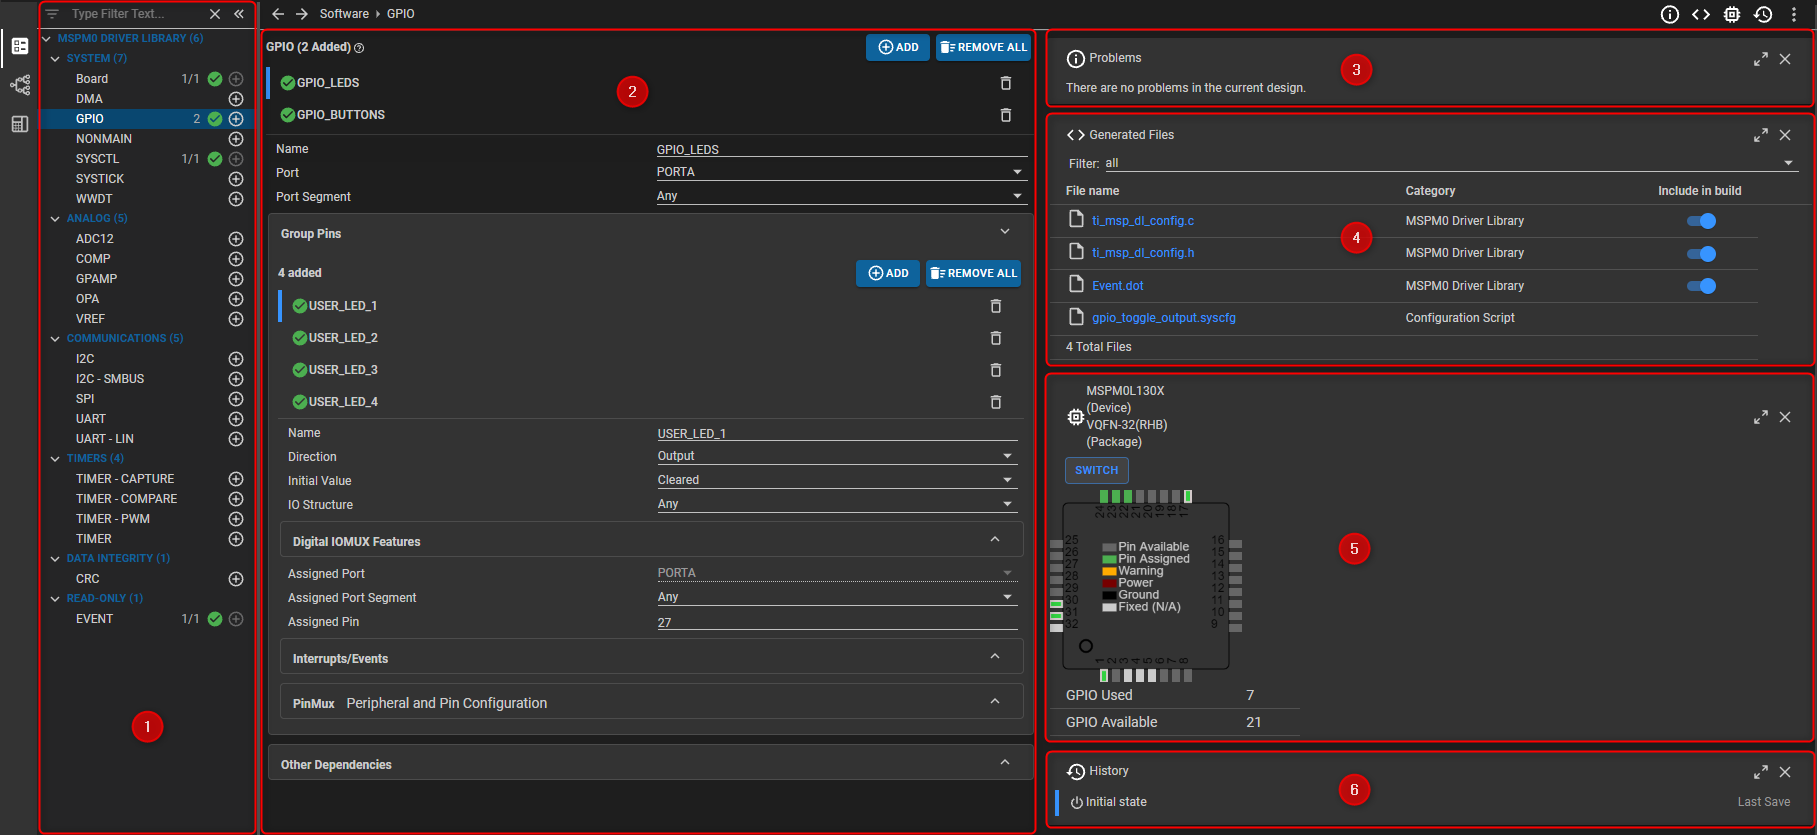
1: Configurable Modules - Contains a list of software module such as drivers, middleware, and protocol stacks that can be configured in the SysConfig GUI.
2: Module Configuration View - This view is where you can add an instance of a module and configure it.
4: Problems - This view highlights any problems detected by the SysConfig solver, such as pinmux conflicts.
5: Generated Files - This view contains the source code generated by SysConfig.
6: Device View - This view contains the device pin layout and displays the number of GPIO pins used in the design.
7: History - This view logs all of the changes done in the SysConfig GUI.
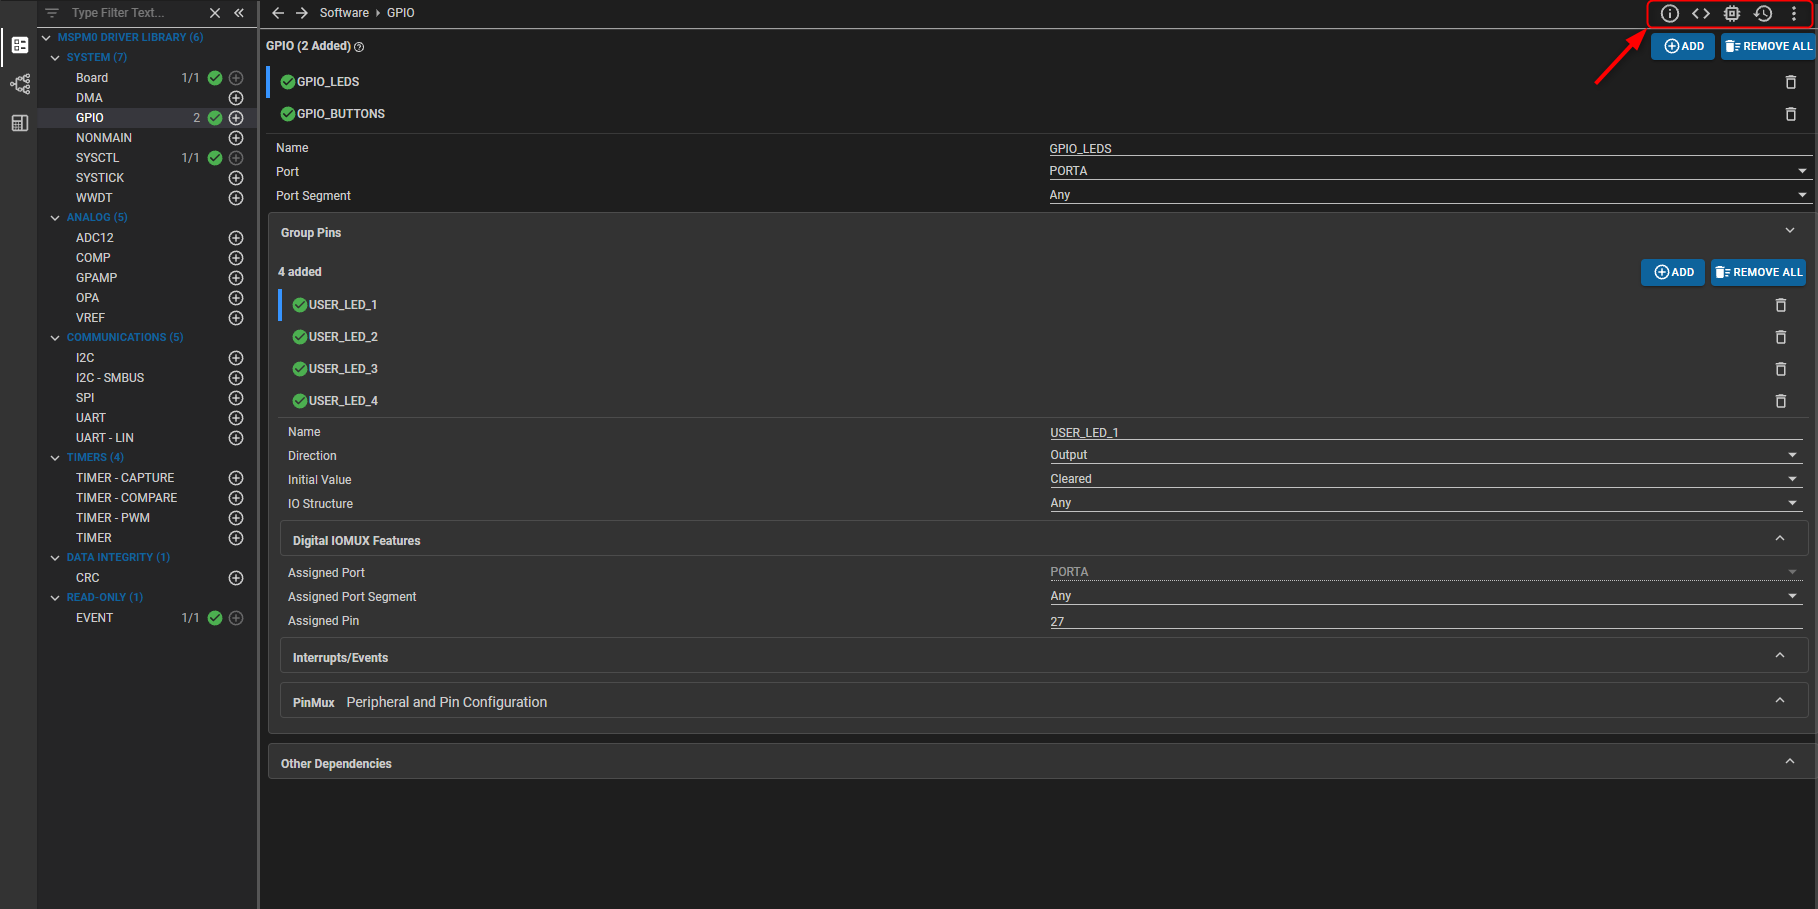
The Problems, Generated Files, Device View and History views can be enabled or disabled in the top right corner.
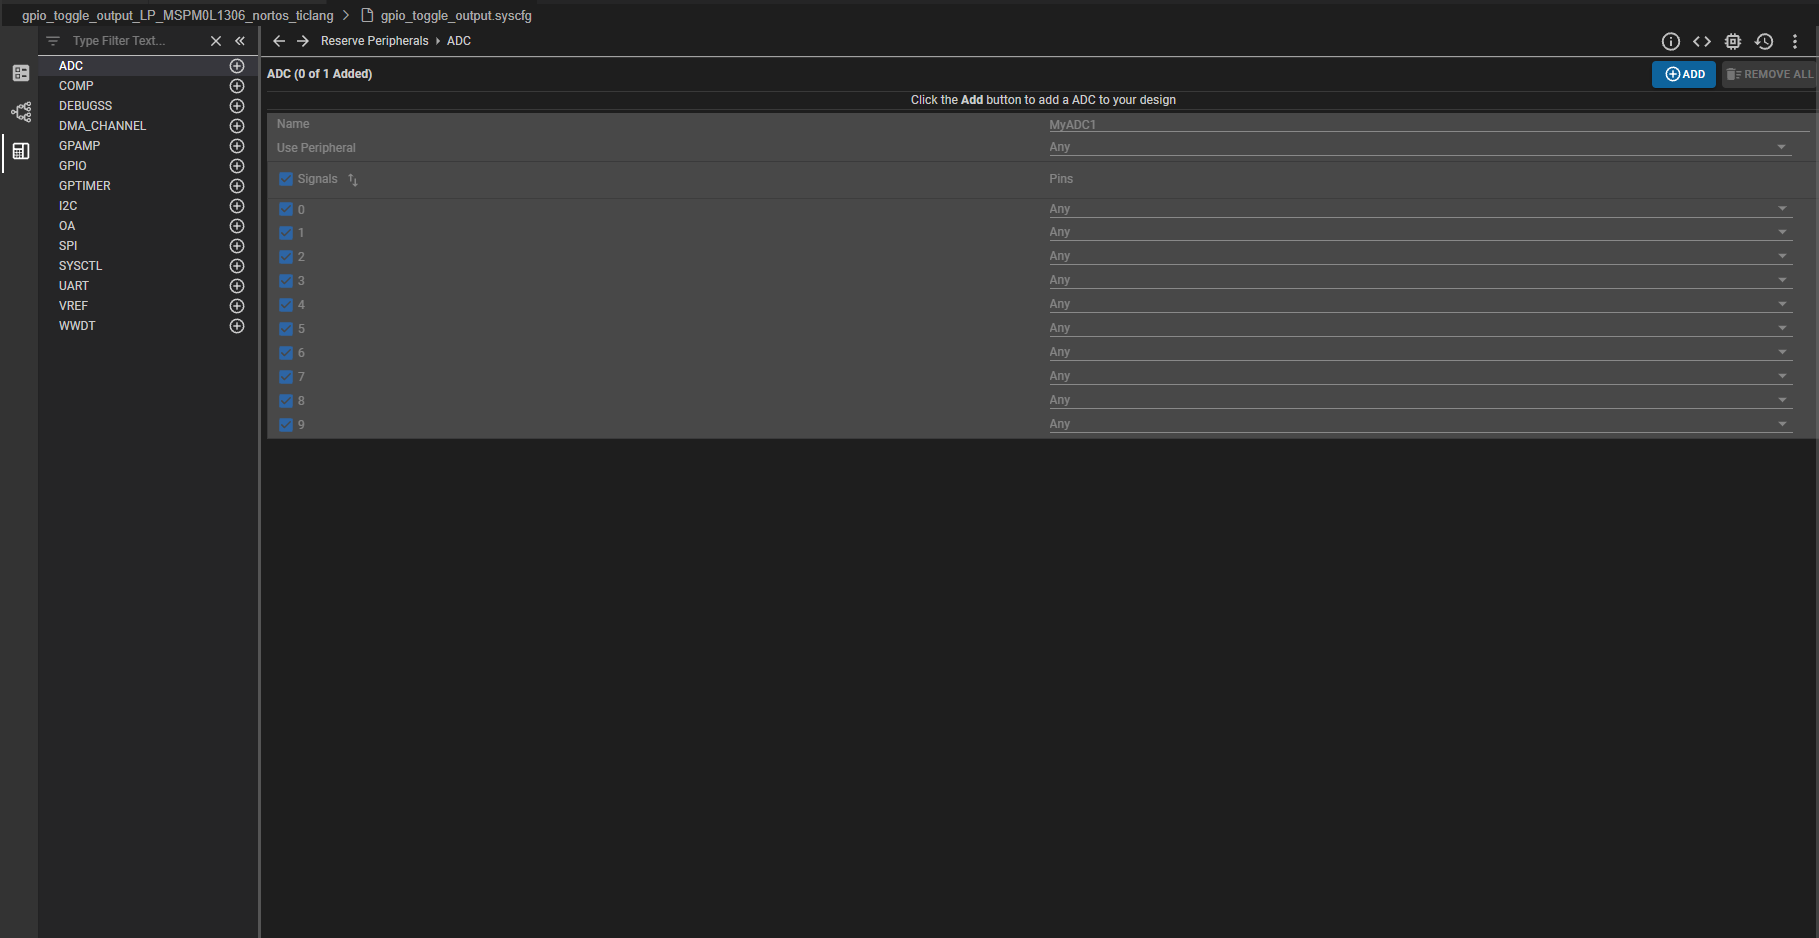
This is the software view. There are two other main views that can be accessed through the sidebar on the right:
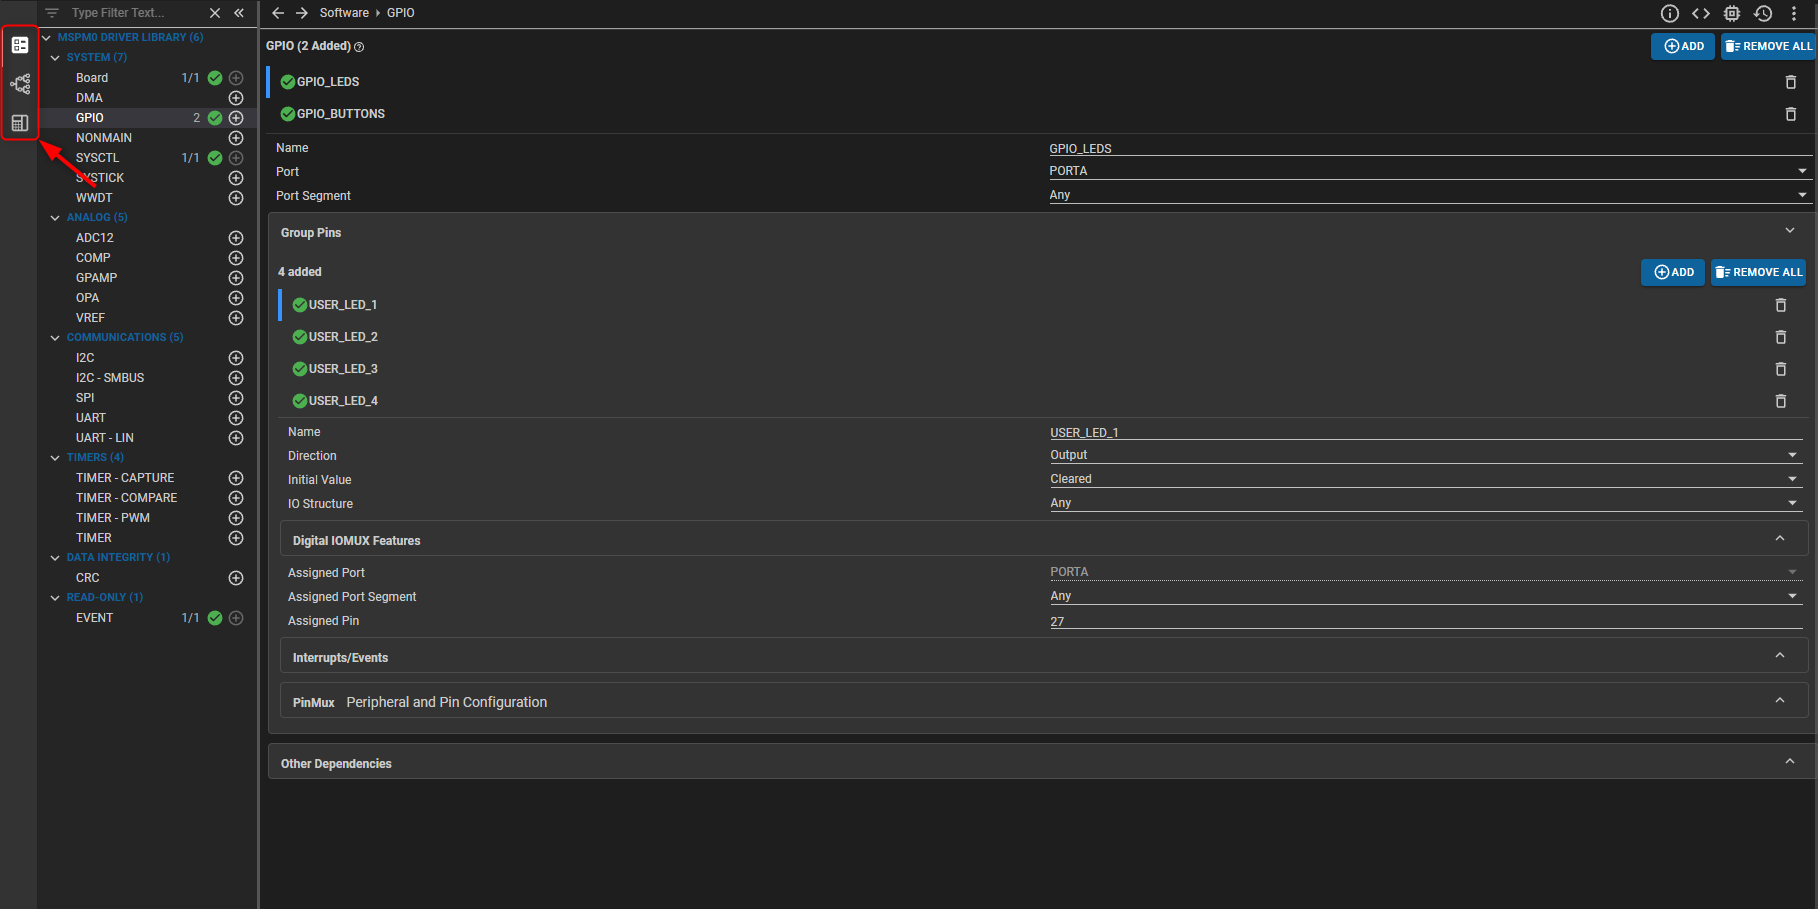
- Clock Tree

- Reserve Peripherals
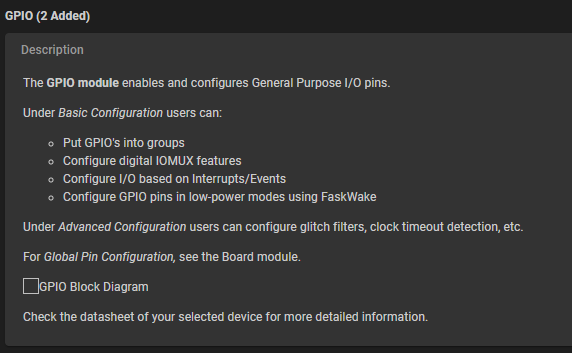
Some modules have a description view that can be opened by clicking the question mark icon.
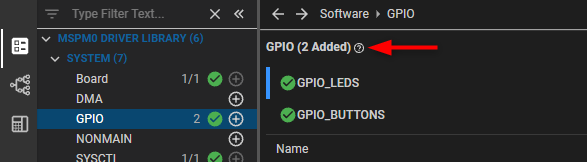
Once opened, you can see further details about the current module as shown below for the GPIO module.
6.5.3. SysConfig Automatic Code Generation
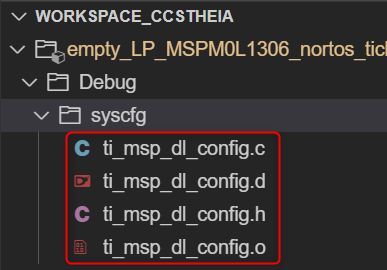
SysConfig automatically generates source code files to simplify the configuration of a device. These files can be found in your project folder under Debug → SysConfig.
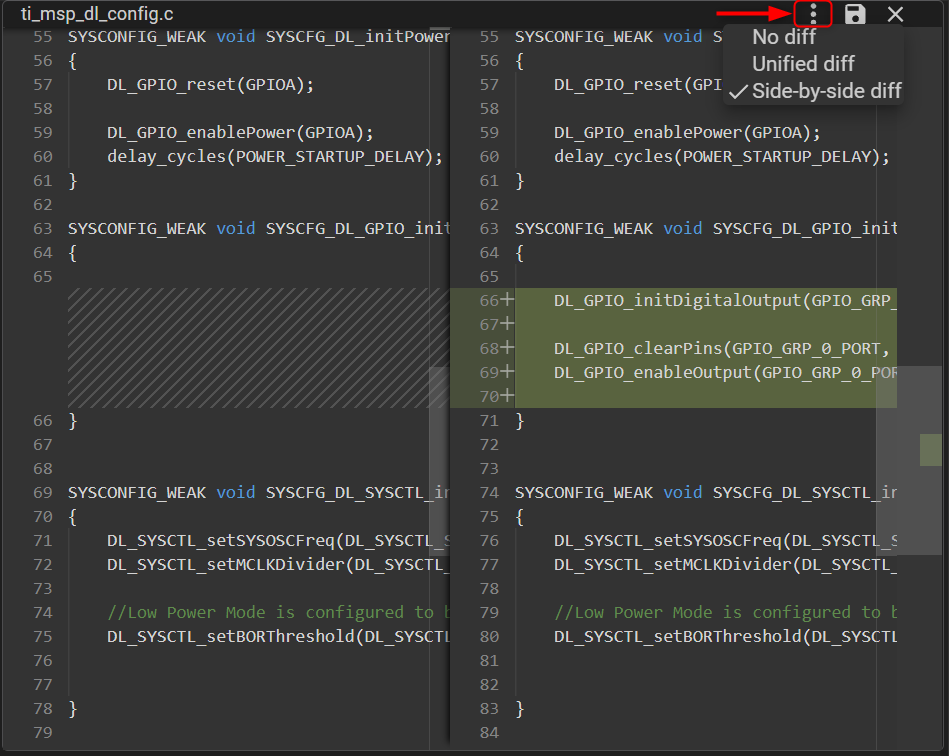
Any edits you make through the SysConfig GUI are added to the generated files automatically. SysConfig shows the diff of the generated files in real time so you can see how the GUI changes affect the generated code. Shown below is an example of how source code is added when a GPIO is added.
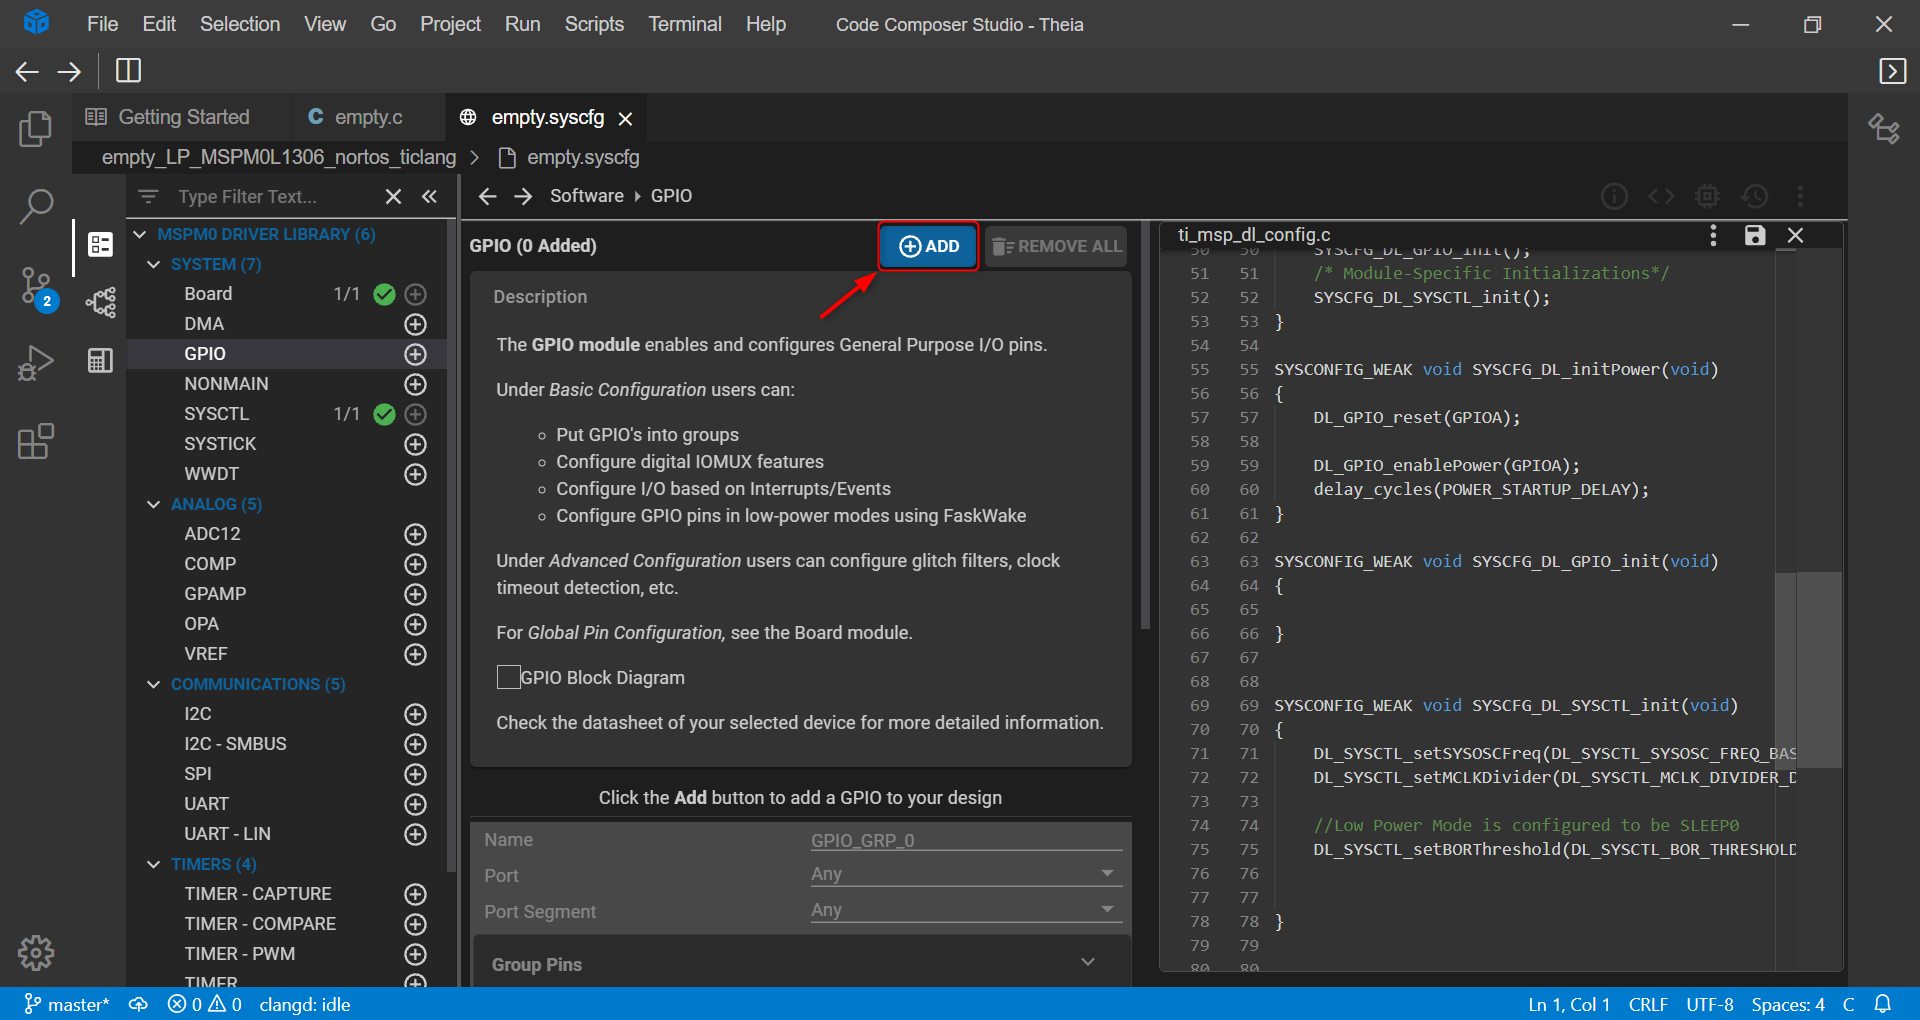
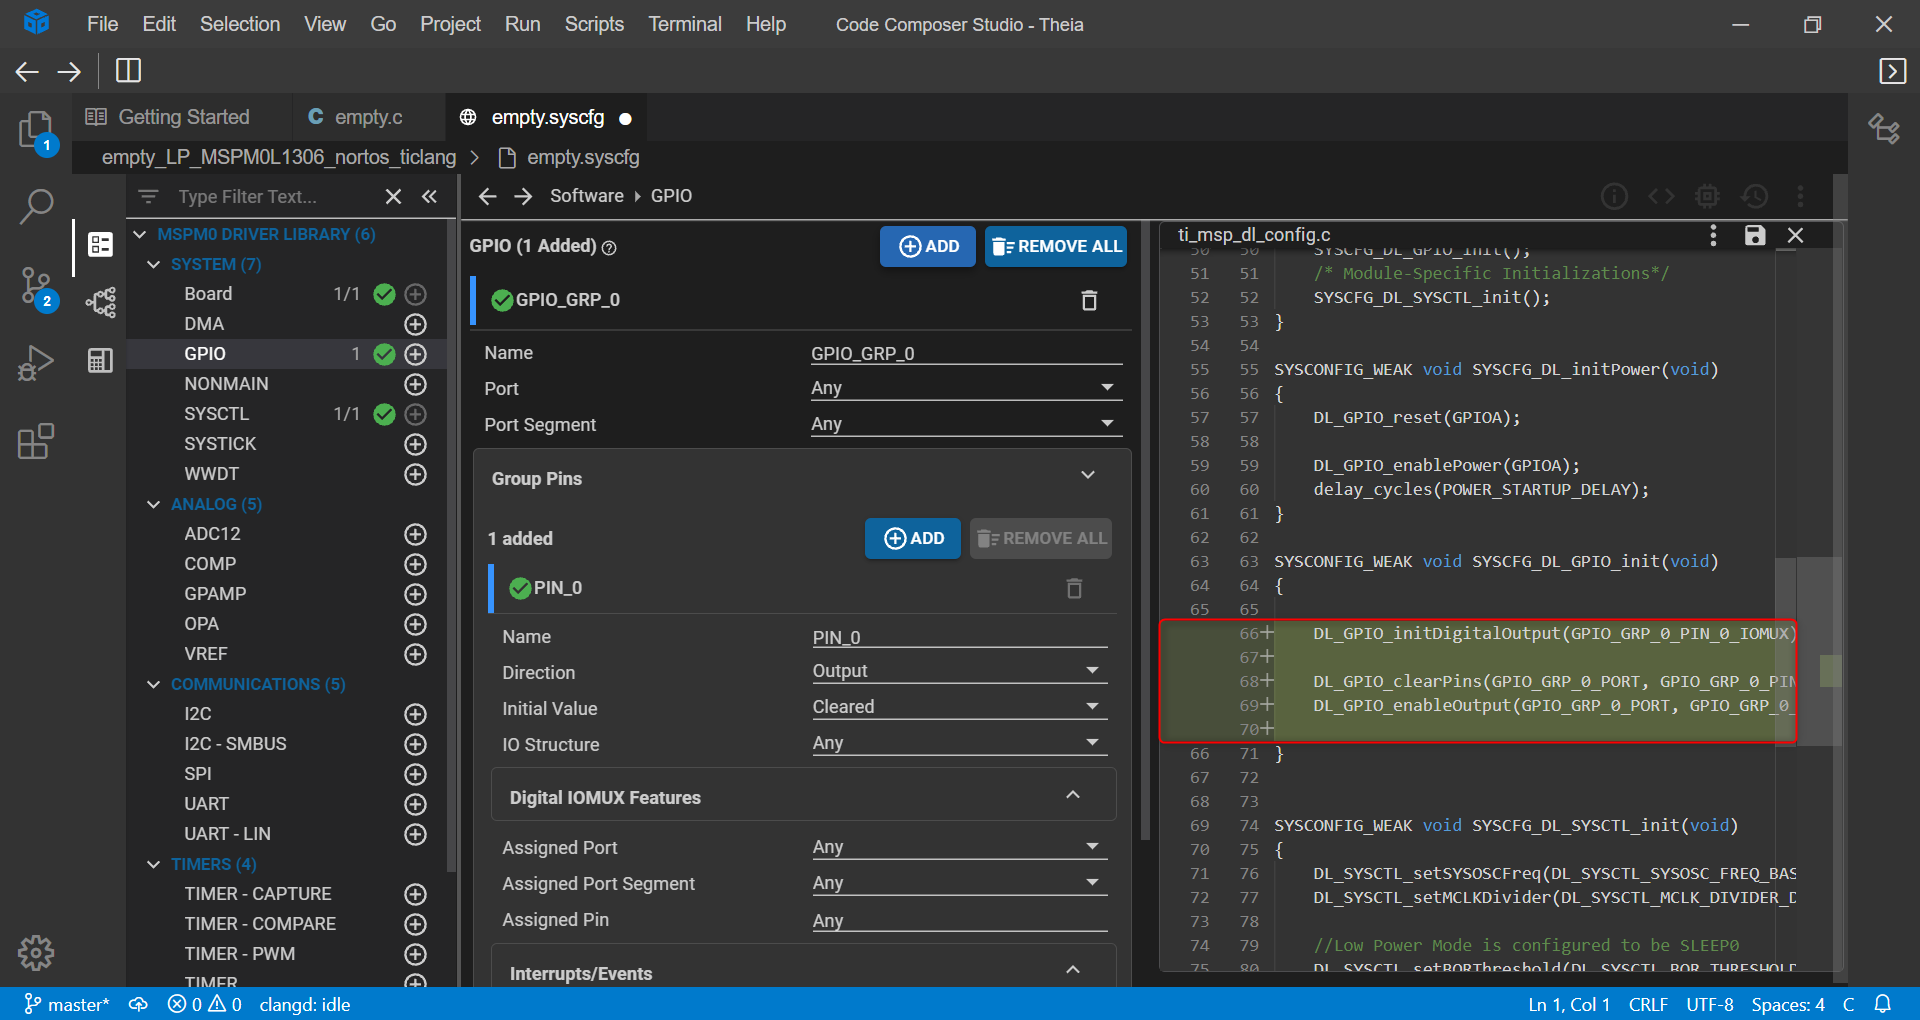
In this case, five new lines were added after line 65. This is the unified diff view and can be changed to no diff or side-by-side diff by clicking the three dots in the top right corner of the file.
6.5.4. Disabling SysConfig Auto-Generation
Once you generate the source files using SysConfig, you can disable the SysConfig auto-generation by copying the source files (Debug → SysConfig) to your project folder and excluding the *.syscfg file from the build.
6.5.5. SysConfig Options
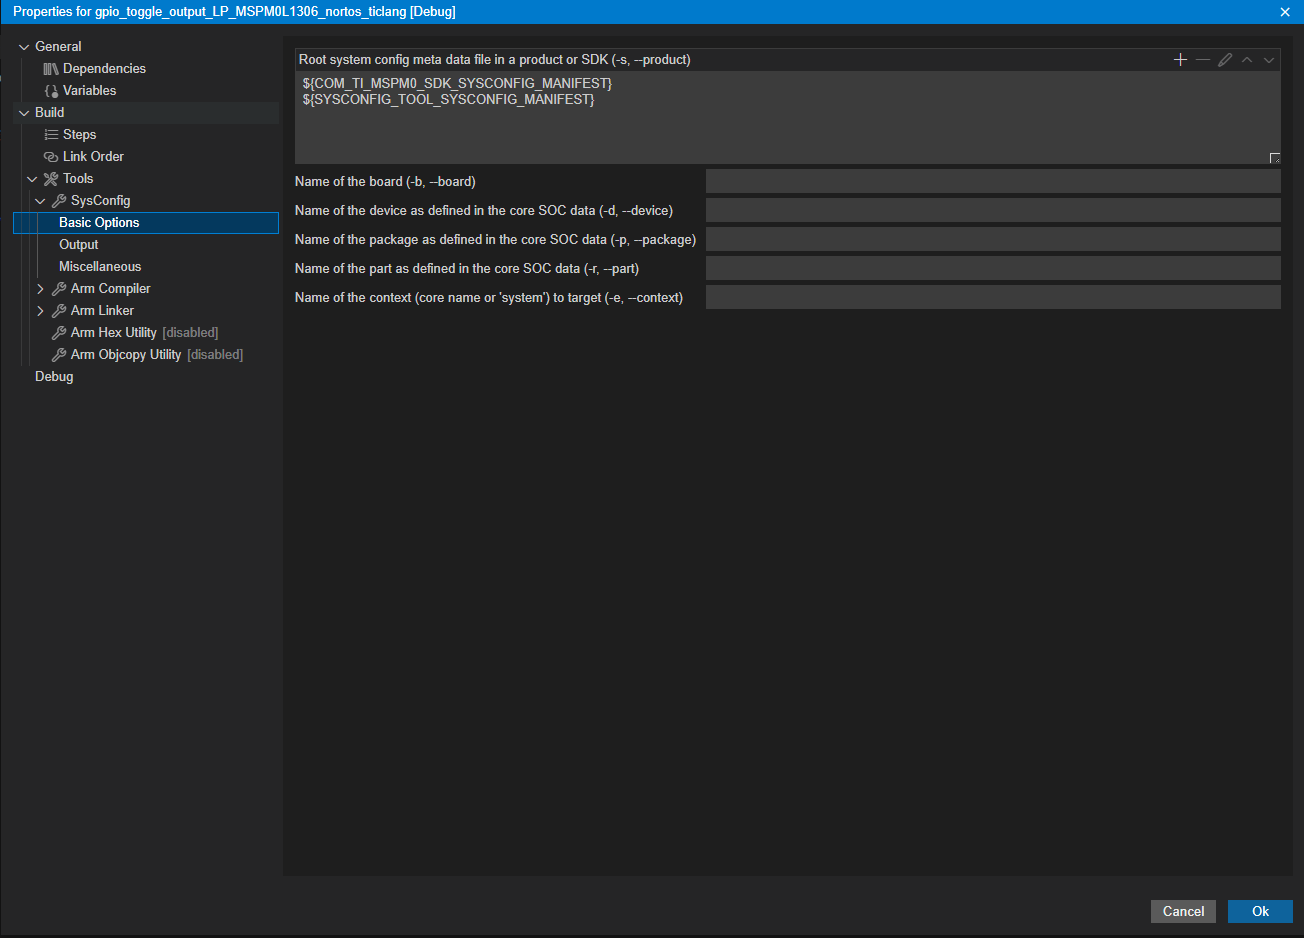
The SysConfig options can be found in the project properties. Under the context menu of the project, select Properties, then navigate to Build → Tools → SysConfig. You can edit SysConfig flags, edit basic options or control the ouput directory for generated content.
6.6. Source Control
CCS Theia has integrated source control management (SCM) and includes Git support out-of-the-box. The feature is very similar to how is works with VS Code. Hence the VS Code documentation for Source Control can be referenced for more details. The below information has a summary on how to get started quickly with using Git source control in CCS Theia.
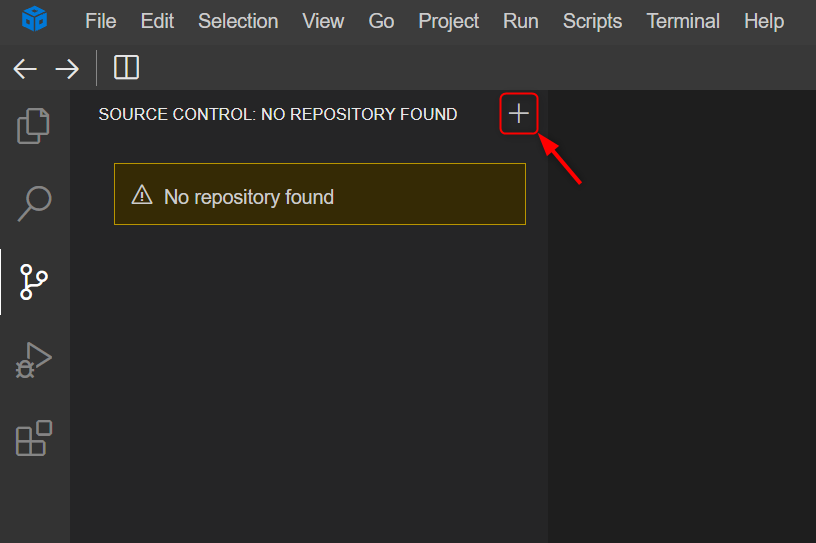
To get started with Source Control, you can open a folder already in your Git repository (File → New Folder) or you can initialize a Git repository by clicking the "+" button in the top right corner of the Source Control view.
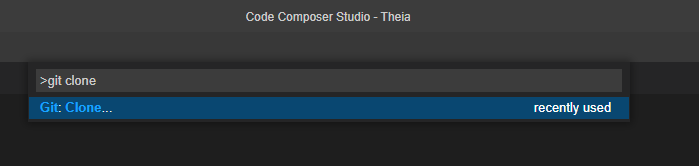
You can also clone a repository with the Git:clone... command in the Command Palette (Ctrl+Shift+P) and enter the repository URL.
6.6.1. Source Control View
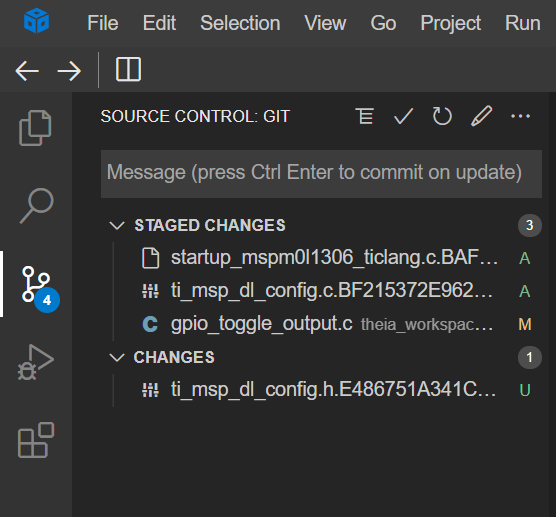
The Source Control view shows your repository changes and staged changes. The Source Control icon indicates how many changes you currently have in your repository. Your files may have a U icon for unstaged changes, an A icon for files added to to the repository or an M icon for modified files.
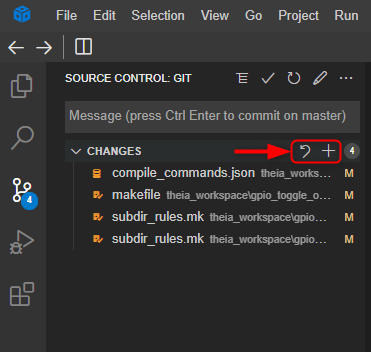
You can stage or discard each file individually, or stage or discard all by clicking the respective icon next to Changes.
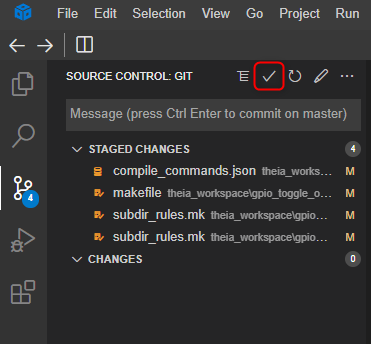
Once the files are staged, you can unstage them or commit them by entering a message and clicking the checkmark at the top of the Source Control view.
There are other options at the top of the Source Control view. You can alter your Changes view from a list to a tree, Refresh the view, or Add a Signed-Off-By.
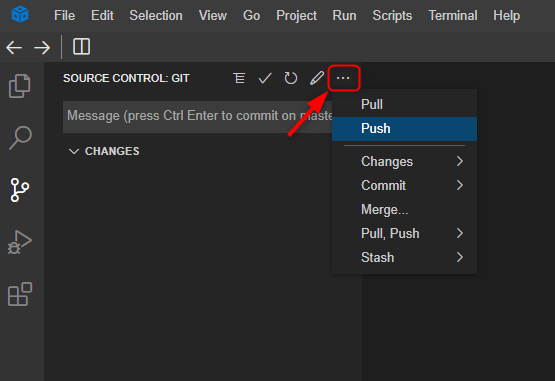
To push your committed files, click on the ... icon and click Push. There are many other actions here as well.
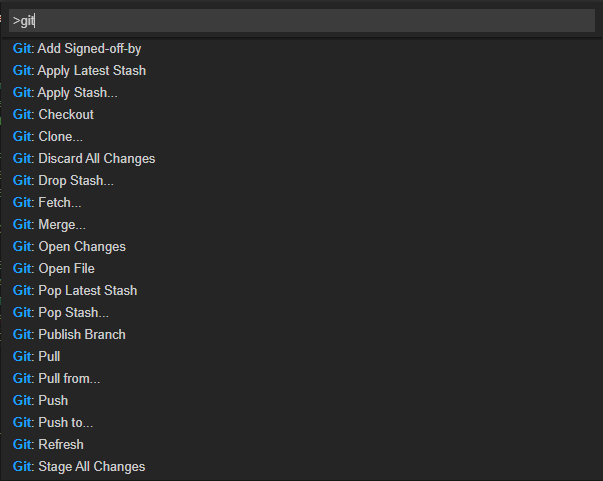
6.6.2. Command Palette
The Command Palette (View → Command Palette or Ctrl+Shift+P) provides many Git commands such as Git Clone or Git Checkout as quick access actions.
For full access to all Git commands, use the Terminal (Terminal → New Terminal or Ctrl+Shift+`).
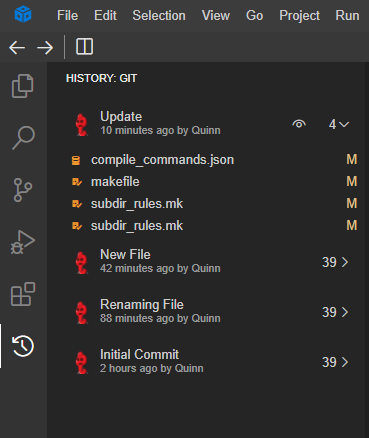
6.6.3. History View
The History view (View → History or Alt+H) provides an overview of all commits in the repository. Clicking on a commit will show you the files in that commit and clicking the eye icon will give you more information on the commit. Double-clicking a file will show you the changes.
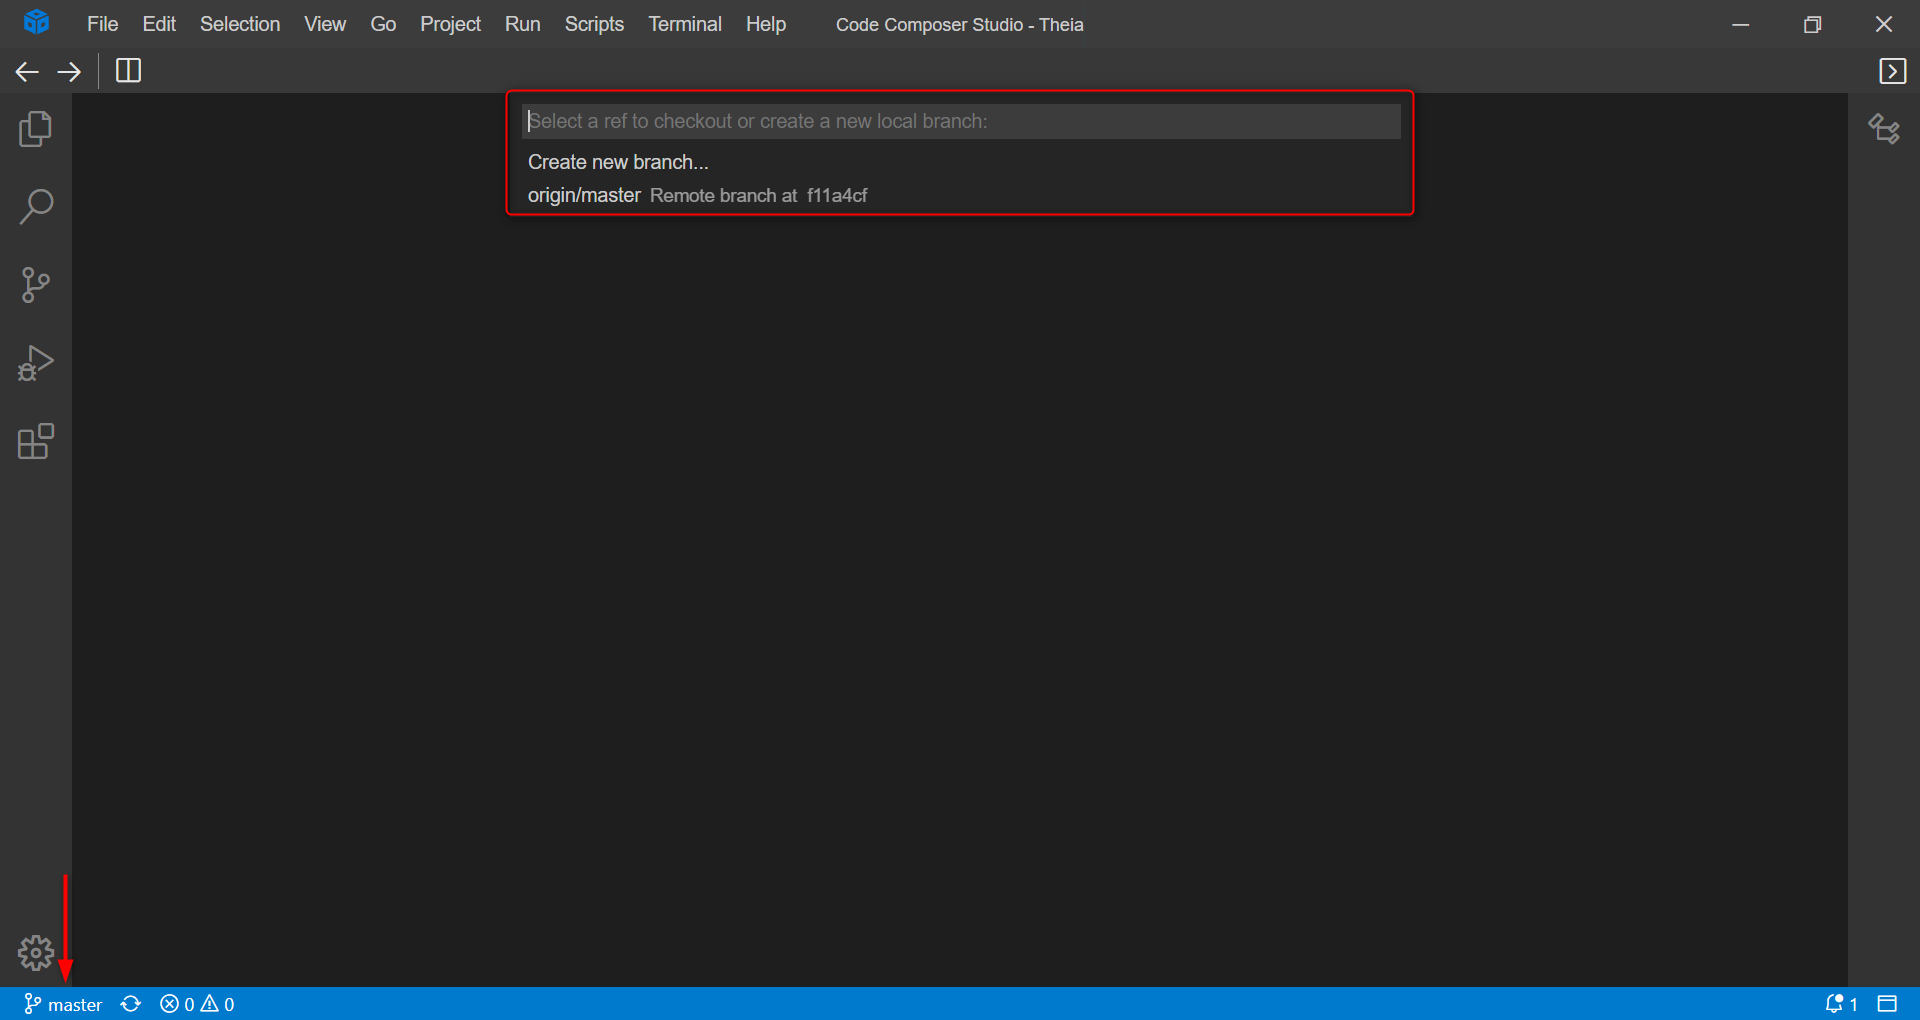
6.6.4. Status Bar Actions
The status bar will indicate what branch you are currently on. Clicking on the branch indicator will allow you to create a new branch or checkout the current branch.
The Synchronize button will pull remote changes down to your local repository and then push local commits to the upstream branch.
If there is no upstream branch configured and the Git repository has remotes set up, the Publish action is enabled. This will let you publish the current branch to a remote.

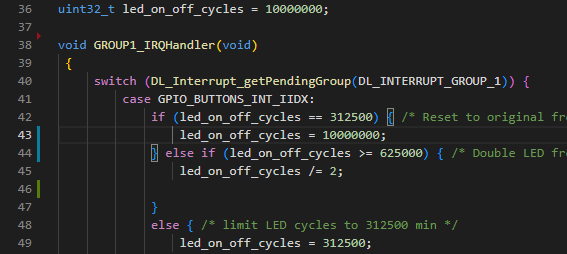
6.6.5. Gutter Indicators
If you open a folder that is a Git repository and begin making changes, useful annotations will be added to the gutter (next to the line number).
- A red triangle indicates where lines have been deleted
- A green bar indicates new added lines
- A blue bar indicates modified lines
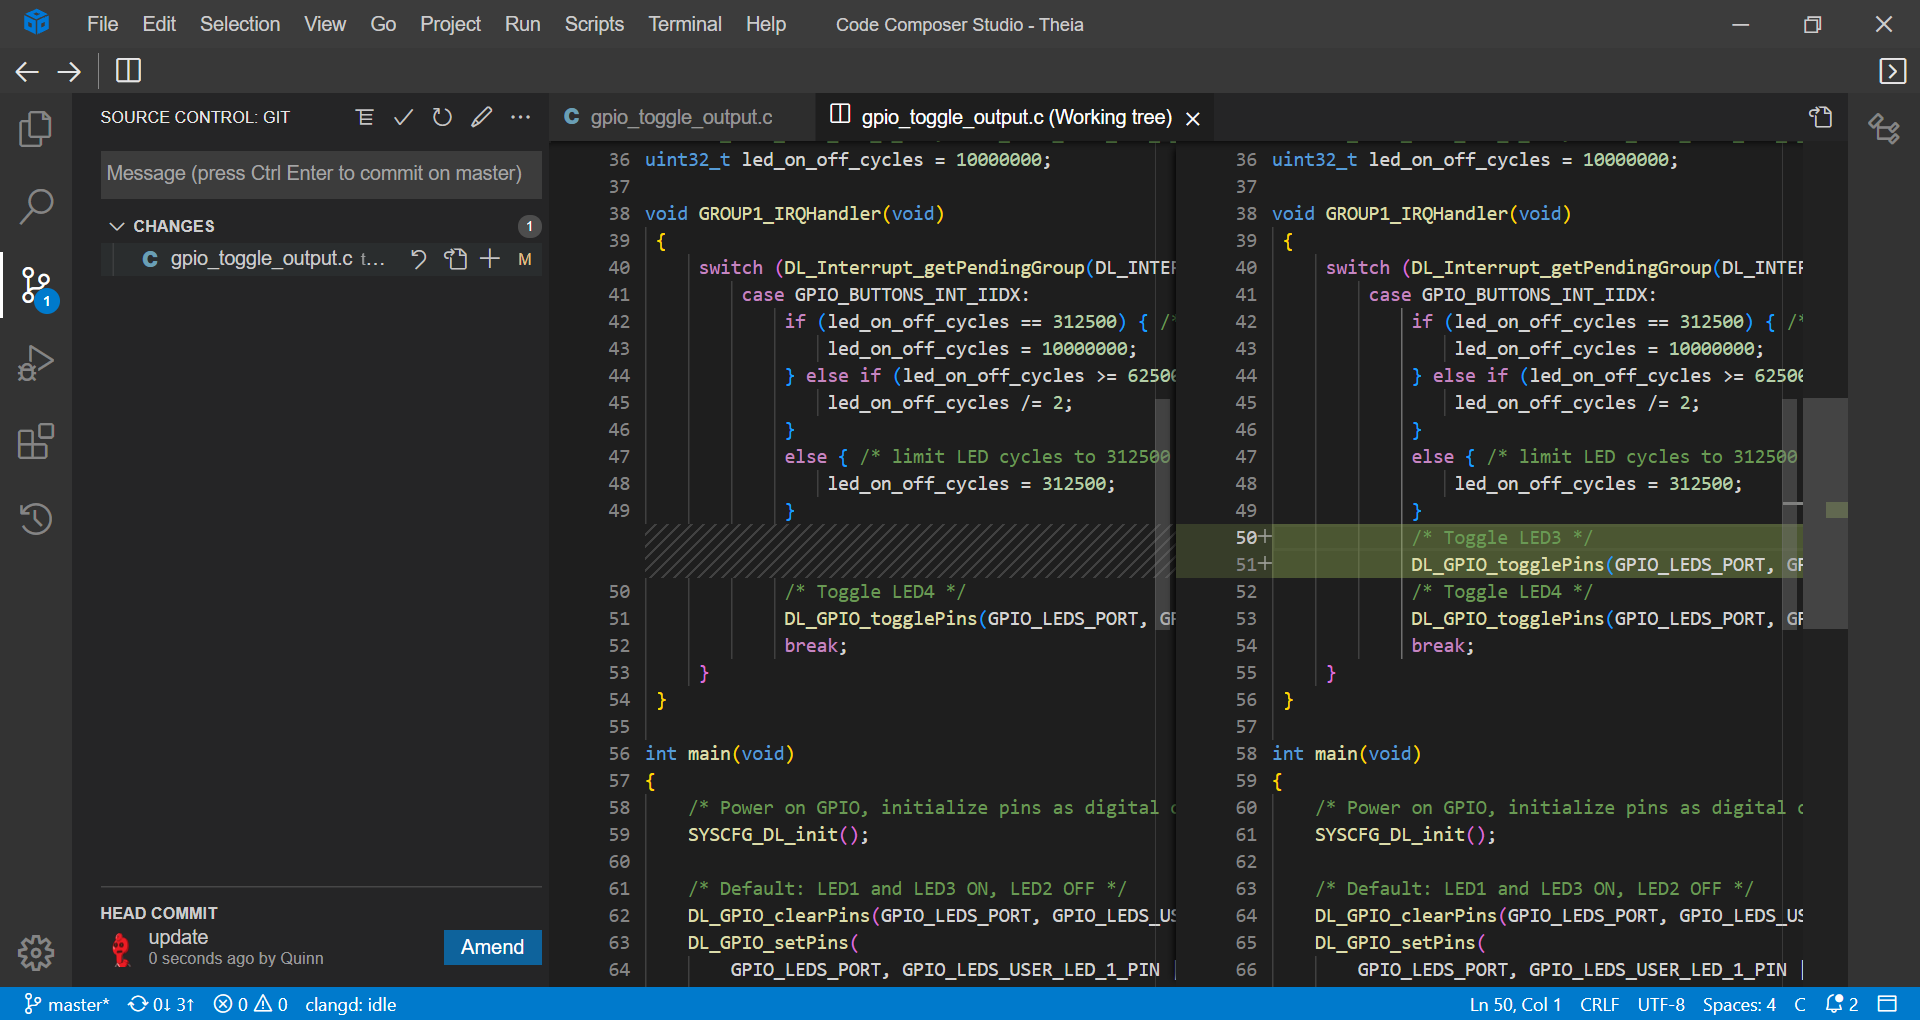
6.6.6. Viewing Diffs
See the changes you made to a file by double-clicking it in the Source Control view.
6.6.7. Merge Conflicts
Any merge conflicts will be shown with the following options:
- Accept Current Change
- Accept Incoming Change
- Accept Both Changes
- Compare Changes
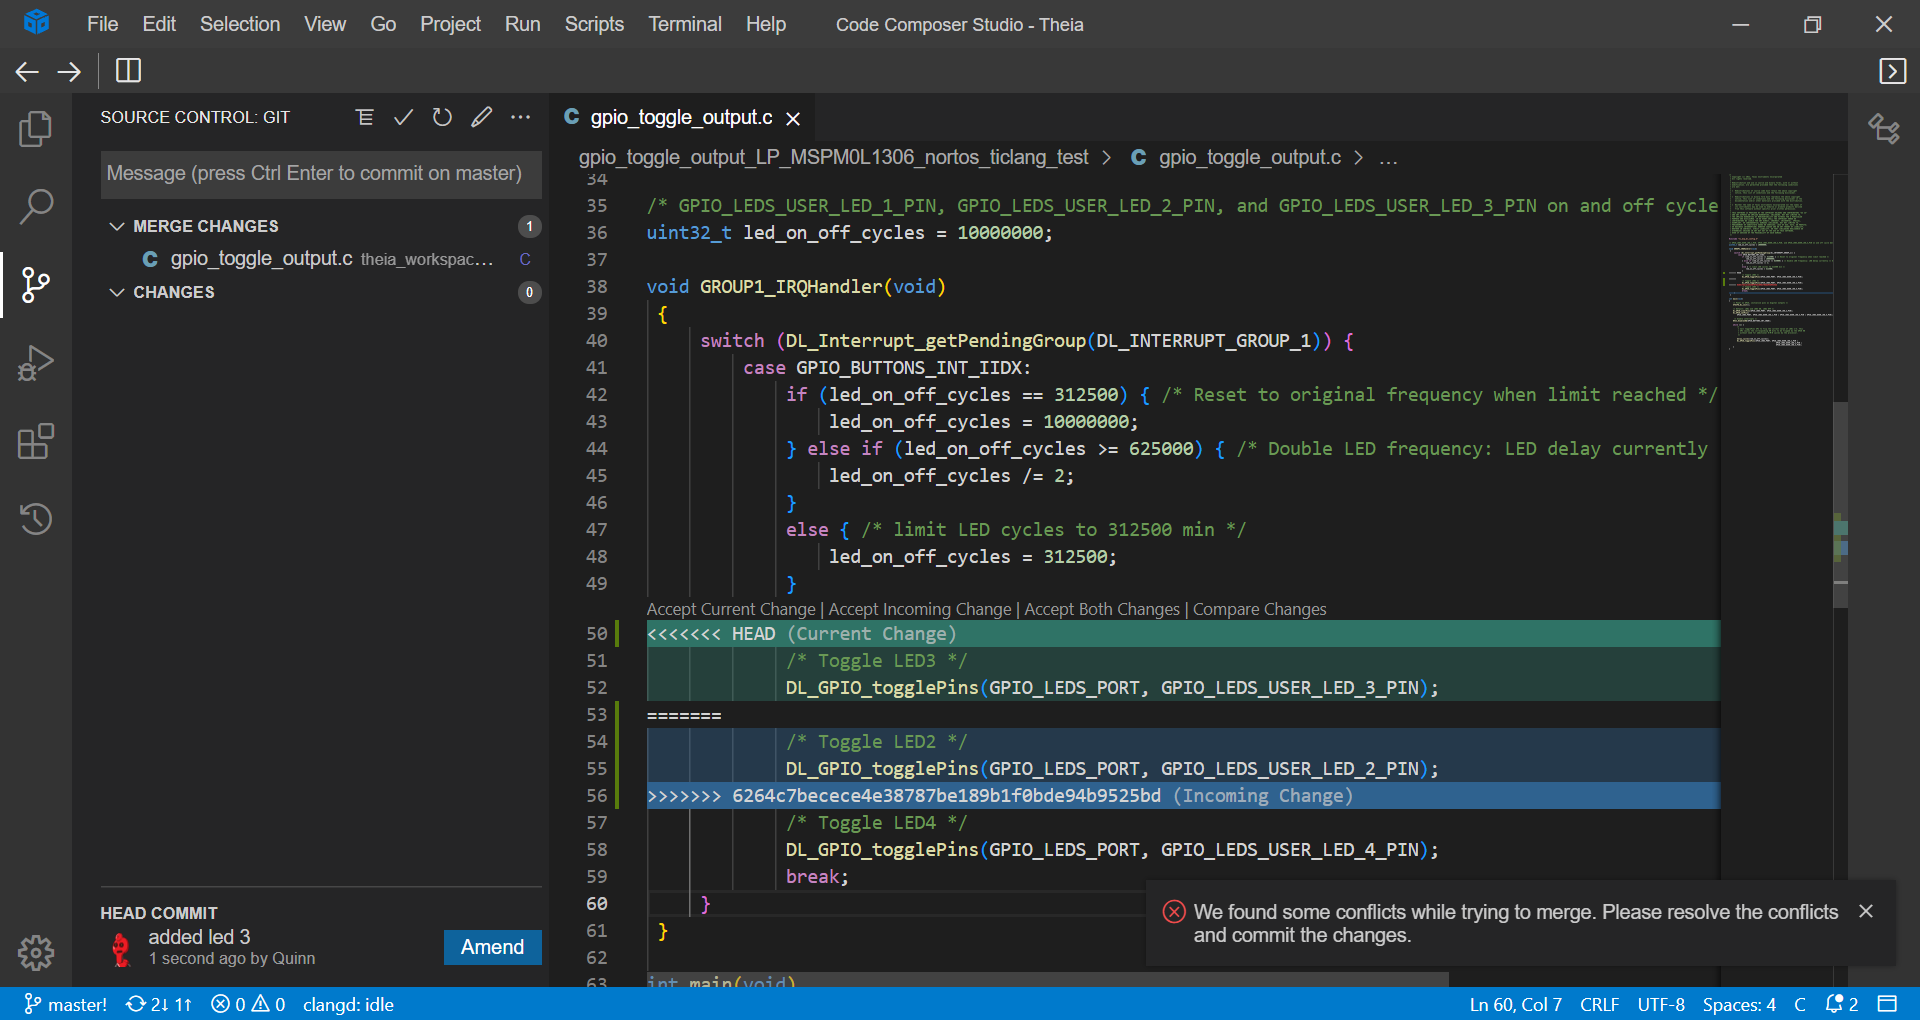
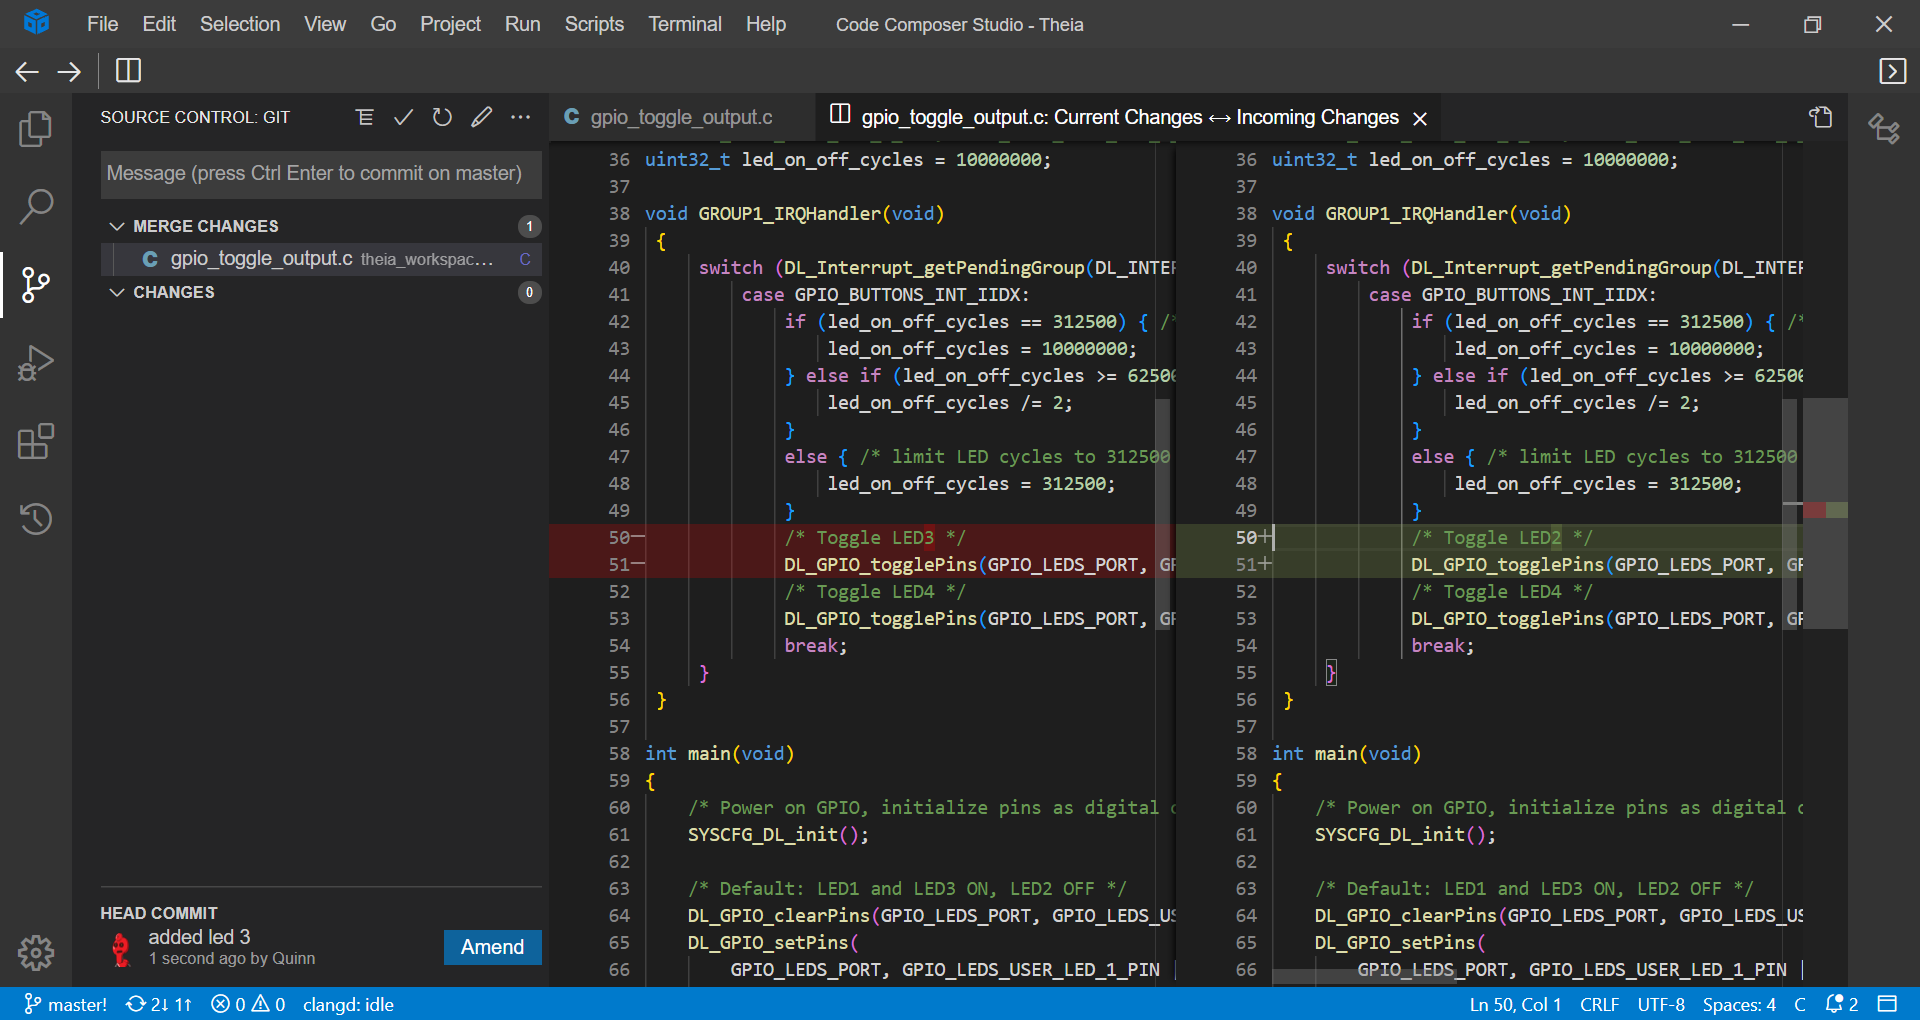
Comparing the changes will show the diffs.
6.6.8. Files to Check In
One of the first questions that come up when working with source control and CCS is which CCS project files need to be checked in to source control.
The following project files should be checked into source control:
- .ccsproject
- .cproject
- .project
- .settings folder
- makefile.defs (if using SYS/BIOS)
.ccsproject has project information specific to CCS. .cproject and .project are Eclipse CDT project files. .settings folder is a standard Eclipse folder that has settings that apply for the project. makefiles.defs has additional make rules included by the generated project makefile for SYS/BIOS projects.
For projects that use TI-RTOS or SysConfig, the RTSC configuration file (.cfg) or SysConfig configuration file (.syscfg) should be checked in along with other source files.
The following files and folders should not be checked into source control:
- Debug or Release folder
- .xdchelp
- .config folder
- .launches folder
Configuration folders like Debug or Release are generated folders that contain build artifacts like object files and do not need to be checked into source control. .xdchelp is a generated file that is used to help display error messages in the problems view and does not need to be checked into source control. .config and .launches are generated folders that do not need to be checked into source control.
For target configuration files or targetConfigs folder: If the project is configured to "Manage the project's target-configuration automatically" and the default settings in the generated ccxml file are not changed, then it is optional to check it into source control (as it will get auto-regenerated if missing). But if the ccxml file is being managed manually, or modifications were made to the default settings in the auto-generated one, then it is advisable to check it into source control.
6.7. Understanding Tools Versioning
The Code Composer Studio Theia toolset consists of different components such as the Compiler tools and SysConfig tools. It is important to understand that each component has its own version number and updates for each component may be released independent of a CCS Theia release.
For example, CCS Theia 1.0 includes the following:
- ARM TI Clang compiler tools version 2.13.LTS
- SysConfig version 1.16.0
Updates to each of these components can be installed individually while still working with CCS Theia 1.0.
To install compiler updates refer to the Compiler Installation and Selection article.
To specifically understand how compiler tools are versioned and released, please see this article.
A CCS Theia project can be modified to build with any of the available versions of compiler tools. The same can be done with different versions of SDKs as well.
When reporting an issue to TI, it is important to not only include the version of CCS, but also the version of Compiler tools, SysConfig, SDK, or any other relevant components and software, depending on the issue.
- The Compiler version will be listed under Properties → General.
- The versions other dependent packages will be listed under Project → Properties → General → Dependencies.
6.8. Troubleshooting
If there are errors encountered during project import or build, refer to this troubleshooting page: Project Import and Build errors in CCS.