1. Overview
1.1. Processor SDK RTOS Getting Started Guide
1.1.1. Overview
The Processor Software Development Kit (Processor-SDK) provides the core foundation and building blocks that facilitate application software development on TI’s embedded processors. This Getting Started Guide focuses on the Real-Time Operating System (RTOS) and provides information on acquiring the software and running basic examples/demonstrations bundled in the SDK.
For anyone that is new to Processor-SDK RTOS, traversing through all the resources we provide in the right order is important. Here is a sequence to follow that introduces the SDK structure and gets you started with writing applications using the SDK.
1.1.2. Introduction to Processor SDK RTOS
First, start with watching introductory Processor SDK training videos that are relevant to RTOS:
| ID | Name | Description |
|---|---|---|
| 1.2 | Introduction to Processor SDK RTOS Part 1 (40 min) | This module is the first installment of a two-part overview of the Processor SDK from the TI-RTOS perspective. It introduces the functional elements that may be included in the installation for an SoC, and then looks at these elements in more detail: TI-RTOS kernel, Inter-Processor Communication (IPC), Network Developer’s Kit (NDK), algorithm libraries, and diagnostic software. |
| 1.3 | Introduction to Processor SDK RTOS Part 2 (30 min) | This module is the second installment of a two-part overview of the Processor SDK from the TI-RTOS perspective. It examines the functional elements that may be included in the installation for an SoC: Low-level Drivers (LLD), Chip Support Library (CSL), OS Abstraction Layer (OSAL), board library, Secondary Boot Loader (SBL), and board diagnostics. |
After going through these videos, you will have a good understanding of
- how the software is organized for portability across platforms
- software API hierarchy within a platform, from chip support to low-level driver to middleware
- where to customize software for different use cases
1.1.3. Basic examples
Next, it is beneficial to start with executing simple examples.
Since we want to do this on the actual hardware target, you will need Code Composer Studio (CCS) and an Evaluation Module (EVM). See sections below for information to configure CCS and EVM for development. This is a top-level starting point, but you may need to go to your specific EVM hardware setup guide for some steps (e.g., connecting external JTAG). A cross reference to all hardware users guide can be found on the Supported Platforms page.
1.1.3.1. “Hello World” example with no operating system
The simplest example that you can write is a “Hello World” example that runs in bare metal or no operating system. CCS comes with templates of a semi-hosted program for the different device and core. Using this template allows standard output to be displayed on the host PC using the debugger. This is a good way to start learning basic configurations such as the memory map of your device. Specific instructions for each platform bundled in the Processor SDK RTOS can be found at Processor SDK Bare-Metal Examples
1.1.3.2. Simple examples with an operating system
The next level of complexity is the take that same “Hello World” example and run it over the TI-RTOS kernel. Besides a template for the simple four-line “Hello World” example, CCS comes with templates for other features of the kernel such as clock, error, event, log, SWI, and task. You will also learn how to configure the TI-RTOS kernel for such things as enabling semi-host support. Specific instructions for each platform bundled in the Processor SDK RTOS can be found at Processor SDK RTOS Examples
1.1.4. Advanced examples
Next, you can get familiar with peripheral drivers.
1.1.4.1. Peripheral driver example
The next level of complexity is to start using peripherals of your device. There are low-level driver examples that are provided in the Processor SDK RTOS package. These are CCS projects that can be used to test an individual peripheral. Some of the examples use multiple low level drivers; for example, the GPIO example will use I2C driver for reading EVM board ID to auto configure the software and UART driver to display status messages.
For simplicity and flexibility, the CCS project information are captured in configuration files that you can use to generate CCS projects for your platform, EVM, endian, and core. Once CCS projects are created, they are loaded and run on the EVM via JTAG. Instructions to create and run the CCS projects can be found at Rebuilding The PDK
1.1.5. Application development
We now take the leap to put together parts of the SDK and create a more complex application.
1.1.5.1. Demonstrations in Processor SDK RTOS
Start with running the demonstrations that are part of Processor SDK RTOS package. These demonstrations can be run “out of box” since pre-build binaries are provided, but also contain source to that you can set breakpoints and step through the code. The demonstrations contain a richer set of software and perform more complex features such as audio and graphics.
Not all demonstrations are applicable to all platforms. The following page has a list of all demonstrations and supported platform: Processor SDK_RTOS Examples and Demonstrations
1.1.5.2. Custom application
Next, watch the following training video on guidelines to write a custom application using the SDK.
| ID | Name | Description |
|---|---|---|
| 1.4 | Application Development Using Processor SDK RTOS (1 hr 40 min) | This presentation provides a detailed overview of the application development process using the Processor SDK RTOS release. It walks through each step of the a typical development flow, including setup of the evaluation module (EVM), getting started with the EVM, running out-of-box examples, developing application code, porting applications to custom hardware, and customization of application software. |
This video has a lot of content, as you can see from the duration. It is broken down into the following sections:
- Setup development environment including download software, configure target EVM
- Start with basic software examples and basic connectivity of EVM
- Run demo applications provided in SDK
- Develop application using drivers in SDK
- Port software to custom hardware by changing the board support package
- Customize application for certain use cases
If you have custom hardware, the SDK software is organized to ease porting to a new hardware. All EVM-specific software is kept in the board support package, Board Library. Functions include unlocking MMR registers, initializing PLL, configuring clock, configuring PinMux, initialing DDR, and creating a UART instance for console output. Individual examples, unit tests, and demonstrations call the Board Library so that each of these applications can be migrated to a custom hardware by modifying the Board Library. You may want to also port the EVM diagnostics to your custom hardware and ensure the test suite passes.
The customize module provides information to create a new application. This includes configuring TI-RTOS kernel to link required driver libraries, memory map, RTSC platform definition, and task creation.
1.1.6. Download and install software
There are three software packages that make up the Processor SDK RTOS development ecosystem:
- Code Composer Studio (if using JTAG, IDE)
- Latest CCS Emulation package (for connecting to target using JTAG)
- Processor-SDK RTOS software
See the Release Notes for information on minimum requirements for host PC.
The size of the installer is large since we want to provide one bundle for all the components. The bad side of this is that if you are manually downloading the Processor-SDK installer, you may run into issues such as download stall or slow download. One simple solution is to run a download manager/accelerator such as https://www.freedownloadmanager.org/.
1.1.6.1. Code Composer Studio

The Processor-SDK RTOS uses Code Composer Studio as the host integrated development environment for development and debug. All compilers are packaged with the SDK installer. This allows compilation of software without needing to install CCS. You only need CCS if you are using CCS projects, using JTAG to communicate with target, or need an Integrated Development Environment (IDE) for development and debug.
To download CCS, use the installer specified on the Processor-SDK download page for your platform (see links in below section).
Attention
See the Release Notes for the recommended version of CCS. This is the version that was validated with the software in the SDK and will provide the best user experience. Occasionally, there may be compatibility issues if different versions are used.
When installing CCS, you can choose to control what is installed for processor architecture.
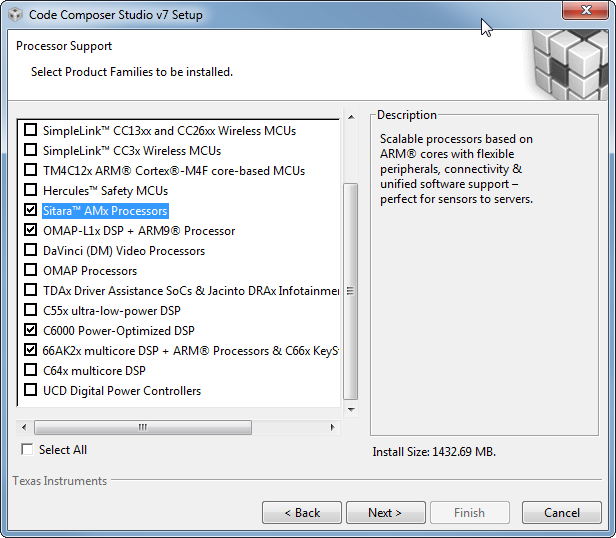
The minimum required for the SDK are the following items
- Sitara AMx Processors for AM335x, AM437x, AM57x
- 66AK2x multicore DSP + ARM Processors & C66x KeyStone multicore DSP for K2E, K2G, K2H, K2K, K2L, C665x, C667x
- OMAP-L1x DSP + ARM9 Processor for OMAP-L1x
- C6000 Power-Optimized DSP for C674x
Note
If you plan to use emulators other than the XDS100 class or XDS200 class of emulators, please select the appropriate emulation drivers at the time of install. Code composer studio does not allow upgrades on drivers that were not installed during the first install.
1.1.6.2. Emulator support
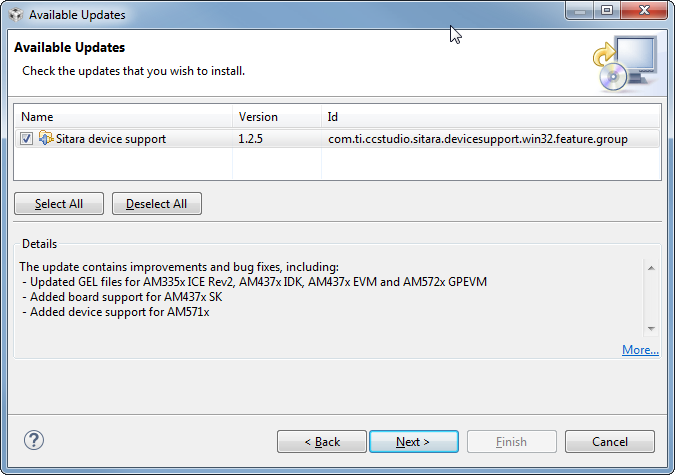
The support for connecting a JTAG to the EVM to debug software is included in the CCS package. In some cases, additional modifications to configuration GEL files are provided separately. To get the latest version, perform a CCS Check for Updates.
The relevant update will be named
- Sitara Device Support for AM335x, AM437x, AM57x
- Keystone2 Device Support for K2E, K2G, K2H, K2K, K2L
- Keystone1 Device Support for C665x, C667x
- OMAPL/Integra Device Support for OMAP-L1x
- C6000 Device Support for C674x
For example, an update for Sitara devices will look like:
1.1.6.3. Processor-SDK for RTOS
The final step is to download and install the Processor-SDK RTOS. See the software product page for your device to get the latest version of this software:
- Processor SDK for AM335x
- Processor SDK for AM437x
- Processor SDK for AM57xx
- Processor SDK for AMIC110
- Processor SDK RTOS for C665x
- Processor SDK RTOS for C667x
- Processor SDK RTOS for C6747/OMAP-L17
- Processor SDK RTOS for C6748/OMAP-L138
- Processor SDK RTOS for K2E
- Processor SDK RTOS for K2G
- Processor SDK RTOS for K2H/K2K
- Processor SDK RTOS for K2L
From the appropriate software product page, go to the download page by clicking “Get Software” for the RTOS package.
Note
- To avoid configuring CCS “Tool Discovery Path” to search for components in different directories, it is recommended to install the SDK in the same directory as CCS. This is C:/TI for Windows and /home/[user]/ti for Linux.
- Once installer has started, the Cancel button may not work properly.
- On Ubuntu 14.04 Linux Host, if you are installing Processor SDK RTOS and observe that the installer exits immediately after you try to run from command line then you need resolve dependencies using instructions provided here Processor SDK RTOS_Release Notes
1.1.7. Setup EVM hardware
Attention
The EVM board is sensitive to electrostatic discharges (ESD). Use a grounding strap or other device to prevent damaging the board. Be sure to connect communication cables before applying power to any equipment.
The EVM provides the ability to utilize a variety of capabilities of the SoC. Follow instructions in the included EVM Quick Start Guide for information on hardware configuration and other pertinent information. This guide is included in the EVM kit and also available for download from the software download page for your particular device. The list of supported EVMs are provided in the Release Notes
If you connect to the EVM UART, use the following host configuration:
- Baud Rate: 115200
- Data Bits: 8
- Parity: None
- Flow Control: Off
For more information beyond what is covered in the EVM Quick Start Guide, see EVM Hardware User Guides
1.1.8. Setting up CCS for EVM and Processor-SDK RTOS
After the Processor SDK is installed, launch Code Composer Studio and make sure that the components inside Processor SDK are discovered by the CCS eclipse environment. If you installed the SDK in the same directory as CCS, this is as simple as starting CCS and it will auto-detect the newly installed components.
Note
If you installed the SDK and CCS in different paths, see the Custom Installation Path How To page that provides instructions to configure for a custom installation path.
The next step is to make a connection between CCS and your EVM (or target). If you need help with this step, see the Setup CCS How To page explaining this further.
At this point, you should be able to connect to target using CCS and start development!
1.1.9. Useful links
Note
This is a good landing page to bookmark since all links below can be found in the Developer Guide.
- Training Videos
- Getting Started Guide
- Supported Platforms
- Landing Page to All Processor SDK RTOS Packages
- Release Notes
- Examples and Demonstrations
- FAQ
1.1.11. Windows SD Card Creation Guide
1.1.11.1. Overview
This page details how to use an image file to create a bootable SD card for the Processor SDK RTOS for AM3/AM4/AM5/K2G. This is only required one time. After that, you can use Windows to delete the SD card contents and replace it with whatever you would like to boot.
The contents of an bootable RTOS application will contain two files on the SD card:
- app - Application image
- MLO - Boot loader image
Tip
If you have the SD card that came in the EVM kit, you can skip the following steps to create a bootable SD card and simply copy your SD card image files directly to the SD card.
1.1.11.2. What is Needed
- Access to a Windows PC
- A valid Processor SDK RTOS for the appropriate processor installed (AM335x, AM437x, AM57xx, K2G)
- Software to write an image file to a SD card
- A SD card appropriate for the required hardware platform, must be 1GB or larger
- A SD card reader/writer
1.1.11.3. Steps to Follow
Here is the process to follow to create the SD card.
1.1.11.3.1. Create a bootable SD image file
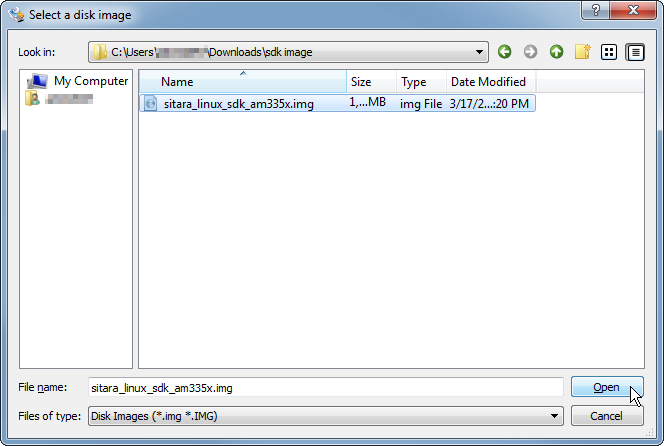
For example purposes, you can use the one that is bundled in the SDK. The file is located in
[SDK Install Path]\processor_sdk_rtos_<platform>_<version>\prebuilt-sdcards\<evm>\sd_card_img\
For example, the default location of the image file for the GP AM57x EVM is C:\processor_sdk_rtos_am57xx_2_00_00_00\prebuilt-sdcards\evmAM572x\sd_card_img\sd_card.img.gz. To save installer space, this file is compressed. Once uncompressed, the file name will be boot.img.
Download a disk imager program to write the image file to the SD card
The open source Win32 Disk Imager is a good option.
Note
This application needs to be installed with Administrative privilages.
1.1.11.3.2. Use the software for writing an image to disk to write the .img file to the SD card
- Plug the SD card into the SD card reader/writer.
- Insert the SD card reader/writer into the PC.
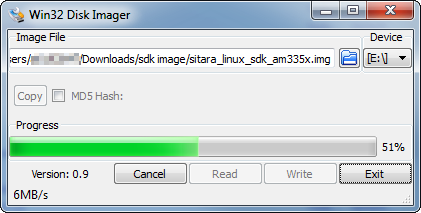
- Launch the disk writer software. In the screenshots below, we are using Win32 Disk Imager.
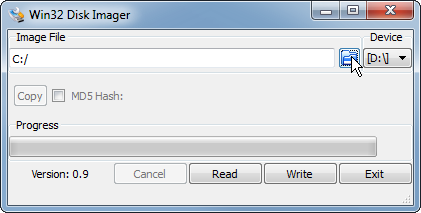
- Choose the image file for the SDK that you want to write.
- Choose the SD card as the “Device”.
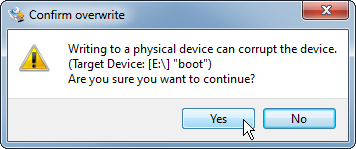
- Write the image to the SD card by click “Write”. You will likely get the below confirmation box. This command will overwrite whatever disk you point it to, please make sure and choose the correct disk.
- You should see the following status bar as the image is being written to the disk
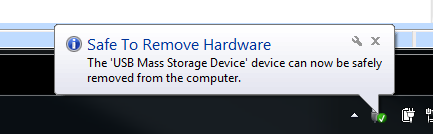
- When the write is complete, you will get the following notification:
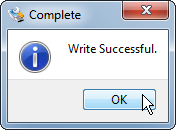
- You can now close the image writing program by click “Exit”.
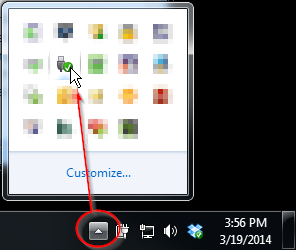
Safely eject the SD card from the computer
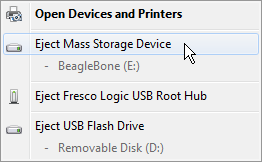
Note
Once SD card is made bootable with Win32 disk imager, it contains sample “MLO” and “app” which can be used on the target platform.
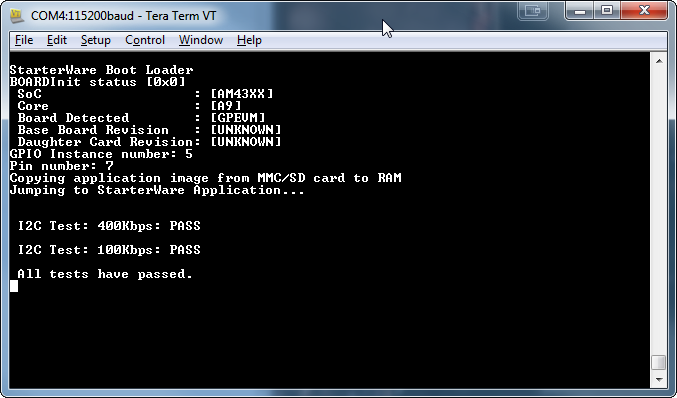
1.1.11.4. Boot from SD Card
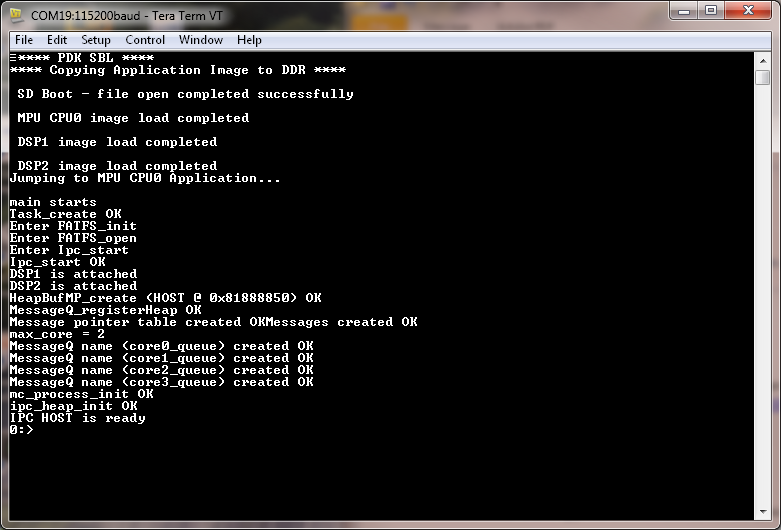
To boot from SD card, simply plug in the SD card to the EVM and power on the board. If you used the examples provided in the Processor SDK RTOS installer, you will see
- AM335x/AM437x:
- AM57x:
1.1.12. Linux SD Card Creation Guide
1.1.12.1. Overview
The Processor SDK RTOS for AM3/AM4/AM5/K2G includes a script in the directory
[SDK Install Path]\processor_sdk_rtos_<platform>_<version>\bin\
named create-sdcard.sh. The purpose of this script is to create SD cards to load with images for RTOS applications.
The contents of an bootable RTOS application will contain two files on the SD card:
- app - Application image
- MLO - Boot loader image
The script will give you information about each step, but the following sections will go over the details and walk you through how to use the script as well.
1.1.12.2. What is Needed
- Access to a Linux PC
- A valid Processor SDK RTOS for the appropriate processor installed (AM335x, AM437x, AM57xx, K2G)
- A SD card appropriate for the required hardware platform, must be 1GB or larger
- A SD card reader/writer
1.1.12.3. Creating an SD card
1.1.12.3.1. Invoking the Script
The create-sdcard.sh script can be run from any location but must be run with root permissions. This usually means using the sudo command to start execution of the script. For example:
sudo [SDK INSTALL DIR]/bin/create-sdcard.sh [path/to/sdcard/files]
The SDK comes with pre-built images that can be directly loaded on an SD card without having to do any builds. These are typically a demonstration or a Power-On Self Test (POST) application. The path for these files are:
sudo [SDK INSTALL DIR]/bin/create-sdcard.sh [SDK INSTALL DIR]/prebuilt-sdcards/[EVM DIR]/sd_card_files/
If you fail to execute the script with root permissions you will receive a message that root permissions are required and the script will exit.
1.1.12.3.2. Select the SD Card Device
The first step of the script will ask you to select the drive representing the SD card that you want to format. In most cases your host root file system drive has been masked off to prevent damage to the host system. When prompted enter the device number corresponding to the SD card. For example, if the output looks like:
Availible Drives to write images to:

#  major   minor    size   name
1:   8       16    7761920 sdb

Enter Device Number:
You would enter 1 to select the sdb device.
For most common installations, this script works fine. However, if you are using more advanced disk slicing and volume management, the presented list of device nodes are off by one; in the best case (picking the last item) it will flag a range error, and in the worst case (anything in the middle) the wrong DASD can be destroyed. The problem originates when it attempts to determine the $ROOTDRIVE to “mask” the volume where “/” is mounted from the selection list using a grep -v $ROOTDRIVE.
For the naive partitioning case, its heuristic is fine, yielding something like “sda” — but for LVM, it grabs some chunk of the device name, e.g. “mapp” (out of “/dev/mapper/kubuntu–vg-root on / type ...”).
Partition and Format the SD Card
Any partitions of the device that are already mounted will be un-mounted so that the device is ready for partitioning. The SD Card will then be partitioned and formatted into FAT32.
1.1.12.3.3. Installing SD Card Contents
After the SD card is partitioned and formatted, the files under the path/to/sdcard/files will be installed onto the SD card, then safely exit the script.
Tip
Once SD card is made bootable, it contains sample “MLO” and “app” which can be used on the target platform.
1.1.12.4. Load Default Images to SD Card
The purpose of this section is to cover how to use the create-sdcard.sh script to populate an SD card that can be used to boot the device using the default images that ship with the Processor SDK for RTOS.
For example purposes, you can use the one that is bundled in the SDK. The file is located in
[SDK Install Path]/processor_sdk_rtos_<platform>_<version>/prebuilt-sdcards/<evm>/sd_card_files/
For example, the default location of the image file for the GP AM57x EVM is
~/ti/processor_sdk_rtos_am57xx_2_00_00_00/prebuilt-sdcards/evmAM572x/sd_card_files/
The command to load the SD card is
sudo [SDK Install Path]/bin/create-sdcard.sh ~/ti/processor_sdk_rtos_am57xx_2_00_00_00/prebuilt-sdcards/evmAM572x/sd_card_files
1.1.12.5. Boot from SD Card
To boot from SD card, simply plug in the SD card to the EVM and power on the board. If you used the examples provided in the Processor SDK RTOS installer, you will see
- AM335x/AM437x:
- AM57x:
1.2. Directory Structure
1.2.1. Overview
The Processor SDK for RTOS contain a number of software components, including a top-level RTOS SDK directory. These components are all installed in one common install path specified when running the installer.
Note
Not all components are applicable on all platforms.
1.2.3. Processor-SDK Directory
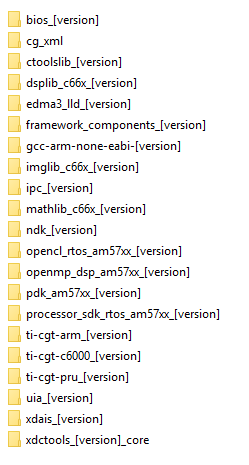
The Processor SDK for RTOS contains a top-level RTOS SDK directory:
[SDK Install Path]/processor_sdk_rtos_<platform>_<version>/
The default SDK Install Path is C:\TI for Windows and /home/[user]/ti for Linux.
This directory contains the following top-level directories and files; here is an example for AM57x:
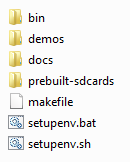
These directories contain the collateral and tools applicable for RTOS:
- bin - Contains the helper scripts for configuring the host system and target device. Based on EVM capability, examples include scripts to create an SD card with an RTOS application, script to flash EVM with bootable application
- demos - Contains demonstrations that implements interesting features. Additionally, these demonstrations serve as a template to start writing an application
- docs - Contains various documentation such as the software manifest and release notes
- prebuilt-sdcards - Contains prebuilt SD card images that can be copied to an SD card and used to load the EVM (AM3, AM4, AM5 only)
- prebuilt-images - Contains prebuilt images to flash images to write to EVM flash (K2x only)
- makefile - Provides build targets for SDK components from the top-level of the SDK
- setupenv.bat - Configures the user Windows host system to prepare to invoke the makefile
- setupenv.sh - Configures the user Linux host system to prepare to invoke the makefile
1.2.4. Components Included in SDK
The following is a list of all components that may be included in the Processor-SDK RTOS SDK installer. See Release Notes for applicable components for a specific platform.
1.2.4.1. Development Host Content
- CG_XML - Perl scripts used to process the XML files that come from the TI code generation tools
- XDC Tools - XDCtools contains all of the tools for reusable software components, optimized for real-time embedded systems
- ARM GCC Compiler - GNU GCC ARM contains runtime libraries and cross-compilers used for ARM development
- TI ARM Compiler - TI ARM code generation tools, including C/C++ compiler, linker, and run-time-support libraries
- TI C6000 Compiler - TI C6X code generation tools, including C/C++ compiler, linker, and run-time-support libraries
- TI PRU Compiler - TI PRU code generation tools, including C/C++ compiler, linker, and run-time-support libraries
1.2.4.2. Target Content
- CTOOLSLIB - C6x DSP software libraries to use trace/instrumentation hardware blocks on SOC (e.g., ETB, AET, STM)
- DSPLIB - Optimized C6x DSP function library for C programmers
- EDMA3-LLD - EDMA3 low level driver that supports data transfers between two memory mapped devices
- FC: Framework Components is comprised of XDAIS algorithm resource managers and functional interfaces
- FFTLIB - Optimized C6x DSP Fast Fourier Transform function library for C programmers
- IMGLIB - Optimized C6x DSP image and video processing function library for C programmers
- IPC - InterProcess Communication mechanisms including message passing, streams, and linked lists, which work transparently in both uniprocessor and multiprocessor configurations
- LIBARCH - Library architecture framework used by other C6x DSP optimized libraries
- LINALG - Optimized C6x DSP dense linear algebra function library for C programmers
- MATHLIB - Optimized C6x DSP floating-point math function library for C programmers
- MPM - Multiproc Manager C6x DSP component provides services to MPM Linux module to load and manage remote processors
- NDK - Network Development Kit package provides an example network stack that runs on the TI-RTOS kernel
- OPENCL - OpenCL is a framework for writing programs that execute across heterogeneous systems
- OPENMP - OpenMP Runtime implements support for the OpenMP API specification, a standard for shared memory parallel programming
- PDK - Platform Development Kit that includes Chip Support Libarary (CSL), Low Level Drivers (LLD), Boot, Diagnostics, and other functions
- SYS/BIOS - TI-RTOS kernel, a real-time operating system that provides pre-emptive deterministic multithreading
- UIA - Unified Instrumentation Architecture (UIA) APIs and transports allow embedded software to log trace/event instrumentation data that can be visualized in CCS
- XDAIS - XDAIS (eXpress DSP Algorithm Interoperability Standard) provides the rules and guidelines necessary to enable integration and execution of algorithms
1.3. RTOS Software Stack
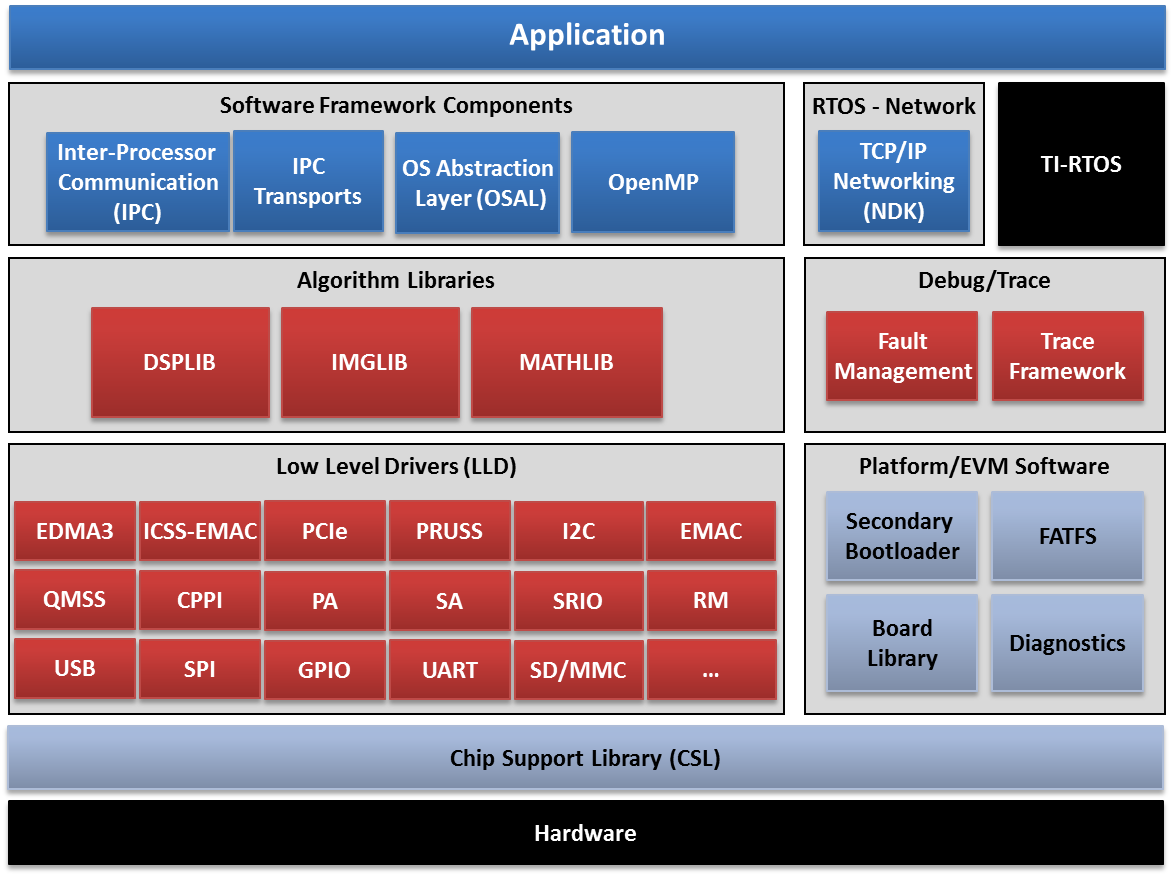
1.3.1. Overview
The following software stack illustrates at a high level the various components provided with the Processor SDK for RTOS. The package provides well-defined API abstraction layers allowing applications to quickly utilize different peripherals accessible from an SOC.
Note
Certain features are platform dependent and are clarified in the associated User Guides.
1.4. Building the SDK
1.4.1. Overview
The Processor SDK comes with pre-built libraries for everything you need to start writing an application. However, you may want to customize and rebuild from source. Inside the SDK there is a top-level Makefile that can be used to build some of the sub-components found within the SDK. Prior to calling this Makefile, run the provided script/batch file to setup your host environment variables. For components not covered by this top-level Makefile, please see guides within the respective component for build instructions.
The Makefile and environment setup script are found in the RTOS SDK directory:
[SDK Install Path]/processor_sdk_rtos_[soc]_[version]/
The default SDK Install Path is C:\ti for Windows and /home/[user]/ti for Linux.
The pre-requisite compilers are provided in Code Compose Studio, see the CCS installation section of the Getting Started Guide.
Note
If you have installed the SDK and/or CCS in non-default locations follow the steps outlined in the article Processor SDK RTOS Install In Custom Path <How_to_Guides.html#update-environment-when-installing-to-a-custom-path> to build the SDK from the toplevel Makefile.
1.4.2. Setup Environment
1.4.2.1. Command
The SDK build environment can be configured on Windows and Linux by running an environment setup script located in the top-level RTOS SDK folder.
1.4.2.1.1. Windows
From the RTOS SDK directory, enter
C:\ti\processor_sdk_rtos_[soc]_[version]> setupenv.bat
which will configure the Windows command shell environment for the installed RTOS SDK.
Note
- You must re-run this batch file any time you open a new terminal.
- Script also sets CCS installation path using TOOLS_INSTALL_PATH variable so set the variable if you are not using default CCS install path
C:\ti\processor_sdk_rtos_[soc]_[version]>setupenv.bat
Optional parameter not configured : CG_XML_BIN_INSTALL_PATH
REQUIRED for xdc release build
Example: set CG_XML_BIN_INSTALL_PATH=C:/ti/cg_xml/bin
Optional parameter not configured : DOXYGEN_INSTALL_PATH
REQUIRED for xdc release build
Example: set DOXYGEN_INSTALL_PATH=C:/ti/Doxygen/doxygen/1.5.1-p1/bin
**************************************************************************
Environment Configuration:
    PDK Directory             : /ti/PDK_AM~3/packages/
    CGTOOL INSTALL Directory  : C:/ti/ccsv6/tools/compiler/ti-cgt-c6000_[version]
    TOOLCHAIN A15 Directory   : C:/ti/ccsv6/tools/compiler/gcc-arm-none-eabi-[version]
    TOOLCHAIN A8 Directory    : C:/ti/ccsv6/tools/compiler/gcc-arm-none-eabi-[version]
    TOOLCHAIN A9 Directory    : C:/ti/ccsv6/tools/compiler/gcc-arm-none-eabi-[version]
    TOOLCHAIN M4 Directory    : C:/ti/ccsv6/tools/compiler/ti-cgt-arm_[version]
    FPULIB_PATH               : C:/ti/ccsv6/tools/compiler/gcc-arm-none-eabi-[version]/lib/gcc/arm-none-eabi/[version]/fpu
    CROSS_TOOL_PRFX           : arm-none-eabi-
    XDC_INSTALL_PATH          : C:/ti/xdctools_[version]_core
    BIOS_INSTALL_PATH         : C:/ti/bios_[version]
    IPC_INSTALL_PATH          : C:/ti/ipc_[version]
    EDMA3LLD_BIOS6_INSTALLDIR : C:/ti/edma3_lld_[version]
    NDK_INSTALL_PATH          : C:/ti/ndk_[version]
    IMGLIB_INSTALL_PATH       : C:/ti/imglib_c66x_[version]
    UIA_INSTALL_PATH          : C:/ti/uia_[version]
    PROC_SDK_INSTALL_PATH     : C:/ti/processor_sdk_rtos_[soc]_[version]
**************************************************************************
Changing to short name to support directory names containing spaces
current directory: C:/ti/processor_sdk_rtos_[soc]_[version]
PROCESSOR SDK BUILD ENVIRONMENT CONFIGURED
**************************************************************************
Note
The warnings of optional parameters not configured can be ignored since we are only rebuilding the libraries and not generating a release package.
1.4.2.1.2. Linux
From the RTOS SDK directory, enter
~/ti/processor_sdk_rtos_[soc]_[version]$ source setupenv.sh
which will configure the Linux shell environment for the installed RTOS SDK.
~/ti/processor_sdk_rtos_[soc>]_[version]$ source setupenv.sh
Optional parameter not configured : CG_XML_BIN_INSTALL_PATH
REQUIRED for xdc release build
Example: export CG_XML_BIN_INSTALL_PATH="~/ti/cg_xml/bin"
Optional parameter not configured : DOXYGEN_INSTALL_PATH
REQUIRED for xdc release build
Example: export DOXYGEN_INSTALL_PATH="~/ti/Doxygen/doxygen/1.5.1-p1/bin"
**************************************************************************
Environment Configuration:
    PDK Directory             : /home/[user]/ti/pdk_[soc]_[version]/packages
    CGTOOL INSTALL Directory  : /home/[user]/ti/ccsv6/tools/compiler/ti-cgt-c6000_[version]
    TOOLCHAIN A15 Directory   : /home/[user]/ti/ccsv6/tools/compiler/gcc-arm-none-eabi-[version]
    TOOLCHAIN A8 Directory    : /home/[user]/ti/ccsv6/tools/compiler/gcc-arm-none-eabi-[version]
    TOOLCHAIN A9 Directory    : /home/[user]/ti/ccsv6/tools/compiler/gcc-arm-none-eabi-[version]
    TOOLCHAIN M4 Directory    : /home/[user]/ti/ccsv6/tools/compiler/ti-cgt-arm_[version]
    FPULIB_PATH               : /home/[user]/ti/ccsv6/tools/compiler/gcc-arm-none-eabi-[version]/lib/gcc/arm-none-eabi/[version]/fpu
    CROSS_TOOL_PRFX           : arm-none-eabi-
    XDC_INSTALL_PATH          : /home/[user]/ti/xdctools_[version]_core
    BIOS_INSTALL_PATH         : /home/[user]/ti/bios_[version]
    IPC_INSTALL_PATH          : /home/[user]/ti/ipc_[version]
    EDMA3LLD_BIOS6_INSTALLDIR : /home/[user]/ti/edma3_lld_[version]
    NDK_INSTALL_PATH          : /home/[user]/ti/ndk_[version]
    IMGLIB_INSTALL_PATH       : /home/[user]/ti/imglib_c66x_[version]
    UIA_INSTALL_PATH          : /home/[user]/ti/uia_[version]
    PROC_SDK_INSTALL_PATH     : /home/[user]/ti/processor_sdk_rtos_[soc]_[version]

PROCESSOR SDK BUILD ENVIRONMENT CONFIGURED
*******************************************************************************
Note
The warnings of optional parameters not configured can be ignored since we are only rebuilding the libraries and not generating a release package.
1.4.3. Top-Level Makefile
The SDK level makefile can be used to compile SDK sub-components after the build environment has been configured. The following sections cover the Makefile found in the top-level of the Processor SDK for RTOS.
1.4.3.1. Target Types
For each of the targets discussed below the following target type are defined:
- <target> - This is the build target which will compile the release version of the component
- <target>_clean - This target will clean the component
1.4.3.2. Top-Level Targets
The Processor SDK for RTOS provides the following targets by default which will invoke the corresponding component targets:
- help - This will print target information defined in the Makefile
- all - This will call the build target for each component defined in the Makefile
- clean - This will call the clean target for each component defined in the Makefile
Note
Invoking build using “all” option in SDK top level for multicore SOC parts can take up to several hours to rebuild as the components need to be built for all cores (e.g., A15, C66x, M4). Please rebuild individual components in the PDK package for these devices to avoid long build times.
1.4.3.3. Common Targets
The following targets are common to all Processor SDKs for RTOS:
- pdk - Builds the Platform Development Kit that includes CSL and low level drivers
1.4.3.4. Additional Targets
You can find the list of all the targets by invoking help target as described above. Depending on the capabilities and software available for a given device additional targets may also be defined:
- demo - Builds demonstrations provided in the SDK
- ipc_bios - Builds the IPC component provided in the SDK
- ipc_examples - Builds the IPC examples provided in the IPC component
1.4.4. Usage Examples
The following examples demonstrate how to use the top-level Makefile for some common tasks. All of the examples below assume that you are calling the Makefile from the top-level of the SDK.
1.4.4.1. Windows
- Build all
C:\ti\processor_sdk_rtos_[soc]_[version]> gmake
- Clean all
C:\ti\processor_sdk_rtos_[soc]_[version]> gmake clean
1.4.4.2. Linux
- Build all
~/ti/processor_sdk_rtos_[soc]_[version]$ make
- Clean all
~/ti/processor_sdk_rtos_[soc]_[version]$ make clean
1.4.5. Rebuilding Components
Instructions for rebuilding sub-components can be found in documentation within the component. Here are a collection of useful pages:
- Rebuild IPC (Starting in Release 3.0, IPC build has been integrated into the top-level SDK Makefile.)
- Rebuild NDK
- Rebuild PDK
- Rebuild SYS/BIOS
1.6. Processor SDK Technical Support
Technical support is a broad term. Our desire is to provide a solid product, good documentation, and useful training that defines a clear path for developing a product based on the Linux/RTOS/Android SDKs. However, we know we’ll never cover everything that can be done, and occasionally we even make mistakes <gasp>. So, when you can’t seem to find what you need, there’s a good place to search through previously answered questions and ask a new one - The E2E Support Forums.
There is an active community of TIers and other customers like you already using a TI Processor, on these forums. You may find your question has already been answered with a quick Search of the Forums. If not, a quick post will likely provide you the answers you need.