5.2. Sub-system Demos
5.2.1. Power Management
Overview
This page is the top level page for support of Power Management topics related to Sitara devices.
Please follow the appropriate link below to find information specific to your device.
Supported Devices
AM335x Power Management User Guide
Note: BeagleBone users click here.
5.2.1.1. AM335x Power Management User Guide
Overview
This article provides a description of the example applications under the Power page of the Matrix application that comes with the Sitara SDK. This page is labled “Power” in the top-level Matrix GUI. The location of the Power icon on the main Matrix app list may be different than shown here, depending on screen size. (Screen shots from SDK 06.00)

Power Examples
Several power examples exist to provide users the ability to dynamically switch the CPU clock frequency. The frequencies shown are those available for your system. Upon making a selection, you will be presented a confirmation page. The readout number “BogoMIPS” will confirm the new clock frequency. Please note that the frequency will read out with a slight margin compare to the intended frequency. For example, if you select 1GHz, you may see a number like 998.84 (in MHz). This is normal. After reviewing the confirmation page, press the Close button to return to normal Matrix operation.
Other power examples are provided which may be useful for power management developers and power users. These have been included in Matrix in part to make users aware that these valuable debugging tools exist, in addition to the convenience of executing each application from the GUI. In depth descriptions for each application follow. Similar descriptions are also given via description pages in Matrix, which will be displayed when clicking the button. Where appropriate, the documentation will point out the corresponding command line operation.
The Suspend/Resume button demonstrates the ability to put the machine into a suspended state. See below for complete documentation of this feature.
Please note that the order of applications which appear on your screen may differ from the picture below, due to devices with different screen sizes, and differences between different versions of Matrix. Screen shot is from SDK 06.00.

Set Frequency
This command opens up another screen from which you choose the frequency based on the available frequencies on the board. Here is a picture of the screen you will see:

The following are the Linux command line equivalents for selecting the operating frequency. Please note that changing the frequency also changes the MPU voltage accordingly. The commands are part of the “cpufreq” kernel interface for selecting the OPP (operating performance point). Cpufreq provides an opportunity to save power by adjusting/scaling voltage and frequency based on the current cpu load.
 (command line equivalent)
cat /sys/devices/system/cpu/cpu0/cpufreq/scaling_available_frequencies
(view options, select one for next step)
echo <selected frequency, in KHz> > /sys/devices/system/cpu/cpu0/cpufreq/scaling_setspeed
cat /proc/cpuinfo
Suspend/Resume
 (command line equivalent)
mkdir /debug
mount -t debugfs debugfs /debug
echo mem > /sys/power/state
SmartReflex
SmartReflex is an active power management technique which optimizes voltage based on silicon process (“hot” vs. “cold” silicon), temperature, and silicon degradation effects. In most cases, SmartReflex provides significant power savings by lowering operating voltage.
On AM335x, SmartReflex is enabled by default in Sitara SDK releases since 05.05.00.00. Please note that the kernel configuration menu presents two options: “AM33XX SmartReflex support” and “SmartReflex support”. For AM33XX SmartReflex, you must select “AM33XX SmartReflex support”, and ensure that the “SmartReflex support” option is disabled. The latter option is intended for AM37x and OMAP3 class devices.
The SmartReflex driver requires the use of either the TPS65217 or TPS65910 PMIC. Furthermore, SmartReflex is currently supported only on the ZCZ package. Please note that SmartReflex may not operate on AM335x sample devices which were not programmed with voltage targets. To disable SmartReflex, type the following commands at the target terminal:
mkdir /debug
mount -t debugfs debugfs /debug
cd /debug/smartreflex   ==> NOTE: You may not see 'smartreflex' node if you have early silicon.  In this case SmartReflex operation is not possible.
echo 0 > autocomp
(Performing "echo 1 > autocomp" will re-enable SmartReflex)
On AM335x, to compile SmartReflex support out of the kernel, follow this procedure to modify the kernel configuration:
cd <kernel source directory>
make ARCH=arm CROSS_COMPILE=arm-linux-gnueabihf- menuconfig
<the menuconfig interface should appear>
Select "System Type"
Select "TI OMAP Common Features"
Deselect "AM33xx SmartReflex Support"
Select "Exit" until you are prompted to save the configuration changes, and save them.
Rebuild the kernel.
Dynamic Frequency Scaling
This feature, which can be enabled via patch to the SDK, enables scaling frequency INDEPENDENT of voltage. It is also referred to as DFS (as in DVFS without the ‘V’).
Media:0001-Introduce-dynamic-frequency-scaling.patch
Discussion
Certain systems are unable to scale voltage, either because they employ a fixed voltage regulator, or use the ZCE package of AM335x. Without being able to scale voltage, the power savings enabled via DVFS are lost. This is because the current version of the omap-cpufreq driver requires a valid MPU voltage regulator in order to operate. The purpose of this DFS feature is to enable additional power savings for systems with these sort of limitations.
When using the ZCE package of AM335x, the CORE and MPU voltage domains are tied together. Due to Advisory 1.0.22, you are not allowed to dynamically modify the CORE frequency/voltage because the EMIF cannot support it. However, to achieve maximum power savings, it may still be desirable to use a PMIC which supports dynamic voltage scaling, in order to use Adaptive Voltage Scaling (aka SmartReflex or AVS). This implementation of DFS does not affect the ability of AVS to optimize the voltage and save additional power.
Using the patch
The patch presented here has been developed for and tested on the SDK 05.07. It modifies the omap-cpufreq driver to operate without requiring a valid MPU voltage regulator. From a user perspective, changing frequency via cpufreq is accomplished with exactly the same commands as typical DVFS. For example, switching to 300 MHz is accomplished with the following command:
echo 300000 > /sys/devices/system/cpu/cpu0/cpufreq/scaling_setspeed
After applying the patch, the user must modify the kernel defconfig in order to enable the DFS feature. You should also configure the “Maximum supported DFS voltage” (shown below) to whatever the fixed voltage level is for your system, in microvolts. For example, use the value 1100000 to signify 1.1V. The software will use the voltage level that you specify to automatically disable any Operating Performance Points (OPPs) which have voltages above that level.
On AM335x, first apply the patch, then follow this procedure to modify the kernel configuration:
cd <kernel source directory>
make ARCH=arm CROSS_COMPILE=arm-linux-gnueabihf- menuconfig
<the menuconfig interface should appear>
Select "System Type"
Select "TI OMAP Common Features"
Select "Dynamic Frequency Scaling"
Configure "Maximum supported DFS voltage (in microvolts)" (default is 1100000, or 1.1V)
Select "Exit" until you are prompted to save the configuration changes, and save them.
Rebuild the kernel.
Power Savings
Tested on a rev 1.2 EVM, running Linux at idle.
The delta between power consumption at 300MHz and 600MHz, with voltage unchanged, is approximately 75mW.
Static CORE OPP 50
Configuring the AM335x system to CORE OPP50 frequency and voltage is an advanced power savings method that can be used, provided that you understand the tradeoffs involved.
This patch, which was developed against the u-boot source tree from the SDK 05.07, configures the bootloader to statically program the system to CORE OPP50 voltage (0.95V) and frequencies. It also configures the MPU to OPP50 voltage (0.95V) and frequency (300MHz). DDR2 is configured with optimized timings to run at 125MHz.
Apply the following patch to your u-boot source tree and rebuild both MLO and u-boot.img. (Refer to AM335x_U-Boot_User’s_Guide#Building_U-Boot)
Media:0001-Static-CORE-OPP50-w-DDR2-125MHz-MPU-300MHz.patch
Caveats
According to section 5.5.1 of the AM335x datasheet, operation of the Ethernet MAC and switch (CPSW) is NOT supported for CORE OPP50.
Note that MPU OPP50 operation is not supported for the 1.0 silicon revision (silicon errata Advisory 1.0.15).
Also be aware of Advisory 1.0.24, which states that boot may not be reliable because OPP100 frequencies are used by ROM at OPP50 voltages.
DDR2 memory must be used (as on the AM335x EVM up to rev 1.2). DDR2 memory timings must be modified to operate at 125MHz.
Power Savings
On an EVM (rev 1.2), active power consumption when Linux is idle for CORE and MPU rails was measured at 150mW. Using the out-of-the-box SDK at OPP100 (MPU and CORE), the comparable figure is 334mW.
Further savings are possible by disabling Ethernet drivers in the Linux defconfig. Refer to AM335x_CPSW_(Ethernet)_Driver’s_Guide#Driver_Configuration and disable “Ethernet driver support” to acheive additional power savings.
Power Management Reference
Refer to this page for Linux specific information on AM335x devices.
The Power Estimation Tool (PET) provides users the ability to gain insight in to the power consumption of select Sitara processors.
This document discusses the power consumption for common system application usage scenarios for the AM335x ARM® Cortex™-A8 Microprocessors (MPUs).
Standby for AM335x is a inactive (system suspended) power saving mode in which the power savings achieved would be lesser than that achieved through DeepSleep0 mode but with lesser resume latency and additional wake-up sources.
5.2.2. ARM Multimedia Users Guide
Overview
Multimedia codecs on ARM based platforms could be optimised for better performance using the tightly coupled **Neon** co-processor. Neon architecture works with its own independent pipeline and register file. Neon technology is a 128 bit SIMD architecture extension for ARM Cortex-A series processors. It is designed to provide acceleration for multimedia applications.
Supported Platforms
AM37x
Beagleboard-xM
AM35x
AM335x EVM
AM437x GP EVM
AM57xx GP EVM
Multimedia on AM57xx Processor
On AM57xx processor, ARM offloads H.264, VC1, MPEG-4, MPEG-2 and MJPEG codecs processing to IVA-HD hardware accelerator. Please refer to AM57xx Multimedia Training guide to learn more on AM57xx multimedia capabilities, demos, software stack, gstreamer plugins and pipelines. Also refer to AM57xx Graphics Display Getting Started Guide to learn on AM57xx graphics software architecture, demos, tools and display applications.
Multimedia on Cortex-A8
Cortex-A8 Features and Benefits
Support ARM v7 with Advanced SIMD (NEON)
Support hierarchical cache memory
Up to 1 MB L2 cache
Up to 128-bit memory bandwidth
13-stage pipeline and enhanced branch prediction engine
Dual-issue of instructions
Neon Features and Benefits
Independent HW block to support advanced SIMD instructions
Comprehensive instruction set with support of 8, 16 & 32-bit signed & unsigned data types
256 byte register file (dual 32x64/16x128 view) with hybrid 32/64/128 bit modes
Large register files enables efficient data handling and minimizes access to memory, thus enhancing data throughput
Processor can sleep sooner which leads to an overall dynamic power saving
Independent 10-stage pipeline
Dual-issue of limited instruction pairs
Significant code size reduction
Neon support on opensource community
NEON is currently supported in the following Open Source projects.
ffmpeg/libav
LGPL media player used in many Linux distros
NEON Video: MPEG-4 ASP, H.264 (AVC), VC-1, VP3, Theora
NEON Audio: AAC, Vorbis, WMA
x264 –Google Summer Of Code 2009
GPL H.264 encoder –e.g. for video conferencing
Bluez –official Linux Bluetooth protocol stack
NEON sbc audio encoder
Pixman (part of cairo 2D graphics library)
Compositing/alpha blending
X.Org, Mozilla Firefox, fennec, & Webkit browsers
e.g. fbCompositeSolidMask_nx8x0565neon 8xfaster using NEON
Ubuntu 09.04 & 09.10 –fully supports NEON
NEON versions of critical shared-libraries
Android –NEON optimizations
Skia library, S32A_D565_Opaque 5xfaster using NEON
Available in Google Skia tree from 03-Aug-2009
For additional details, please refer the **NEON - ARM website**.
SDK Example Applications
This application can be executed by selecting the “Multimedia” icon at the top-level matrix.
NOTE
The very first GStreamer launch takes some time to initialize outputs or set up decoders.

Codec portfolio
Processor SDK includes ARM based multimedia using opensource GPLv2+ FFmpeg/Libav codecs, the codec portfolio includes MPEG-4, H.264 for video in VGA/WQVGA/480p resolution and AAC codec for audio. Codec portforlio for Processor SDK on AM57xx device is listed here
The script file to launch multimedia demo detects the display enabled and accordingly decodes VGA or 480p video. In AM37x platform VGA clip is decoded when LCD is enabled and 480p is decoded when DVI out is enabled. Scripts in “Settings” menu can be used to switch between these two displays.
MPEG4 + AAC Decode
MPEG-4 + AAC Dec example application demonstrates use of MPEG-4 video and AAC audio codec as mentioned in the description page below.

The multimedia pipeline is constructed using gst-launch, GStreamer elements such as qtdemux is used for demuxing AV content. Parsers are elements with single source pad and can be used to cut streams into buffers, they do not modify the data otherwise.
gst-launch-0.10 filesrc location=$filename ! qtdemux name=demux demux.audio_00 ! queue ! ffdec_aac ! alsasink sync=false demux.video_00 ! queue ! ffdec_mpeg4 ! ffmpegcolorspace ! fbdevsink device=/dev/fb0
“filename” is defined based on the selected display device which could be LCD of DVI.
MPEG4 Decode
MPEG-4 decode example application demonstrates use of MPEG-4 video codec as mentioned in the description page below.

gst-launch-0.10 filesrc location=$filename ! mpeg4videoparse ! ffdec_mpeg4 ! ffmpegcolorspace ! fbdevsink device=/dev/fb0
H.264 Decode
H.264 decode example application demonstrates use of H.264 video codec as mentioned in the description page below.

gst-launch-0.10 filesrc location=$filename ! h264parse ! ffdec_h264 ! ffmpegcolorspace ! fbdevsink device=/dev/fb0
AAC Decode
AAC decode example application demonstrates use of AAC video codec as mentioned in the description page below.

gst-launch-0.10 filesrc location=$filename ! aacparse ! faad ! alsasink
Streaming
Audio/Video data can be streamed from a server using souphttpsrc. For example to stream audio content, if you set-up an apache server on your host machine you can stream the audio file HistoryOfTI.aac located in the files directory using the pipeline
gst-launch souphttpsrc location=http://<ip address>/files/HistoryOfTI.aac ! aacparse ! faad ! alsasink
Multimedia Peripheral Examples
Examples of how to use several different multimedia peripherals can be found on the ARM Multimedia Peripheral Examples page.
SDK Multimedia Framework
Multimedia framework for cortex-a8 SDK will leverage GStreamer multimedia stack with gst-ffmpeg plug-in’s to support GPLv2+ FFmpeg/libav library code.

gst-launch is used to build and run basic multimedia pieplines to demonstrate audio/avideo decoding examples.

GStreamer
Multimedia processing library
Provides uniform framework across platforms
Includes parsing & A/V sync support
Modular with flexibility to add new functionality via plugins
Easy bindings to other frameworks
Some of the build dependencies for GStreamer are shown here:

Open Source FFmpeg Codecs
**FFmpeg** is an open source project which provides a cross platform multimedia solution.
Free audio and video decoder/encoder code licensed under GPLv2+ (GPLv3 licensed codecs can be build separately)
A comprehensive suite of standard compliant multimedia codecs
Codec software package
Codec libraries with standard C based API
Audio/Video parsers that support popular multimedia content
Use of SIMD/NEON instructions **cortex-A8 neon architecture**
Neon provides 1.6x-2.5x performance on complex video codecs
Multimedia Neon Benchmark
Test Parameters:
Sep 21 2009 snapshot of gst-ffmpeg.org
Real silicon measurements on Omap3 Beagleboard
Resolution |
480x270 |
Frame Rate |
30fps |
Audio |
44.1KHz |
Video Codec |
H.264 |
Audio Codec |
AAC |
Benchmarks released by ARM demonstrating an overall performance improvement of ~2x.

FFmpeg Codecs List
FFmpeg Codec Licensing
FFmpeg libraries include LGPL, GPLv2, GPLv3 and other license based codecs, enabling GPLv3 codecs subjects the entire framework to GPLv3 license. In the Sitara SDK GPLv2+ licensed codecs are enabled. Enabling Additional details of **legal and license** of these codecs can be found on the FFmpeg/libav webpage.
GPLv2+ codecs list
Codec |
Description |
ffenc_a64multi |
FFmpeg Multicolor charset for Commodore 64 encoder |
ffenc_a64multi5 |
FFmpeg Multicolor charset for Commodore 64, extended with 5th color (colram) encoder |
ffenc_asv1 |
FFmpeg ASUS V1 encoder |
ffenc_asv2 |
FFmpeg ASUS V2 encoder |
ffenc_bmp |
FFmpeg BMP image encoder |
ffenc_dnxhd |
FFmpeg VC3/DNxHD encoder |
ffenc_dvvideo |
FFmpeg DV (Digital Video) encoder |
ffenc_ffv1 |
FFmpeg FFmpeg video codec #1 encoder |
ffenc_ffvhuff |
FFmpeg Huffyuv FFmpeg variant encoder |
ffenc_flashsv |
FFmpeg Flash Screen Video encoder |
ffenc_flv |
FFmpeg Flash Video (FLV) / Sorenson Spark / Sorenson H.263 encoder |
ffenc_h261 |
FFmpeg H.261 encoder |
ffenc_h263 |
FFmpeg H.263 / H.263-1996 encoder |
ffenc_h263p |
FFmpeg H.263+ / H.263-1998 / H.263 version 2 encoder |
ffenc_huffyuv |
FFmpeg Huffyuv / HuffYUV encoder |
ffenc_jpegls |
FFmpeg JPEG-LS encoder |
ffenc_ljpeg |
FFmpeg Lossless JPEG encoder |
ffenc_mjpeg |
FFmpeg MJPEG (Motion JPEG) encoder |
ffenc_mpeg1video |
FFmpeg MPEG-1 video encoder |
ffenc_mpeg4 |
FFmpeg MPEG-4 part 2 encoder |
ffenc_msmpeg4v1 |
FFmpeg MPEG-4 part 2 Microsoft variant version 1 encoder |
ffenc_msmpeg4v2 |
FFmpeg MPEG-4 part 2 Microsoft variant version 2 encoder |
ffenc_msmpeg4 |
FFmpeg MPEG-4 part 2 Microsoft variant version 3 encoder |
ffenc_pam |
FFmpeg PAM (Portable AnyMap) image encoder |
ffenc_pbm |
FFmpeg PBM (Portable BitMap) image encoder |
ffenc_pcx |
FFmpeg PC Paintbrush PCX image encoder |
ffenc_pgm |
FFmpeg PGM (Portable GrayMap) image encoder |
ffenc_pgmyuv |
FFmpeg PGMYUV (Portable GrayMap YUV) image encoder |
ffenc_png |
FFmpeg PNG image encoder |
ffenc_ppm |
FFmpeg PPM (Portable PixelMap) image encoder |
ffenc_qtrle |
FFmpeg QuickTime Animation (RLE) video encoder |
ffenc_roqvideo |
FFmpeg id RoQ video encoder |
ffenc_rv10 |
FFmpeg RealVideo 1.0 encoder |
ffenc_rv20 |
FFmpeg RealVideo 2.0 encoder |
ffenc_sgi |
FFmpeg SGI image encoder |
ffenc_snow |
FFmpeg Snow encoder |
ffenc_svq1 |
FFmpeg Sorenson Vector Quantizer 1 / Sorenson Video 1 / SVQ1 encoder |
ffenc_targa |
FFmpeg Truevision Targa image encoder |
ffenc_tiff |
FFmpeg TIFF image encoder |
ffenc_wmv1 |
FFmpeg Windows Media Video 7 encoder |
ffenc_wmv2 |
FFmpeg Windows Media Video 8 encoder |
ffenc_zmbv |
FFmpeg Zip Motion Blocks Video encoder |
ffenc_aac |
FFmpeg Advanced Audio Coding encoder |
ffenc_ac3 |
FFmpeg ATSC A/52A (AC-3) encoder |
ffenc_alac |
FFmpeg ALAC (Apple Lossless Audio Codec) encoder |
ffenc_mp2 |
FFmpeg MP2 (MPEG audio layer 2) encoder |
ffenc_nellymoser |
FFmpeg Nellymoser Asao encoder |
ffenc_real_144 |
FFmpeg RealAudio 1.0 (14.4K) encoder encoder |
ffenc_sonic |
FFmpeg Sonic encoder |
ffenc_sonicls |
FFmpeg Sonic lossless encoder |
ffenc_wmav1 |
FFmpeg Windows Media Audio 1 encoder |
ffenc_wmav2 |
FFmpeg Windows Media Audio 2 encoder |
ffenc_roq_dpcm |
FFmpeg id RoQ DPCM encoder |
ffenc_adpcm_adx |
FFmpeg SEGA CRI ADX ADPCM encoder |
ffenc_g722 |
FFmpeg G.722 ADPCM encoder |
ffenc_g726 |
FFmpeg G.726 ADPCM encoder |
ffenc_adpcm_ima_qt |
FFmpeg ADPCM IMA QuickTime encoder |
ffenc_adpcm_ima_wav |
FFmpeg ADPCM IMA WAV encoder |
ffenc_adpcm_ms |
FFmpeg ADPCM Microsoft encoder |
ffenc_adpcm_swf |
FFmpeg ADPCM Shockwave Flash encoder |
ffenc_adpcm_yamaha |
FFmpeg ADPCM Yamaha encoder |
ffenc_ass |
FFmpeg Advanced SubStation Alpha subtitle encoder |
ffenc_dvbsub |
FFmpeg DVB subtitles encoder |
ffenc_dvdsub |
FFmpeg DVD subtitles encoder |
ffenc_xsub |
FFmpeg DivX subtitles (XSUB) encoder |
ffdec_aasc |
FFmpeg Autodesk RLE decoder |
ffdec_amv |
FFmpeg AMV Video decoder |
ffdec_anm |
FFmpeg Deluxe Paint Animation decoder |
ffdec_ansi |
FFmpeg ASCII/ANSI art decoder |
ffdec_asv1 |
FFmpeg ASUS V1 decoder |
ffdec_asv2 |
FFmpeg ASUS V2 decoder |
ffdec_aura |
FFmpeg Auravision AURA decoder |
ffdec_aura2 |
FFmpeg Auravision Aura 2 decoder |
ffdec_avs |
FFmpeg AVS (Audio Video Standard) video decoder |
ffdec_bethsoftvid |
FFmpeg Bethesda VID video decoder |
ffdec_bfi |
FFmpeg Brute Force & Ignorance decoder |
ffdec_binkvideo |
FFmpeg Bink video decoder |
ffdec_bmp |
FFmpeg BMP image decoder |
ffdec_c93 |
FFmpeg Interplay C93 decoder |
ffdec_cavs |
FFmpeg Chinese AVS video (AVS1-P2, JiZhun profile) decoder |
ffdec_cdgraphics |
FFmpeg CD Graphics video decoder |
ffdec_cinepak |
FFmpeg Cinepak decoder |
ffdec_cljr |
FFmpeg Cirrus Logic AccuPak decoder |
ffdec_camstudio |
FFmpeg CamStudio decoder |
ffdec_cyuv |
FFmpeg Creative YUV (CYUV) decoder |
ffdec_dnxhd |
FFmpeg VC3/DNxHD decoder |
ffdec_dpx |
FFmpeg DPX image decoder |
ffdec_dsicinvideo |
FFmpeg Delphine Software International CIN video decoder |
ffdec_dvvideo |
FFmpeg DV (Digital Video) decoder |
ffdec_dxa |
FFmpeg Feeble Files/ScummVM DXA decoder |
ffdec_eacmv |
FFmpeg Electronic Arts CMV video decoder |
ffdec_eamad |
FFmpeg Electronic Arts Madcow Video decoder |
ffdec_eatgq |
FFmpeg Electronic Arts TGQ video decoder |
ffdec_eatgv |
FFmpeg Electronic Arts TGV video decoder |
ffdec_eatqi |
FFmpeg Electronic Arts TQI Video decoder |
ffdec_8bps |
FFmpeg QuickTime 8BPS video decoder |
ffdec_8svx_exp |
FFmpeg 8SVX exponential decoder |
ffdec_8svx_fib |
FFmpeg 8SVX fibonacci decoder |
ffdec_escape124 |
FFmpeg Escape 124 decoder |
ffdec_ffv1 |
FFmpeg FFmpeg video codec #1 decoder |
ffdec_ffvhuff |
FFmpeg Huffyuv FFmpeg variant decoder |
ffdec_flashsv |
FFmpeg Flash Screen Video v1 decoder |
ffdec_flic |
FFmpeg Autodesk Animator Flic video decoder |
ffdec_flv |
FFmpeg Flash Video (FLV) / Sorenson Spark / Sorenson H.263 decoder |
ffdec_4xm |
FFmpeg 4X Movie decoder |
ffdec_fraps |
FFmpeg Fraps decoder |
ffdec_FRWU |
FFmpeg Forward Uncompressed decoder |
ffdec_h261 |
FFmpeg H.261 decoder |
ffdec_h263 |
FFmpeg H.263 / H.263-1996, H.263+ / H.263-1998 / H.263 version 2 decoder |
ffdec_h263i |
FFmpeg Intel H.263 decoder |
ffdec_h264 |
FFmpeg H.264 / AVC / MPEG-4 AVC / MPEG-4 part 10 decoder |
ffdec_huffyuv |
FFmpeg Huffyuv / HuffYUV decoder |
ffdec_idcinvideo |
FFmpeg id Quake II CIN video decoder |
ffdec_iff_byterun1 |
FFmpeg IFF ByteRun1 decoder |
ffdec_iff_ilbm |
FFmpeg IFF ILBM decoder |
ffdec_indeo2 |
FFmpeg Intel Indeo 2 decoder |
ffdec_indeo3 |
FFmpeg Intel Indeo 3 decoder |
ffdec_indeo5 |
FFmpeg Intel Indeo Video Interactive 5 decoder |
ffdec_interplayvideo |
FFmpeg Interplay MVE video decoder |
ffdec_jpegls |
FFmpeg JPEG-LS decoder |
ffdec_kgv1 |
FFmpeg Kega Game Video decoder |
ffdec_kmvc |
FFmpeg Karl Morton’s video codec decoder |
ffdec_loco |
FFmpeg LOCO decoder |
ffdec_mdec |
FFmpeg Sony PlayStation MDEC (Motion DECoder) decoder |
ffdec_mimic |
FFmpeg Mimic decoder |
ffdec_mjpeg |
FFmpeg MJPEG (Motion JPEG) decoder |
ffdec_mjpegb |
FFmpeg Apple MJPEG-B decoder |
ffdec_mmvideo |
FFmpeg American Laser Games MM Video decoder |
ffdec_motionpixels |
FFmpeg Motion Pixels video decoder |
ffdec_mpeg4 |
FFmpeg MPEG-4 part 2 decoder |
ffdec_mpegvideo |
FFmpeg MPEG-1 video decoder |
ffdec_msmpeg4v1 |
FFmpeg MPEG-4 part 2 Microsoft variant version 1 decoder |
ffdec_msmpeg4v2 |
FFmpeg MPEG-4 part 2 Microsoft variant version 2 decoder |
ffdec_msmpeg4 |
FFmpeg MPEG-4 part 2 Microsoft variant version 3 decoder |
ffdec_msrle |
FFmpeg Microsoft RLE decoder |
ffdec_msvideo1 |
FFmpeg Microsoft Video 1 decoder |
ffdec_mszh |
FFmpeg LCL (LossLess Codec Library) MSZH decoder |
ffdec_nuv |
FFmpeg NuppelVideo/RTJPEG decoder |
ffdec_pam |
FFmpeg PAM (Portable AnyMap) image decoder |
ffdec_pbm |
FFmpeg PBM (Portable BitMap) image decoder |
ffdec_pcx |
FFmpeg PC Paintbrush PCX image decoder |
ffdec_pgm |
FFmpeg PGM (Portable GrayMap) image decoder |
ffdec_pgmyuv |
FFmpeg PGMYUV (Portable GrayMap YUV) image decoder |
ffdec_pictor |
FFmpeg Pictor/PC Paint decoder |
ffdec_png |
FFmpeg PNG image decoder |
ffdec_ppm |
FFmpeg PPM (Portable PixelMap) image decoder |
ffdec_ptx |
FFmpeg V.Flash PTX image decoder |
ffdec_qdraw |
FFmpeg Apple QuickDraw decoder |
ffdec_qpeg |
FFmpeg Q-team QPEG decoder |
ffdec_qtrle |
FFmpeg QuickTime Animation (RLE) video decoder |
ffdec_r10k |
FFmpeg AJA Kona 10-bit RGB Codec decoder |
ffdec_rl2 |
FFmpeg RL2 video decoder |
ffdec_roqvideo |
FFmpeg id RoQ video decoder |
ffdec_rpza |
FFmpeg QuickTime video (RPZA) decoder |
ffdec_rv10 |
FFmpeg RealVideo 1.0 decoder |
ffdec_rv20 |
FFmpeg RealVideo 2.0 decoder |
ffdec_rv30 |
FFmpeg RealVideo 3.0 decoder |
ffdec_rv40 |
FFmpeg RealVideo 4.0 decoder |
ffdec_sgi |
FFmpeg SGI image decoder |
ffdec_smackvid |
FFmpeg Smacker video decoder |
ffdec_smc |
FFmpeg QuickTime Graphics (SMC) decoder |
ffdec_snow |
FFmpeg Snow decoder |
ffdec_sp5x |
FFmpeg Sunplus JPEG (SP5X) decoder |
ffdec_sunrast |
FFmpeg Sun Rasterfile image decoder |
ffdec_svq1 |
FFmpeg Sorenson Vector Quantizer 1 / Sorenson Video 1 / SVQ1 decoder |
ffdec_svq3 |
FFmpeg Sorenson Vector Quantizer 3 / Sorenson Video 3 / SVQ3 decoder |
ffdec_targa |
FFmpeg Truevision Targa image decoder |
ffdec_thp |
FFmpeg Nintendo Gamecube THP video decoder |
ffdec_tiertexseqvideo |
FFmpeg Tiertex Limited SEQ video decoder |
ffdec_tiff |
FFmpeg TIFF image decoder |
ffdec_tmv |
FFmpeg 8088flex TMV decoder |
ffdec_truemotion1 |
FFmpeg Duck TrueMotion 1.0 decoder |
ffdec_truemotion2 |
FFmpeg Duck TrueMotion 2.0 decoder |
ffdec_camtasia |
FFmpeg TechSmith Screen Capture Codec decoder |
ffdec_txd |
FFmpeg Renderware TXD (TeXture Dictionary) image decoder |
ffdec_ultimotion |
FFmpeg IBM UltiMotion decoder |
ffdec_vb |
FFmpeg Beam Software VB decoder |
ffdec_vc1 |
FFmpeg SMPTE VC-1 decoder |
ffdec_vcr1 |
FFmpeg ATI VCR1 decoder |
ffdec_vmdvideo |
FFmpeg Sierra VMD video decoder |
ffdec_vmnc |
FFmpeg VMware Screen Codec / VMware Video decoder |
ffdec_vp3 |
FFmpeg On2 VP3 decoder |
ffdec_vp5 |
FFmpeg On2 VP5 decoder |
ffdec_vp6 |
FFmpeg On2 VP6 decoder |
ffdec_vp6a |
FFmpeg On2 VP6 (Flash version, with alpha channel) decoder |
ffdec_vp6f |
FFmpeg On2 VP6 (Flash version) decoder |
ffdec_vp8 |
FFmpeg On2 VP8 decoder |
ffdec_vqavideo |
FFmpeg Westwood Studios VQA (Vector Quantized Animation) video decoder |
ffdec_wmv1 |
FFmpeg Windows Media Video 7 decoder |
ffdec_wmv2 |
FFmpeg Windows Media Video 8 decoder |
ffdec_wmv3 |
FFmpeg Windows Media Video 9 decoder |
ffdec_wnv1 |
FFmpeg Winnov WNV1 decoder |
ffdec_xan_wc3 |
FFmpeg Wing Commander III / Xan decoder |
ffdec_xl |
FFmpeg Miro VideoXL decoder |
ffdec_yop |
FFmpeg Psygnosis YOP Video decoder |
ffdec_zlib |
FFmpeg LCL (LossLess Codec Library) ZLIB decoder |
ffdec_zmbv |
FFmpeg Zip Motion Blocks Video decoder |
ffdec_aac |
FFmpeg Advanced Audio Coding decoder |
ffdec_aac_latm |
FFmpeg AAC LATM (Advanced Audio Codec LATM syntax) decoder |
ffdec_ac3 |
FFmpeg ATSC A/52A (AC-3) decoder |
ffdec_alac |
FFmpeg ALAC (Apple Lossless Audio Codec) decoder |
ffdec_als |
FFmpeg MPEG-4 Audio Lossless Coding (ALS) decoder |
ffdec_amrnb |
FFmpeg Adaptive Multi-Rate NarrowBand decoder |
ffdec_ape |
FFmpeg Monkey’s Audio decoder |
ffdec_atrac1 |
FFmpeg Atrac 1 (Adaptive TRansform Acoustic Coding) decoder |
ffdec_atrac3 |
FFmpeg Atrac 3 (Adaptive TRansform Acoustic Coding 3) decoder |
ffdec_binkaudio_dct |
FFmpeg Bink Audio (DCT) decoder |
ffdec_binkaudio_rdft |
FFmpeg Bink Audio (RDFT) decoder |
ffdec_cook |
FFmpeg COOK decoder |
ffdec_dca |
FFmpeg DCA (DTS Coherent Acoustics) decoder |
ffdec_dsicinaudio |
FFmpeg Delphine Software International CIN audio decoder |
ffdec_eac3 |
FFmpeg ATSC A/52B (AC-3, E-AC-3) decoder |
ffdec_flac |
FFmpeg FLAC (Free Lossless Audio Codec) decoder |
ffdec_gsm |
FFmpeg GSM decoder |
ffdec_gsm_ms |
FFmpeg GSM Microsoft variant decoder |
ffdec_imc |
FFmpeg IMC (Intel Music Coder) decoder |
ffdec_mace3 |
FFmpeg MACE (Macintosh Audio Compression/Expansion) 3 |
ffdec_mace6 |
FFmpeg MACE (Macintosh Audio Compression/Expansion) 6 |
ffdec_mlp |
FFmpeg MLP (Meridian Lossless Packing) decoder |
ffdec_mp1float |
FFmpeg MP1 (MPEG audio layer 1) decoder |
ffdec_mp2float |
FFmpeg MP2 (MPEG audio layer 2) decoder | |
ffdec_mpc7 |
FFmpeg Musepack SV7 decoder |
ffdec_mpc8 |
FFmpeg Musepack SV8 decoder |
ffdec_nellymoser |
FFmpeg Nellymoser Asao decoder |
ffdec_qcelp |
FFmpeg QCELP / PureVoice decoder |
ffdec_qdm2 |
FFmpeg QDesign Music Codec 2 decoder |
ffdec_real_144 |
FFmpeg RealAudio 1.0 (14.4K) decoder |
ffdec_real_288 |
FFmpeg RealAudio 2.0 (28.8K) decoder |
ffdec_shorten |
FFmpeg Shorten decoder |
ffdec_sipr |
FFmpeg RealAudio SIPR / ACELP.NET decoder |
ffdec_smackaud |
FFmpeg Smacker audio decoder |
ffdec_sonic |
FFmpeg Sonic decoder |
ffdec_truehd |
FFmpeg TrueHD decoder |
ffdec_truespeech |
FFmpeg DSP Group TrueSpeech decoder |
ffdec_tta |
FFmpeg True Audio (TTA) decoder |
ffdec_twinvq |
FFmpeg VQF TwinVQ decoder |
ffdec_vmdaudio |
FFmpeg Sierra VMD audio decoder |
ffdec_wmapro |
FFmpeg Windows Media Audio 9 Professional decoder |
ffdec_wmav1 |
FFmpeg Windows Media Audio 1 decoder |
ffdec_wmav2 |
FFmpeg Windows Media Audio 2 decoder |
ffdec_wmavoice |
FFmpeg Windows Media Audio Voice decoder |
ffdec_ws_snd1 |
FFmpeg Westwood Audio (SND1) decoder |
ffdec_pcm_lxf |
FFmpeg PCM signed 20-bit little-endian planar decoder |
ffdec_interplay_dpcm |
FFmpeg DPCM Interplay decoder |
ffdec_roq_dpcm |
FFmpeg DPCM id RoQ decoder |
ffdec_sol_dpcm |
FFmpeg DPCM Sol decoder |
ffdec_xan_dpcm |
FFmpeg DPCM Xan decoder |
ffdec_adpcm_4xm |
FFmpeg ADPCM 4X Movie decoder |
ffdec_adpcm_adx |
FFmpeg SEGA CRI ADX ADPCM decoder |
ffdec_adpcm_ct |
FFmpeg ADPCM Creative Technology decoder |
ffdec_adpcm_ea |
FFmpeg ADPCM Electronic Arts decoder |
ffdec_adpcm_ea_maxis_xa |
FFmpeg ADPCM Electronic Arts Maxis CDROM XA decoder |
ffdec_adpcm_ea_r1 |
FFmpeg ADPCM Electronic Arts R1 decoder |
ffdec_adpcm_ea_r2 |
FFmpeg ADPCM Electronic Arts R2 decoder |
ffdec_adpcm_ea_r3 |
FFmpeg ADPCM Electronic Arts R3 decoder |
ffdec_adpcm_ea_xas |
FFmpeg ADPCM Electronic Arts XAS decoder |
ffdec_g722 |
FFmpeg G.722 ADPCM decoder |
ffdec_g726 |
FFmpeg G.726 ADPCM decoder |
ffdec_adpcm_ima_amv |
FFmpeg ADPCM IMA AMV decoder |
ffdec_adpcm_ima_dk3 |
FFmpeg ADPCM IMA Duck DK3 decoder |
ffdec_adpcm_ima_dk4 |
FFmpeg ADPCM IMA Duck DK4 decoder |
ffdec_adpcm_ima_ea_eacs |
FFmpeg ADPCM IMA Electronic Arts EACS decoder |
ffdec_adpcm_ima_ea_sead |
FFmpeg ADPCM IMA Electronic Arts SEAD decoder |
ffdec_adpcm_ima_iss |
FFmpeg ADPCM IMA Funcom ISS decoder |
ffdec_adpcm_ima_qt |
FFmpeg ADPCM IMA QuickTime decoder |
ffdec_adpcm_ima_smjpeg |
FFmpeg ADPCM IMA Loki SDL MJPEG decoder |
ffdec_adpcm_ima_wav |
FFmpeg ADPCM IMA WAV decoder |
ffdec_adpcm_ima_ws |
FFmpeg ADPCM IMA Westwood decoder |
ffdec_adpcm_ms |
FFmpeg ADPCM Microsoft decoder |
ffdec_adpcm_sbpro_2 |
FFmpeg ADPCM Sound Blaster Pro 2-bit decoder |
ffdec_adpcm_sbpro_3 |
FFmpeg ADPCM Sound Blaster Pro 2.6-bit decoder |
ffdec_adpcm_sbpro_4 |
FFmpeg ADPCM Sound Blaster Pro 4-bit decoder |
ffdec_adpcm_swf |
FFmpeg ADPCM Shockwave Flash decoder |
ffdec_adpcm_thp |
FFmpeg ADPCM Nintendo Gamecube THP decoder |
ffdec_adpcm_xa |
FFmpeg ADPCM CDROM XA decoder |
ffdec_adpcm_yamaha |
FFmpeg ADPCM Yamaha decoder |
ffdec_ass |
FFmpeg Advanced SubStation Alpha subtitle decoder |
ffdec_dvbsub |
FFmpeg DVB subtitles decoder |
ffdec_dvdsub |
FFmpeg DVD subtitles decoder |
ffdec_pgssub |
FFmpeg HDMV Presentation Graphic Stream subtitles decoder |
ffdec_xsub |
FFmpeg XSUB decoder |
Third Party Solutions
Third parties like Ittiam and VisualON provide highly optimized ARM only codecs on Linux, WinCE and Android OS.
Software Components & Dependencies
Dependancies: Required packages to build Gstreamer on Ubuntu:
sudo apt-get install automake autoconf libtool docbook-xml docbook-xsl fop libxml2 gnome-doc-utils
build-essential
libtool
automake
autoconf
git-core
svn
liboil0.3-dev
libxml2-dev
libglib2.0-dev
gettext
corkscrew
socket
libfaad-dev
libfaac-dev
Software components for Sitara SDK Release:
glib
gstreamer
liboil
gst-plugins-good
gst-ffmpeg
gst-plugins-bad
gst-plugins-base
Re-enabling Mp3 and Mpeg2 decode in the Processor SDK
Starting with version 05.05.01.00, mp3 and mpeg2 codecs are no longer distributed as part of the SDK. These plugins can be re-enabled by the end user through rebuilding the gst-plugins-ugly package. The following instructions have been tested with gst-plugins-ugly-0.10.19 which can be found at **gstreamer.freedesktop.org**. Note that these instructions will work for any of the gstreamer plugin packages found in the sdk.
Source environment-setup at the terminal
Navigate into the example-applications path under the SDK install directory
Extract the GStreamer plug-in source archive
Navigate into the folder that was created
On the command line type
./configure --host=arm-arago-linux-gnueabi --prefix=/usrNotice that some components are not built because they have dependencies that are not part of our SDK
Run
maketo build the plugins.Run
make install DESTDIR=<PATH TO TARGET ROOT>
5.2.3. Accelerated Multimedia
Refer to various GStreamer pipelines documented at Multimedia chapter.
5.2.4. Graphics and Display
Refer to various SGX 3D demos and other Graphics applications at Graphics & Display chapter.
5.2.5. DSP offload with OpenCL
See http://downloads.ti.com/mctools/esd/docs/opencl/examples/index.html
5.2.6. Camera Users Guide
Introduction
This users guide provides an overview of camera loopback example integrated in matrix application on AM37x platform. This application can be executed by selecting the “Camera” icon at the top-level matrix.
Supported Platforms
AM37x
Camera Loopback Example
Camera example application demonstrates streaming of YUV 4:2:2 parallel data from Leopard Imaging LI-3M02 daughter card with MT9T111 sensor on AM37x EVM. Here, driver allocated buffers are used to capture data from the sensor and display to any active display device (LCD/DVI/TV) in VGA resolution (640x480).
Since the LCD is at inverted VGA resolution video buffer is rotated by 90 degree. Rotation is enabled using the hardware rotation engine called Virtual Rotated Frame Buffer (VRFB), VRFB provides four virtual frame buffers: 0, 90, 180 and 270. For statically compiled drivers, VRFB buffer can be declared in the bootloader. In this example, data is displayed through video1 pipeline and “omap_vout.vid1_static_vrfb_alloc=y” bootargument is included in the bootargs.
Sensor Daughter card
Smart sensor modules have control algorithms such as AE, AWB and AF are implemented in the module. Third parties like Leopard Imaging and E-Con Systems provide smart sensor solutions for OMAP35x/AM37x Rev G EVM and Beagle Board. SDK 5.02 integrates support for LI-3M02 daughter card which has MT9T111 sensor, the sensor is configured in 8-bit YUV4:2:2 mode. Leopard Imaging daughter card LI-3M02 can be ordered from their website.
For additional support on daughter cards or sensor details please contact the respective third parties
Contact: support@leopardimaging.com
Contact: Harishankkar
Connectivity
OMAP35xx/AM/DM37xx |
Signal Description |
Comment |
IO Type |
cam_hs |
Camera Horizontal Sync |
IO |
|
cam_vs |
Camera Vertical Sync |
IO |
|
cam_xclka |
Camera Clock Output a |
Optional |
O |
cam_xclkb |
Camera Clock Output b |
Optional |
O |
cam_[d0:12] |
Camera/Video Digital Image Data |
I |
|
cam_fld |
Camera Field ID |
Optional |
IO |
cam_pclk |
Camera Pixel Clock |
I |
|
cam_wen |
Camera Write Enable |
Optional |
I |
cam_strobe |
Flash Strobe Contrl Signal |
Optional |
O |
cam_global_reset |
Global Reset - Strobe Synchronization |
Optional |
IO |
cam_shutter |
Mechanical Shutter Control Signa |
Optional |
O |
LI-3M02 daughter card is connected to the 26-pin J31 connector on the EVM. 24MHz oscillator on the LI daughter card is used to drive the sensor device, alternatively camera clock output generated by processor ISP block can be used to drive the sensor pixel clock. Horizontal sync (HS) and vertical sync (VS) lines are used to detect end of line and field respectively. Sensor data line CMOS D4:D11 are connected to the processor D4:D11.

Connectivity of LI-3M02 daughter card to AM/DM37x
Note: H/V signal connectivity not required for ITU-R BT.656 input since synchronization signals are extracted from BT.656 bit stream
Media Controller Framework
SDK 5.02 includes support for media controller framework, for additional details of media controller framework and its usage please refer the PSP capture driver users guide
In order to enable streaming each links between each entity is established. Currently only MT9T111/TV5146 => CCDC => Memory has been validated.
Media: Opened Media Device
Enumerating media entities
[1]:OMAP3 ISP CCP2
[2]:OMAP3 ISP CCP2 input
[3]:OMAP3 ISP CSI2a
[4]:OMAP3 ISP CSI2a output
[5]:OMAP3 ISP CCDC
[6]:OMAP3 ISP CCDC output
[7]:OMAP3 ISP preview
[8]:OMAP3 ISP preview input
[9]:OMAP3 ISP preview output
[10]:OMAP3 ISP resizer
[11]:OMAP3 ISP resizer input
[12]:OMAP3 ISP resizer output
[13]:OMAP3 ISP AEWB
[14]:OMAP3 ISP AF
[15]:OMAP3 ISP histogram
[16]:mt9t111 2-003c
[17]:tvp514x 3-005c
Total number of entities: 17
Enumerating links/pads for entities
pads for entity 1=(0 INPUT) (1 OUTPUT)
[1:1]===>[5:0]  INACTIVE

pads for entity 2=(0 OUTPUT)
[2:0]===>[1:0]  INACTIVE

pads for entity 3=(0 INPUT) (1 OUTPUT)
[3:1]===>[4:0]  INACTIVE
[3:1]===>[5:0]  INACTIVE

pads for entity 4=(0 INPUT)

pads for entity 5=(0 INPUT) (1 OUTPUT) (2 OUTPUT)
[5:1]===>[6:0]  ACTIVE
[5:2]===>[7:0]  INACTIVE
[5:1]===>[10:0] INACTIVE
[5:2]===>[13:0] ACTIVE
[5:2]===>[14:0] ACTIVE
[5:2]===>[15:0] ACTIVE

pads for entity 6=(0 INPUT)

pads for entity 7=(0 INPUT) (1 OUTPUT)
[7:1]===>[9:0]  INACTIVE
[7:1]===>[10:0] INACTIVE

pads for entity 8=(0 OUTPUT)
[8:0]===>[7:0]  INACTIVE

pads for entity 9=(0 INPUT)

pads for entity 10=(0 INPUT) (1 OUTPUT)
[10:1]===>[12:0]        INACTIVE

pads for entity 11=(0 OUTPUT)
[11:0]===>[10:0]        INACTIVE

pads for entity 12=(0 INPUT)

pads for entity 13=(0 INPUT)

pads for entity 14=(0 INPUT)

pads for entity 15=(0 INPUT)

pads for entity 16=(0 OUTPUT)
[16:0]===>[5:0] ACTIVE

pads for entity 17=(0 OUTPUT)
[17:0]===>[5:0] INACTIVE

Enabling link [MT9T111]===>[ccdc]
[MT9T111]===>[ccdc]     enabled
Enabling link [ccdc]===>[video_node]
[ccdc]===>[video_node]  enabled

Capture: Opened Channel
successfully format is set on all pad [WxH] - [640x480]
Capture: Capable of streaming
Capture: Number of requested buffers = 3
Capture: Init done successfully


Display: Opened Channel
Display: Capable of streaming
Display: Number of requested buffers = 3
Display: Init done successfully

Display: Stream on...
Capture: Stream on...
AM/DM37x ISP Configuration
ISP CCDC block should be configured to enable 8-bit YUV4:2:2 parallel data input, the registers below provide details of ISP and CCDC registers in this mode.
ISP Registers:
ISP_CTRL: 0x480BC040
29C14C
ISP_SYSCONFIG: 0x480BC004
2000
ISP_SYSSTATUS: 0x480BC008
1
ISP_IRQ0ENABLE: 0x480BC00C
811B33F9
ISP_IRQ0STATUS: 0x480BC010
0
ISP_IRQ1ENABLE: 0x480BC014
0
ISP_IRQ1STATUS: 0x480BC018
80000300
CCDC Registers:
CCDC_PID: 0x480BC600
1FE01
CCDC_PCR
0
CCDC_SYN_MODE: 0x480BC604
31000
CCDC_HD_VD_WID: 0x480BC60C
0
CCDC_PIX_LINES: 0x480BC610
0
CCDC_HORZ_INFO: 0x480BC614
27F
CCDC_VERT_START: 0x480BC618
0
CCDC_VERT_LINES: 0x480BC61C
1DF
CCDC_CULLING: 0x480BC620
FFFF00FF
CCDC_HSIZE_OFF: 0x480BC624
500
CCDC_SDOFST: 0x480BC628
0
CCDC_SDR_ADDR: 0x480BC62C
1C5000
CCDC_CLAMP: 0x480BC630
10
CCDC_DCSUB: 0x480BC634
40
CCDC_COLPTN: 0x480BC63
0
CCDC_BLKCMP: 0x480BC63C
0
CCDC_FPC: 0x480BC640
0
CCDC_FPC_ADDR: 0x480BC644
0
CCDC_VDINT: 0x480BC648
1DE0140
CCDC_ALAW: 0x480BC64C
0
CCDC_REC: 0x480BC650
0
CCDC_CFG: 0x480BC65
8800
CCDC_FMTCFG: 0x480BC658
0
CCDC_FMT_HORZ: 0x480BC65C
280
CCDC_FMT_VERT: 0x480BC660
1E0
CCDC_PRGEVEN0: 0x480BC684
0
CCDC_PRGEVEN1: 0x480BC688
0
CCDC_PRGODD0: 0x480BC68C
0
CCDC_PRGODD1: 0x480BC690
0
CCDC_VP_OUT: 0x480BC694
3BE2800
CCDC_LSC_CONFIG: 0x480BC698
6600
CCDC_LSC_INITIAL: 0x480BC69C
0
CCDC_LSC_TABLE_BA: 0x480BC6A0
0
CCDC_LSC_TABLE_OF: 0x480BC6A4
0
5.2.7. WLAN and Bluetooth
Introduction
This page is a landing page for the entire set of WLAN and Bluetooth Demos available for the WL127x. Many of the demos are platform-agnostic, others apply specifically to a single platform.
The WL127x’s dual mode 802.11 b/g/n and Bluetooth transceiver gives users a robust selection of applications. A list of some basic use cases preloaded on the EVMs can be seen below:
Senario |
Description |
|---|---|
Bluetooth A2DP profile |
Play a *.wav music file from the EVM on a stereo headset |
Bluetooth OPP profile |
Send a *.jpg image from the EVM to a cellular phone via OPP profile |
Bluetooth FTP profile |
Sends a text file from the EVM to a PC via FTP profile |
Wireless LAN ping |
Connect to an Access Point and perform a ping test |
Wireless LAN throughput |
Test UDP downstream throughput using the iPerf tool |
Web browsing through the WLAN |
Browse the web over WLAN using a PC connected to the EVM Ethernet port |
Bluetooth and WLAN coexistence |
Play a *.wav music file from the EVM on a stereo headset while browsing the web over WLAN |
Bluetooth Demos
Classic Bluetooth
Bluetooth Low-Energy (BLE)
WLAN Demos
First Time
If running the WLAN demos on an EVM for the first time, it is recommended that you first complete the two steps below:
Step 1: Calibration – Calibration is a one-time procedure, performed before any WLAN operation. Calibration is performed once after the board assembly, or in case the 12xx connectivity daughtercard or EVM are replaced (refer to Calibration Process).
You may refer to Linux Wireless Calibrator page for more instruction.
Step 2: MAC address settings - This is a one-time procedure, done after the calibration, and before any WLAN operation is performed (refer to: <modifying WLAN MAC address>)
WLAN Station Demos
Connect to AP (Ping Test)
WLAN Throughput Test Utility (Command line)
Web-Browsing on Matrix UI and Remote (PC Based) Web Browser (QT GUI)
WLAN Low Power Use Case Demo (Magic Packet visibly wakes up system)
AM37x platform:
AM18x platform:
AM335x platform:
Currently Not Supported
WLAN Soft AP Demos
WLAN - WiFi Direct Demos
Miscellaneous WLAN Demos
`WLAN Code Descriptions and Examples <https://processors.wiki.ti.com/index.php/OMAP35x_Wireless_Connectivity_Code_Descriptions_and_Examples>`__
Miscellaneous Demos
Regulatory Domain
5.2.8. Hands on with QT
Introduction
This lab is going to give you a hands on tutorial on QT, the GUI devolpment tool, which is a component of the Sitara SDK. Each of the following sections below will walk you through a particular Lab exercise, the key points to take away, and the step-by-step instructions to complete the lab. The labs in this section will utilize both a command line build approach and a IDE approach using QT Creator.
Training: - You can find the necessary code segments embedded in the this article. You can cut and paste them from the wiki as needed.
Hands On Session: - In the vmware image, there are cheater files: /home/sitara/QT_Lab You can cut and paste section of code from this file rather than have to type them in. You can find a copy here, just right click and select “Save Target As”: File:QT Lab.tar.gz
NOTE: In this guide commands to be executed for each step will be marked in BOLD
Lab Configuration
The following are the hardware and software configurations for this lab. The steps in this lab are written against this configuration. The concepts of the lab will apply to other configurations but will need to be adapted accordingly.
Hardware
AM335x EVM-SK (TMDSSK3358) - Order Now
NOTE All Sitara boards with an LCD display or HDMI/DVI out can be used for these labs, but the steps below related to serial and ethernet connections may differ.
Router connecting AM335x EVM-SK and Linux Host
USB cable connection between AM335x EVM-SK and Linux Host using the micro-USB connector (J3/USB0)
NOTE The AM335x EVM uses a standard DB9 connector and serial cable. New Win7 based Host PCs may require a USB-to-Serial cable since newer laptops do not have serial ports. Additionally, since the serial connection is not required for these labs, you can telnet or ssh into the target over ethernet instead of using a serial terminal for target interaction.
5V power supply (typically provided with the AM335x EVM-SK)
Software
A Linux host PC configured as per the Linux Host Configuration page
**PLEASE NOTE** currently the Linux Host Configuration page is under revision. Please download Ubuntu 14.04 rather than Ubuntu 12.04 at this link http://releases.ubuntu.com/14.04/
Sitara Linux SDK installed. This lab assumes the latest Sitara Linux SDK is installed in /home/sitara. If you use a different location please modify the below steps accordingly.
SD card with Sitara Linux SDK installed.
For help creating a 2 partition SD card with the SDK content see the create_sdcard.sh script page
QT Creator 5.7.0 installed on your Linux host.
You can download Qt Creator from open source distribution version of Qt http://download.qt.io/official_releases/qt/5.7/5.7.0/
QT will download as a .run file. Make the file executable by running the chmod + <qtfile> command and ./<qtfile>. These steps should launch the QT installer.
Extract the package. Qt creator will be under Tools/Qt5.7.0 folder. In some cases it may also be under the opt folder. Type cd /opt/Qt5.7.0 into the command line to locate the file.
The labs in this wiki page is validated with Ubuntu 14.04 on 64 bit machine.
Supported Platforms and revisions
The following platforms are system tested to verify proper operation.
am335x
am37x
am35x
am180x
BeagleBoard XM
This current version has been validated on ti-processor-sdk version 02.00.01.07 using QT Creator 3.6.0
LAB 1: Hello World Command Line
Description
This LAB is optional, it introduces where to find QT components and build tools in the Sitara SDK. Approximate time to complete this LAB: 15 minutes. This section will cover the following topics
Introduction to build tools
enviroment setup script
The QT component of the Sitara SDK
where to find things in the Sitara SDK
Key Points
Where in the SDK to find the build tools
Where in the SDK to find the QT components
How to setup your build environment
How to utilize the above points to create a Hello World application.
Lab Steps
Connect the cables to the EVM. For details on where to connect these cables see the Quick Start Guide that came with your EVM.
Connect the Serial cable to provide access to the console.
Connect the network cable
Insert the SD card into the SD connector
Insert the power cable into the 5V power jack
Power on the EVM and allow the boot process to finish. You will know when the boot process has finished when you see the Matrix application launcher on the LCD screen
NOTE You may be required to calibrate the touchscreen. If so follow the on screen instructions to calibrate the touchscreen.
Open a terminal window on your Linux host by double clicking the Terminal icon on the desktop
The cross-compiler is located in the linux-devkit/bin directory of the SDK installation directory. In the terminal window enter the following commands, replacing the <machine> and <sdk version> fields with the target machine you are using and the SDK version installed.
NOTE You can use TAB completion to help with this
cd /home/sitara/AM335x/ti-processor-sdk-linux-<machine>-<sdk version>/linux-devkit/sysroots/x86_64-arago-linux/usr/bin
ls
You should see a listing of the cross-compile tools available like the one below.

To locate the pre-built ARM libraries perform the following commands:
cd /home/sitara/AM335x/ti-processor-sdk-linux-<machine>-<sdk version>/linux-devkit/sysroots/cortexa8hf-vfp-neon-linux-gnueabi/usr/lib
ls
You should now see a listing of all the libraries (some are contained within their individual sub-directories) available as pre-built packages within the SDK.
Now list only the QT libraries from the same directory by listing all libs starting with libQt.
ls libQt*
You should see a listing of QT related libraries that can be used to build and run QT projects.

You can also find out where the QT header files are located. At the directory below are sub directories full of QT header files.
cd /home/sitara/AM335x/ti-processor-sdk-linux-<machine>-<sdk version>/linux-devkit/sysroots/cortexa8hf-vfp-neon-linux-gnueabi/usr/include/qt5
ls
In order to make it easier to perform cross-compilations and ensure linking with the proper cross-compiled libraries instead of the host system libraries the environment-setup script has been created in the linux-devkit directory. This script will configure many standard variables such as CC to use the cross-compile toolchain, as well as adding the toolchain to your PATH and configuring paths for library locations. To utilize the setting provided by the environment-setup script you will need to source the script. Perform the following commands to source the environment-setup script and observe the change in the QMAKESPEC variable:
echo $QMAKESPEC
source /home/sitara/AM335x/ti-processor-sdk-linux-<machine>-<sdk version>/linux-devkit/environment-setup
echo $QMAKESPEC
You should see the changes that were applied by executing the setup script.
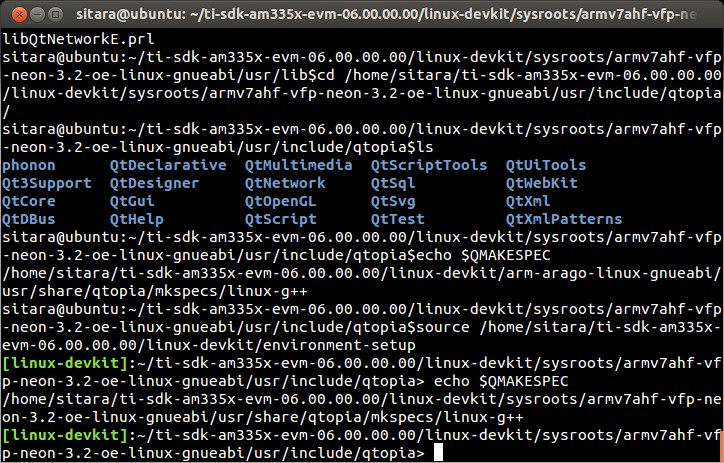
You should have observed that the QMAKESPEC variable now contains the path to the QMAKESPEC files. Additionally your compile tools were added. There was also another change that occurred which was that your standard prompt changed from sitara@ubuntu to [linux-devkit]. The purpose of this change is to make it easy to identify when the environment-setup script has been sourced. This is important because there are times when you DO NOT want to source the environment-setup script. A perfect example is when building the Linux kernel. During the kernel build there are some applications that get compiled which are meant to be run on the host to assist in the kernel build process. If the environment-setup script has been sourced then the standard CC variable will cause these applications to be built for the ARM, which in turn will cause them to fail to execute on the x86 host system.
As mentioned above sometimes it is not appropriate to source the environment-setup script, or you only want to source it during a particular build but not affect your default environment. The way this is done in the SDK is to source the environment-setup script inside of the project Makefile so that it is used only during the build process.
Take a look at the enviroment setup file to see what all is going on there. Look through file to see where the compile tools variables such as CC and CPP and PATH are defined.
gedit /home/sitara/AM335x/ti-processor-sdk-linux-<machine>-<sdk version>/linux-devkit/environment-setup
It is now time to build a Hello World project using QT. You need to create two files: helloworld.cpp and helloworld.pro
mkdir /home/sitara/AM335x/ti-processor-sdk-linux-<machine>-<sdk version>/example_applications/helloworld
cd /home/sitara/AM335x/ti-processor-sdk-linux-<machine>-<sdk version>/example_applications/helloworld
gedit helloworld.cpp and add the following code
IMPORTANT You can find pre-written files in the in the /home/sitara/sitara-training-helper-files/QT_Lab/lab1 directory. You can just copy those files to your directory instead of typing the contents if you want to
`` #include <QApplication>`` #include <QLabel> int main(int argc, char **argv) { QApplication app(argc,argv); QLabel label(“Hello World”); label.show(); return app.exec(); }
gedit helloworld.pro and add code
IMPORTANT You can find pre-written files in the in the /home/sitara/sitara-training-helper-files/QT_Lab/lab1 directory. You can just copy those files to your directory instead of typing the contents if you want to
QT += core gui widgetsSOURCES += helloworld.cpp
Now lets use qmake to create a Makefile
qmake helloworld.pro
Notice how qmake automatically generated a Makefile for us, now lets build.
make
Notice the build is using our cross-compiler-arm-linux-gnueabihf-g++

Also notice we now have an executable, lets see what type of file we created
file helloworld
You should see something similar to the following: helloworld: ELF 32-bit LSB executable, ARM, version 1 (SYSV), dynamically linked (uses shared libs), for GNU/Linux 2.6.31, BuildID[sha1]=0x8569a0956d8efffcfde68fca5c883be5fa4f1c31, not stripped
Finally lets copy the helloworld over to our target file system and run it.
If you have not already done so connect with minicom and type ifconfig to find your target’s ip address
NOTE You can also get your ip address from Matrix if it is running. Select Settings->Network Settings
On your Linux host console issue the command scp -r helloworld root@xx.xx.xx.xx:/home/root replacing the xx.xx.xx.xx below with you target’s ip address.
When asked for password, just hit return
Type yes when asked if you would like to continue
Move back over to your minicom window and execute it. You should find the helloworld in your default /home/root directory on the target.
./helloworld
You should see helloworld print on the LCD panel of your target board.
LAB 2: QT Creator Hello World
Description
This section will cover setting up QT Creator the integrated development environment. We start to investigate how QT Creator aids in rapid GUI development.
Key Points
Setting up QT Creator to find your tools
Setting up QT Creator to communicate with the target platform
Creating hello world and run using QT Creator.
Lab Steps
Source the enviroment setup file to ensure all the paths are setup correctly. This was done in the previous section. If you already see [linux-devkit]: as your prompt then you can skip this step.
source /home/sitara/AM335x/ti-processor-sdk-linux-<machine>-<sdk version>/linux-devkit/environment-setup
Bring up Qt Creator
./home/sitara/Qt5.7.0/Tools/QtCreator/bin/qtcreator
IMPORTANT By bringing QT Creator up manually, you will pass in the environment setup. If you double click on the Qt Creator Icon from the Desktop, you will not have the enviroment setup correctly and your lab will not work later on.
QT creator should be up and running now

Now lets setup QT creator to configure qmake. From the QT creator main menu shown above select the following:
Tools -> Options…
On the left side vertical menubar click Build & Run
Click the Qt Versions tab under Build & Run
Remove any versions that may already exist to make sure you start with a clean configuration
Click Add… on the right
Navigate to /home/sitara/AM335x/ti-processor-sdk-linux-<machine>-<sdk version>/linux-devkit/sysroots/x86_64-arago-linux/usr/bin/qt5
Select qmake then click on Open
Double click on Version Name and give the Qt Version a descriptive name such as QT 5.5 Sitara See image below.

IMPORTANT Notice there is a red ! icon. Don’t worry, lets add in the toolchain next and it should change to yellow.
Click Apply to save your changes
Now we will setup the toolchain
Click the Compiler tab under Build & Run
Click Add in the top right and add a GCC
Change the name to arm-linux-gnueabihf-gcc. This can be done by editing the “Name” field.
For Compiler Path select Browse
Navigate to /home/sitara/AM335x/ti-processor-sdk-linux-<machine>-<sdk version>/linux-devkit/sysroots/x86_64-arago-linux/usr/bin
Select arm-linux-gnueabihf-gcc and click on open
Make sure to click on Apply to save your changes.

Next, let’s setup the Debuggers.
Click the Debuggers tab under Build and Run
Click Add in the top right
Change the name to GDB Engine. This can be done by editing the “Name” field.
For Debugger Path select Browse
Navigate to /home/sitara/AM335x/ti-processor-sdk-linux-<machine>-<sdk version>/linux-devkit/sysroots/x86_64-arago-linux/usr/bin
Select arm-linux-gnueabihf-gdb and click on open
Make sure to click on Apply to save your changes.

Click the Kits tab under Build & Run
Change the name to give the device a unique name: AM335x EVM
Select Device type Generic Linux Device instead of Desktop.
Select Compiler arm-linux-gnueabihf-gcc instead of the host gcc.
For Debugger select GDB Engine.
For QT Version select Qt 5.5 Sitara
Click Apply to register the options.

Now let’s setup our Target. While still in the Tools -> Options menu
On the left side of the window, select the Devices tab
In Devices: click the Devices tab
Click Add… in the top right

Select Generic Linux device and click on Start Wizard

The Device Configuration Wizard Selection Dialog box comes up
Type in the name of the Device: AM335x EVM
Type in the IP address of the Embedded Linux Device. Type the IP address for your board, not the one shown in the screen capture.
NOTE This is the same IP address you obtained in the previous lab
For Username type in root (Most Texas Instruments Boards have this username)
Make sure Authentication type is Password, but leave the password field blank.
Click Next

Click Finish. You should see that the target test passed, so you can close that window.

Now we need to setup an SSH key so that the host can communicate with the target
Still under the Devices tab click Create New for Private key file

Key algorithm RSA
Select Key size: 1024
Then click Generate and Save Key Pair…

Click Do not Encrypt key file

Just use the default name qtc_id.pub and Click Save and Click Close to close the Generate SSH Key window.
Under the Devices tab now click Deploy Public Key…

Select the file just generated (should be under /home/sitara/.ssh)
IMPORTANT You may need to right click and select show hidden files
Select the file qtc_id.pub and click on Open, shortly a window should show up saying “Deployment finished sucessfully”

Close the window and Click OK to exit the Linux Devices Window.

Now that lets create a project build it and run it on the host
Select File -> New File or Project
Then select Applications under projects then select QT Widgets Applicaton on the top center
Click on Choose

Type in the name of the project as terminal. We will be building on this project in the next section.
Change the Create in value to /home/sitara
Click on Next

Select the desired Kit for the target system
Click on Next

Type in terminal for the Class name
Click Next

Select None under version control
Click Finish

Now we’ve setup a new project let’s explore and add some code.
Click on Edit on the left hand menubar and look at the project files including terminal.pro, main.cpp, terminal.cpp and terminal.ui

Under Forms, double click on terminal.ui This will bring up the widget editor.
Remove the menuBar where it says Type Here on the top of the ui
Right click on the menuBar and select Remove MenuBar
Use the same procedure to remove the statusBar at the bottom of the ui. It is not that easy to see, but it is there and blank.
Once again remove the ToolBar (mainToolBar). It is found at the top of the ui and is also hard to see.

Find the label widget in the category of display widgets, left click and drag it on to the User Interface (UI).
Type Hello World!!! into the label widget and strech out the borders so you can see all the letters.

Now we need to check and update the build and run settings:
On the left side vertical menubar select Projects
Select the Build and Run tab and select Build under AM335x.
Uncheck Shadow build as shown in the screenshot below:

Now under the AM335x select the Run tab
Under Method click Add and select Add and then Deploy to Remote Linux Host
However you see the <Remote path not set> error under the Run secton.

To fix the <Remote path not set> error do the following:
Click on Edit on the left side vertical bar and click on terminal.pro
Add the two lines below to the bottom of terminal.pro as shown in the screen shot below
IMPORTANT You can find pre-written files in the in the /home/sitara/sitara-training-helper-files/QT_Lab/lab2 directory. You can just copy those files to your directory instead of typing the contents if you want to
target.path += /home/rootINSTALLS += target

Select File -> Save
Click on Projects on the left side vertical bar and you should now see the error is gone and replaced with /home/root/terminal
Now in the Run portion: Select Add -> terminal (on Remote Generic Linux Host)

Finally we are ready to run
Click the Green Arrow on the bottom left to run the project
NOTE ti-processor-sdk-linux-<> version 02.00.00.00 and 02.00.01.07 has dropbear package that doesn’t let the QT Creator to deploy the built image on the target board. dropbear version 2015.71 fixes this problem and the prebuilt binary can be download from here. Replace the /usr/sbin/dropbearmulti on target board filesystem with the downloaded 2015.71 dropbearmulti binary. Change the copied file mode to executable. Restart the target board. QT Creator should be able to successfully deploy the binary now
If you receive the error ‘g++: Command not found’, navigate to tools>options>build and run>kits. Add “linux-oe-g++” to the “Qt mkspec” text box

Save all files if asked

Extra Investigation:
From minicom: run top on the target while helloworld is running. Check out CPU utilization and memory utilization for this simple app.
See how much memory is used by helloworld by itself, you may need to kill matrix /etc/init.d/matrix-gui-2.0 stop
LAB 3: Terminal project
Description
This section shows how you can use QT Creator to create a GUI from scratch.
Key Points
Adding widgets to a an User Interface (ui).
Adding code to make the widgets do something meaningful.
Lab Steps
We will continue on from the previous lab using the terminal project you created. First we will remove the Hello world widget and resize the ui.
Click terminal.ui to bring up design mode.
Click the Hello World widget, and delete it making the ui empty and clean
This next action is mainly for those with small displays, but will not adversely affect larger displays.
Select the entire ui as shown below.
Edit the Geometry values to Width = 440 and Height = 230 as shown.

Next we will add the Tab Widget. Just like the label widget, drag it over to the ui.

Select the tab widget layout. Currently, the tab widget is part of our ui, but it is just sitting at fixed location where we dragged it.
On the upper right side right click on the terminal QWidget and select Lay Out -> Lay Out Vertical as shown below

Now the tab widget should completely fill the ui.
Now let’s ad
Two Push Button Widgets
One Text Browser widget
One Line Edit widget.
Drag all of them up to the ui
Now lets set the TabWidget layout like we did with the terminal widget
Right click on the upper right QtabWidget -> Lay Out -> Lay Out in a Grid
Move them around so they look somewhat like the screen shot below

Lets Rename the Push Button widgets.
Double click on the PushButton text in the ui
Edit the upper push button to say Send CMD
Edit the lower push botton to say Exit
Depending on how the grid layout worked for you, lets stretch out the Text Browser widget and the bottom Push Button widget to take up the whole screen horizontally if needed.
Just click on the widget and drag the border to fill the screen See screen shot below:

Now lets give our widget objects a unique name.
Select the Text Browser widget
Go over to properties on the bottom right and edit ObjectName
Add the text _linuxshell to the end of the textBrowser name as shown below:

Now create unique names for the other 3 widgets.
For lineEdit: lineEdit_commandline
For the Send CMD push button: pushButton_sendcmd
For exit push button: pushButton_exit
We are not done yet, but for fun lets run this application and see what it looks like on the target.
Push the Green Arrow at the bottom left to launch on the target. Save all files if asked.
IMPORTANT You can not start a new application on the target if your previous one is still running. To exit, push the “X” on the menubar at the top right of your target.
NOTE It should appear just as we designed it, but pushing the buttons has no effect because we haven’t added any code yet.
Now we are going to add code to make the buttons do what we wish them to do.
Right click on the Exit widget -> Go to slot

In the Go to Slot selector, select the first selection clicked() and hit OK
Notice this pops you over to your terminal.cpp file where some code has been automatically added for you.
IMPORTANT The code additions below can also be found in the /home/sitara/sitara-training-helper-files/QT_Lab/lab3 directory and can be copied into your project
Add the following line of code to on_pushButton_exit_clicked()
qApp->quit();

Now repeat the same process you did for the exit button on the send CMD button. We will add code to control that button press.
NOTE You will need to go back to the ui file to do this
Right click on the Send CMD widget -> Go to slot
In the Go to Slot selector, select the first selection clicked() and hit OK
Add the following line at the top of terminal.cpp to support QProcess.
#include <QtGui>Add the following code to on_pushButton_sendCmd_clicked()
QString LinuxTexttoSend = ui->lineEdit_commandline->text();// QProcess used to binaries in /usr/bin QProcess process; // Merge Channels so the output of binaries can be seen process.setProcessChannelMode(QProcess::MergedChannels); // Start whatever command is in LinuxTexttoSend process.start(LinuxTexttoSend, QIODevice::ReadWrite); // Run the command and loop the output into a QByteArray QByteArray data; while(process.waitForReadyRead()) data.append(process.readAll()); ui->textBrowser_linuxshell->setText(data.data());

Finally since we don’t have a keyboard to type a command lets add a predefined command to our line Edit Widget like shown below:
Double click on the line edit and add the text: date –help

Now run, you should see interaction with the Linux shell when you push sendCMD.
LAB 4: Enhancing the project with a web viewer, soft keyboard, and Style Sheets
Description
In this section we Enhance our GUI with a web browser, soft keyboard and style sheets.
Key Points
Adding a Web view.
Adding a softkeyboard.
How to adjust the look and feel
Lab Steps
One of the first things we did in the Terminal Lab was to add a Tab widget which is a container widget. So far we added a Linux shell terminal to Tab 1, now lets add a Web View widget to Tab 2
From the terminal.ui, click on Tab 2 and notice it is empty.
Drag over a QWebView widget to Tab 2
Set the Layout of Tab 2 to a vertical layout
NOTE Do you recall how we did this on the Terminal Lab? On the top right, right click tabWidget -> Lay Out -> Lay Out Vertically
When complete with the above steps, it should look like the following:

Now we can add a default URL. Since we are not connected to the internet, lets bring up matrix since it is running on a local server.
Select the WebView widget and on the bottom right find the url property of QWebView near the bottom of the list.
Type in: http://localhost

NOTE Notice how the Webview in your ui tries to display the webpage but can’t since it is not local to your host. Some people see this error and some do not.
Now we need to add the webkit libraries to our project.
Go to Edit mode and bring up the terminal.pro file
Add webkitwidgets as shown below

Give it a try and run it, you should see the Matrix displayed.
IMPORTANT You will need to use the Exit button on Tab1 to close this program
Now lets address a couple of cosmetic issues. Notice how our new GUI does not fill the entire screen.
Change over to Edit’ mode and bring up main.cpp.
Find the line w.show()
Remove that line
type w. and notice how QT Creator will fill in all the possible options. Also notice that when you start to type it will jump the available options with the matching text.
Select w.showFullScreen(); see screen shot.

Now re-run and notice how it takes up the full screen.

<div style=”margin: 5px; padding: 5px 10px; background-color: #ffffec; border-left: 5px solid #ff6600;”>
IMPORTANT You will need to use the Exit button on Tab1 to close this program
Now lets fix another issue back on Tab 1. We hard coded in a default command: date –help
Since we did not provide a keyboard, lets add a soft keyboard.
Download a keyboard class from this location: Qt Keyboard Template wiki. These instruction assume you downloaded the tarball to the /home/sitara directory.
IMPORTANT If you are using a TI laptop or followed the host configuration steps you can find these files in the /home/sitara/sitara-training-helper-files/QT_Lab/keyboard directory and can skip these steps
cd /home/sitara
tar -xzvf Keyboard.tar.gz
Copy the keyboard files to your terminal project directory
cd /home/sitara/terminal/
cp -rf <keyboard extraction directory>/keyboard .
Now lets add keyboard into our project.
Go to Edit mode and right click on terminal -> Add Existing Files as shown below.
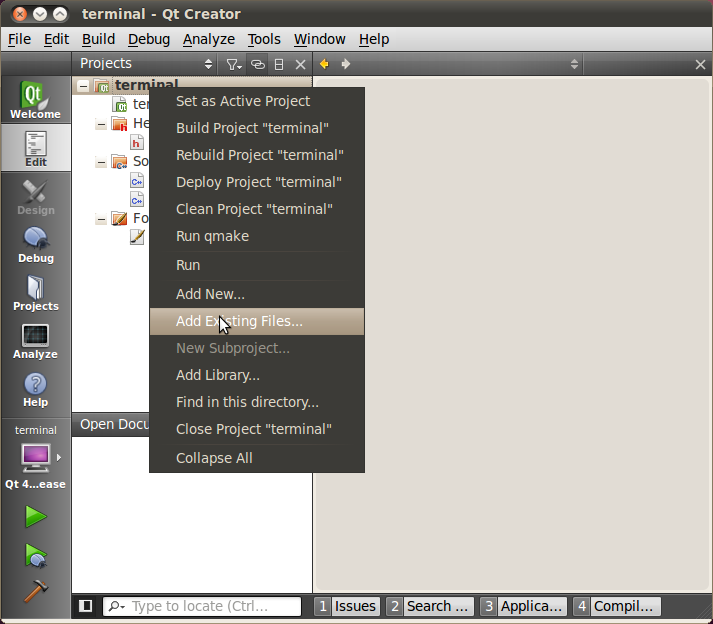
Navigate to the keyboard directory /home/sitara/terminal/keyboard and add all 4 files in that directory.

NOTE Notice how all four keyboard files are now part of the Terminal project. Click on the keyboard.ui and take a look. It is made up mainly of QPushButtons and one QLineEdit and layout controls
Now we need to hook in the keyboard to the terminal GUI.
IMPORTANT As always you can find copy that you can copy into your project in the /home/sitara/sitara-training-helper-files/QT_Lab/lab4 directory
Add some code to terminal.h
At the top of the file add
#include "keyboard/keyboard.h"In private slots: add
void open_keyboard_lineEdit();In the section private: add
Keyboard *lineEditkeyboard;

Now add some code to terminal.cpp
In the function terminal::terminal
lineEditkeyboard = new Keyboard();connect( ui->lineEdit_commandline ,SIGNAL(selectionChanged()),this ,SLOT(open_keyboard_lineEdit()));Also add the function below to the bottom of terminal.cpp
void terminal::open_keyboard_lineEdit(){ QLineEdit *line = (QLineEdit *)sender(); lineEditkeyboard->setLineEdit(line); lineEditkeyboard->show(); }

You are now ready to run your code.
Run and verify when you touch the line edit widget, that the keyboard pops up.
IMPORTANT Depending on your screen resolution you may need to double-tap the bar at the top of the keyboard to size it to full screen
Type in a linux command such as ps to list the running processes and verify that you get back the expected results.
Next lets add specific colors to the GUI components using style sheets.
Go back to your ui in the upper right corner: right click on the terminal widget -> Change styleSheet

Cut and paste from terminal sytle sheet settings at the end of this lab section to the Terminal stylesheet settings and Apply them
IMPORTANT You can find this file in the /home/sitara/sitara-training-helper-files/QT_Lab/lab4/style_sheet_terminal.txt file
Do the same thing for the Tab Widget by cutting and pasting from the tab style sheet settings at the end of this Lab section
IMPORTANT You can find this file in the /home/sitara/sitara-training-helper-files/QT_Lab/lab4/style_sheet_tab.txt file
voila … TI colors - your setup should now match the look and feel of the one below:

Run it!
Extra investigation: Run a debug session and set break points in keyboard.cpp. Notice how the each QPushbutton signals the keyboardHandler slot.
NOTE If breakpoints are not working for you, verify you have created a Debug version of terminal and not a Release version. Look under Projects and “Build Settings” and check Details under Build Steps.
terminal style sheet settings
QWidget {
    background-color: rgb(0, 0, 0);
}

QTabWidget::pane {
    position: absolute;
    border: 2px solid red;
}

QTabWidget::tab-bar {
    alignment: center;
}


QTabBar::tab {
    color: red;
    background-color: black;
    border: 2px solid red;
    border-radius: 0px;
    padding: 4px;
    margin-left: 0.25em;
    margin-right: 0.25em;
}

QTabBar::tab:selected, QTabBar::tab:hover {
    color: white;
    background: red;
}

QPushButton {
     /**font: bold 16pt;
     color: white ;

     border-image: url(:/pushblueup.png);
     background-color: transparent;
     border-top: 3px transparent;
     border-bottom: 3px transparent;
     border-right: 10px transparent;
     border-left: 10px transparent;**/
 }
tab style sheet settings
QWidget{
    background-color: red;
}

QTextBrowser{
    background-color: black;
    color: yellow;
}

QLineEdit{
    background-color: white;
    color: black;
}

QPushButton{
}

QWebView{
    background-color: white;
}
LAB 5: Exploring Existing Demos and Examples
Key Points
Exploring existing projects in the QT SDK.
Using a SGX accelerated QT Demo
Lab Steps
In a console window on your host:
gedit /home/sitara/AM335x/ti-processor-sdk-linux-<machine>-<sdk version>/example-applications/matrix-gui-browser-2.0/main.cpp
NOTE This is the QT application which displays matrix for all Sitara platforms. As you can see it uses a QWebView just like we did in the Terminal Enhancements Lab. The main differences are that you pass in the url as an argument, and all window framing was removed.
Now try this one using the minicom connection to your target, it may surpise some of you:
cd usr/share/qt5/examples
We are now in the target Filesystem provided with Sitara SDK. Lets search for how many QT project files we can find.
find . -name *.pro
There are many QT project files here
find . -name *.pro | wc
Over 300 different projects already available in the SDK.
Lets take a look at one specific example hellogl2. This is an SGX accelerate QT demo. In your minicom window do
cd /usr/share/qt5/examples/opengl/hellogl2
run this ./hellogl2
You should see an SGX accelerated demo
As mentioned there are many demos available. Some may not work due to how QT was configured when it was built.
Some additional demo of interest:
/usr/share/qt5/examples/webkitwidgets/browser – This is the broswer demo featured in matrix.
Extra Excercise: Pull in one the the demos or examples into QT Creator by opening it as a project. Build it and run it on the target.
NOTE You may need to do some project setup to make sure you will run on the target
Debugging QT Libraries
For debugging QT application with source code to QT libraries, corresponding QT library will need to be installed to the <ti-processor-sdk-linux-xxx>/linux-devkit/sysroots/armv7ahf-neon-linux-gnueabi location. The *.ipk package can be found from the yocto build of PSDK under build/arago-tmp-external-arm-toolchain/work/armv7ahf-neon-linux-gnueabi. Linux “find” command can be used to refine the search for *.ipk file. For example, following steps to debug qtbase application
1. Copy and install the associated ipk packages into the sysroot directory
# dpkg -x qtbase-dbg_xxx_armv7ahf-neon.ipk sysroots/armv7ahf-neon-linux-gnueabi/
2. Set sysroot in the QT Creator: Under Tools -> Options -> Debugger tab of the QT Creator, go to the GDB tab and add these additional startup commands, for example set sysroot /home/sitara/ti-processor-sdk-linux-xxx/linux-devkit/sysroots/armv7ahf-neon-linux-gnueabi set debug-file-directory /home/sitara/ti-processor-sdk-linux-xxx/linux-devkit/sysroots/armv7ahf-neon-linux-gnueabi/usr/lib/.debug