4.1. Getting Started View
First time users of Code Composer Studio (CCS) Theia should start with the aptly named Getting Started view. The Getting Started view is the first screen that is visible when CCS is launched for the first time. The view can also be explicitly opened via the Help → Getting Started menu item.
The purpose of the Getting Started view is to provide fast access to common actions and tasks, especially those that are relevant when first starting to use CCS. This includes browsing examples and documentation, importing example projects, and so forth:
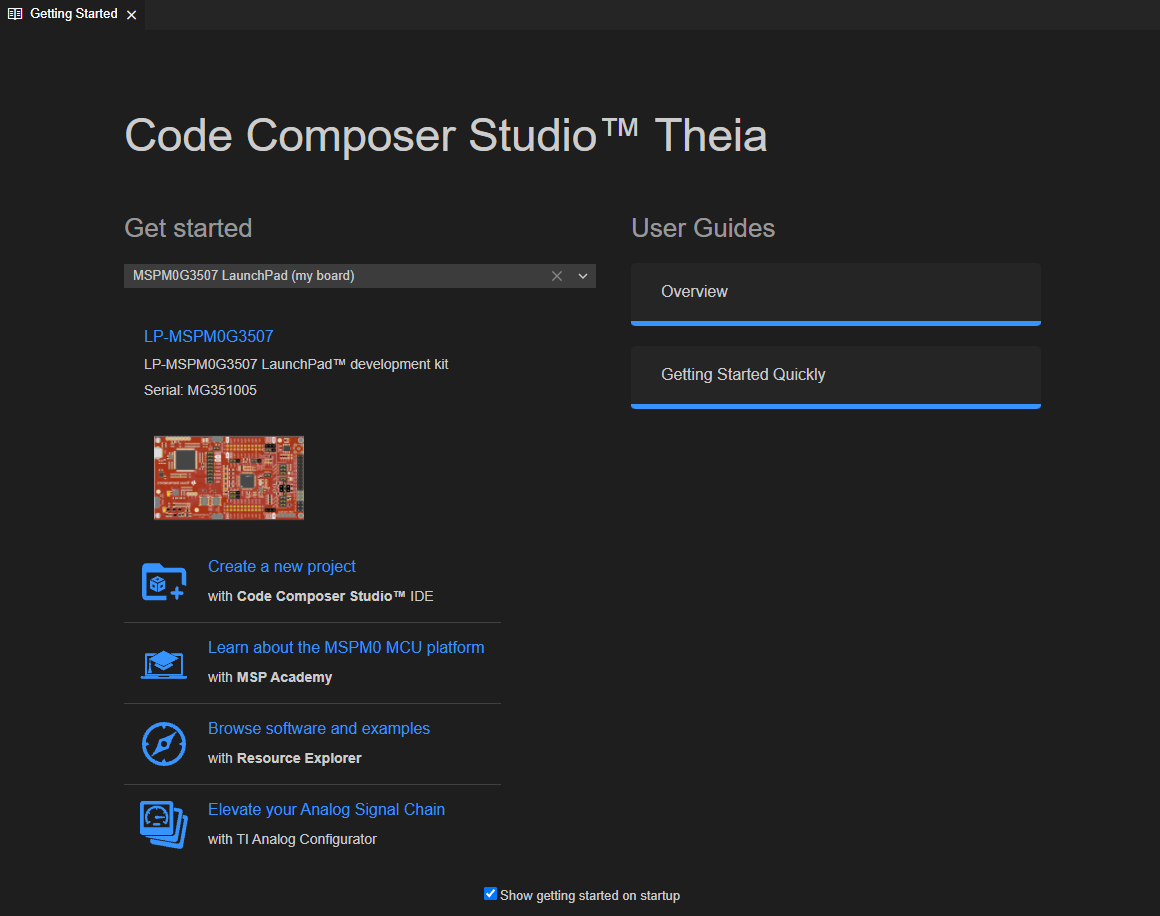
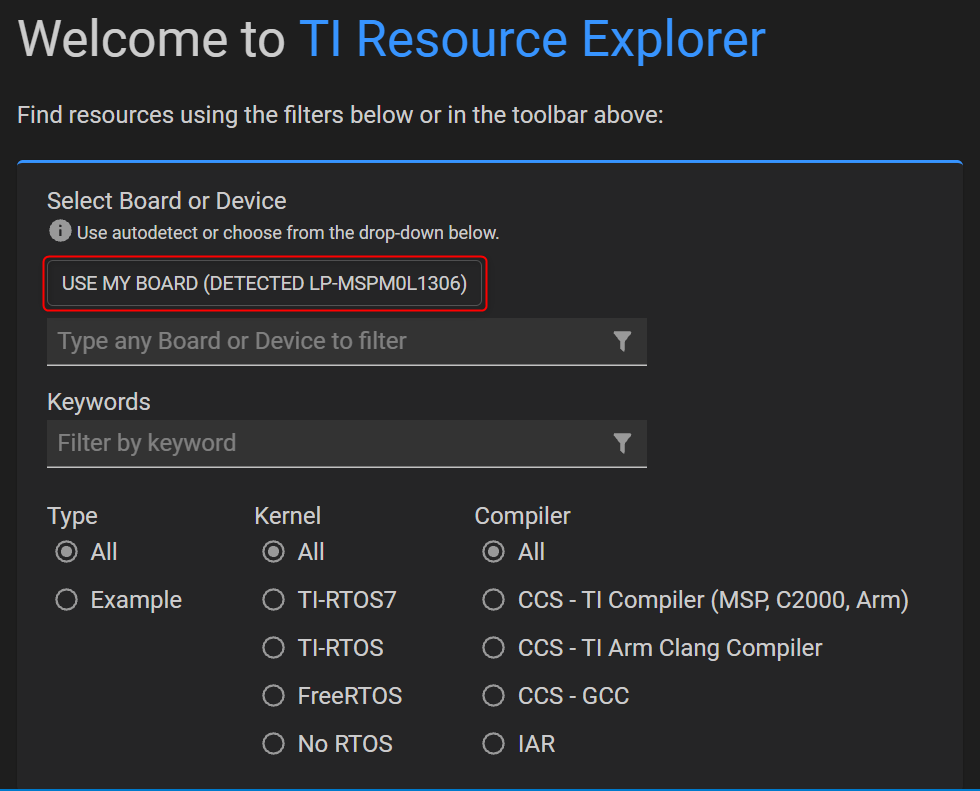
If you have a valid TI kit (such as a LaunchPad Development Kit) connected to your computer, the Getting Started view may be able to autodetect it. If autodetect is successful, it will be displayed under the Get Started section of the view.
4.2. Resource Explorer
The Resource Explorer helps you find all the latest examples, libraries, demo applications, data sheets, and more for your chosen platform.
The Resource Explorer can be opened by selecting Browse Software and examples under Start exploring in the Getting Started view or from the View → Open Resource Explorer menu item.
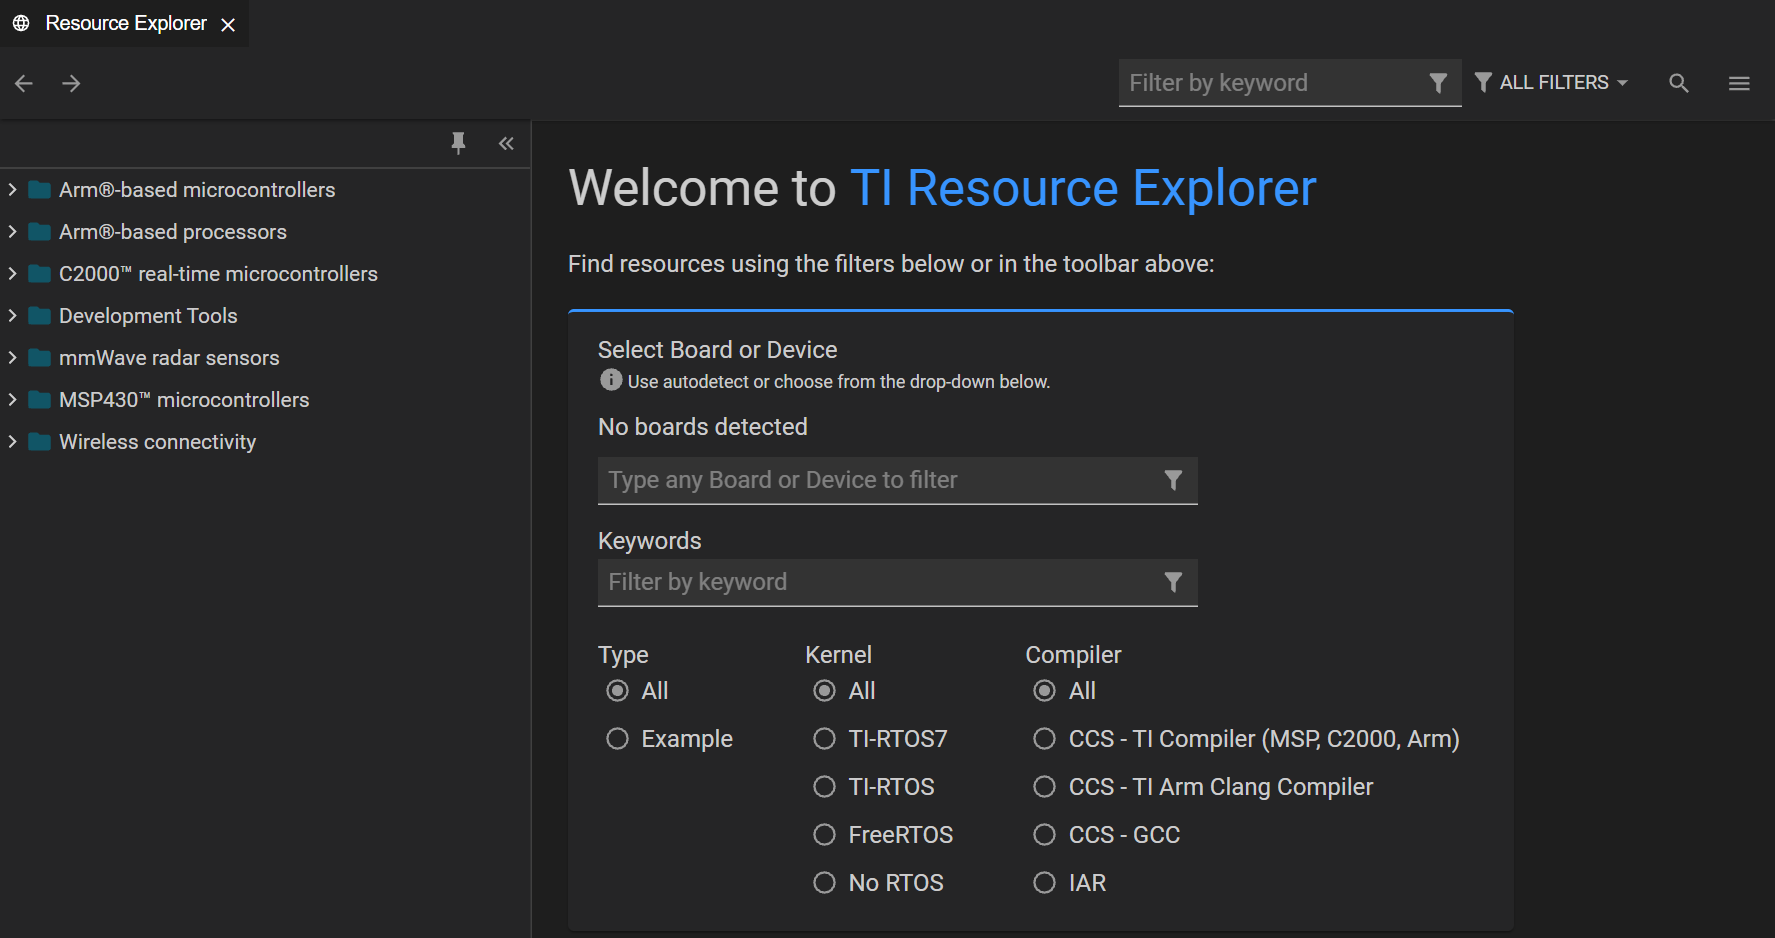
Filtering by device, or by TI LaunchPad Kit, the interface enables you to filter the content to only what is relevant to your chosen platform.
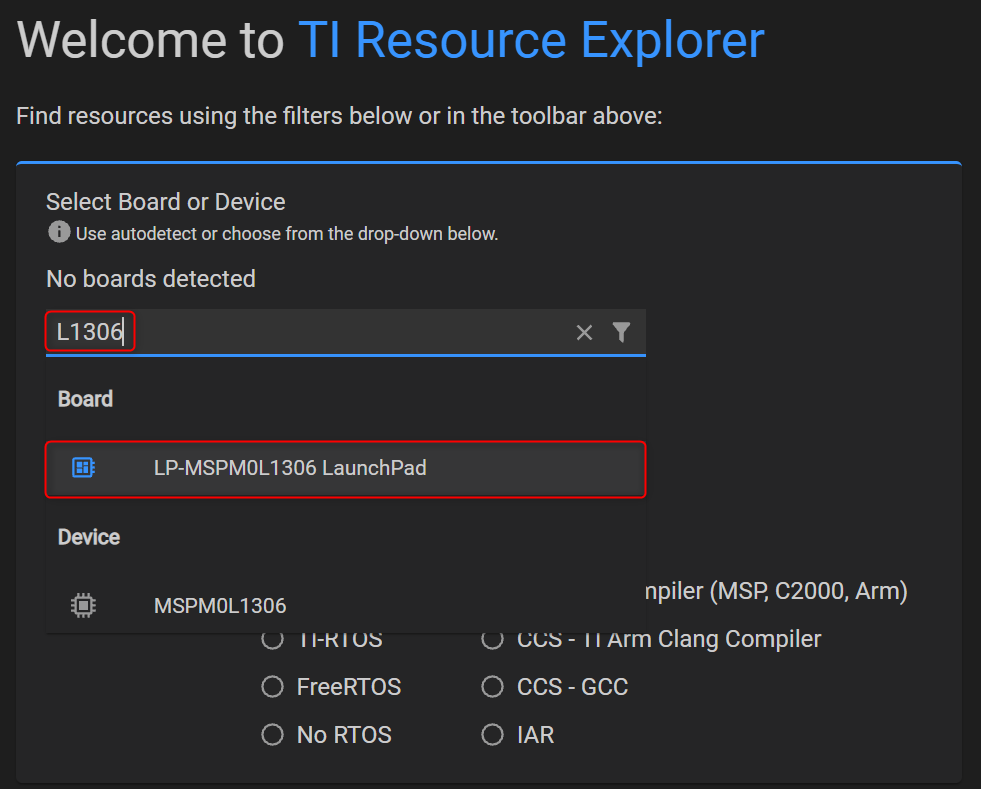
Use the Select Board or Device filter field to search and select the device or TI LaunchPad Kit that you are using. For example, if you are using the LP-MSPM0L1306, you can starting typing "L1306" in the search field to filter the list to easily find your LaunchPad:
If you have a valid TI kit (such as a LaunchPad Development Kit) connected to your computer, Resource Explorer may be able to autodetect it. If autodetect is successful, you can select the USE MY BOARD option to specify your kit:
Once your device or TI LaunchPad Kit is selected, the filter will be applied and only content relevant to your selection will be displayed. You can now browse through the displayed content to learn more about your device, board, relevant tools, and available software packages. Note the additional filters to display examples based on RTOS and compiler type.

The best way to get going with software development on your target is to start with some existing examples for your target. Many examples are included with the software package with supports your device, and many of these software packages are accessible right from Resource Explorer.
Note
Not all devices are supported via Resource Explorer. Please see the device family specific information in the next few sections for more details.
4.3. Device Family Specific Information
Please refer to the section below that is applicable for your device.
4.3.1. MSPM0
The recommended starting point is the Code Composer Studio (CCS) Theia Quick Start Guide for the MSPM0 SDK. It provides a brief overview of the CCS Theia environment for MSPM0.
Code Composer Studio (CCS) Theia Quick Start Guide
The Code Composer Studio (CCS) Theia Quick Start Guide can be found in Resource Explorer by browsing to the following location: Arm-based microcontrollers → Embedded Software → MSPM0 SDK → Quick Start Guide.
There is also an additional MSPM0 Fundamentals Workshop for CCS Theia.
It can be found in Resource Explorer by browsing to the following location: Development Tools → Code Composer Studio → General and IDE → Training → Workshops → MSPM0 Fundamentals Workshop for CCS Theia.
Once the above workshop is completed, more examples, resources, documentation, and training can be found in the MSPM0 SDK package and MSPM0 academy in Resource Explorer.
4.4. Importing a CCS Theia Project
CCS Theia projects must be imported into the current CCS Theia workspace before they can be used. The most convenient way to import example CCS Theia projects is from Resource Explorer, as mentioned in some of the sections above.
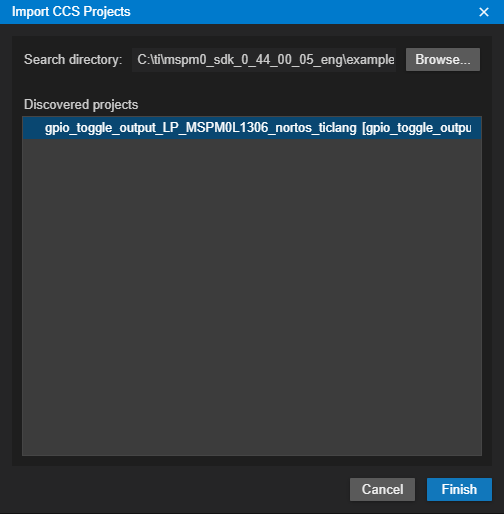
The project can also be manually imported using the Import Projects wizard:
- Go to menu File → Import Project(s).
- Next to Search directory, click Browse and browse to the location of a project or project spec.
- Select the desired project(s) from the list of Discovered projects.
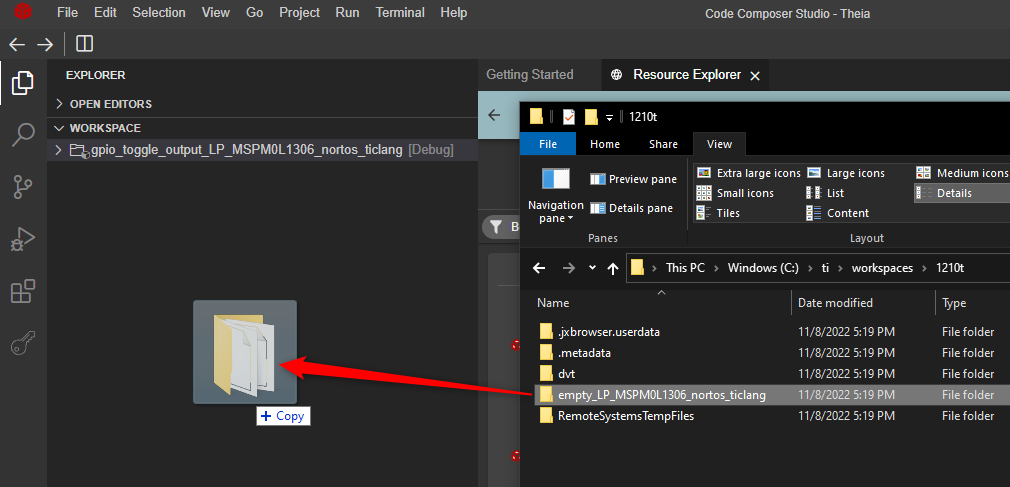
An alternative way to import a project is to drag it from the system file explorer and drop it directly into the CCS Theia Explorer.
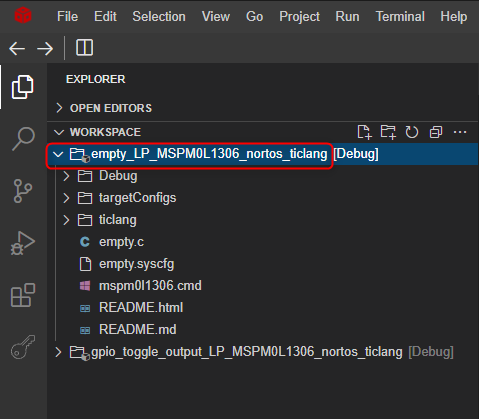
Once the project has been imported into the workspace, it will be visible in the Explorer.
Warning
Importing a project of the same name as one that already exists in the workspace is not allowed.
Note
CCS Theia can import projects that are created with CCS Theia or CCS versions 4.x and greater. However, bear in mind that the greater the variance in CCS version used to create the project vs. version used to import the project, the more error-prone the import process could be.
When a project created with an older version of CCS Theia is imported into the workspace of a newer CCS Theia version, the project will be migrated to support the newer version of CCS Theia. This may prevent the project from being imported or opened again with the older CCS Theia version. This is especially true for major CCS Theia revision number differences while minor revision number differences are typically not impacted.
The same rule also applies when a project created in a newer version of CCS Theia is imported into an older version of CCS Theia. CCS Theia projects are typically not backward compatible in cases with major revision number differences. If you want to use a newer CCS Theia project with an older CCS Theia version, for example, it is recommended to create a new project in the older CCS Theia version and copy over the source files and settings.
For more information on importing CCS Theia projects, please refer to the relevant section in the Projects and Build chapter.
4.5. Creating a New CCS Theia Project
Creating a new CCS Theia project purely from "scratch" is no longer supported. It is strongly recommended to start with an existing SDK example. There is often a very minimal example which ofter serves as a template for users wishing to start from "scratch".
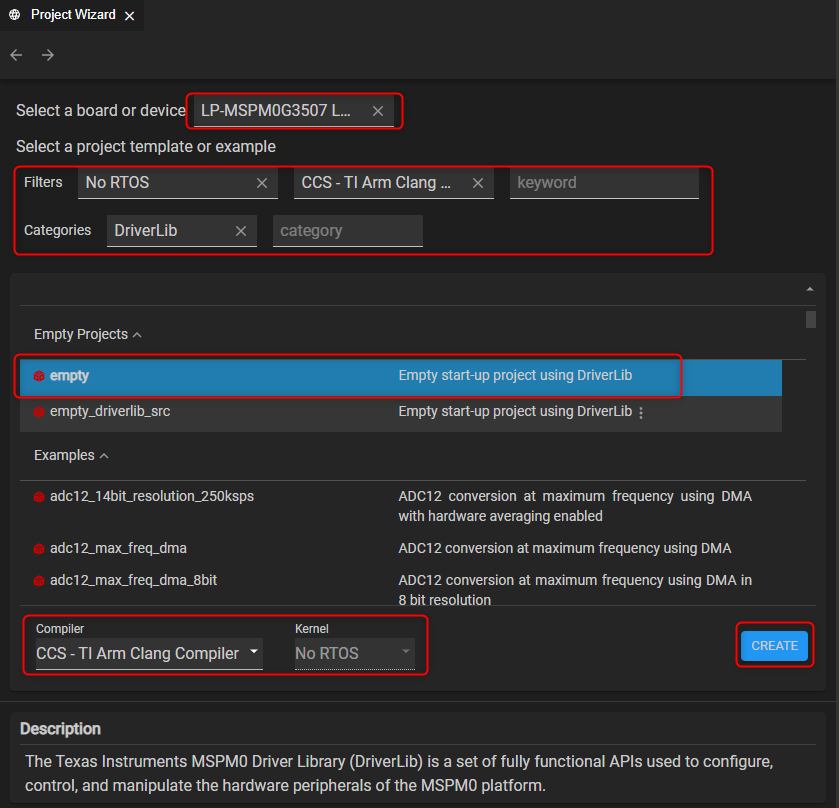
- Go to menu File → Create New Project... or open the Getting Started view and select the Select the Create a new project in Code Composer Studio option under the Start developing section of the Getting Started view. This will open the Project Wizard in Resource Explorer
- In Project Wizard, specify the board or device under under Select Board or Device. Once a board or device is specified, a list of available projects appear.
- (Optional) Use the Filters and Categories fields under Select a project template or example to filter the list of available projects.
- Select the desired project to import. For MSPM0 users looking to start a new project from "scratch", an empty example project is an ideal starting point for people wishing to create a project from scratch.
- (Optional) Use the Compiler and Kernel fields below the project list to specify the compiler type and kernel to use.
- Press Create to import the example project into the CCS Theia Explorer
Note
Most SDKs provide some sort of empty type example which serves as a basic template for new projects.
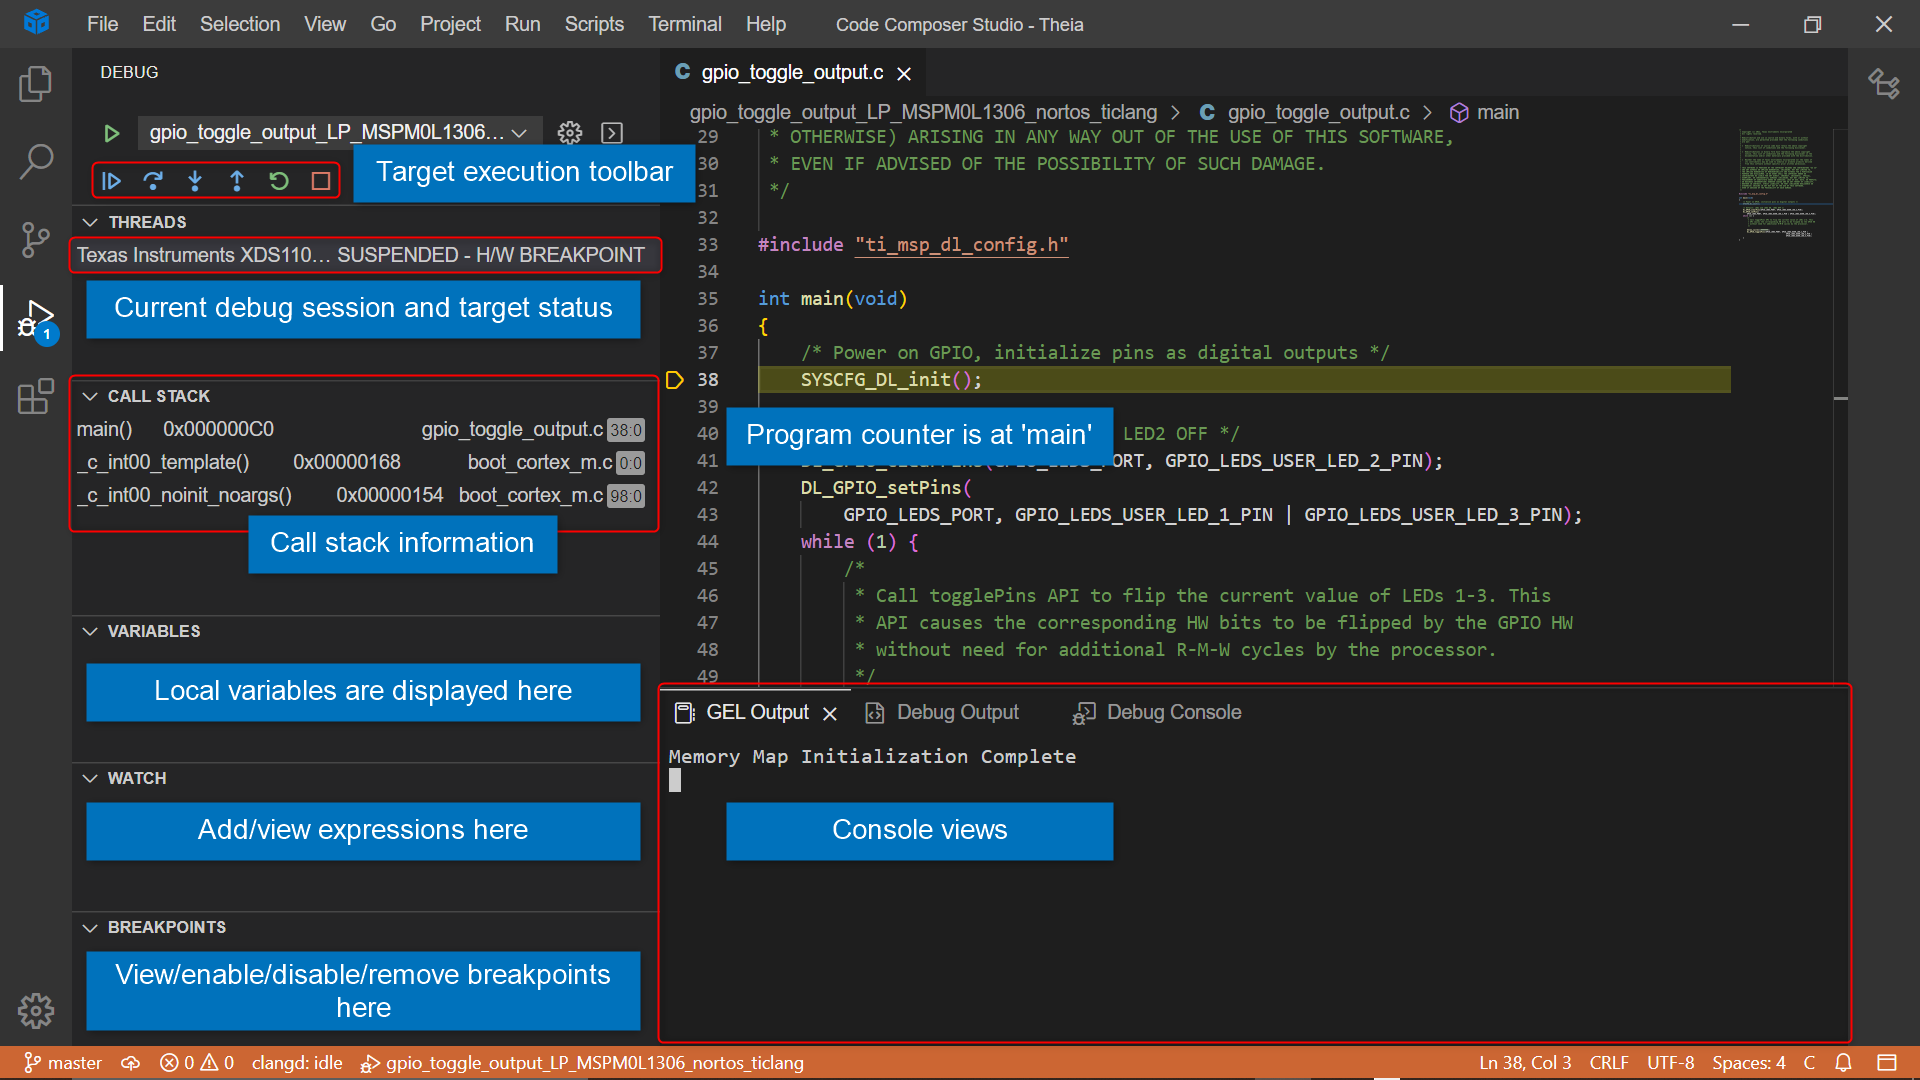
4.6. Building and Debugging Your Project
Once your project has been created/imported and any necessary manual changes completed, the project can then be compiled and loaded to the target for execution/debug. There is one easy option to do all this - by selecting the project in the Explorer view and selecting Debug Project in the context menu (or select Run → Debug Selected Project in the top menu bar). This option will automatically do all the below steps by default:
- Save source files (if necessary).
- Build the project (incrementally).
- Start the debugger (CCS Theia will switch from the Explorer to the Debug view in the Side Bar).
- Connect CCS Theia to the target.
- Load (flash) the program on the target.
- Run to main.