3.7. OpenCV
3.7.1. Introduction
OpenCV (Open Source Computer Vision Library) is an open-source BSD-licensed library that includes several hundreds of computer vision algorithms. It is designed for computational efficiency with strong focus on real-time application.
The OpenCV 3.1 release provides a transparent API that allows seamless offloads of OpenCL kernels when a supported accelerator is available. Documentation, tutorials and examples of how to use OpenCV 3.1 are available here.
This document outlines the specifics of how to test OpenCV that has been released within Processor SDK. This release is based off OpenCV 3.1.
OpenCV implementation is available for the following TI devices:
- AM335X
- AM437X
- AM57X/DRA7xx
- K2E
- K2H
- K2L
- K2G
To meet the requirements of real-time processing of images and video OpenCV functions were optimized.
More-ever, TI’s OpenCV implementation of hybrid ARM-DSP devices (AM57X, K2E, K2H, K2L, K2G) provides very efficient implementation of OpenCV function where signal-processing-rich algorithms are processed by DSP while the ARM processes all other algorithms, controls and manages the DSP.
TI implementation of OpenCV contains implementation of OpenCV functions as well as a set of unit tests to verify the performances and the accuracy of the implementation.
This document provides instructions show how to load and run unit tests of TI’s OpenCV implementation.
3.7.2. OpenCV Modules Supported By TI
Table 1 lists the modules of OpenCV and indicates which modules are supported by Processor SDK for K2H family and AM57X family.
| Module Name | K2 Family Support | AM57x Family Support | Comments |
|---|---|---|---|
| calib3d | Yes | Yes | |
| Core | Yes | Yes | |
| features2d | Yes | Yes | |
| flann | Yes | Yes | |
| imgcodecs | Yes | Yes | |
| imgproc | Yes | Yes | |
| ml | Yes | Yes | |
| objdetect | Yes | Yes | |
| photo | Yes | Yes | |
| shape | Yes | Yes | |
| stiching | Yes | Yes | |
| superres | Yes | Yes | |
| video | Yes | Yes | |
| videoio | Yes | Yes | |
| cudaarithm | No | No | No cuda support |
| cudabgsegm | No | No | No cuda support |
| cudacodec | No | No | No cuda support |
| cudafeatures2d | No | No | No cuda support |
| cudafilters | No | No | No cuda support |
| cudaimgproc | No | No | No cuda support |
| cudalegacy | No | No | No cuda support |
| cudaobjdetect | No | No | No cuda support |
3.7.3. OpenCL offload
OpenCV 3.1 provides a transparent API that allows seamless offloads of OpenCL kernels when a supported hardware accelerator is available. OpenCV 3.1 available with Processor SDK allows these OpenCL kernels to be offloaded to the C66x DSP.
OpenCV 3.1 supports approximately 200+ OpenCL kernels that optimize key functionalities in the different modules. The OpenCL kernel offload through the transparent API is enabled by the UMat data structure that replaces the legacy Mat data structure. UMat uses the OpenCL memory allocation procedure whenever possible, but maintains backward compatibility with Mat data structure. Additional explanation can be found on OpenCV site: https://opencv.org/platforms/opencl.html (or others URL if you search for “OpenCV transparent API”).
Within the context of Processor SDK, to enable the offload of OpenCL kernels in OpenCV 3.1, the environment variable OPENCV_OPENCL_DEVICE should be defined as follows:
For K2 Platforms export OPENCV_OPENCL_DEVICE=’TI KeyStone II:ACCELERATOR:TI Multicore C66 DSP’
For AM57x Platforms export OPENCV_OPENCL_DEVICE=’TI AM57:ACCELERATOR:TI Multicore C66 DSP’
If this environment variable is not defined properly then OpenCV will not initialize OpenCL and the OpenCL support is disabled.
Further, the library user can enable/disable OpenCL at runtime (at higher granularity, e.g. to let only part of program to do OpenCL offload) using ocl::setUseOpenCL(true) or ocl::setUseOpenCL(false) routines.
More OpenCL specific environment variables can affect the behavior. Please refer to: http://downloads.ti.com/mctools/esd/docs/opencl/environment_variables.html
Note
The script setupEnv.sh, part of the SDK release (in /usr/share/OpenCV/titestsuite), defines the appropriate environment variables OPENCV_OPENCL_DEVICE as well as other environment variables that are needed for the unit tests.**
Figure 1 shows the decision tree the transparent API executes to determine if the computations will be offloaded to the accelerator through OpenCL. The boxes that are shaded gray are specific to TI’s implementation of OpenCV. The prohibited list allows us to prevent certain OpenCL kernels from executing on the DSP. The kernels are prevented to execute on the DSP if they did not pass the accuracy tests.

Example of OpenCL offload
Here is a simple image processing example, using OpenCL dispatch via Transparent API (Color-to-Gray, Gaussian Blur and Canny kernels).
#include <opencv2/imgproc/imgproc.hpp>
#include <opencv2/highgui/highgui.hpp>
#include <opencv2/core/ocl.hpp>
#include <time.h>
#include <unistd.h>
/* Time difference calculation, in ms units */
double tdiff_calc(struct timespec &tp_start, struct timespec &tp_end)
{
  return (double)(tp_end.tv_nsec -tp_start.tv_nsec) * 0.000001 + (double)(tp_end.tv_sec - tp_start.tv_sec) * 1000.0;
}
using namespace cv;
int main(int argc, char** argv)
{
  struct timespec tp0, tp1, tp2, tp3;
  UMat img, gray;
  imread("lena.png", 1).copyTo(img);
  clock_gettime(CLOCK_MONOTONIC, &tp0);
  cvtColor(img, gray, COLOR_BGR2GRAY);
  clock_gettime(CLOCK_MONOTONIC, &tp1);
  GaussianBlur(gray, gray, Size(5, 5), 1.25);
  clock_gettime(CLOCK_MONOTONIC, &tp2);
  Canny(gray, gray, 0, 30);
  clock_gettime(CLOCK_MONOTONIC, &tp3);
  printf ("BGR2GRAY  tdiff=%lf ms \n", tdiff_calc(tp0, tp1));
  printf ("GaussBlur tdiff=%lf ms \n", tdiff_calc(tp1, tp2));
  printf ("Canny     tdiff=%lf ms \n", tdiff_calc(tp2, tp3));
  imwrite("canny_proc.jpg", gray);
  return 0;
}
It can be compiled on target (AM57xx), using following command:
g++ -I/usr/local/include/opencv -I/usr/local/include/opencv2 -L/usr/local/lib/ -g -o canny_ex1 canny_ex1.cpp -lrt -lopencv_core -lopencv_imgproc -lopencv_video -lopencv_features2d -lopencv_imgcodecs
Execution can be launched using following script, showing execution time with OpenCL dispatch respectively enabled and disabled:
export TI_OCL_LOAD_KERNELS_ONCHIP=Y
export TI_OCL_CACHE_KERNELS=Y
export OPENCV_OPENCL_DEVICE='TI AM57:ACCELERATOR:TI Multicore C66 DSP'
echo "OpenCL on, canny"
./canny_ex1
export OPENCV_OPENCL_DEVICE='disabled'
echo "OpenCL off, canny"
./canny_ex
Please note that the first run, with OpenCL on, has additional delay of ~1min, due to kernel compilation on AM57xx. This is constrained to first run only, if “TI_OCL_CACHE_KERNELS” environemnt variable is set. Profiling shows different execution time for DSP (OpenCL on) and A15 (OpenCL off) platforms.
OpenCL on, canny
BGR2GRAY  tdiff=12.064661 ms
GaussBlur tdiff=5.948558 ms
Canny     tdiff=5.788493 ms
OpenCL off, canny
BGR2GRAY  tdiff=4.158085 ms
GaussBlur tdiff=2.989813 ms
Canny     tdiff=9.780171 ms
A15 loading (measured with ‘top’) during repeated execution with ‘OpenCL on’, is in 50-60% range (single CPU load). A15 loading (measured with ‘top’) during repeated execution with ‘OpenCL off’, is in 150-170% range (both CPUs loaded).
It is possible to make finer grained mapping of individual kernel execution (some kernels could be mapped to DSP, others to A15 only). Here is an example:
#include <opencv2/imgproc/imgproc.hpp>
#include <opencv2/highgui/highgui.hpp>
#include <opencv2/core/ocl.hpp>
#include <time.h>
#include <unistd.h>
using namespace cv;
/* Time difference calculation, in ms units */
double tdiff_calc(struct timespec &tp_start, struct timespec &tp_end)
{
  return (double)(tp_end.tv_nsec -tp_start.tv_nsec) * 0.000001 + (double)(tp_end.tv_sec - tp_start.tv_sec) * 1000.0;
}
int main(int argc, char** argv)
{
  struct timespec tp0, tp1, tp2, tp3, tp4;
  Mat  img_mat;
  UMat img, gray;
  imread("lena.png", 1).copyTo(img_mat);
  cv::ocl::setUseOpenCL(false); /* suspend dispatch to DSP - from now on kernels are executed on A15 only! */
  clock_gettime(CLOCK_MONOTONIC, &tp0);
  cvtColor(img_mat, img_mat, COLOR_BGR2GRAY);
  clock_gettime(CLOCK_MONOTONIC, &tp1);
  cv::ocl::setUseOpenCL(true); /* resume DSP dispatch - from now on kernels, based on above decision tree, can be dispatched to DSP */
  img_mat.copyTo(gray);
  clock_gettime(CLOCK_MONOTONIC, &tp2);
  GaussianBlur(gray, gray,Size(5, 5), 1.25);
  clock_gettime(CLOCK_MONOTONIC, &tp3);
  Canny(gray, gray, 0, 30);
  clock_gettime(CLOCK_MONOTONIC, &tp4);
  printf ("BGR2GRAY  tdiff=%lf ms \n", tdiff_calc(tp0, tp1));
  printf ("Copy2UMat tdiff=%lf ms \n", tdiff_calc(tp1, tp2));
  printf ("GaussBlur tdiff=%lf ms \n", tdiff_calc(tp2, tp3));
  printf ("Canny     tdiff=%lf ms \n", tdiff_calc(tp3, tp4));
  imwrite("canny_proc.jpg", gray);
  return 0;
}
3.7.4. Unit Tests
Each function in the OpenCV implementation has a unit test associate with the function. The following instructions show how to load and run unit tests of TI’s OpenCV implementation. The screen shots and device dependent instructions in this document are from AM57X build and run and can be used as a reference for build and run OpenCV test for any other TI devices from the above list
Unit Tests Prerequisites
OpenCV function unit test can run on any of TI devices that were mentioned above. This document describes how to run the unit test on AM57X family of TI devices. The screen shots were taken from a Tera-terminal connected to AM5728 EVM.
Prerequisites
- AM572 EVM (or other AM57X based system) with connection to the network. See here for information on AM57X EVM. For other devices use a similar EVM
- TI Processor SDK Linux prospective LINUX operating system. URL to download Processor SDK Linux prospective is below.
- File system either on a SD card (for devices with SD card interface), or mount to external server. If the file system resides on SD card, the card size should be at least 32GB.
Loading SDK and Standard Test Data
Processor SDK is available from the following locations
For AM335X -> https://www.ti.com/tool/PROCESSOR-SDK-AM335X
For AM437X -> https://www.ti.com/tool/PROCESSOR-SDK-AM437X
For AM57X -> https://www.ti.com/tool/PROCESSOR-SDK-AM57X
For DRA7XX -> https://www.ti.com/tool/processor-sdk-dra7x
For K2E -> https://www.ti.com/tool/PROCESSOR-SDK-K2E
For K2H -> https://www.ti.com/tool/PROCESSOR-SDK-K2H
For K2L -> https://www.ti.com/tool/PROCESSOR-SDK-K2L
For K2G -> https://www.ti.com/tool/PROCESSOR-SDK-K2G
Loading Standard Test Data
The standard test code data opencv_extra-master.zip can be downloaded from here
Procedure to Get the Test Data
There are multiple ways to download the data into the EVM
If the EVM has display and keyboard the user can downloaded
the data compressed file directly to the EVM and then unzip it
Otherwise download the data compressed file to a PC on the network and
use SCP or tftp or USB memory stick to move the data compressed file into the EVM.
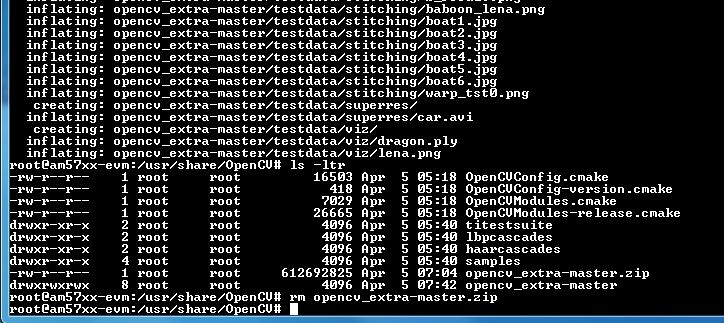
The following screen shots show how to download the standard data compressed file into the EVM and unzip it. It assumes that there is a TFTP master server, for example Solarwinds or similar, and that the file opencv_extra-master.zip was downloaded from https://github.com/Itseez/opencv_extra/archive/master.zip and resides in the root directory of the TFTP server. The beginning of the unzip process and the end of the unzip process are shown in the screen shots as well.
The TFTP command is tftp -g -r opencv_extra-master.zip xxx.xxx.xxx.xxx where xxx.xxx.xxx.xxx stands for the IP address of the TFTP server. Note that the process takes few minutes because the file is very large. (More than 600MB)


Summary of Getting the Data Steps
- Boot the EVM and login as root.
- Change directory to /usr/share/OpenCV
- Get the opencv_extra-master.zip file from a server as described above
- unzip the opencv_extra-master.zip file
- Delete the opencv_extra-master.zip file
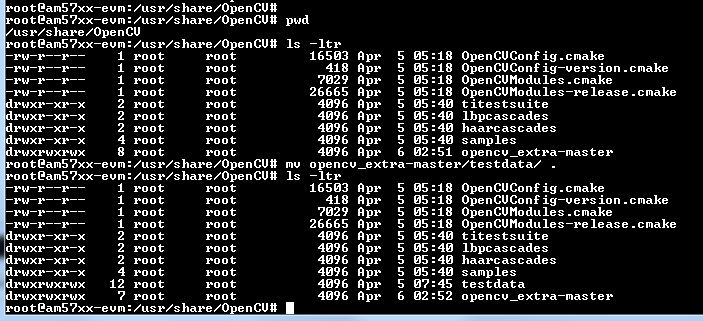
After unzip the file a new directory *opencv_extra-master* is generated. A sub-directory *testdata* should be moved up one level.
From the OpenCV directory do the following: *mv opencv_extra-master/testdata .* . See the screen shot below.
Environment Settings and Run the Tests
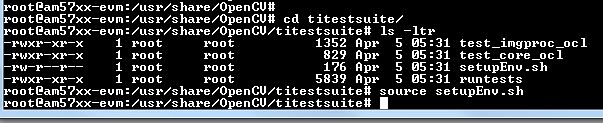
The script setupEnv.sh in directory /usr/share/OpenCV/titestsuite sets the environment variables that are needed for the unit tests.
From the OpenCV directory do the following: *cd titestsuit* and then *source ./setupEnv.sh* . See the screen shot below.
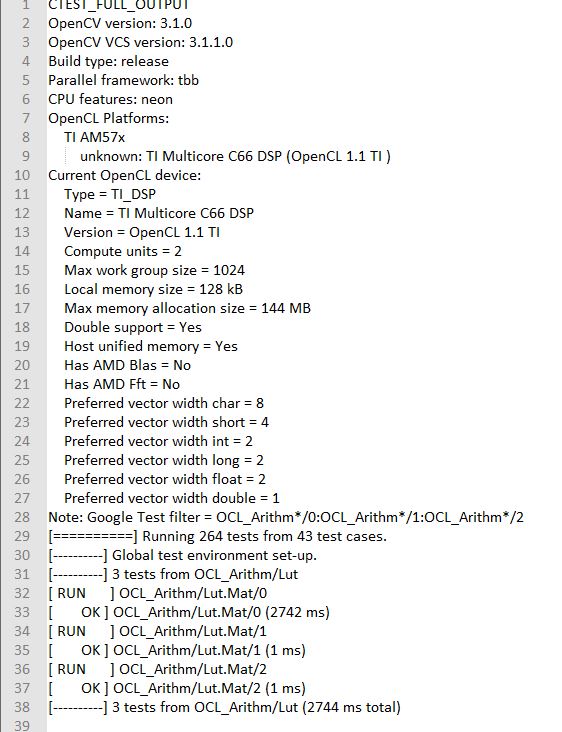
The script runtests run all the unit tests. From the titestsuit directory do *./runtests* . The unit tests starts executing. The screen will show the following:

- Currently the last three tests in the script (videoio) do not run on AM57X. The script will stuck after about 90 minutes. The user can stop the script (“control C”) or eliminate the videoio tests
- An output log file opencv_test_log.out is generated in directory /usr/share/OpenCV/titestsuite. The start of the log file looks like the following:
Reports and Results
Summary of accuracy test results on 66AK2H12 and AM57x platforms
| Module Name | # Of Tests | #66AK2H12 Failures | # AM57X Failures | |
|---|---|---|---|---|
| calib3d | 70 | 1 | 1 | |
| Core | 10299 | 9 | 11 | |
| features2d | 86 | 0 | 0 | |
| flann | 1 | 0 | 0 | |
| imgcodecs | 15 | 0 | 0 | |
| imgproc | 8699 | 3 | 6 | |
| ml | 26 | 0 | 0 | |
| objdetect | 9 | 0 | 0 | |
| photo | 63 | 0 | 0 | |
| shape | 3 | 0 | 0 | |
| stiching | 4 | 0 | 0 | |
| superres | 3 | 0 | 0 | |
| video | 58 | 0 | 0 | |
| videoio | 70 | 0/3 (Not built with FFMPEG/GST) | 1 |
Details of accuracy test failures results on 66AK2H12 and AM57x platforms
| Module Name | # Test | 66AK2H12 Failure | # Test | AM57X Failure |
|---|---|---|---|---|
| calib3d | 1 | Calib3d_SolvePnP (Neon) | 1 | FisheyeTest.Rectify |
| core | 1 | turnOffOpenCL::Image2D (No Image2d support in TI OpenCL) | 1 | turnOffOpenCL::Image2D (No Image2d support in TI OpenCL) |
| core | 8 | Mul (Neon) | 8 | Mul (Neon) |
| core | 1 | Add (doesn’t fail when run individually) | ||
| core | 1 | Bitwise_and (doesn’t fail when run individually) | ||
| imgproc | 1 | Imgproc_moments | 1 | Imgproc_moments |
| imgproc | 1 | Filter 2D (one test does not fail when run individually) | 1 | Erode (does not fail when run individually) |
| imgproc | 1 | Filter 2D (one test does not fail when run individually) | ||
| imgproc | 1 | Corner Harris (Not the same tests fail when run individually | 1 | Corner Harris (does not fail when run individually) |
| imgproc | 2 | CornerMinEigenVal (does not fail when run individually) | ||
| videoio | 0 | videoio.Regression (GST Library Issue) | 1 | GST library issue? |
3.7.5. Necessary steps to modify OpenCV framework to add more OpenCL Host side and DSP C66 optimized kernels
Primary purpose of this tutorial is to show how one can add TI DSP C66 optimized kernels to existing OpenCV framework. Necessary steps are described in below paragraphs, describing several already optimized kernels, and also how to add new and then recompile and deploy updated OpenCV in PLSDK 3.1. TI DSP specific OpenCL implementation is additional to few existing accelerators: Intel x86: SSE2/SSE4/AVX/AVX2 extensions; ARM: NEON; nVIDIA: CUDA; Generic OpenCL. Range of accelerated kernels via OpenCL is wide, e.g. OpenCV 3.10 baseline includes ~200 kernels encoded in OpenCL C. TI OpenCL (C66 core) follows 1.2 version of standard, and can execute baseline OpenCV OpenCL kernels (as-is!). But additional performance improvements can be achieved by using TI DSP OpenCL extensions (intrinsics and EDMAmgr).
3.7.5.1. Supported Platforms
See here for a list of supported platforms and links to more information. OpenCL dispatch is available only on platforms with DSP C66 core, like AM5728 (2 C66 cores).
3.7.5.2. OpenCV OpenCL run-time setup
OpenCV and OpenCL are already included in PLSDK 3.10. OpenCV uses run-time compilation of OpenCL kernels, so first time kernel execution is dominated by kernel compilation (later they are cached either in memory or tmp filesystem) - please note that it may take several dozens of seconds on AM5728EVM. In order to enable OpenCL acceleration inside OpenCV, following environment variable need to be set (example applies to AM57xx): export OPENCV_OPENCL_DEVICE=’TI AM57:ACCELERATOR:TI Multicore C66 DSP’
- For additional information, please refer to: OpenCL User Guide
3.7.5.3. OpenCV OpenCL development setup
OpenCV and OpenCL are already included in PLSDK 3.10.
- Development setup need to be prepared based on Building the Processor SDK
- When needed, source code under the work directory (e.g., arago-tmp-[toolchain]/work/am57xx_evm-linux-gnueabi/opencv/git) can be modified.
- Forced compilation can be started, after code modification:
 ARAGO_BRAND=processor-sdk MACHINE=am57xx-evm bitbake opencv --force -c compile
ARAGO_BRAND=processor-sdk MACHINE=am57xx-evm bitbake opencv
- To install modified package (not all OpenCV ipk-s are changed), select updated packages in arago-tmp-[toolchain]/work/am57xx_evm-linux-gnueabi/opencv//am57xx_evm and install on target system using:
opkg install libopencv-<modulename.version.commit>-r0.tisdk4_am57xx_evm.ipk
3.7.5.5. Creating OpenCL C kernel optimized for C66 core
DSP specific implementation of kernel body can be placed in existing XXX.cl or new YYY.cl file - both have to be placed in modules/ZZZ/src/opencl folder. No modification of top level CMake files are required (all .cl files present in ./opencl folder are included in compilaton). There are three options in adding new kernel implementation:
- If we decide to use existing file and kernel name, we can use macro set in kernel build options (refer to previous paragraph) - example in: modules/video/src/bgfg_gaussmix2.cpp:
 ...
    String opts = format("-D CN=%d -D NMIXTURES=%d%s -DTIDSP_MOG2 -D SUBLINE_CACHE=%d", nchannels, nmixtures, bShadowDetection ? " -DSHADOW_DETECT" : "", subline_cache);
    kernel_apply.create("mog2_kernel", ocl::video::bgfg_mog2_oclsrc, opts);
...
to select baseline or DSP specific implementation - example in: modules/video/src/opencl/bgfg_mog2.cl:
 #ifdef TIDSP_MOG2
TI DSP specific implementation
...
__kernel void mog2_kernel(__global const uchar* frame, int frame_step, int frame_offset, int frame_row, int frame_col,  //uchar || uchar3
                        __global uchar* modesUsed,                                                                    //uchar
                        __global uchar* weight,                                                                       //float
                        __global uchar* mean,                                                                         //T_MEAN=float || float4
                        __global uchar* variance,                                                                     //float
                        __global uchar* fgmask, const int fgmask_step, const int fgmask_offset,                       //uchar
                        const float alphaT, const float alpha1, const float prune,
                        const float c_Tb, const float c_TB, float c_Tg, const float c_varMin,                         //constants
                        const float c_varMax, const float c_varInit, const float c_tau
 #ifdef SHADOW_DETECT
                        , const uchar c_shadowVal
 #endif
                        )
...
#else
OPENCL generic implementation:
...
__kernel void mog2_kernel(__global const uchar* frame, int frame_step, int frame_offset, int frame_row, int frame_col,  //uchar || uchar3
                        __global uchar* modesUsed,                                                                    //uchar
                        __global uchar* weight,                                                                       //float
                        __global uchar* mean,                                                                         //T_MEAN=float || float4
                        __global uchar* variance,                                                                     //float
                        __global uchar* fgmask, int fgmask_step, int fgmask_offset,                                   //uchar
                        float alphaT, float alpha1, float prune,
                        float c_Tb, float c_TB, float c_Tg, float c_varMin,                                           //constants
                        float c_varMax, float c_varInit, float c_tau
#ifdef SHADOW_DETECT
                        , uchar c_shadowVal
#endif
                        )
...
#endif
- Another option is to use different kernel name, and use it appropriately as mentioned in previous paragraph.
   TI DSP specific implementation
__attribute__((reqd_work_group_size(1,1,1))) __kernel void tidsp_morph_erode (__global const uchar * srcptr, int src_step, int src_offset,
                  __global uchar * dstptr, int dst_step, int dst_offset,
                  int src_offset_x, int src_offset_y, int cols, int rows,
                  int src_whole_cols, int src_whole_rows)
 ...
__attribute__((reqd_work_group_size(1,1,1))) __kernel void tidsp_morph_dilate (__global const uchar * srcptr, int src_step, int src_offset,
                  __global uchar * dstptr, int dst_step, int dst_offset,
                  int src_offset_x, int src_offset_y, int cols, int rows,
                  int src_whole_cols, int src_whole_rows)
   OpenCL generic implementation
__kernel void morph(__global const uchar * srcptr, int src_step, int src_offset,
                  __global uchar * dstptr, int dst_step, int dst_offset,
                  int src_offset_x, int src_offset_y, int cols, int rows,
                  int src_whole_cols, int src_whole_rows EXTRA_PARAMS)
- Third option is to create new file and use it in kernel constructor, with _oclsrc postfix (as mentioned in previous paragraph), like used in modules/imgproc/src/smooth.cpp
   TI DSP specific OpenCL implementation
...
  cv::String kname = format( "tidsp_gaussian" ) ;
  cv::String kdefs = format("-D T=%s -D T1=%s -D cn=%d", ocl::typeToStr(type), ocl::typeToStr(depth), cn) ;
  ocl::Kernel k(kname.c_str(), ocl::imgproc::gauss_oclsrc, kdefs.c_str() );
...
Implementation for this OpenCL kernel is provided in modules/imgproc/src/opencl/gauss.cl, which is a new file.
DSP kernels can use standard 1.2 OpenCL C and DSP specific extensions. OpenCL included in PLSDK 3.1 allows direct use of functions in edmamgr module. We can even use printf() in .cl files (developer does not need to bother with any additional hooks on Host side) which is very useful for development, debugging and benchmarking.
 ...
#ifdef TIDSP_OPENCL_VERBOSE
  clk_end = __clock();
  printf ("TIDSP dilate clockdiff=%d\n", clk_end - clk_start);
#endif
...
Output looks like:
 [core 1] TIDSP dilate clockdiff=532646
[core 0] TIDSP dilate clockdiff=531362
3.7.5.6. OpenCV OpenCL kernels implemented specifically for DSP C66 core
Coding in OpenCL C is very close to coding in Native DSP C (cl6x). Many platform specific details are automatically resolved with OpenCL tools (like memory map handling, header file inclusion, etc) and framework (loading, buffer transfer). OpenCV is based on run-time compilation of OpenCL kernels provided in source, and preprocessed and converted to header and CPP arrays during configure stage. But, it is also possible to use off-line compilation or link with Native DSP C libraries. TI DSP OpenCL supports 1.2 standard and several DSP extensions. In order to achieve maximum performance, majority of techniques applicable in DSP C are applicable in OpenCL C:
- DSP intrinsics.
 ...
/* Convert from 8bpp to 16bpp so we can do SIMD of rows \*/
r0_2 = _dmpyu4(as_uchar8(r0), as_uchar8(mask1_8));  /* 8-way unsigned 8-bit X 8-bit multiplication \*/
r1_2 = _dmpyu4(as_uchar8(r1), as_uchar8(mask2_8));
r2_2 = _dmpyu4(as_uchar8(r2), as_uchar8(mask1_8));
/* Add rows 0+1, column-wise \*/
r01_lo = _dadd2(as_long(r0_2.s0123), as_long(r1_2.s0123));
r01_hi = _dadd2(as_long(r0_2.s4567), as_long(r1_2.s4567));
...
- Multi-DSP core operation - splitting work load by partitioning input data
int gid = get_global_id(0); /* 1st dimension can be used to identify DSP core */
- It is highly advisable to copy input data to L2 or even L1 memory. Use EDMA to parallelize data transfers (from DDR to/from L2) with DSP core execution
3.7.5.6.1. EDMA transfer framework
It is essential that EDMA operates in parallel with DSP core operation, so that DSP core always have ready data to be processed. This can be accomplished with well known “ping-pong” scheme at input end. It is possible to implement similar method at output end of operation, but typically there are much fewer write operations. Several kernels include “EDMA image processing framework”: it ensures that several consecutive image rows are transferred to L2 memory and ready to be processed by DSP core. In order to avoid redundant copies, an array of pointers to beginning of image rows is maintained. Main unit of operation is single image row. Only one image row is in-flight, both on input and output. Still, DSP processing (which is typical use case) may use multiple consecutive image rows. Examples of this framework can be found in: gauss.cl, sobel.cl, thresh.cl in tiopencv repository (http://git.ti.com/opencv/tiopencv/trees/tiopencvrelease_3.1)
- Initialization: resetting L2 image rows
 for(i = 0; i < (LINES_CACHED + 1); i ++)
{
  memset ((void \*)img_lines[i], 0, MAX_LINE_SIZE);
}
- Partitioning data between DSP cores
 ...
int   gid   = get_global_id(0);  /* Identify DSP core: gid is set to 0 for 1st DSP core, and 1 for 2nd DSP core \*/
...
 if(gid == 0)
{ /* Upper half of image \*/
  for(i = 1; i < LINES_CACHED; i ++)
  { /* Use this, one time multiple 1D1D transfers, instead of one linked transfer, to allow for fast EDMA later \*/
    EdmaMgr_copy1D1D(evIN, (void \*)(srcptr + (rows - 1 + i) * cols), (void \*)(img_lines[i]), cols);
  }
  fetch_rd_idx = cols;
} else if(gid == 1)
{ /* Bottom half of image \*/
  for(i = 0; i < LINES_CACHED; i ++)
  { /* Use this, one time multiple 1D1D transfers, instead of one linked transfer, to allow for fast EDMA later \*/
    EdmaMgr_copy1D1D(evIN, (void \*)(srcptr + (rows - 1 + i) * cols), (void \*)(img_lines[i]), cols);
  }
  fetch_rd_idx = (rows + 1) * cols;
  dest_ptr += rows * cols;
} else return;
start_rd_idx = 0;
- Main image row loop
 for (int y = 0; y < rows; y ++)
{
  EdmaMgr_wait(evIN);
  rd_idx  = start_rd_idx;
  for(kk = 0; kk < LINES_CACHED; kk ++)
  {
    y_ptr[kk] = (uchar \*)img_lines[rd_idx];
    rd_idx = (rd_idx + 1) & LINES_CACHED;
  }
  start_rd_idx = (start_rd_idx + 1) & LINES_CACHED;
  EdmaMgr_copyFast(evIN, (void*)(srcptr + fetch_rd_idx), (void*)(img_lines[rd_idx]));
  fetch_rd_idx += cols;
  /**********************************************************************************/
  yprev_ptr = y_ptr[0];
  ycurr_ptr = y_ptr[1];
  ynext_ptr = y_ptr[2];
  ...
  /* Access L2 data directly using yprev_ptr, ycurr_ptr, ynext_ptr... \*/
3.7.5.6.2. Additional information about C66 specific optimizations
- C6000 Programmers guide: https://www.ti.com/lit/ug/spru198k/spru198k.pdf.
- TMS320C6000 DSP Optimization Workshop Student Guide (6.1 MB) (pdf file): https://processors.wiki.ti.com/index.php/TMS320C6000_DSP_Optimization_Workshop,
- TMS320C6000 Optimizing Compiler: https://www.ti.com/lit/ug/spru187u/spru187u.pdf
- TMS320C66x CorePac User Guide: https://www.ti.com/lit/ug/sprugw0c/sprugw0c.pdf
- TMS320C66x DSP CPU and instruction set: https://training.ti.com/system/files/docs/c66x-corepac-instruction-set-reference-guide.pdf
3.7.5.7. List of currently (PLSDK 3.1) DSP optimized OpenCV OpenCL kernels, using non-standard OpenCL extensions
3.7.5.7.1. OpenCL C C66 DSP kernels
| Kernel name | Data type - input | Data type - output | Host side file (full path) | OpenCL C kernel file (full path) | Comments |
|---|---|---|---|---|---|
| erode | uint8 | uint8 | modules/imgproc/src/morph.cpp | modules/imgproc/src/opencl/morph.cl | |
| dilate | uint8 | uint8 | modules/imgproc/src/morph.cpp | modules/imgproc/src/opencl/morph.cl | |
| SobelX/SobelY | uint8 | int16 | modules/imgproc/src/deriv.cpp | modules/imgproc/src/opencl/sobel.cl | |
| threshold | uint8 | uint8 | modules/imgproc/src/thresh.cpp | modules/imgproc/src/opencl/threshold.cl | |
| GaussBlur (3x3) | uint8 | uint8 | modules/imgproc/src/smooth.cpp | modules/imgproc/src/opencl/gauss.cl | |
| convertScaleAbs | int16 | uint8 | modules/core/src/convert.cpp | modules/core/src/opencl/tidsparithm.cl | Additional optimizations possible |
| MOG2 (mixture of Gaussians) | uint8 (float32 internal) | uint8 (float32 internal) | modules/core/src/bgfg_gaussmix2.cpp | modules/core/src/opencl/bgfg_mog2.cl | Additional optimizations possible |
3.7.5.8. Profiling results of DSP optimized OpenCV OpenCL kernels (PLSDK 3.1), AM5728 platform
3.7.5.8.1. Single channel, 1200x709, barcode ROI detection use case
| Kernel name | DSP optimized, cycles (per core) | DSP baseline wall clock | DSP optimized wall clock | ARM wall clock | DSP/ARM |
|---|---|---|---|---|---|
| erode | 883436 | 288.10ms | 2.33ms | 13.65ms | 5.8x |
| dilate | 893387 | 290.232ms | 2.36ms | 13.67ms | 5.8x |
| SobelX/SobelY | 586885 | 232.450ms | 1.58ms | 2.69ms | 1.7x |
| threshold | 676208 | 3.583ms | 1.72ms | 0.49288ms | 0.3x |
| GaussBlur (3x3) | 903159 | 82.601ms | 2.036ms | 4.289ms | 2.1x |
| convertScaleAbs | 725346 | 112.60ms | 1.73077ms | 3.92ms | 2.3x |
3.7.5.8.2. Single channel, 1920x1080. barcode ROI detection use case
| Kernel name | DSP optimized, cycles (per core) | DSP baseline wall clock | DSP optimized wall clock | ARM wall clock | DSP/ARM |
|---|---|---|---|---|---|
| erode | 2016149 | 358.46ms | 3.762ms | 74.7736ms | 20.2x |
| dilate | 2020188 | 348.255ms | 3.734ms | 68.1547ms | 20.2x |
| SobelX/SobelY | 1260833 | 281.58ms | 2.38ms | 13.3328ms | 5.6x |
| threshold | 1535483 | 6.311ms | 2.815ms | 1.08271ms | 0.4x |
| GaussBlur (3x3) | 2092713 | 98.61ms | 3.478ms | 10.0458ms | 2.9x |
| convertScaleAbs | 1646050 | 268.272ms | 3.13524ms | 5.77027ms | 1.8x |
3.7.5.8.3. Single channel, 720x576, Gesture recognition use case
| Kernel name | DSP optimized, cycles (per core) | DSP baseline wall clock | DSP optimized wall clock | ARM wall clock | DSP/ARM |
|---|---|---|---|---|---|
| erode | 567719 | 30.985ms | 1.707ms | 5.45ms | 3.2x |
| dilate | 570094 | 31.035ms | 1.750ms | 5.455ms | 3.2x |
| MOG2 (mixture of Gaussians) | 40307446 | 316.984ms | 59.63ms | 40.667ms | 0.7x |
3.7.5.9. Alternative approach to add new OpenCL kernels at OpenCV application level
Instead of adding OpenCL kernels into OpenCV framework, it is possible to do that directly from OpenCV application. This approach might be preferred if scope and reuse of work are limited. Primary benefit is more direct control of development (avoid OpenCV framework complexities) and reduced build time (only top level application and specific kernels need to be recompiled instead of doing Yocto builds). Building the application (below example is executed on target) is straightforward:
g++ -I/usr/local/include/opencv -I/usr/local/include/opencv2 -g -c  cvclapp-direct.cpp
g++ -I/usr/local/include/opencv -I/usr/local/include/opencv2 -L/usr/local/lib/ -g -o cvclapp \
     cvclapp.cpp \
     cvclapp-direct.o \
     -lrt \
     -lopencv_core \
     -lopencv_imgproc \
     -lopencv_highgui \
     -lopencv_ml \
     -lopencv_video \
     -lopencv_features2d \
     -lopencv_calib3d \
     -lopencv_objdetect \
     -lopencv_imgcodecs \
     -lOpenCL -locl_util
Below two sections show how OpenCL kernels can be dispatched from OpenCV application in two different ways.
3.7.5.9.1. OpenCL kernel dispatch from OpenCV application, using existing OpenCV-OpenCL classes
OpenCV host side code, using OpenCV classes (defined in modules/core/src/ocl.cpp) to load and dispatch OpenCL kernels (online compilation).
#define __CL_ENABLE_EXCEPTIONS
#include <CL/cl.hpp>
#include <iostream>
#include <fstream>
#include <string>
#include <iterator>
#include <cassert>
#include "ocl_util.h"
#include <opencv2/opencv.hpp>
#include <opencv2/core/ocl.hpp>
#include <opencv2/imgproc/imgproc.hpp>
#include <opencv2/highgui/highgui.hpp>
using namespace std;
using namespace cv;
// This function is used for 2nd approach described in next section (standard OpenCL kernel dispatch)
extern void ProcRawCL(Mat &mat_src, const string &kernel_name);
int main()
{
    if (!ocl::haveOpenCL())
    {
        cout << "OpenCL is not avaiable..." << endl;
        return 0;
    }
    ocl::Context context;
    if (!context.create(ocl::Device::TYPE_ACCELERATOR))
    {
        cout << "Failed creating the context..." << endl;
        return 0;
    }
    // Select the first device
    ocl::Device(context.device(0));
    // Read the OpenCL kernel code into a string
    ifstream ifs("kernel_inv.cl");
    if (ifs.fail()) return 0;
    std::string kernelSource((std::istreambuf_iterator<char>(ifs)), std::istreambuf_iterator<char>());
    ocl::ProgramSource programSource(kernelSource);
    // Compile the kernel code
    cv::String errmsg;
    cv::String buildopt = "-DDBG_VERBOSE "; // We can set various clocl build options here, e.g. define-s to compile-in/out parts of CL code
    ocl::Program program = context.getProg(programSource, buildopt, errmsg);
    ocl::Kernel kernel("invert_img", program);
    // Transfer Mat data to the device
    Mat mat_src = imread("lena.png", IMREAD_GRAYSCALE);
    UMat umat_src = mat_src.getUMat(ACCESS_READ, USAGE_ALLOCATE_DEVICE_MEMORY);
    cout << "Input image size: " << mat_src.size() << endl << flush;
    UMat umat_dst(mat_src.size(), mat_src.type(), ACCESS_WRITE, USAGE_ALLOCATE_DEVICE_MEMORY);
    kernel.args(ocl::KernelArg::ReadOnlyNoSize(umat_src), ocl::KernelArg::ReadWrite(umat_dst));
    size_t globalThreads[2] = { (unsigned int)mat_src.cols, (unsigned int)mat_src.rows };
    size_t localThreads[2] = { 16, 16 };
    bool success = kernel.run(2, globalThreads, localThreads, false);
    if (!success){
      cout << "Failed running the kernel..." << endl;
      return 0;
    } else {
      cout << "Kernel OK!" << endl;
    }
    GaussianBlur(umat_dst, umat_dst, Size(5, 5), 1.25);
    Canny(umat_dst, umat_dst, 0, 50);
    // Fetch the dst data from the device
    Mat mat_dst = umat_dst.getMat(ACCESS_READ);
    imwrite("out1.jpg", mat_dst);
    ProcRawCL(mat_src, "kernel_direct.cl");
//    imshow("src", mat_src);
//    imshow("dst", mat_dst);
//    waitKey();
    return 1;
}
This is kernel_inv.cl file with OpenCL kernels (executed on DSP). It is loaded and compiled by above host program.
__kernel void invert_img(__global uchar* src, int src_step, int src_offset,
                         __global uchar* dst, int dst_step, int dst_offset,
                         int dst_rows, int dst_cols)
{
   int x = get_global_id(0);
   int y = get_global_id(1);
   if (x >= dst_cols) return;
   int src_index = mad24(y, src_step, x + src_offset);
   int dst_index = mad24(y, dst_step, x + dst_offset);
   dst[dst_index] = 255 - src[src_index];
#ifdef DBG_VERBOSE
   if((x < 3) && ((y < 3) || (y >= (512 - 3)))) printf ("[x=%d][y=%d]\n", x, y);
#endif
}
3.7.5.9.2. OpenCL kernel dispatch from OpenCV application, using standard OpenCL dispatch with access to OpenCV data objects
This example shows how to use CMEM memory directly accessible by DSP. OpenCV Mat data structures are created to store data in CMEM, thus avoid buffer copy. For more information refer to http://downloads.ti.com/mctools/esd/docs/opencl/memory/host-malloc-extension.html .
#define __CL_ENABLE_EXCEPTIONS
#include <CL/cl.hpp>
#include <iostream>
#include <fstream>
#include <string>
#include <iterator>
#include <cassert>
#include "ocl_util.h"
#include <opencv2/opencv.hpp>
#include <opencv2/core/ocl.hpp>
#include <opencv2/imgproc/imgproc.hpp>
#include <opencv2/highgui/highgui.hpp>

using namespace std;
using namespace cv;
using namespace cl;

const int NumElements     = 512*512;  // image size
const int NumWorkGroups   = 256;
const int VectorElements  = 4;
const int NumVecElements  = NumElements / VectorElements;
const int WorkGroupSize   = NumVecElements / NumWorkGroups;

void ProcRawCL(Mat &mat_src, const std::string &kernel_name)
{
    //===============================================================
    // Allocates memory in CMEM, directly accessible by both DSP and A15.
    // This avoids buffer copying.
    // Create three Mat data objects using pre-allocated CMEM memory
    int bufsize = mat_src.rows * mat_src.cols;
    void *ptr_cmem1 = __malloc_ddr(bufsize);
    void *ptr_cmem2 = __malloc_ddr(bufsize);
    void *ptr_cmem3 = __malloc_ddr(bufsize);
    Mat test_mat1(mat_src.size(), CV_8UC1, ptr_cmem1);
    Mat test_mat2(mat_src.size(), CV_8UC1, ptr_cmem2);
    Mat test_mat3(mat_src.size(), CV_8UC1, ptr_cmem3);

    mat_src.copyTo(test_mat1);
    threshold(test_mat1, test_mat2, 128.0, 192.0, THRESH_BINARY);
    imwrite("out_cmem1.jpg", test_mat2);
    //----
    mat_src.copyTo(test_mat3);
   try
   {
     Context context(CL_DEVICE_TYPE_ACCELERATOR);
     std::vector<Device> devices = context.getInfo<CL_CONTEXT_DEVICES>();

     int d = 0;
     std::string str;
     ifstream t(kernel_name);
     std::string kernelStr((istreambuf_iterator<char>(t)), istreambuf_iterator<char>());

     devices[d].getInfo(CL_DEVICE_NAME, &str);
     cout << "DEVICE: " << str << endl << endl;

     Program::Sources source(1, std::make_pair(kernelStr.c_str(), kernelStr.length()));
     Program          program = Program(context, source);
     program.build(devices);

     Kernel kernel(program, "maskVector");
     Buffer bufA   (context, CL_MEM_READ_ONLY  | CL_MEM_USE_HOST_PTR, bufsize, ptr_cmem2);
     Buffer bufDst (context, CL_MEM_WRITE_ONLY | CL_MEM_USE_HOST_PTR, bufsize, ptr_cmem1);
     kernel.setArg(0, bufA);
     kernel.setArg(1, bufDst);

     Event ev1;

     CommandQueue Q(context, devices[d], CL_QUEUE_PROFILING_ENABLE);
     Q.enqueueNDRangeKernel(kernel, NullRange, NDRange(NumVecElements), NDRange(WorkGroupSize), NULL, &ev1);
     ev1.wait();

     ocl_event_times(ev1, "Kernel Exec");
     imwrite("out_cmem2.jpg", test_mat1);
   }
   catch (cl::Error err)
   {
     cerr << "ERROR: " << err.what() << "(" << err.err() << ", "
          << ocl_decode_error(err.err()) << ")" << endl;
   }
    //----
    __free_ddr(ptr_cmem1);
    __free_ddr(ptr_cmem2);
    __free_ddr(ptr_cmem3);
    //===============================================================
}
This is kernel_direct.cl OpenCL C file. Kernel maskVector is loaded, compiled and disptache by above host program
kernel void maskVector(global const uchar4* a, global uchar4* b)
{
    int id = get_global_id(0);
    b[id] = a[id] & (uchar4)(127, 127, 127, 127);
}
3.7.5.10. OpenCV profiling - standard procedure
Standard procedure for profiling OpenCV kernels (with OpenCL dispatch or without), is described in: https://github.com/opencv/opencv/wiki/HowToUsePerfTests In case of Processor Linux SDK on AM3/4/5 (AM57xx only supports OpenCL dispatch to DSP cores), these steps should be followed:
[EVM] cd /usr/share/OpenCV/titestsuite
[EVM] source setupEnv.txt
[LINUXBOX] Copy test vectors (copy https://github.com/opencv/opencv_extra/tree/master/testdata) to [EVM] /usr/share/OpenCV/testdata
[LINUXBOX] We need Yocto build (follow https://processors.wiki.ti.com/index.php/Processor_SDK_Building_The_SDK)
    as opencv performance executables or scripts are not distributed, as standard deliverables:
    From Yocto build, copy all python scripts from opencv/XYZ/git/modules/ts/misc, to EVM folder: /usr/share/OpenCV/titestsuite
    From Yocto build, copy opencv_perf_* executables from opencv/XYZ/build/bin, to EVM folder: /usr/share/OpenCV/titestsuite
[EVM] Use environment variable to enable / disable OpenCL kernel acceleration:
    OPENCL off:
        export OPENCV_OPENCL_DEVICE='
    OPENCL on:
        export TI_OCL_CACHE_KERNELS=Y
        export TI_OCL_KEEP_FILES=Y
        export OPENCV_OPENCL_DEVICE='TI AM57:ACCELERATOR:TI Multicore C66 DSP'
[EVM] Now we are ready to run the tests, or subsets of tests:
    EXAMPLE (EVM, execute from folder /usr/share/OpenCV/titestsuite): python ./run.py -t objdetect (run objdetect module performance tests)
    EXAMPLE (EVM, execute from folder /usr/share/OpenCV/titestsuite): python ./run.py -t core,imgproc (run both core and imgproc performance tests... this takes a lot of time)
    EXAMPLE (EVM, execute from folder /usr/share/OpenCV/titestsuite): python ./run.py --perf_force_samples=5 -t imgproc --gtest_filter="*Sobel*" (run only Sobel filters from imgproc module)
    EXAMPLE (EVM, execute from folder /usr/share/OpenCV/titestsuite): python ./run.py --gtest_list_tests -t imgproc (list all the available performance tests, for imgproc module)
    EXAMPLE (EVM, execute from folder /usr/share/OpenCV/titestsuite): python ./run.py --perf_force_samples=5 -t imgproc --gtest_filter="*threshold/20*" (run single test case)
3.7.6. OpenCV Performance
Please refer to OpenCV Performance for the comparison of example performance of OpenCV routines as measured on multicore ARM Cortex-A15 cores and C66x DSPs in two different TI SoCs.
3.7.7. Frequently Asked Questions
How to compile OpenCV natively on 66AK2H platform?
The ARM gcc compiler is included in the ProcSDK filesystem under /usr/bin directory. OpenCV is supported on Keystone2 platforms (K2H/K/E/L). However, the following OpenCV include files and libraries are not in the filesystem, but needed to compile natively.
Libraries need to be copied from Linux_ProSDK/linux-devkit/sysroot/armv7ahf-neon-linux-gnueabi/usr/lib to /usr/lib are:
libopencv*
libgst*
libgphoto*
liborc*
libtbb*
libwebp*
libtiff*
libgst*
libgphoto*
libexif*
liborc*
OpenCV include directories need to be copied from Linux_ProSDK/linux-devkit/sysroot/armv7ahf-neon-linux-gnueabi/usr/include to /usr/include are:
opencv
opencv2
Once all the libraries and include files are copied, the OpenCV example, canny_ex1, can be compiled natively on EVM..
Why the performance of running on DSP offloaded using OpenCL is slower than that running on ARM using OpenMP?
Unless the system can hide somewhat the data movement (using DMA to move data while some other computations are taking place) this is data movement problem. Each of the cores, DSP and the ARM are capable of doing floating point multiplication and addition in a single step (in pipeline fashion) so really the bottle neck is the data in and out the DDR, 2M 32-bit elements of two vectors read and one vector write must reside in the DDR (or generated on the fly)
Since this is data movement problem and not processing problem, it is not expected that the DSP to be much faster, unless the ARM is busy doing something else at the same time. So the advantage of the OpenCL in this case is that the ARM can do something else while the DSP is busy performing the (so simple) algorithm.
When using UMat to do remap, it shows faster than using Mat, but why UMat time cost of saving results is longer than Mat?
When OpenCL is turned on and if data are in UMat, remap is directed to DSP, i.e. offload to DSP happens, but OpenCL in OpenCV has somewhat different call flow. It submits a task (to DSP OpenCL queue) and returns immediately. This allows parallelization between accelerator (DSP) and CPU, as long as data dependency is satisfied. So, when save is requested, CPU waits for end of submitted task before it can actually do the save. DSP in many cases is slower than A15 (NEON operation). The UMat cost time includes: waiting time (for DSP to finish) plus actual write and any format conversion (done on CPU). It also depends a lot on data types used, and if floating point operations are involved. This can be accelerated if DSP optimized implementation of remap() is created.
To optimize DSP, please follow guideline in Chapters Creating OpenCL C kernel optimized for C66 core to Alternative approach to add new OpenCL kernels at OpenCV application level
Why isn’t the performance improved when calling dsplib and use OpenMP to accelerate?
There is overhead involved in dispatching compute to the DSP. If the amount of compute in the offloaded region is small, the user can notice a slowdown. The “null” OpenMPAcc example that ships on the target file system (/usr/share/ti/examples/openmpacc/) can be run to determine the overhead involved in dispatching a target region.