Examples Users Guide
The Proprietary RF examples are split in to 2 types:
- RF Driver Examples
- EasyLink Examples
The RF driver offers very low-level API’s to run radio operation commands on the RF core and send and receive raw packets.
The EasyLink layer is an abstraction layer above the RF driver API’s for the more convenience. It uses the RF driver and executes radio operation commands. The EasyLink library was developed to be simple enough for developers to extend for their needs and should be seen as a starting point for adding an API on top of the RF driver. The EasyLink examples show how to develop an RF application on top of the EasyLink API.
RF Driver Examples
The RF Driver examples can be imported from the SDK directory:
C:/ti/simplelink_cc13x0_sdk_${VERSION}/examples/rtos/<PLATFORM>/drivers/
| Packet RX/TX: | Shows how to send and receive packets using the RF driver. The PHY/RF settings can be modified using SmartRF Studio. Commands exported and used directly in code. Out of the box IEEE 802.15.4g GFSK 50kbps is used. Easy to change to e.g. Long Range Mode or custom PHY settings. |
|---|---|
| Synchronized Packet RX/TX: | |
In this example you will learn how to build a time-synchronized connection between one transmitter and a receiver. This leads to the lowest possible power consumption on both sides. Time synchronization builds also the foundation for Frequency and Time Division Multiple Access, FDMA and TDMA respectively. |
|
| Wake On Radio RX/TX: | |
These examples showcase the Wake-on-Radio (WoR) functionality of the CC13x0 family to significantly lower the power consumption of an RF link by duty cycling the RF core. It shows how to use the RF Driver to schedule automatic wake-ups and send messages with long preambles. |
|
| Listen Before Talk: | |
The Listen Before Talk (LBT) TX example illustrates how to implement a simple, proprietary LBT algorithm using the command chaining feature of the CC13x0 family. |
|
| Packet Error Rate: | |
System example that showcases all available PHY configurations in one application. Multiple packets are transmitted or received and the packet error rate is calculated. The result is shown on the Display as well as a VT-100 compatible UART console. |
|
| Carrier Wave: | Basic example for RF performance measurements and testing, written directly on top of the TI-RTOS RF driver. Set the radio into various test modes. Transmission of modulated or unmodulated signal. Easy to change radio configuration. Use radio settings exported from SmartRF Studio. |
EasyLink Examples
The EasyLink examples can be imported from the SDK directory:
C:/ti/simplelink_cc13x0_sdk_${VERSION}/examples/rtos/<PLATFORM>/easylink/
| EasyLink RX/TX: | The EasyLink RX and TX examples show how to use the EasyLink API, how to set the frequency, and how to transmit and receive packets. One board can run the RX example while the other runs the TX example. The transmitter sends a packet every 100 ms, with a delay of 300ms between every 10th packet. The LED on the receiver board will blink for every packet received. |
|---|---|
| EasyLink Network Processor: | |
The EasyLink API has been exposed over an AT Command Interface such that it can be exercised by Host SW (running on a PC, MPU or MCU) or by a human using a serial terminal emulator over a UART. |
|
| Wireless Sensor Network: | |
The Wireless Sensor Network (WSN) Node and Concentrator examples illustrate how to create a very basic sensor network consisting of one or many Node device(s) and a Concentrator device. The example shows how to form one-to-many network where the Nodes send messages to the Concentrator. The Node use the Sensor Controller Engine to periodically read the value of the light sensor. Whenever the sensor value change, the main controller wakes up and sends a packet with the value to the Concentrator. The Concentrator is always waiting for incoming packet. Once a packet is received, the Concentrator sends an acknowledgement packet in return and displays the data on an LCD (if the kit has one) |
|
| Wireless Sensor Network Dual Mode: | |
Extended versions of the Wireless Sensor Network examples that show how to combine BLE advertisements and a simple sub-1GHz Wireless Sensor Network. |
|
Running examples in Code Composer Studio (CCS)
The following walks through importing and building one of the proprietary RF examples using the CCS IDE and the TI Resource Explorer.
If CCS v7 is not already installed; download and install CCS from here: https://processors.wiki.ti.com/index.php/Download_CCS.
If it is installed it is recommended that you install the available updates (Arm 16.9.0.LTS or higher is required).
Download and install the CC13x0 MCU SDK from https://www.ti.com/product/CC1310/toolssoftware#softTools.
This step is recommended, but optional as the TI Resource exploerer can download the examples from the resource explorer server. The rest of this section will assume that you have downloaded the SDK.
Open CCS, and use the menu option
View-> Resource Explorer.Browse to the example of interest in the Resource Explorer.
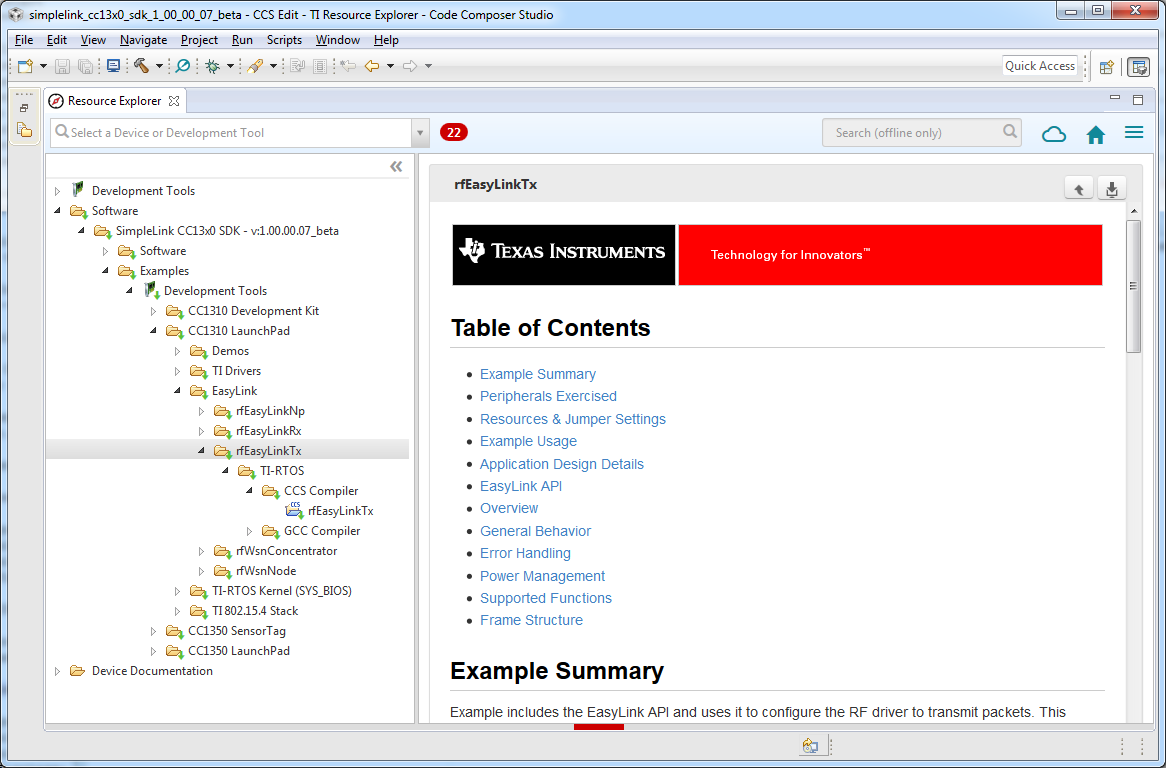
Figure 7. CCS Resoure Explorer Examples
Note
EasyLink examples can be found in the EasyLink folder and the RF Driver examples can be found in the TI Drivers directory.
Select the CCS or GCC compiler, we recommend using the CCS compiler, but compiling with GCC in the CCS IDE is also possible. Then select the example name and click the CCS icon in the top left to import it into your workspace.
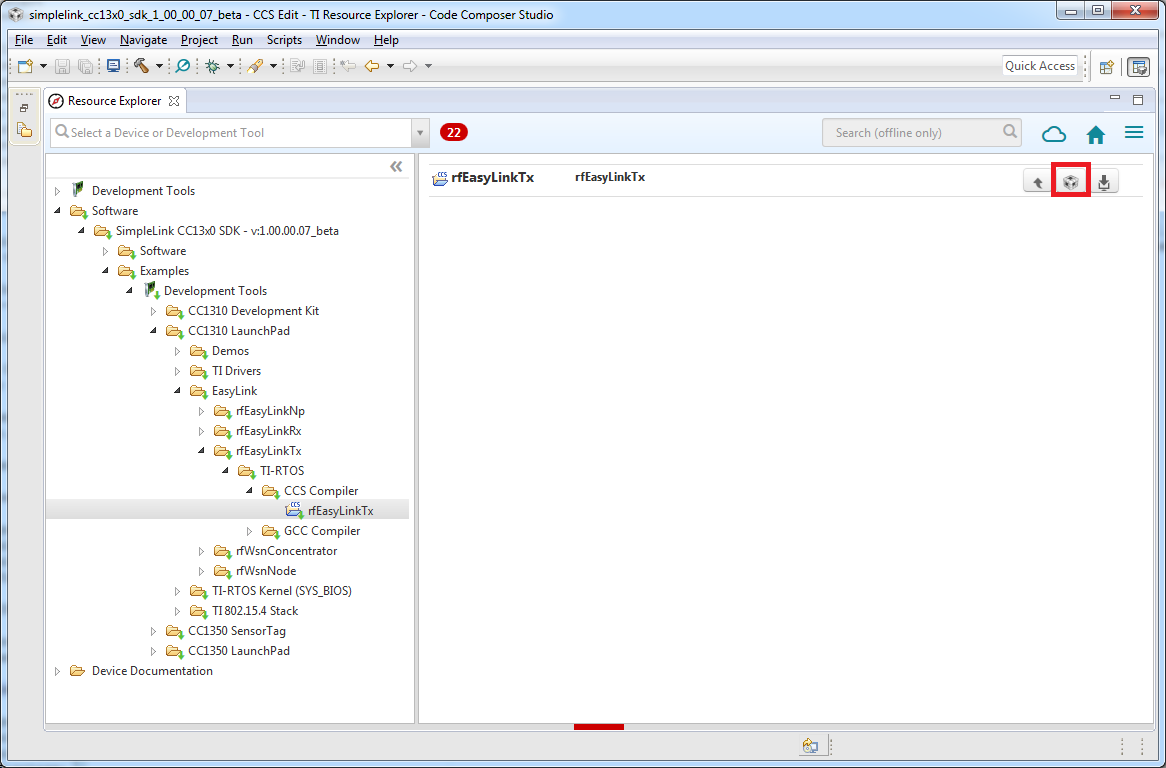
Figure 8. CCS Project Selection
You will notice that 2 projects have been included in the workspace:
rfEasyLinkTx_CC1310_LAUNCHXL_tirtos_ccstirtos_builds_CC1310_LAUNCHXL_release_ccs
As well as the example selected there is also the tirtos_builds project which is a platform and compiler specific TIRTOS build. This will only build once and is shared by all the projects for that platform and compiler in your workspace.

Figure 9. CCS Project workspace
Build and download and debug the project by clicking on the ‘bug’. The first time it will take some time due to the TI-RTOS build.

Figure 10. CCS Debug
Click run to run the example.

Figure 11. CCS Run
Running examples in IAR
If IAR ARM Workbench v7.70.1 or higher is not already installed, download and install IAR Workbench for ARM from http://www.iar.com .
Download and install the CC13x0 MCU SDK from https://www.ti.com/product/CC1310/toolssoftware#softTools .
Before creating the IAR project you must first build the TIRTOS build for that platform.
Correct the IAR install path in <SDK Base>/imports.mak
XDC_INSTALL_DIR        ?= c:/ti/xdctools_3_32_01_22_core


CCS_ARMCOMPILER        ?= c:/ti/ccsv7/tools/compiler/ti-cgt-arm_16.9.0.LTS
GCC_ARMCOMPILER        ?= c:/ti/ccsv7/tools/compiler/gcc-arm-none-eabi-4_9-2015q3
IAR_ARMCOMPILER        ?= c:/PROGRA~2/IARSYS~1/EWARM-~1.1/arm
To find the correct DOS path you can:
- Open a command prompt.
- Navigate (cd) into the directory.
- Enter the command
for %I in (".") do echo %~sI
For example; to find the DOS path for
c:\Program Files (x86)\IAR Systems\EWARM-v7.70.1\arm:c:\>cd "c:\Program Files (x86)\IAR Systems\EWARM-v7.70.1\arm" c:\Program Files (x86)\IAR Systems\EWARM-v7.70.1\arm>for %I in (".") do echo %~s c:\Program Files (x86)\IAR Systems\EWARM-v7.70.1\arm>echo c:\PROGRA~2\IARSYS~1\EWARM-~1.1\arm c:\PROGRA~2\IARSYS~1\EWARM-~1.1\armThe resulting path is
c:\PROGRA~2\IARSYS~1\EWARM-~1.1\arm. You must then replace the backslashes ‘\’ with forward slashes ‘/’ before adding it to imports.mak.IAR_ARMCOMPILER ?= c:/PROGRA~2/IARSYS~1/EWARM-~1.1/arm
Choose the <PLATFORM> you are using from:
CC1310_LAUNCHXL CC1310DK_7XD CC1350_LAUNCHXL CC1350STK Open a command prompt and change the directory to <SDK Base>/kernel/tirtos/builds/<PLATFORM>/release/iar:
c:\> cd C:\ti\simplelink_cc13x0_sdk_1_00_00_xx\kernel\tirtos\builds\CC1310_LAUNCHXL\release\iar
Build TIRTOS using the XDC gmake utility:
c:\ti\simplelink_cc13x0_sdk_1_00_00_07_beta\kernel\tirtos\builds\CC1310_LAUNCHXL\release\iar> c:\ti\xdctools_3_32_01_22_core\gmake
The build output should look like:
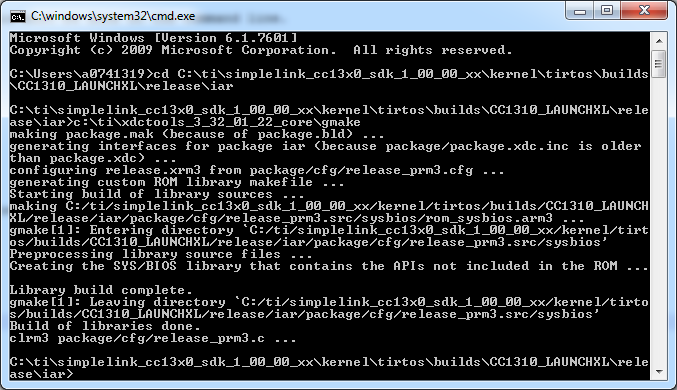
Figure 12. IAR Console Build
Open IAR and create a new workspace with the menu option
File -> New -> WorkspaceImport the IAR Custom Argument Variables file with the menu option
Tools -> Configure Custom Argument Variables. The location and file to be imported isC:/ti/simplelink_cc13x0_sdk_1_00_00_xx/tools/iar/SIMPLELINK_CC13XX_CC26XX_SDK.custom_argvars.
Figure 13. Custom Argument Variables
Save the Workspace with the menu option
File -> Save Workspace As....To enable the Custom Argument Variables for this workspace close and open the workspace with the menu options
File -> Close WorkspaceandFile -> Open -> Workspace.Select the menu option
Help -> Information Centerand select the Integrated Solutions icon: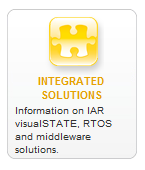
Figure 14. Integrated Solutions
Select the Texas Instruments Example projects and then click on the example applications link.

Figure 15. Texas Instruments Examples
Follow the instructions on this page to import and make the project.
Remember to import the platform that TIRTOS was built for in this earlier step.
To download and debug the project you must first select the correct debugger.
- Select the menu option
Project -> Options.... - In the
Debuggercategory selectTI XDS:
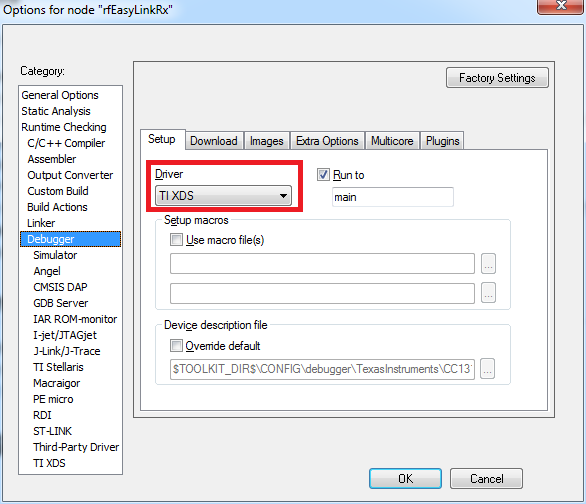
Figure 16. IAR Debugger
In the
TI XDScategory select the correct emulator for the platform: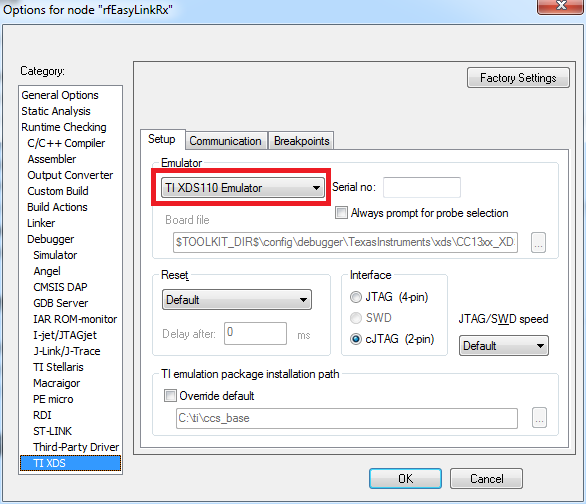
Figure 17. TI XDS Debugger
The correct emulators for the platforms support are:
CC1310 LaunchPad TIXDS110 Emulator CC1350 LaunchPad CC1350 SensorTag CC1310 DK TIXDS100v3 Emulator
- Select the menu option
Download and debug the example with the menu option
Project -> Download and Debug.