Introduction
This application combines the Auto Valet Parking Application 2 application and the 3D Surround View Application application on a single J721e SoC. This demo utilizes two separate displays to output a live camera surround view image in addition to an output showing multiple deep learning networks for parking spot detection, vehicle detection and semantic segmentation.
Supported plaforms
| Platform | Linux x86_64 | Linux+RTOS mode | QNX+RTOS mode | SoC |
| Support | NO | YES | YES | J721e |
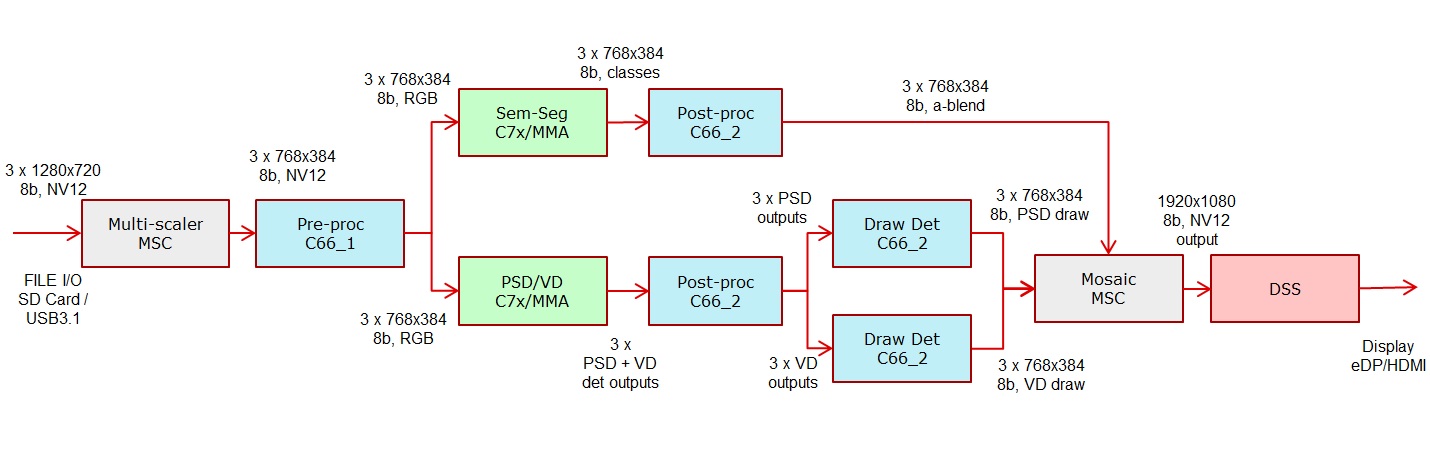
Data flow
The auto valet parking data flow can be seen below:
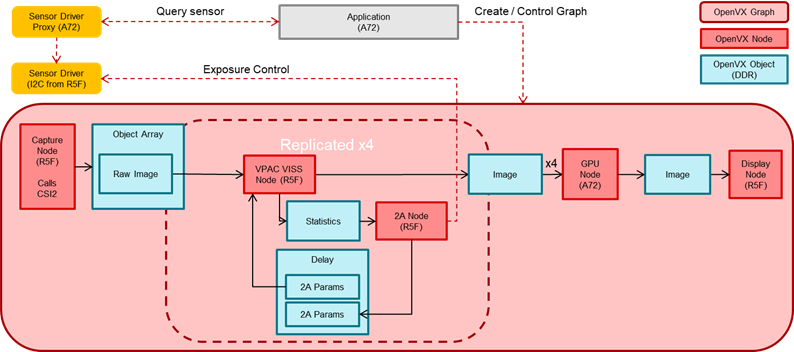
The surround view data flow can be seen below:
Steps to run the application on J721e EVM
- Dual display mode must first be enabled prior to building. This can be done by undefining the ENABLE_DSS_SINGLE and defining the ENABLE_DSS_DUAL macros as seen below in the file platform//rtos/common/app_cfg_mcu2_0.h.
#undef ENABLE_DSS_SINGLE
#define ENABLE_DSS_DUAL
- Ethernet firmware must also be disabled in order to run this demo. The instructions for doing so can be found here How to disable ETHFW
- Build the application and related libraries as mentioned in Build Instructions for Linux+TI-RTOS mode
- Sample config files "app_avp2.cfg" and "app_srv.cfg" are provided under "/opt/vision_apps/app_srv_avp" folder on the rootfs partition. The Auto Valet Parking Application 2 and 3D Surround View Application explain details on how to configure these files properly.
- Follow steps 1-3 as mentioned in Run Instructions
- Important note: be sure to extract all test data to SD card or else the demo won't run
- The input files come from "${VX_TEST_DATA_PATH}/test_data/psdkra/"
- In Linux+RTOS or QNX+RTOS mode
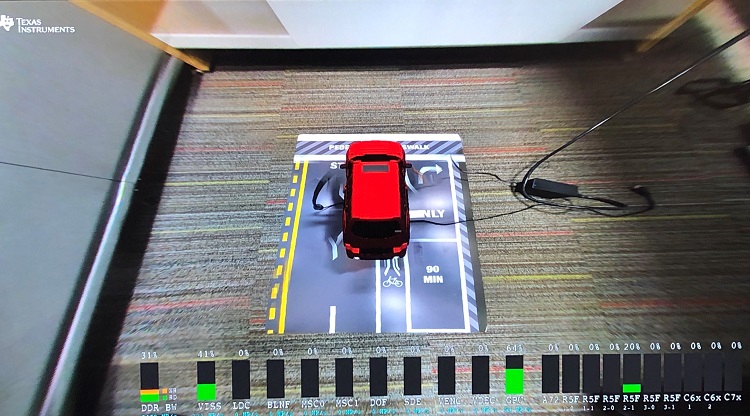
- Setup requirements:
- Connect 4 D3-IMX390 (Version1-D3RCM) sensor boards on cam0-cam3 input port of the Fusion1 Platform, as shown in the above image. (Note: these are the only sensors that have been tested with the SRV demo). Please ensure that the power to the Fusion1 Platform is connected.
- The four cameras must be connected in the order front, right, back, left to cam0, cam1, cam2, cam3 respectively.
- An eDP display and an HDMI display with infotainment daughter card must be connected to the EVM in order to visualize the Surround View output and the Valet Parking application. Note: the display type is chosen via a build option as described in Step 3 of Run Instructions
- Prior to running the SRV demo, the Surround View Calibration demo must be run in order to view a properly calibrated demo.
- After running the Surround View Calibration demo, the following files will be located in the "${VX_TEST_DATA_PATH}/test_data/psdkra/srv/srv_app/" path:
- CALMAT.BIN
- CHARTPOS.BIN
- LENS.BIN
- You may need to power cycle the board after running the calibration demo. If the SRV demo hangs after running calibration, please power cycle the board.
- VX_TEST_DATA_PATH environment variable is set as part of vision_apps_init.sh
- Run the app as shown below on the EVM target
cd /opt/vision_apps
source ./vision_apps_init.sh
./run_app_srv_avp.sh
- Output will be visualized in real-time on your screen
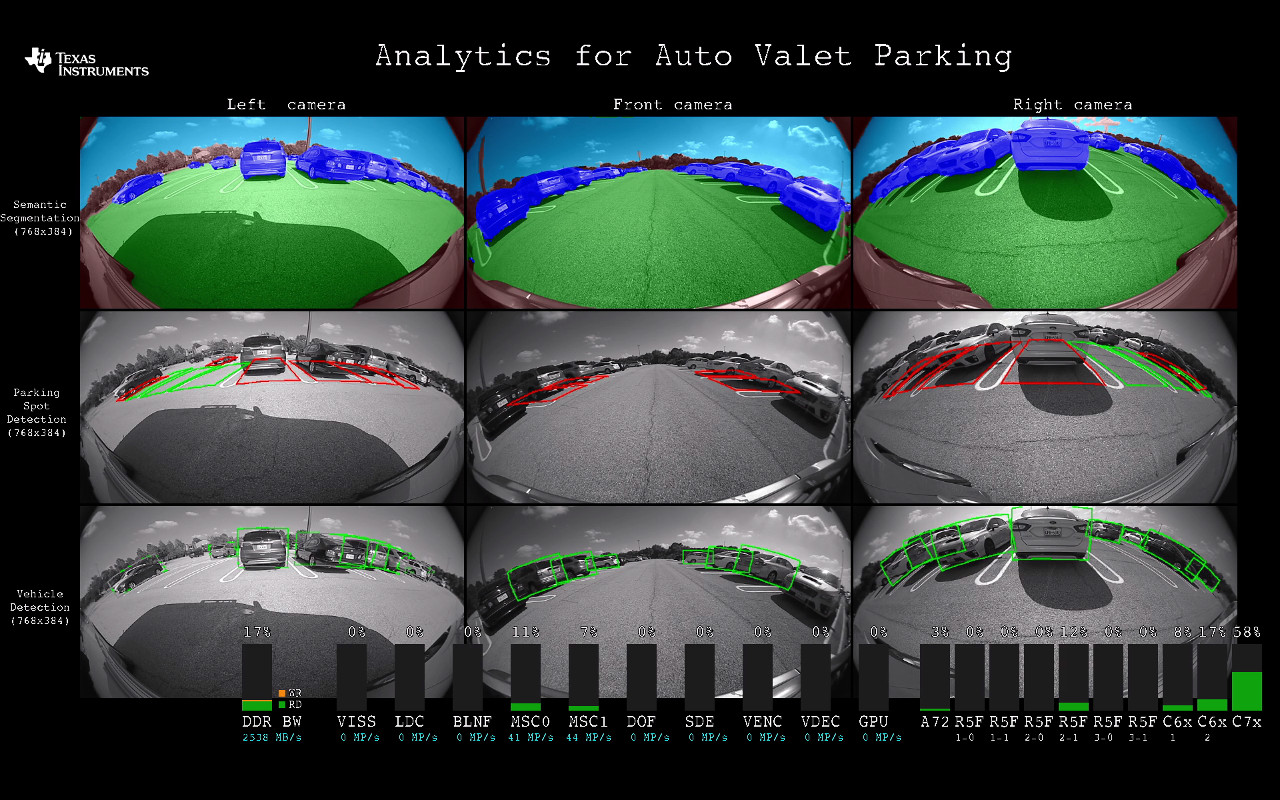
Sample Output
Shown below are sample outputs seen on each of the dual displays.


 1.8.15