4.1.2. How to Setup a Samba Server
Introduction
When using a Virtual machine you may share files & folders via the Share Foldr feature of that partoicular Virtual Machine. Another alternative, especially if you are using a dedicated Linux host, is to configure a Samba server on your Linux host.
Samba allows a host to interact with a Microsoft Windows client or server as if it is a Windows file and print server. In other words, if you are installing software on a Windows machine, you can easily transfer/modify files to the host machine by accessing it (the host machine) through windows.
Installing a Samba Server
1. Samba can be installed by opening a terminal. (Applications -> System Tools -> Terminal)
2. Switch to root user by typing su and entering the password you set during the install.
On Fedora install Samba with the yum command: system-config-samba
Open the Samba GUI (System -> Administration -> Samba).
Configure the share
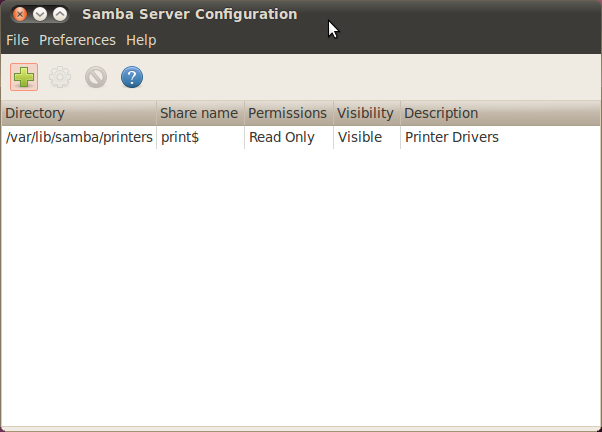
Click on “Add Share”
Specify the directory you want to share. For example, /home/<username>
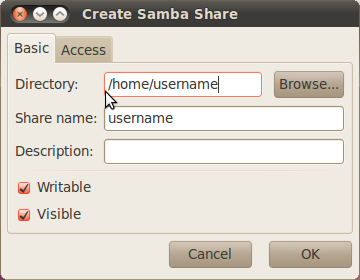
Check both the Writable and Visable boxes
On the “Access” tab, select the Allow access to everyone option
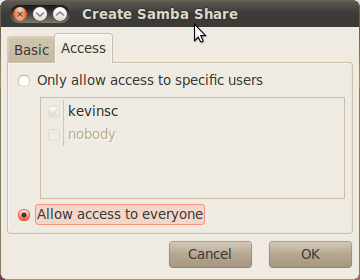
Select “OK”
Set up the workgroup
From the toolbar, select Preferences -> Server Settings
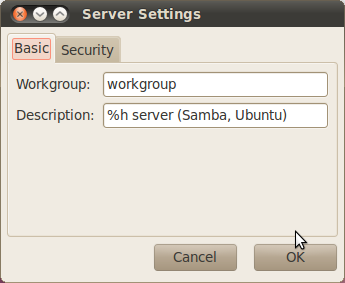
Specify the “Workgroup” to match the workgroup on your Windows environment
Select “OK”
Add a user
From the toolbar, select Preferences -> Samba Users
Click “Add User”
From the “Unix Username” dropdown box, select the username you set up
In the “Windows Username” and password boxes, enter the Unix Username and password for that user, respectively.
Select “OK”
Turn off the firewall
System -> Administration -> Firewall
Select the “Disable” button
NOTE - If you are within your company’s firewall you may need to configure the network proxy.
Enable the Samba and NFS services
System -> Administration -> Services (NOTE - Not available in Ubuntu 10.04 LTS. However the Samba service should start automatically)
Enable the services by browsing through the list on the left and locating nfs and smb. If they are not already enabled, enable them by clicking the “Enable” button.
Test the configuration
From a terminal on the Linux workstation, type the command <prompt> ifconfig and note the IP address
From your Windows machine, go to Start -> Run and type \\<IP_ADDR> replacing <IP_ADDR> with the IP address of the Linux system