1.1. Getting Started Guide
Welcome to the Linux Getting Started Guide
Thanks for your interest in learning more about the Linux Software Development Kit (SDK). The SDK as we affectionately call it is our attempt to provide a great starting point to develop an embedded system on a TI Processor running Linux. Given this goal, we wanted to provide something that is more than just a typical Board Support Package (BSP) containing a bootloader, Linux kernel, and filesystem. While these are certainly necessary elements, we feel they are just a starting point, especially for those that aren’t experts in developing with Linux. So, the SDK also contains tools for developing on TI Processors (a validated cross-compiling toolchain, for example), pre-built libraries that you can use without having to rebuild them yourself, and some documentation to help explain how all of these pieces work together. We package all of this together with a working Linux Embedded System that has been built with all of the things mentioned above, and it contains a featured application called “Matrix” (derived from the fact that it is basically a simple Graphical User’s Interface (GUI) of icon’s arranged in a “matrix”). Matrix is a fairly simple embedded Linux system that highlights some of the key features of the TI Processor offering (LCD display, graphics, networking, etc.).
What it really serves as is a “known good” starting point. One of the big challenges with starting development on a new platform (not to mention, a new Operating System (OS) for many), is getting an environment set up where you can build and debug code on hardware. The SDK attacks this problem with providing everything you need to do development, and it is validated on standard TI hardware platforms (EVMs) (see here for more details). It wraps all of this up into one simple installer that helps get everything you need in the right place to do development. For example, you can start off with simply re-building the Linux Embedded System that we provide to validate that everything is working on your system. This simple step gives you confidence that you can move forward from a good baseline.
As you go along your development journey and have questions, there is documentation and support available to you. Make sure to save a pointer to the `Linux SDK Software Developer’s Guide`_. If you don’t find what you need, take a look at the active E2E Processor Support Forum and see if the topic has been covered before. If not, post a new thread and we’ll do our best to provide some guidance.
What would you like to do with the SDK?
As described above, the SDK has a lot to it. Let’s break it down to two pieces to simplify things a bit:
- The example `Embedded Linux System`_ starring Matrix. Essentially, a working bootloader (U-Boot), Linux kernel, and filesystem that can be put on an SD card and ran on a TI EVM, or even one of the very popular Beaglebones (either the original “white” or the newer “black”). For K2H/K2K, K2E, and K2L platforms which are not using SD cards, U-Boot is loaded to NOR, Linux kernel is fetched from TFTP server, and filesystem is on NFS.
- Everything needed to create the above embedded system from “scratch”:
- U-Boot sources and configuration files
- Kernel sources and configuration files
- A Linaro cross-compiling toolchain as well as other host binaries and components
- A Yocto/OE compliant filesystem and sources for example applications in Matrix
- A variety of scripts and Makefiles to automate certain tasks
- Other components needed to build an embedded Linux system that don’t fit neatly into one of the above buckets
With these two pieces more clearly defined, we can now get back to that all important question, “What would you like to do with the SDK?”. If the answer is clearly “I want to build something and I’m ready to start developing now!”, then go ahead and skip down to the “I want to Develop!” (or, `Developing with the Linux SDK`_ section below for instructions on installing the SDK on a Linux Host System. This is a somewhat involved process focusing on the second of the two parts of the SDK listed above and may be more than some people want to start with. However, it provides access to the full spectrum of development from rebuilding the SDK from sources to fully adapting it with new device drivers and applications.
Note
For K2H/K2K, K2E, and K2L platforms which are not using SD cards, please also go ahead and skip down to the “I want to Develop!” (or, `Developing with the Linux SDK`_ section.
So, if you’re not quite there yet, let’s discuss some other options. Maybe you’d like to evaluate the SDK a bit to see if it is how you’d like to get started.
If this is not good enough and you really want to get your hands on something, check out the next section which shares how to play with the embedded Linux system featuring Matrix, the first piece of the SDK mentioned earlier. All you’ll need is access to a Windows/Linux computer, a SD card, a SD card reader, some free, open-source software, and a supported `Hardware Platform`_.
Evaluating the SDK Embedded Linux System and Matrix
If you’re a hands on person, reading documentation and looking at presentations gets old fast. So, if you want to see an example of what you can build with the SDK and actually hold it in your hands and play with it (or show it to someone else that needs help understanding what you want to do with it), with minimal effort, you can simply run the SDK Embedded Linux System with Matrix on a supported `Hardware platform`_. This will allow you to poke and prod and interact. It’s a powerful way to get the imagination active and engaged.
If you’ve recently purchased a TI EVM or Starterkit, it should have came with a SD card with the SDK on it. If that is the case, simply plug the card in, boot it up, and let your imagination run wild. However, if you’re like us and the boards you are given never have all of the stuff they came with, or if you purchased a Beaglebone or Beaglebone Black, you might not have a SD card with the SDK on it. Or, maybe, the SDK on your SD card is simply a few revisions old and you want the latest and greatest. If that is the case, check out the `Creating a SD Card with Windows`_ page. Just remember, you won’t be able to build or change anything, simply evaluate the SDK Embedded Linux System with Matrix as delivered. But, even this is enough to get the imagination going and all some folks want to do.
Note
The above is not applicable to K2H/K2K, K2E, and K2L platforms, which are not using SD card.
Start your Linux Development
OK, you’re all in. Either you’ve known this is what you wanted to do, or you’ve gone through the above steps and you want to do more. It’s time to develop! Here’s a high level overview:
- Get a Linux host up and running if you don’t already have one
- Install the SDK and run some scripts to get everything set up
- Put the SDK Embedded Linux System on a SD card or TFTP/NFS to play with
- Build something to validate set up – the SDK for example
- Add something to the SDK, like a simple Hello World app
After completing these steps, you’ll have a known good baseline from which you can start development.
Configure a Linux Host - If you already have a Linux host machine, go to Step 2.
To do Linux development with the SDK, you’ll need a host PC running Linux. The Linux host is generally much faster and has a lot more memory (both RAM and hard disk space) than the typical embedded system. While it is certainly possible to do all development natively, we feel the advantages of using a host provide a better way to go and what is supported out of the box with the SDK.
There are many, many ways to get access to a Linux host. We simply can’t validate all possibilities and iterations, therefore we focus on validating using Ubuntu as the host Linux distribution, running natively. We validate the Long-term Support (LTS) versions of Ubuntu at the time of a SDK release (for example, at the time of this writing, Ubuntu 14.04 and Ubuntu 16.04 are the currently supported LTS versions).
Can you use other versions of Ubuntu or even other distributions? Theoretically, yes, as long as you can get it to work and there may be more “assembly” required. If you can use the Ubuntu version validated against the SDK, it will be the smoothest path and we will be able to help you more if you do run into trouble.
Likewise, we would strongly recommend getting a native 64-bit Ubuntu LTS machine set up for development. For the cost of a little bit of hard drive space, Ubuntu can have direct access to the host’s hardware. Virtual Machines (VMs) have come a long way over the years, and many people use them daily without problems. However, when you are working with a target embedded system (that may be a prototype board), whether it be a TI board or eventually your own, removing the complexity of a VM from the get go can avoid a lot of frustration (i.e. wasted time). When using a VM while connecting and disconnecting hardware components, you have to be very diligent about making sure what is connected to what. You might prefer using an hour to get more work done than debugging a perceived problem caused by the fact the virtual host grabbed a USB port when you weren’t watching.
When you’re ready to proceed, Ubuntu provides a great overview for how to install natively.
Install the SDK - Within your Linux host machine, `Install the Linux SDK`_
Note
Processor SDK Installer is 64-bit, and installs only on 64-bit host machine. Support for 32-bit host is dropped as Linaro toolchain is available only for 64-bit machines
Note
At least 20 GB of free space is required on the host machine for installing Processor SDK Linux
Create a SD Card - using the `SDK Create SD Card Script`_, or One-time Program EVM for K2H/K2K, K2E, and K2L - following directions for Program EVM User Guide
Note
You will need a >8GB SD Card and the capability to connect that card to your Linux Host machine (using a USB SD Card reader, for example).
Note
If using a virtual machine as your Linux host, you may need to import the SD Card reader into your virtual machine (disconnect it from the host and connect it to the VM so that the Linux VM can see it).
Note
For K2H/K2K, K2E, and K2L platforms which are not using SD card, one-time EVM programming is needed if u-boot has not been loaded before or the previous u-boot is somehow corrupted. Please see details at Program EVM User Guide.
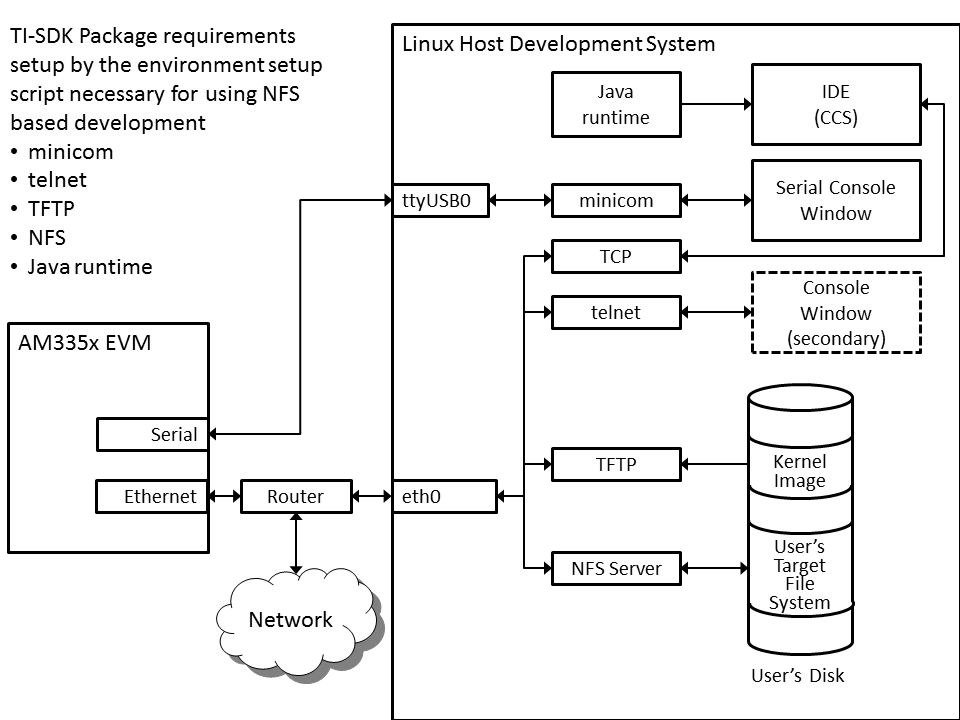
Configure your development environment
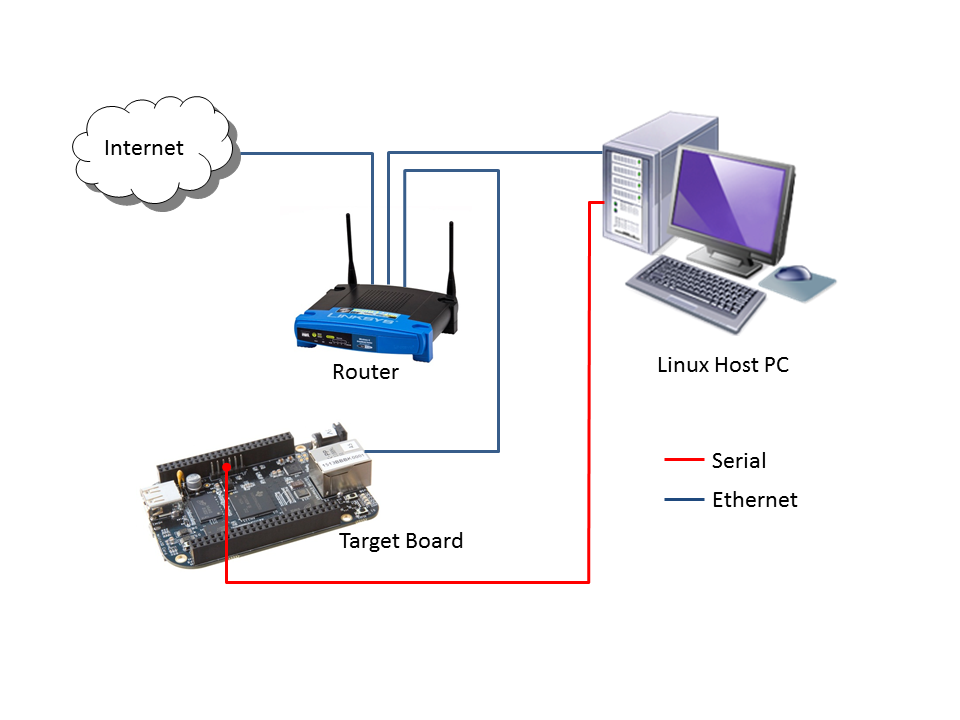
There are many ways to connect the host development platform and the target board. These connections will vary depending on how you like to develop and what you are trying to do. Here is an example of a common set up with a serial connection for console and ethernet for networking (TFTP, NFS, etc.):
Note
The recommended setup is to use TFTP for booting the kernel and NFS for hosting the target root filesystem. Since the SDK provides full cross-compile development environment for the x86 host, this configuration will simplify the transfer of files to and from the target platform.
Use the SD Card to boot the target board properly connected for your development environment
Note
This is not applicable to K2H/K2K, K2E, and K2L platforms. For those platforms, power up the EVM and stop at the U-boot prompt as described in Program EVM User Guide
Run the Setup Script - Once the SDK has been installed, `Run the Setup.sh Script`_ on your host to guide you through the remaining development environment configuration.
Note
If using a virtual machine as your Linux host, you will likely need to import the target board into the virtual machine as a mass storage device.
Rebuild sources using the top-level Makefile in the SDK root directory. For example:
make allrebuilds all components in the SDKmake linuxconfigures and builds the kernelmake u-boot-splbuilds u-boot and u-boot-splThe file system can be rebuilt following the instructions at `Building the SDK`_.
Note
Starting with Processor SDK 3.3, some components such as Jailhouse Hypervisor needs a newer make (> 3.81) that what comes by default with Ubuntu 14.04. Please check your make version (make -v) and upgrade to latest using following instructions. You can make it your default make by prefixing /usr/local/bin to your $PATH variable in your shell startup file; for instance, in .profile or .bashrc if you use the bash shell. Don’t try to install a self-compiled make (or anything else that doesn’t come from the distribution’s package manager) into /bin or /usr/bin; doing that will confuse your package manager.
cd /tmp
wget https://ftp.gnu.org/gnu/make/make-4.1.tar.gz
tar xvf make-4.1.tar.gz
cd make-4.1/
./configure
make
sudo make install
cd ..
rm -rf make-4.1.tar.gz make-4.1
What Would You Like to do Next?
Now that you have a solid baseline set up, you can choose what you’d like to do next based on what you need to do. Here are some of the many possibilities:
| Link | Summary |
| AM335X, AM437X, AM57X, 66AK2Ex, 66AK2Gx, 66AK2Hx, 66AK2Lx | Download the SDK |
| `Processor SDK Linux Software Developer’s Guide`_ | The SDK’s Homepage, a must have link for SDK users. |
| Processor SDK Training Series | This series provides an introduction to the Processor SDK and how to use this software to start building applications on TI embedded processors. |
| Processor SDK Linux Training: Hands on with the Linux SDK | The next step in learning about the Processor SDK Linux. This lab walks through how to use the SDK and Code Composer Studio with examples applications. |
| Debugging Embedded Linux Systems Training Series | This series teaches the techniques of debugging kernel issues that may be encountered in embedded Linux systems. It explains the Linux kernel logging system and logging API, illustrates how to locate a particular device driver, and demonstrates how to read kernel oops logs. |
| `Processor SDK Linux How-To Guides`_ | The SDK How-To pages. The Hands On with the SDK has some great information for developing your first Linux application. |
| `Processor SDK Linux Kernel`_ | More information on the Linux Kernel provided with the SDK (how to build it, for example). |
| `Processor SDK Linux U-Boot`_ | Everything you want to know about U-Boot, the bootloader provided with the SDK. |
| `Processor SDK Linux Filesystem`_ | Details about the various Filesystems delivered with the SDK, and their contents. |
| `Processor SDK Linux Tools`_ | Documentation for all of the various tools included with the SDK. |
1.1.1. Linux SD Card Creation Guide
1.1.1.1. Overview
The Linux SDK includes a script in the <SDK INSTALL DIR>/bin directory named create-sdcard.sh. The purpose of this script is to create SD cards for the following high-level use cases:
- Create the SD Card using default images from the Processor SDK for Linux
- Create the SD card using custom images
- Create the SD card using partition tarballs (This is not common and is used most often by board vendors)
The script will give you information about each step, but the following sections will go over the details for the use cases above and walk you through how to use the script as well.
1.1.1.2. Common Steps
No matter which use case above that you are creating an SD card for the following steps are the same. |
Invoking the Script
The create-sdcard.sh script can be run from any location but must be run with root permissions. This usually means using the sudo command to start execution of the script. For example:
sudo <SDK INSTALL DIR>/bin/create-sdcard.sh If you fail to execute the script without root permissions you will receive a message that root permissions are required and the script will exit.
Select the Target Board [AM65x/DRA80xM Only]
Due to a limitation in automatically detecting the specific board, the script for AM65x/DRA80xM will request this information from the user. The following options are available:
- am65x_evm : AM654x EVM (TMDSEVM654X)
- am65x_idk : AM654x Industrial Development Kit (TMDXIDK654X)
- unknown
This information is used to determine which board features are required to be enabled in the Linux kernel. Therefore, if unsure, unknown is a valid option. The resulting SD card will be capable of booting Linux, but minimal board support will be available.
Select the SD Card Device
The first step of the script will ask you to select the drive representing the SD card that you want to format. In most cases your host root file system drive has been masked off to prevent damage to the host system. When prompted enter the device number corresponding to the SD card. For example if the output looks like:
Availible Drives to write images to:

#  major   minor    size   name
1:   8       16    7761920 sdb

Enter Device Number:
You would enter 1 to select the sdb device
NOTE: For most common installations, this script works fine. However, if you are using more advanced disk slicing and volume management, the presented list of device nodes are off by one; in the best case (picking the last item) it will flag a range error, and in the worst case (anything in the middle) the wrong DASD can be destroyed. The problem originates when it attempts to determine the $ROOTDRIVE to “mask” the volume where “/” is mounted from the selection list using a “grep -v $ROOTDRIVE” For the naive partitioning case, its heuristic is fine, yielding something like “sda” — but for LVM, it grabs some chunk of the device name, e.g. “mapp” (out of “/dev/mapper/kubuntu–vg-root on / type ...”)
Re-Partitioning the SD Card
Any partitions of the device that are already mounted will be un-mounted so that the device is ready for partitioning.
If the SD Card already has partition you will see a prompt like the following asking you if you would like to repartition the card. If the card was not already partitioned then this step will be skipped and you can move on to the next step.
Would you like to re-partition the drive anyways [y/n] :
- Options:
- y - This will allow you to change the partitioning of the SD card. For example if you have a 3 partition card and want to create a 2 partition card to give additional storage space to the root file system you would select y here. NOTE: This operation WILL ERASE the contents of your SD card
- n - If the SD card already has the desired number of partitions then this will leave the partitioning alone. If you select n here skip on to the Installing SD Card Content section.
Select Number of Partitions
You should now see a prompt like the following which will ask you how many partitions you want to create for the SD card.
Number of partitions needed [2/3] :
- Options:
- 2 - This is the most common use case and will give the most space to the root file system.
- 3 - This case should only be used by board manufacturers making SD cards to go in the box with the EVM. This requires access to the partition tarballs used for Out-Of-Box SD cards. This option should be selected if you are going to follow the SD card using partition tarballs steps below
After selecting the number of partitions, move on to the next section.
1.1.1.3. Installing SD Card Content
After the SD card is partitioned, you will be prompted whether you want to continue installing the file system or safely exit the script.
- Options:
- y - Selecting yes here will begin the process of installing
the SD card contents. This operation WILL ERASE any existing
data on the SD card. Refer to one of the following sections for
additional instructions depending on which use case you are
creating an SD card for
- Create the SD card using default images
- Create the SD card using custom images
- Create the SD card using partition tarballs
- n - Selecting no here will allow you to have partitioned your card but will leave the partitions empty.
- y - Selecting yes here will begin the process of installing
the SD card contents. This operation WILL ERASE any existing
data on the SD card. Refer to one of the following sections for
additional instructions depending on which use case you are
creating an SD card for
1.1.1.4. SD Card Using Default Images
The purpose of this section is to cover how to use the create-sdcard.sh script to populate an SD card that can be used to boot the device using the default images that ship with the Processor SDK for Linux.
Prerequisites
- The Processor SDK for Linux is installed on your host system
- The SD card you wish to create is inserted into the host system and has a size sufficiently large (16GB or larger) to hold at least the bootloaders, kernel, and root file system.
- You have started running the script as detailed in the SD Card Common Steps section above.
Choose Install Pre-built Images
You should now see a prompt like:
################################################################################

    Choose file path to install from

    1 ) Install pre-built images from SDK
    2 ) Enter in custom boot and rootfs file paths

################################################################################

Choose now [1/2] :
You should choose option 1 to create an SD card using the pre-built images from the SDK.
If you executed this script from within the SDK then the script can determine the SDK path automatically and will start copying the contents to the SD card. Once the files are copied the script will exit.
If you executed the script from outside of the SDK (i.e. you copied it to some other directory and executed it there) please see the next section.
NOTE: option 1 will only work with the format of the default SDK directory name, which makes the Hands on with the SDK training easiest. If you have to change the directory name, use option 2 to enter the custom file paths.
Choose rootfs tarball for K2G
For K2G, you should now see a prompt like:
################################################################################

   Multiple rootfs Tarballs found

################################################################################

         1:tisdk-server-extra-rootfs-image-k2g-evm.tar.gz
         2:tisdk-server-rootfs-image-k2g-evm.tar.gz

Enter Number of rootfs Tarball:
Enter SDK Path
In the case that the script was invoked from a directory without the SDK installation in the path, i.e. the script was copied to your home directory and executed there, you may see a prompt like
no SDK PATH found
Enter path to SDK :
Enter the path to the SDK installation directory here. For example if the SDK was installed into the home directory of the sitara user the path to enter would be /home/sitara/ti-processor-sdk-linux-<machine>-<version>. You will be prompted to confirm the installation directory. The SD card will then be created using the default images and the script will exit when finished.
1.1.1.5. SD Card Using Custom Images
Often times you will use TFTP and NFS during development to transfer you kernel images and boot your root file systems respectively. Once you are done with your development you may want place these images onto an SD card so that they can be used stand-along without requiring a network connection to a server.
Prerequisites
- The Processor SDK for Linux is installed on your host system
- The SD card you wish to create is inserted into the host system and has a size sufficiently large (16GB or larger) to hold at least the bootloaders, kernel, and root file system.
- You have started running the script as detailed in the SD Card Common Steps section above.
Choose Custom Images
You should now see a prompt like:
################################################################################

    Choose file path to install from

    1 ) Install pre-built images from SDK
    2 ) Enter in custom boot and rootfs file paths

################################################################################

Choose now [1/2] :
Select option 2 to create an SD card with your custom images.
Select Boot Partition
You will now be prompted to provide a path to the location of the boot partition files. The prompt will explain the requirements of the files to be placed at the path, but the basic options are:
- Point to a tarball containing all of the files you want placed on the boot partition. This would include the boot loaders and the kernel image as well as any optional files like uEnv.txt
- Point to a directory containing the files for the boot partition like those in the first option.
The script is intelligent enough to recognize whether you provided a tarball or a directory path and will copy the files accordingly. You will be given a list of the files that are going to be copied and given the option to change the path if the list of files is not correct.
Select Root Partition
You will now be prompted to provide a path to the location of the root file sysetm partition files. The prompt will explain the requirements of the files to be placed at the path, but the basic options are:
- Point to a tarball of the root file system you want to use
- Point to a directory containing the root file sysetm such as an NFS share directory.
The script is intelligent enough to recognize whether you provided a tarball or a directory path and will copy the files accordingly. You will be given a list of the files that are going to be copied and given the option to change the path if the list of files is not correct.
1.1.1.6. SD Card Using Partition Tarballs
This option is meant for board vendors to create SD cards to go in the box with the EVM. It requires access to the three tarballs representing the the partitions of the SD card shipped with the EVM.
Prerequisites
- The Processor SDK for Linux is installed on your host system
- The SD card you wish to create is inserted into the host system and has a size sufficiently large (16GB or larger) to hold at least the bootloaders, kernel, and root file system.
- You have started running the script as detailed in the SD Card Common Steps section above.
Provide Tarball Location
After the SD card has been partitioned you will be prompted to
Enter path where SD card tarballs were downloaded :
Point to the directory containing the following tarball files:
- boot_partition.tar.gz
- rootfs_partition.tar.gz
- start_here_partition.tar.gz
The script will show you the contents of the directory given and ask you to verify that the tarballs are present in that directory. The SD card will then be populated with the contents of the tarballs and be ready for inclusion in the box with the EVM.
Additional Step for OMAPL138 after SD Card Creation
For OMAP-L138 LCDK, boot loader needs to be updated after the SD card is created as above. The pre-built u-boot-omapl138-lcdk.ais needs to be written to the SD card using the dd command. /dev/sd<N> below corresponds to the SD card device listed from the host machine.
$ cd <SDK INSTALL DIR>/board-support/prebuilt-images
$ sudo dd if=u-boot-omapl138-lcdk.ais of=/dev/sd<N> seek=117 bs=512 conv=fsync
1.1.2. Windows SD Card Creation Guide
Introduction
This page details how to use an image file to create a SD Card containing the embedded Linux system provided with the Linux SDK. This allows a user to evaluate the embedded system on a supported hardware platform.
What is Needed
- Access to a Windows PC
- A valid Linux SDK image for the appropriate processor (AM335x, for example)
- Software to decompress a zip file (ex. 7-zip)
- Software to write an image file to a SD card
- A SD card appropriate for the required hardware platform, must be 16GB or larger
- A SD card reader/writer
Steps to Follow
Here is the process to follow to create the SD card.
Download the Processor SDK for Linux image file that you want to use.
On a Windows PC, you’ll need software to decompress a zip file. Windows 7 can do this natively. If you don’t already have something that works, the open source software 7-zip is a great choice. Since this image is created with lots of empty space, this step saves about 700 MB of download time.
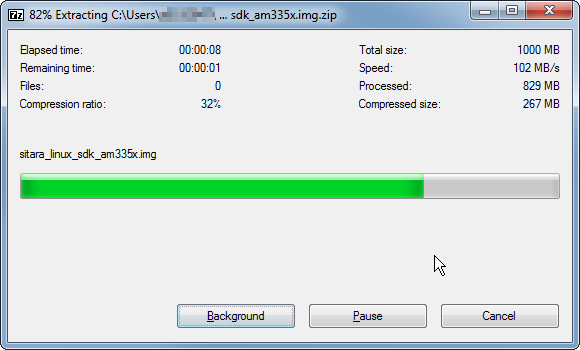
Use the decompression software to decompress the zipped file to an image file. Here’s how to do it with 7-zip:

You should see a status bar as the image is decompressed:
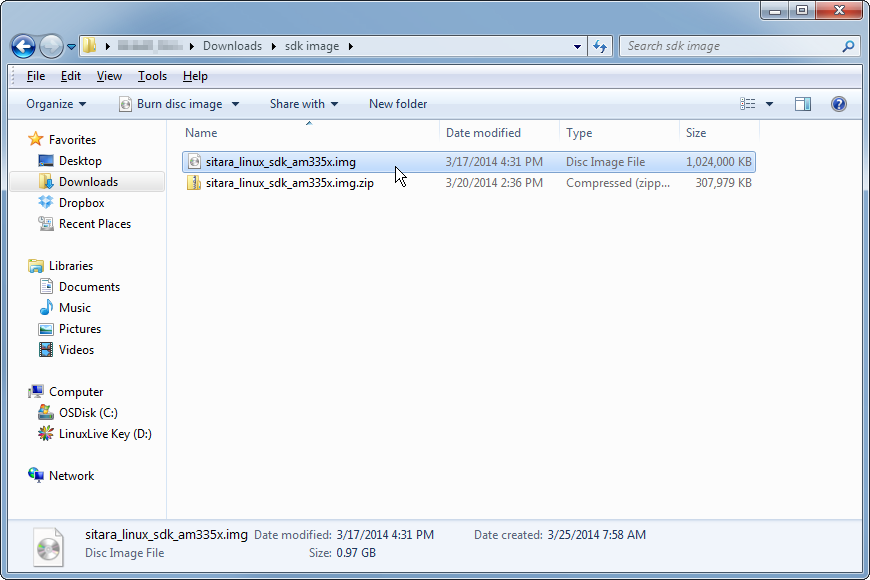
And this is what you should have when it is finished:
If you don’t have it already, download a program to write the image file to the SD card. The open source Win32 Disk Imager is a good option.
Use the software for writing an image to disk to write the decompressed .img file to the SD card.
Plug the SD card into the SD card reader/writer.
Insert the SD card reader/writer into the PC.
Launch the disk writer software, if needed.
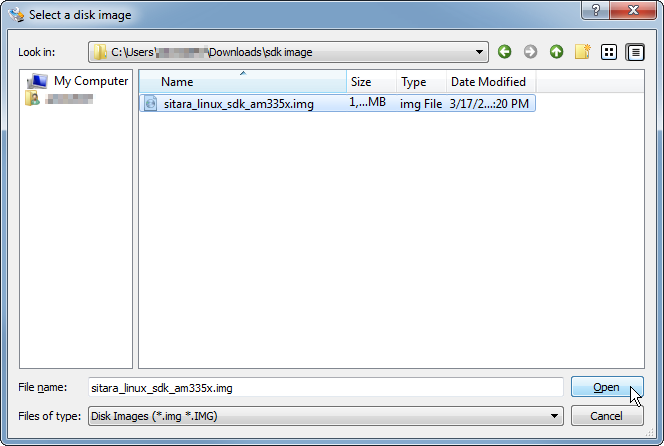
Choose the image file for the SDK that you want to write.
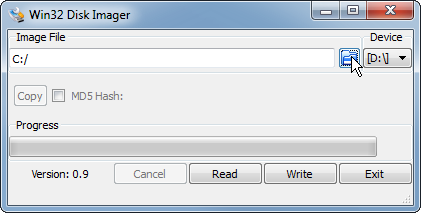
And select the appropriate SDK Image file:
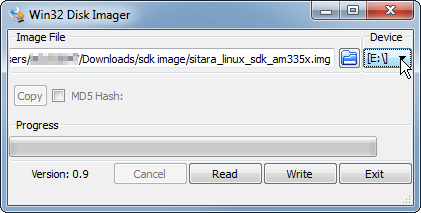
Choose the SD card as the destination.
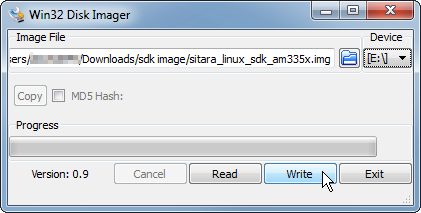
Write the image to the SD card.
Note
You’ll likely get the below confirmation box. This command will overwrite whatever disk you point it to, please make sure and choose the correct disk:

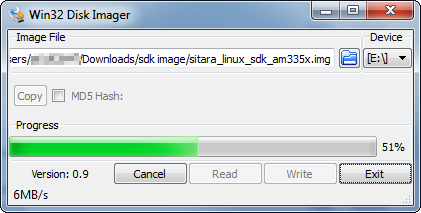
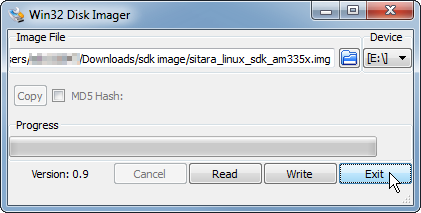
You should see the following status bar as the image is being written to the disk:
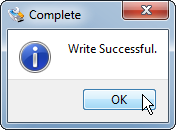
And when the write is complete, you should get a notification:
You can now close the image writing program:
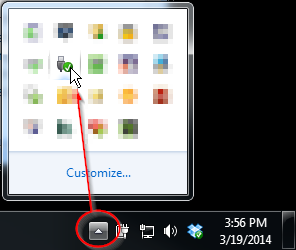
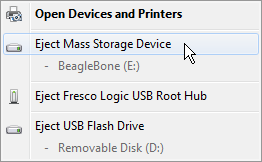
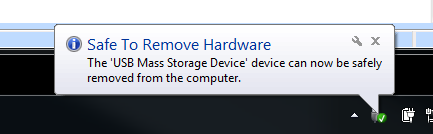
Safely eject the SD card from the computer. Here’s an example using Windows 7:
- Plug it into a supported hardware platform and boot the platform from the SD card.
- If the platform has a display (Starterkit, for example), you should see the Matrix application from the SDK. If the hardware does not have a display, you should be able to access Matrix remotely through a web browser if the PC and the board are on a common network. You can also connect to the board using a terminal emulator (ex. Tera Term) in order to view the serial console and interact with the embedded Linux system (ex. run ifconfig to get the IP address of the target board in order to connect to it to view remote matrix).
1.1.3. Download and Install the SDK
Overview
The Processor SDK Installer (ti-processor-sdk-linux-[platformName]-evm-xx.xx.xx.xx-Linux-x86-Install.bin) will install the necessary components to start your development on the TI microprocessor. The SDK consists of source for the Matrix App launcher starting point application, a development filesystem, a target filesystem, example applications, toolchain and board support package, ease of use scripts and documentation. The Processor SDK now includes the Linaro GCC toolchain. The Processor SDK was built and tested against a specific Linux Distribution name and version, Ubuntu 14.04 and 16.04. Note this does not prevent the user from installing the SDK on other Linux distributions.
How to Get the SDK Installer
There are two ways you can get the installer:
From a file downloaded from the SDK download page. This will always host the latest version of SDK.
Note
The second way below is not applicable to K2H/K2K, K2E, and K2L platforms, which are using SD card.
From the SD Card included with a TI EVM. This may not be the latest version of the SDK. We recommend checking the above site and using the latest version if at all possible. Before running the SDK Installer from the SD card, the SD Card from the EVM box needs to be mounted to your Linux Host PC (using a USB SD Card reader). The SDK Installer is found in the START_HERE partition of the SD card.
How to Run the SDK Installer
Make sure that the execute permissions are set. Bring up a terminal window and change directories to the where the installer is located (probably the Downloads directory if downloaded or the START_HERE partition mounted from the SD Card) and run the following commands:
chmod +x ./ti-processor-sdk-linux-[platformName]-evm-xx.xx.xx.xx-Linux-x86-Install.bin ./ti-processor-sdk-linux-[platformName]-evm-xx.xx.xx.xx-Linux-x86-Install.bin |
Alternatively, you can give execute permissions and run the SDK Installer by double clicking on it within your Linux host PC.
Note
If nothing seems to happen, you are probably running a 32-bit version of Linux. The installer is 64-bit, and will not execute properly.
Additional Installer Options
Invoking the installer with argument –help will list available options for the installer (e.g. text installer, etc.):
./ti-processor-sdk-linux-[platformName]-evm-xx.xx.xx.xx-Linux-x86-Install.bin –help |
SDK Installer Execution Steps
- Confirm User is to confirm if loading the Processor SDK is ok. This is important to note if the user is trying to over-install on an existing directory and has made changes to the directory.
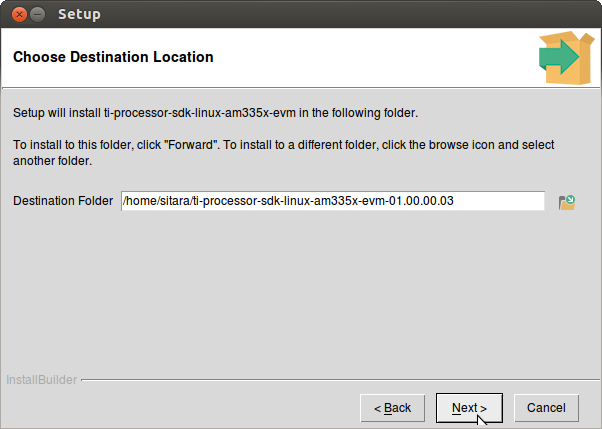
- Directory Install Location The user will be prompted for a location on where to put the Processor SDK. An example is given below.
- Installation of software The software is installed.
Where to install the Processor SDK package
The default selection of where to install is the user’s home directory. In this particular example the name of the user is ‘sitara’.
1.1.4. Program EVM User Guide
1.1.4.1. Overview
This release provides the images for the factory to program on the eeprom, nand and nor for EVMK2H, EVM2E, and EVMK2L. The mechanism only applies to the devices with DSP core, and won’t work for devices without DSP, such as AM5K2E02 and AM5K2E04 devices.
1.1.4.2. Files Provided
The files used for programming the EVMs are provided under bin\program_evm\binaries\[evmk2h, evmk2e, evmk2l].
First, create the following symbolic links of nor.bin and nand.bin.
For EVMK2H:
cd bin/program_evm/binaries/evmk2h/
ln -sv ../../../../board-support/prebuilt-images/u-boot-spi-k2hk-evm.gph nor.bin
ln -sv ../../../../filesystem/tisdk-server-rootfs-image-k2hk-evm.ubi nand.bin
For EVMK2E:
cd bin/program_evm/binaries/evmk2e/
ln -sv ../../../../board-support/prebuilt-images/u-boot-spi-k2e-evm.gph nor.bin
ln -sv ../../../../filesystem/tisdk-server-rootfs-image-k2e-evm.ubi nand.bin
For EVMK2L:
cd bin/program_evm/binaries/evmk2l/
ln -sv ../../../../board-support/prebuilt-images/u-boot-spi-k2l-evm.gph nor.bin
ln -sv ../../../../filesystem/tisdk-server-rootfs-image-k2l-evm.ubi nand.bin
| File Name | Description |
| nand.bin | Nand UBIFS image (symbolic link to tisdk-server-rootfs-image-[k2hk, k2e, k2l]-evm.ubi) |
| nandwriter_evmk2h.out | Nand Writer DSP executable |
| nand_writer_input.txt | nand image writer input file |
| nor.bin | SPI NOR file for U-Boot (symbolic link to u-boot-spi-[k2hk, k2e, k2l]-evm.gph) |
| norwriter_evmk2h.out | NOR image writer DSP executable |
| nor_writer_input.txt | NOR image writer input file |
Then, modify nor_writer_input.txt and nand_writer_input.txt to update the file name.
nor_writer_input.txt:
file_name = nor.bin
nand_writer_input.txt:
file_name = nand.bin
MD5SUM utility used
Please use the md5sum utility from the following link: http://www.pc-tools.net/files/win32/freeware/md5sums-1.2.zip
1.1.4.3. Device Support
- EVMK2H in Little endian Mode.
- EVMK2E in little endian mode
- EVMK2L in little endian mode
1.1.4.4. Directory Structure
- The program_evm (top-level) directory is intended to hold the *DSS* script for the Code Composer Studio which programs the default images to NAND/NOR/EEPROM.
- The binaries/evmxxx directory is intended to hold all the factory default images and the respective writers.
- The configs/evmxxx directory is intended to hold the “CCS target configuration files”. Use evmxxx-linuxhost.ccxml for linux.
- The gel directory holds custom GEL files for the board. It also contains a README.txt for the gel file usage.
- The logs directory is empty and will be used to store logs. Logs are automatically generated when using program_evm.js to flash evmxxx devices.
├───program_evm
│   │   program_evm.js
│   │
│   ├───binaries
│   │   └───evmxxx
│   │           eepromwriter_evmxxx.out
│   │           eepromwriter_input.txt
│   │           eepromwriter_input50.txt
│   │           eepromwriter_input51.txt
│   │           nand.bin (symbolic link created as above)
│   │           nandwriter_evmxxx.out
│   │           nand_writer_input.txt
│   │           nor.bin (symbolic link created as above)
│   │           norwriter_evmxxx.out
│   │           nor_writer_input.txt
│   ├───configs
│   │   └───evmxxx
│   │           evmxxx.ccxml
│   │           evmxxx-linuxhost.ccxml
│   ├───gel
│   │           xtcievmk2x.gel
│   │           evmk2e.gel
│   │           tcievmk2l.gel
│   │           README.txt
│   └───logs (empty directory)
1.1.4.5. Programming the bin files
This section assumes you have installed Processor SDK 02.00.01 and above (which supports EVMK2H/EVMK2L/EVMK2E) and Code Composer Studio.
1.1.4.6. Verify CCS Connection
First, start CCS on linux host machine and configure the target configuration for the EVM (e.g., bin/program_evm/configs/evmk2h/evmk2h-linuxhost.ccxml). Then, launch the target configuration, and verify the connection to the ARM and DSP through JTAG.
After the CCS connection is verified, disconnect the target connection, exit CCS and continue to Set the Environment Variables.
Update firmware on xd200 pod for USB3 Ports
Note
Please note that this section is needed only the CCS connection cannot be established successfully.
When USB3 ports are used for the JTAG, the following error can be reported when testing the connection to the target.
...
This utility has selected a 560/2xx-class product.
This utility will load the program 'xds2xxu.out'.
E_RPCENV_IO_ERROR(-6) No connection
Failed to open i/o connection (xds2xxu:0)
...
When this happens, it is required to update the firmware on the xd200 pod. This can be done on a PC which is able to communicate to the xd200 pod, and has CCS and the latest TI emulators package installed. Example:
cd ccsv6/ccs_base/common/uscif/xds2xx
xds2xx_conf.exe update xds2xxu 0 xds200_firmware_v1006.bin
xds2xx_conf.exe boot xds2xxu 0
Set the EVM for no-boot mode
For EVMK2H
Due to hardware NAND issue, EVM of certain revisions need to use alternative programming method:
| EVM Revision | NAND Known Issue | Programming Method |
| Rev 3.0 | Yes | Alternative U-Boot command |
| Rev 2.0 | Yes | Alternative U-Boot command |
| Rev 1.x | No | Program_evm |
For Rev 2.0 and 3.0 EVM using alternative U-Boot command to program NAND, please follow the steps below: Set the boot mode to SPI boot mode: Set_SPI_boot
1. Set up TFTP server
2. copy filesystem/tisdk-server-rootfs-image-k2h-evm.ubi to tftp directory
3. Have Ethernet cable connected to the EVM and verify the connection to the TFTP server
4. Boot up the EVM to the U-boot prompt and type the following commands:
u-boot# setenv serverip <TFTP server IP address>
u-boot# setenv tftp_root <tftp directory>
u-boot# setenv addr_fs 0x82000000
u-boot# nand erase.part ubifs
u-boot# dhcp ${addr_fs} ${tftp_root}/tisdk-server-rootfs-image-k2h-evm.ubi
u-boot# nand write ${addr_fs} ubifs ${filesize}
u-boot# env default -f -a
u-boot# setenv boot ubi
u-boot# saveenv
Once it is completed, the EVM is ready to use.
For Rev 1.0 EVM, make sure the EVM dip switches are set for no-boot mode and continue.
| SWITCH | Pin1 | Pin2 | Pin3 | Pin4 |
| SW1 | Off | Off | Off | On |
See instruction here for K2H no boot mode for reference K2H_Noboot
For EVMK2E
Make sure the EVM dip switches are kept as below to put the board in no-boot mode, and continue.
| SWITCH | Pin1 | Pin2 | Pin3 | Pin4 |
| SW1 | On | On | On | On |
See instruction here for K2E no boot mode for reference: K2E_NoBoot
For EVMK2L
Make sure the EVM dip switches are kept as below, and continue.
| SWITCH | Pin1 | Pin2 | Pin3 | Pin4 |
| SW1 | On | On | On | On |
See instructions here for K2L no boot mode for reference: K2L_NoBoot
Set the Environment Variables
Please make sure the below environment variables needs to be set. Otherwise there could be some unexpected behavior experienced.
1. Set the DSS_SCRIPT_DIR environment variable (Mandatory) to your Code Composer Studio scripting bin directory. Example:
export DSS_SCRIPT_DIR=~/ti/ccsv6/ccs_base/scripting/bin
2. Set the PROGRAM_EVM_TARGET_CONFIG_FILE environment variable. Please provide the path for the ccxml file that is created for the EVM for the CCS. Example:
export PROGRAM_EVM_TARGET_CONFIG_FILE=configs/evmk2h/evmk2h-linuxhost.ccxml
DSS Script Arguments
General Script Usage
Script Usage:
cd bin/program_evm
$DSS_SCRIPT_DIR/dss.sh program_evm.js evm(k2h|k2e|k2l)[-le] (nor|nand)
Formatting the NAND Flash
Note
Sometimes, NAND flash could be corrupted (e.g. EVM boots from UBI and does not gracefully shut down), NAND flash needs to be formatted before loading the program using program_evm utility.
The program_evm supports formatting the NAND device as below. Linux:
cd bin/program_evm
$DSS_SCRIPT_DIR/dss.sh program_evm.js evm(k2h|k2e|k2l)-le format-nand
Warning
Please note that this would erase all the nand blocks.
Executing the DSS script to restore factory default images
- cd “bin/program_evm” directory
- Set the necessary environment variables as described under Set the Environment Variable.
- Run the “program_evm.js” script command from program_evm directory.
Example:
cd bin/program_evm
$DSS_SCRIPT_DIR/dss.sh program_evm.js evmk2h-le nor
This will write all the little endian images to K2H EVM.
Sample DSS Script Output
The sample output after running the DSS Script is as below.
Note
The loading of nand.bin can take up to a few minutes depending on the image size.
bin/program_evm$ $DSS_SCRIPT_DIR/dss.sh program_evm.js evmk2h nor
board: evmk2h
endian: Little
emulation: XDS2xx emulator
binaries: /home/user/ti-processor-sdk-linux-k2hk-evm-02.00.01.07/bin/program_evm/binaries/evmk2h/
ccxml: configs/evmk2h/evmk2h-linuxhost.ccxml
C66xx_0: GEL Output:
Connecting Target...

C66xx_0: GEL Output: TCI6638K2K GEL file Ver is 1.3

C66xx_0: GEL Output: Detected PLL bypass disabled: SECCTL[BYPASS] = 0x00000000

C66xx_0: GEL Output: (3a) PLLCTL = 0x00000040

C66xx_0: GEL Output: (3b) PLLCTL = 0x00000040

C66xx_0: GEL Output: (3c) Delay...

C66xx_0: GEL Output: (4)PLLM[PLLM] = 0x0000000F

C66xx_0: GEL Output: MAINPLLCTL0 = 0x07000000

C66xx_0: GEL Output: (5) MAINPLLCTL0 = 0x07000000

C66xx_0: GEL Output: (5) MAINPLLCTL1 = 0x00000040

C66xx_0: GEL Output: (6) MAINPLLCTL0 = 0x07000000

C66xx_0: GEL Output: (7) SECCTL = 0x00090000

C66xx_0: GEL Output: (8a) Delay...

C66xx_0: GEL Output: PLL1_DIV3 = 0x00008002

C66xx_0: GEL Output: PLL1_DIV4 = 0x00008004

C66xx_0: GEL Output: PLL1_DIV7 = 0x00000000

C66xx_0: GEL Output: (8d/e) Delay...

C66xx_0: GEL Output: (10) Delay...

C66xx_0: GEL Output: (12) Delay...

C66xx_0: GEL Output: (13) SECCTL = 0x00090000

C66xx_0: GEL Output: (Delay...

C66xx_0: GEL Output: (Delay...

C66xx_0: GEL Output: (14) PLLCTL = 0x00000041

C66xx_0: GEL Output: PLL has been configured (CLKIN * PLLM / PLLD / PLLOD = PLLOUT):

C66xx_0: GEL Output: PLL has been configured (122.88 MHz * 16 / 1 / 2 = 983.04 MHz)

C66xx_0: GEL Output: Power on all PSC modules and DSP domains...

C66xx_0: GEL Output: Power on all PSC modules and DSP domains... Done.

C66xx_0: GEL Output: WARNING: SYSCLK is the input to the PA PLL.

C66xx_0: GEL Output: Completed PA PLL Setup

C66xx_0: GEL Output: PAPLLCTL0 - before: 0x0x07080400    after: 0x0x07080400

C66xx_0: GEL Output: PAPLLCTL1 - before: 0x0x00002040    after: 0x0x00002040

C66xx_0: GEL Output: DDR begin

C66xx_0: GEL Output: XMC setup complete.

C66xx_0: GEL Output: DDR3 PLL (PLL2) Setup ...

C66xx_0: GEL Output: DDR3 PLL Setup complete, DDR3A clock now running at 666 MHz.

C66xx_0: GEL Output: DDR3A initialization complete

C66xx_0: GEL Output: DDR3 PLL Setup ...

C66xx_0: GEL Output: DDR3 PLL Setup complete, DDR3B clock now running at 800MHz.

C66xx_0: GEL Output: DDR3B initialization complete

C66xx_0: GEL Output: DDR done

Writer:/home/user/ti-processor-sdk-linux-k2hk-evm-02.00.01.07/bin/program_evm/binaries/evmk2h/norwriter_evmk2h.out

NOR:/home/user/ti-processor-sdk-linux-k2hk-evm-02.00.01.07/bin/program_evm/binaries/evmk2h/nor.bin

Start loading nor.bin
Start programming NOR
2016_01_7_174332
NOR Writer Utility Version 01.00.00.04

Flashing sector 0 (0 bytes of 458752)
Flashing sector 1 (65536 bytes of 458752)
Flashing sector 2 (131072 bytes of 458752)
Flashing sector 3 (196608 bytes of 458752)
Flashing sector 4 (262144 bytes of 458752)
Flashing sector 5 (327680 bytes of 458752)
Flashing sector 6 (393216 bytes of 458752)
Reading and verifying sector 0 (0 bytes of 458752)
Reading and verifying sector 1 (65536 bytes of 458752)
Reading and verifying sector 2 (131072 bytes of 458752)
Reading and verifying sector 3 (196608 bytes of 458752)
Reading and verifying sector 4 (262144 bytes of 458752)
Reading and verifying sector 5 (327680 bytes of 458752)
Reading and verifying sector 6 (393216 bytes of 458752)
NOR programming completed successfully
End programming NOR
Note
For EVMs without Security Accelerator components, PSC errors will show up due to a known issue in GEL file. The PSC errors can be ignored and are not fatal. The program EVM will proceed and complete successfully.
Programming the bin files for devices without DSP core
This section describes how to program the bin files to either NOR or NAND on the devices without DSP core (AM5K2E02 and AM5K2E04). The installation of Processor SDK and Code Composer Studio is required.
Set up TFTP server on the Linux host machine
Eable the TFTP server service on the Linux host machine, and copy u-boot-{platform].gph and isdk-server-rootfs-image-{platform].ubi from ProSDK installed directory to the tftp server directory. The files are located in board-support/prebuilt-images and filesystem directory respectively.
Have the Ethernet connection between the EVM and TFTP Server.
Set the EVM for no-boot mode
Follow the instruction in previous section to set the dip switch of the EVM in no-boot mode
Load and Run U-Boot on keystone EVMs using CCS
Follow the instructions in {Proc_SDK_Install_Dir}/board-support/u-boot-{Version}/board/ti/ks2_evm/README to run u-boot using CCS
Configuration for TFTP download
Interrupt the boot process when running u-boot using CCS. In the u-boot prompt console, configure the u-boot environment variables for TFTP download
# setenv serverip <TFTP_SERVER_IP>
# setenv tftp_root <TFTP_SERVER_DOWNLOAD_DIR>
Restore Factory default images
To restore the u-boot image in NOR:
# run get_uboot_net
# run burn_uboot_spi
To restore the combined kernel and fileystem UBI image in NAND:
# run get_ubi_net
# run burn_ubi
Note
When programming UBI image to NAND, be sure the UBI image size is enough to fit in NAND memory.
Reset U-Boot Environment Variables
Reset U-Boot environment variables if U-Boot version has been changed
# env default -f -a
# saveenv
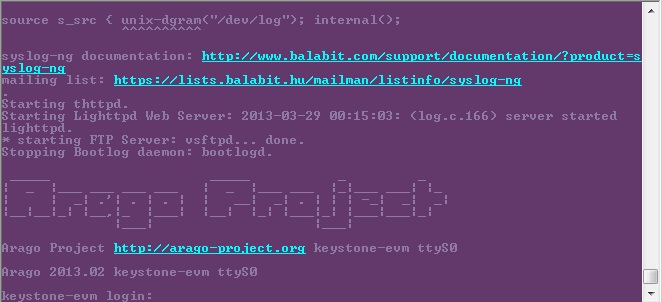
Verification
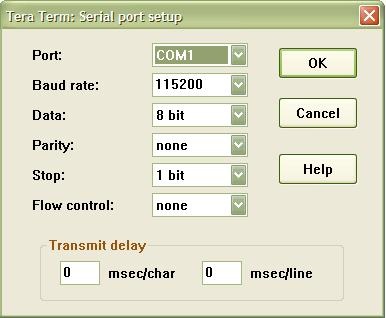
Serial Port Setup
Connect the RS232 Serial cable provided in the box to the serial port of the Host PC. If Host is running Windows OS, start tera term and configure the serial port settings as follows.
1.1.4.7. Verifying NOR
EVMK2H, EVMK2E, EVMK2L
- Set the dip switches as below to set SPI boot mode
| SWITCH | Pin1 | Pin2 | Pin3 | Pin4 |
| SW1 | Off | Off | On | Off |
- Power Cycle the board.
- Make sure the evm is connected to the DHCP server.
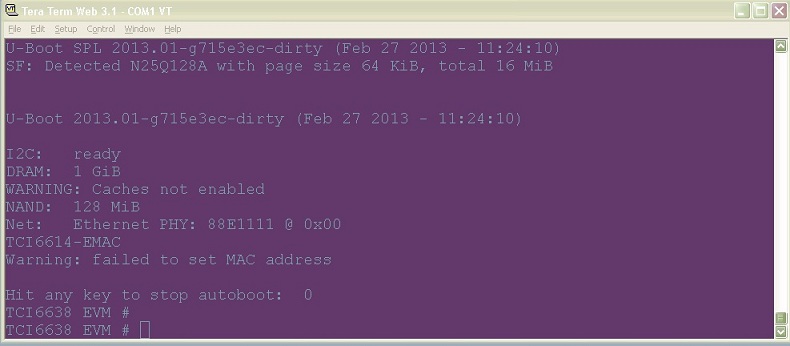
- U-Boot will show up on the UART. A sample screen is shown below.
Verifying NAND
EVMK2H, EVMK2E, EVMK2L
NOR(U-Boot) must be flashed prior to performing any of the steps below.
For EVMK2H, EVMK2E & EVMK2L it is necessary to reformat the NAND Flash prior to burning the image. Example command to do this:
%DSS_SCRIPT_DIR%\dss.sh program_evm.js evmk2h format-nand
After entering the command, burn the NAND and perform the steps below to verify.
- Set the dip switches as below to set SPI boot mode
| SWITCH | Pin1 | Pin2 | Pin3 | Pin4 |
| SW1 | Off | Off | On | Off |
- Power Cycle the board. U-Boot will show up on the UART.
- Type the following commands into U-Boot:
env default –f –a
setenv boot ubi
boot
- A sample screen is shown below.
1.1.5. Run Setup Scripts
Overview
- Verification that the Linux host is the recommended Ubuntu LTS version
- Installation of required host packages
- Target FileSystem installation
- NFS setup
- TFTP setup
- Minicom setup
- uboot setup
- Load uboot script
BeagleBone Black Users
To run the SDK’s setup scripts the following cables are required to be connected to the BeagleBone Black and your Linux PC. Please ensure both are connected before following any of the steps in this guide.
- USB Mini cable (included with BBBlack)
- FTDI Serial cable
Clearing the eMMC
The BeagleBone Black includes an eMMC device on it which comes pre-flashed with an Angstrom distribution. Because eMMC is the default boot mode for this board we need to prevent it from being able to boot by either removing or renaming the MLO.
To do this you will need to wipe out the MLO file stored in the eMMC.
To eliminate the MLO first boot up the board with the USB mini cable connected to the board and your PC. Once the Angstrom kernel loads your host will mount the eMMC boot partition on your Linux host under /media/BEAGLEBONE. You can then erase or rename the MLO file here. You can also login to the BeagleBone Black and rename or remove /boot/MLO (e.g., mv /boot/MLO /boot/OLDMLO).
Once the above steps are completed you can follow the remaining steps on this guide to execute the setup script.
Restoring the eMMC
Instructions on restoring the eMMC can be found here.
K2H/K2K, K2L, and K2E Users
For K2H/K2K, K2L, and K2E platforms, if u-boot has not been loaded before or the previous u-boot is somehow corrupted, please first program the EVMs following the instructions at Program EVM User Guide. After that, continue to follow the sections below to use the setup scripts.
How to run the setup script
The Setup Script is located in the Processor SDK installation directory. By default, this directory has a name that has the form ti-processor-sdk-linux-<Hardware-Platform>-<Version>. Change to that ti-processor-sdk-linux install directory. Then run the script:
./setup.sh
Note
The Setup Script will first check to see if the user is running the recommended Ubuntu Long Term Support (LTS) distribution, if not it will exit. If the user is running on a different Ubuntu version or another Linux distribution, they are encouraged to modify the environment setup script to match their distribution. See which version of Ubuntu is currently supported here.
Detailed step by step description through the setup script
The following sections describe in more detail how to run the script and what is doing.
Installation of Required Host Packages
This section will check to make sure you have the proper host support packages to allow you do the following tasks:
- telnet
- bring up menuconfig, the kernel configuration tool
- mounting filesystem via nfs
- tftp
- bring up minicom
- rebuild u-boot
If your host lacks any of the needed packages, they will automatically be installed in this step.
Note
This command requires you to have administrator priviliges (sudo access) on your host.
The command below is an example of what this script is doing. The actual packages may vary for different releases:
sudo apt-get install xinetd tftpd nfs-kernel-server minicom build-essential libncurses5-dev autoconf automake dos2unix screen lrzsz lzop u-boot-tools
Add to Dialout Group
Note
This part requires you to have administrator priviliges (sudo access).
A unique step is required for users using Ubuntu 12.04+. By default the user does not have the proper permissions to access a serial device ( ex ttyS0, ttyUSB0, etc...). A user must be apart of a “dialout” group to access these serial device without root privileges.
During this step the script will check if the current Linux user is apart of the dialout group. If not the current Linux user will automatically be added to the dialout group. The Linux user will still be required to use sudo when accessing the serial device until the user logs out and then logs back in.
Target FileSystem Installation
This step will extract the target filesystem.
Note
This part requires you to have administrator priviliges (sudo access).
The default locations is: /home/user/ti-processor-sdk-linux-[platformName]-evm-x.x.x.x/targetNFS
In which directory do you want to install the target filesystem?(if this directory does not exist it will be created)
[ /home/user/ti-processor-sdk-linux-[platformName]-evm-x.x.x.x/targetNFS ]
You can override the default location by typing in another location or by hitting <Enter> you can accept the default location. This can take a little time to untar and unzip the filesytem.
If you have run this script more than once and the filesystem already exists, you will be asked to either:
- rename the filesystem
- overwrite the filesystem
- skip filesystem extraction
NFS Setup
This step will allow you to export your filesystem which was extracted in the previous step.
Note
This command requires you to have administrator priviliges (sudo access).
- This step adds the path to root filesystem from the previous step to the file /etc/exports on your host.
- The NFS kernel daemon is then stopped and then restarted to make sure the exported file system is recognized.
TFTP Setup
This section will setup tftp access on your host.
Note
This command requires you to have administrator priviliges (sudo access) on your host.
Which directory do you want to be your tftp root directory?(if this directory does not exist it will be created for you)
[ /tftpboot ]
The default location is /tftpboot which is off of the root directory on your linux host and requires administrator privileges. You can hit <Enter> to select the default location or type in another path to override the default. Then the following task occur:
- A tftp config file is created for you on your host at /etc/xinetd.d/tftp
- The tftp server is stopped and then restarted to insure the changes are picked up.
If you have run this script more than once or the filename already exists, you will be asked to select one of the following options.
- rename the filesystem
- overwrite the filesystem
- skip filesystem extraction
Repeat this for any additional prompts about /tftpboot files.
Minicom Setup
This step will set up minicom (serial communication application) for SDK development.
Which serial port do you want to use with minicom?
[ /dev/ttyUSB0 ]
For most boards, the default /dev/ttyUSB0 should be selected. For Beaglebone which has a USB-to-Serial converter, just hit enter and the proper serial port will be setup in a later step.
- A minicom configuration will be saved for you at /home/user/.minirc.dfl
- The old configuration if there was one will be saved at /home/user/.minirc.dfl.old
The configuration saved to /home/user/.minirc.dfl can be changed, see the Software Development Guide for more information.
Note
If you are using a USB-to-Serial converter, your port should be configured for /dev/ttyUSBx
uboot Setup
This section will create the necessary u-boot commands to boot up your board.
The script will detect your ip address and display it. You can override the detected value by entering an alternate value.
This step will set up the u-boot variables for booting the EVM.
Autodetected the following ip address of your host, correct it if necessary
[ xxx.xxx.xxx.xxx ]
Next, you will be prompted where you prefer your kernel and file system to be located.
- Kernel location
- TFTP - located on your Host in your designated /tftpboot directory
- SD card - located in the 1st partition named “boot” of your SD card
- Filesystem location
- NFS - located on your Host. The location is where the file system was extracted in an earlier step.
- SD card - located on the 2nd partition named “rootfs” of your SD card.
Note
The option of “SD card” is not applicable to K2H/K2K, K2E, and K2L platforms. Therefore, please use TFTP/NFS for those keystone2 platforms.
Next if you have selected TFTP, you will be prompted which uImage you want to boot using TFTP. You will be given a list of existing uImage’s and you can type one in from the list or hit <Enter> to select the default option. The default option will be the uImage corresponding to the SDK installation. This will be used in the next step to create the necessary u-boot options to boot up your device.
Load uboot Script
This section creates a minicom script or a uEnv.txt file which will be used by u-boot to provide the necessary commands to boot up in the preferred configuration.
- For boards with straight serial connectors and K2H/K2K, K2E, and K2L platforms, a minicom script is created.
- For boards like beaglebone with a USB-to-Serial configuration, then a uEnv.txt script is created and placed in the /boot partition of the SD card.
Note
For devices which create a uEnv.txt, the device must already be booted up with the USB-to-Serial connector attached to the Host. Further the Host must recognize the boot and START_HERE partitions.
1.1.6. Top-Level Makefile
Overview
Inside of the Processor Linux SDK there is a top-level Makefile that can be used to build some of the sub-components found within the SDK. This Makefile uses the Rules.make file and gives an example of how the various components can be built and the parameters to use.
NOTE: You should not call this makefile with the environment-setup script sourced. The sub-component Makefiles will handle sourcing this script where appropriate, but some make targets such as the Linux kernel make target do not work properly when this script is already sourced.
Rules.make
The following sections cover the Rules.make file found in the top-level of the Processor Linux SDK.
Purpose
The Rules.make file in the top-level of the Processor Linux SDK is used not only by the top-level Makefile, but also by many of the sub-component Makefiles to gain access to common shared variables and settings. The next section covers the main variables defined in the Rules.make file.
Variables Defined
- PLATFORM - This represents the machine name of the device supported by the SDK. This machine name has a direct correlation to the machine definition in the Arago project build system. The PLATFORM variable can be used by component Makefiles to make decisions on a per-machine basis.
- ARCH - This represents the architecture family of the machine. This can be used by component Makefiles to change settings such as mtune values in CFLAGS based on the architecture of the PLATFORM.
- UBOOT_MACHINE - This us used when building u-boot to configure the u-boot sources for the correct device.
- TI_SDK_PATH - This points to the top-level of the SDK. This is the same directory where the Rules.make file itself is located.
- DESTDIR - This points to the base installation directory that applications/drivers should be installed to. This is usually the root of a target file system but can be changed to point anywhere. By default the initial value is a unique key value of __DESTDIR__ which is replaced with the location of the target NFS file system when the setup.sh script is run.
- LINUX_DEVKIT_PATH - This points to the linux-devkit directory. This directory is the base directory containing the cross-compiler and cross-libraries as well as the environment-setup script used by many component Makefiles to source additional variable settings.
- CROSS_COMPILE - This setting represents the CROSS_COMPILE prefix to be used when invoking the cross-compiler. Many components such as the Linux kernel use the variable CROSS_COMPILE to prepend the proper prefix to commands such as gcc to invoke the ARM cross-compiler.
- ENV_SETUP - This points to the environment-setup script in the linux-devkit directory used by many components to configure for a cross-compilation build.
- LINUXKERNEL_INSTALL_DIR - This points to the location of the Linux kernel sources, which is used by components such as out-of-tree kernel drivers to find the Linux kernel Makefiles and headers.
Makefile
The following sections cover the Makefile found in the top-level of the Processor Linux SDK
Target Types
For each of the targets discussed below the following target type are defined
- <target> - This is the build target which will compile the release version of the component
- <target>_install - This target will install the component to the location pointed to by DESTDIR
- <target>_clean - This target will clean the component
Top-Level Targets
The Processor Linux SDK provides the following targets by default which will invoke the corresponding component targets:
- all - This will call the build target for each component defined in the Makefile
- install - This will call the install target for each component defined in the Makefile
- clean - This will call the clean target for each component defined in the Makefile
Common Targets
The following targets are common to all platforms in Processor Linux SDK:
- linux - Compiles the Linux kernel using the default tisdk_<PLATFORM>_defconfig configuration
- matrix-gui - Builds the matrix-gui sources
- am-benchmarks - Builds the ARM Benchmarks for the ARCH defined in Rules.make
- am-sysinfo - Build the helper applications used by the system settings demos in Matrix
- matrix-gui-browser - Builds the matrix GUI browser Qt project
- refresh-screen - Builds the refresh screen Qt project
Additional Targets
Depending on the capabilities and software available for a given device additional targets may also be defined. You can find the list of all the targets by looking at the all target as described in the **Top-Level Targets** section above. Add devices will have one or the other of the following targets depending on the u-boot version used:
- u-boot-spl - This target will build both u-boot and the u-boot SPL (MLO) binaries used in newer versions of u-boot. This actually provides a u-boot and u-boot-spl target in the Makefile.
- u-boot-legacy - This target will build the u-boot binary for older versions of u-boot which do not support the SPL build.
- wireless - A wireless top-level build target that can be used to rebuild the wireless drivers against the kernel sources in the board-support directory.
Usage Examples
The following examples demonstrate how to use the top-level Makefile for some common tasks. All of the examples below assume that you are calling the Makefile from the top-level of the SDK.
- Build Everything
host# make
- Clean Everything
host# make clean
- Install Everything
host# make install
- Build the Linux kernel
host# make linux
- Install the Linux kernel modules
host# make linux_install
- Build the ARM Benchmarks
host# make am-benchmarks
- Clean the ARM Benchmarks
host# make am-benchmarks_clean
- Install the ARM Benchmarks
host# make am-benchmarks_install
A Note about Out-of-tree Kernel Modules
Some drivers like the SGX drivers are delivered as modules outside of the kernel tree. If you rebuild the kernel and install it using the “make linux_install” target you will also need to rebuild the out of tree modules and install them as well. The modules_install command used by the linux_install target will remove any existing drivers before installing the new ones. This means those drivers are no longer available until they have been rebuilt against the kernel and re-installed.
A Note about the Linux Kernel Version
To simplify and accelerate rebuilding and installing the linux kernel, the file .scmversion is included in the kernel source tree to pin down the version of the kernel provided in the SDK. If upgrading the kernel sources or adding new commits, this file should be removed so that the appropriate version is built into the kernel image.
1.1.7. GCC ToolChain
Overview
The Processor SDK for Linux contains a Linaro based toolchain for Cortex A devices. The Linaro toolchain also enables hardware floating point (hardfp) support. Older toolchains including arm-arago-linux-gnueabi- uses software floating point (softfp). This results in software built using a hardfp toolchain being incompatible with software built with a softfp toolchain.
Linaro Toolchain
The Processor SDK for Linux uses a Linaro based tool chain. Other than using a newer version of GCC the Linaro tool chain also supports hard floating point also known as Hard-FP. Hard-FP uses the FPU on the ARM instead of simulating it. Older tool chains including the Arago tool chain uses soft floating point (Soft-FP). Binaries built using a soft-fp tool chain are not compatible with binaries built using a hard-fp. Therefore, you must rebuild all binaries to use either hard-fp and soft-fp since you can’t mix and match. By default all binaries included in the Processor SDK for Linux will be built for hard-fp.
The name of the toolchain binaries have also been updated from older versions of the SDK. Previous versions may have used a prefix of “arm-arago-linux-gnueabi-”. Current SDK toolchains uses a prefix of “arm-linux-gnueabihf-” For example, the new toolchain’s gcc compiler is named arm-linux-gnueabihf-gcc.
Linux-Devkit Structure
Here is the structure of the Linux-devkit directory within the SDK.
| Element | Location |
| Toolchain Location | linux-devkit/sysroots/x86_64-arago-linux/usr/bin |
| Cross Compile Libraries Location | linux-devkit/sysroots/<device specific string>-vfp-neon-linux-gnueabi/usr/lib |
| Headers for Cross Compiled Libraries Location | linux-devkit/sysroots/<device specific string>-vfp-neon-linux-gnueabi/usr/include |
Location in SDK
The toolchain is located in the Linux SDK in the <SDK INSTALL DIR>/linux-devkit directory. The following sections will cover the key components of the toolchain.
Cross-Compilers/Tools
The cross-compilers and tools such as qmake2 can be found the the <SDK INSTALL DIR>/linux-devkit/bin directory. Adding this directory to your PATH will allow using these tools. For example:
host# export PATH=”<SDK INSTALL DIR>/linux-devkit/sysroots/x86_64-arago-linux/usr/bin:$PATH”
The cross-compile tools are prefixed with the arm-linux-gnueabihf- prefix. i.e. the GCC cross compiler is called arm-linux-gnueabihf-gcc. Additional tools are also located here such as the qmake2, rcc, uic tools used by Qt. In addition there is a qt.conf file that can be used by tools such as Qt creator to use the pre-built libraries found in the Linux SDK.
Cross-Compiled Libraries
The toolchain within the Linux SDK contains more than just the cross-compiler, it also contains pre-built libraries that can be used in your applications without requiring you to cross-compile them yourself. These libraries include packages from alsa to zlib. The libraries are located in the <SDK INSTALL DIR>/linux-devkit/sysroots/<device specific string>-vfp-neon-linux-gnueabi/ directory. For a list of the libraries you can refer to the software manifest found in the <SDK INSTALL DIR>/docs directory or look at the list of libraries available in the <SDK INSTALL DIR>/linux-devkit/sysroots/<device specific string>-vfp-neon-linux-gnueabi/usr/lib directory. You will also find the header files corresponding to these libraries in the <SDK INSTALL DIR>/linux-devkit/sysroots/<device specific string>-vfp-neon-linux-gnueabi/usr/include directory. Usage of these libraries will be covered in more detail in the next sections, but as an example if your application wants access to the alsa asound library then you can now do the following command (assuming you have added the cross compiler to your PATH):
host# arm-linux-gnueabihf-gcc -lasound app.c -o app.out |
environment-setup script
When cross-compiling packages that use configuration tools and autotools there are many settings that are required to make sure that the proper cross-compile libraries are used. The environment-setup script located in the <SDK INSTALL DIR>/linux-devkit directory handles this for you. This script exports variables to perform actions such as:
- Adding the toolchain to the PATH
- Setting up CPATH
- Setting up PKG_CONFIG_* paths
- Setting standard variable such as CC, CPP, AR to the cross-compile values
To use the environment-setup script you only need to source it. This is as simple as:
host# source linux-devkit/environment-setup |
To know if the environment setup script has been sourced in your current shell the shell prompt will be changed to contain the [linux-devkit]: prefix in the command prompt.
The Usage section below will cover some cases where using the environment-setup script is useful.
When Compiling the Linux Kernel
Because environment-setup changes standard variables such as CC you should not use this script when compiler projects that build host-side as well as target-side tools. A prime example of this is the Linux kernel, which builds some host side tools to help during the kernel build. If the environment-setup script has been sourced then the CC value will specify the cross-compiler for the host-side tool build. This means that the tools compiled and used during the kernel build will be compiled for the ARM platform while the kernel build tries to run these tools on an Intel platform. This will cause the tools to fail to run and the kernel to fail to compile.
Usage
The following sections give some examples of how to use the included toolchain to compile simple applications such as HelloWorld to more complex examples such as configuring and compiler GStreamer plugins.
Simple Cross-Compile
In the simplest case the cross-compiler can be used to compile simple applications that just need access to standard libraries. The two examples below cover an application that uses only the standard libgcc libraries and another example that uses the pthreads threading library.
HelloWorld
Simple applications like HelloWorld can be compiled using just a call to the cross-compiler since the cross-compiler can find the libraries it was built with without any issues. The following steps will show how to make a simple helloworld application and cross-compile that application.
Create a helloworld.c file |
#include <stdio.h>

 int main() {
     printf ("Hello World from TI!!!\n");
     return 0;
 }
Cross-compile the helloworld.c file using the cross-compile toolchain. In this example we will invoke the toolchain without it having been added to our PATH.
host# <SDK INSTALL DIR>/linux-devkit/sysroots/x86_64-arago-linux/usr/bin/arm-linux-gnueabihf-gcc helloworld.c -o helloworld
After the above steps are run you should now have a helloworld executable in your directory that has been compiled for the ARM. A simple way to check this is to run the following command:
host# file helloworld
This should yield output like:
“helloworld: ELF 32-bit LSB executable, ARM, version 1 (SYSV), dynamically linked (uses shared libs), for GNU/Linux 2.6.31, not stripped”
Note
The ARM entry above was made bold for emphasis.
Using PThreads
In many cases your simple application probably wants to use additional libraries than the standard libgcc and glibc libraries. In this case you will need to include the header files for those libraries as well as add the library to the compile line. In this example we will look at how to build a simple threading application and use the pthread library. This example was derived from the example code at **https://www.amparo.net/ce155/thread-ex.html**
Create a file thread-ex.c with the following contents
#include <unistd.h>;
#include <sys/types.h>;
#include <errno.h>;
#include <stdio.h>;
#include <stdlib.h>;
#include <pthread.h>;
#include <string.h>;

int print_message_function(void *ptr);

/* struct to hold data to be passed to a thread
this shows how multiple data items can be passed to a thread */
typedef struct str_thdata
{
    int thread_no;
    char message[100];
} thdata;

int main(int argc, void **argv)
{
    pthread_t thread1, thread2;
    thdata data1, data2;

    data1.thread_no = 1;
    strcpy(data1.message, "Hello!");

    data2.thread_no = 2;
    strcpy(data2.message, "Hi!");

    pthread_create (&thread1, NULL, (void *) &print_message_function, (void *) &data1);
    pthread_create (&thread2, NULL, (void *) &print_message_function, (void *) &data2);

    pthread_join(thread1, NULL);
    pthread_join(thread2, NULL);

    exit(0);
}

int print_message_function ( void *ptr )
{
    thdata *data;
    data = (thdata *) ptr;  /* type cast to a pointer to thdata */

    /* do the work */
    printf("Thread %d says%s \n", data->thread_no, data->message);

    return 0;
}
Cross-compile the thread-ex.c file using the cross-compile toolchain. In this example we will first add the toolchain to our PATH. This only needs to be done once. We will also add the pthread library to the compile line so that we will link with the library file that provides the pthread_* functions. |
export PATH=”<SDK INSTALL DIR>/linux-devkit/sysroots/x86_64-arago-linux/usr/bin/:$PATH”
arm-linux-gnueabihf-gcc ‘-lpthread’ thread-ex.c -o thread-ex
Note
The -lpthread entry above was made italics for emphasis.
Configure/Autotools
The last case to cover is one where the environment-setup script is useful. In this case we will download the gst-plugins-bad package and configure and build it using the environment-setup script to configure the system for the autotools to properly detect the libraries available as pre-built libraries.
First download the gst-plugins-bad-0.10.11.tar.gz package wget https://gstreamer.freedesktop.org/src/gst-plugins-bad/gst-plugins-bad-0.10.11.tar.gz
IMPORTANT In order to build the gst-plugins-bad package you will need libglib2.0-dev installed on your system. You can install this using sudo apt-get install libglib2.0-dev
Extract the plugins tarball tar zxf gst-plugins-bad-0.10.11.tar.gz
Change directory into the extracted sources cd gst-plugins-bad-0.10.11
Source the <SDK INSTALL DIR>/linux-devkit/environment-setup script to prepare to configure and build the plugins. source <SDK INSTALL DIR>/linux-devkit/environment-setup
Now configure the package. We need to define the host setting to tell the configuration utility what our host system is, and we will also disable some plugins that are known to be bad. ./configure –host=i686 –disable-deinterlace2 –disable-x264
When the configuration is done the last sections will show which plugins will be build based on the libraries available. This is the key point behind what the environment-setup script provides. By setting up the PKG_CONFIG_* paths and other variables the configure script was able to check for required libraries being available to know which plugins to enable. Now that the sources have been configured you can compile them with a simple make command. make