7.7.5. Adding GEL Files to a Target Configuration
Most of the target boards and devices have all the features pre-configured in Code Composer Studio. However, in some cases a new board or a custom system may require modifying or adding a configuration script (GEL file) to perform proper initialization of the device.
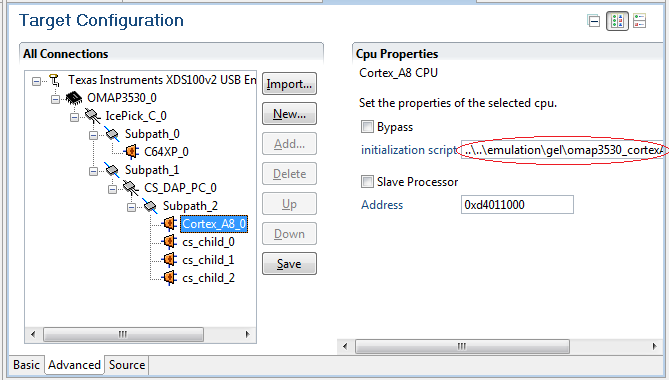
This page shows how to use the Manual Method and add the proper GEL files.
- In the Target Configuration Editor, Browse to the advanced-target-configuration-options>.
- Expand the configuration and select the connection that corresponds to the core that will be configured.
Note
The connections marked as ETB, CS_DAP, cs_child and others are rarely used by Code Composer Studio. Also, if the device is an SoC with multiple cores, not necessarily all cores need to be assigned a GEL.
- In the box Initialization Script provide the location of the GEL file.
- Save the target configuration file.
Once the debugger is launched, the GEL files loaded can be seen by using the Loading and Unloading GEL Files.
Note
If the device is an SoC with multiple cores, each core will show the corresponding GEL files in the Loading and Unloading GEL Files.
Once the debugger is launched and the target is connected, some functions can also be available in the Scripts menu.
Note
The availability of these functions is highly dependent on the scripts configured in the GEL file.