Signing binaries for Secure Boot on HS Devices
This document describes the various steps in signing binaries for secure boot. Usecases are listed in order of increasing complexity.
Signing an unencrypted binary for secure boot
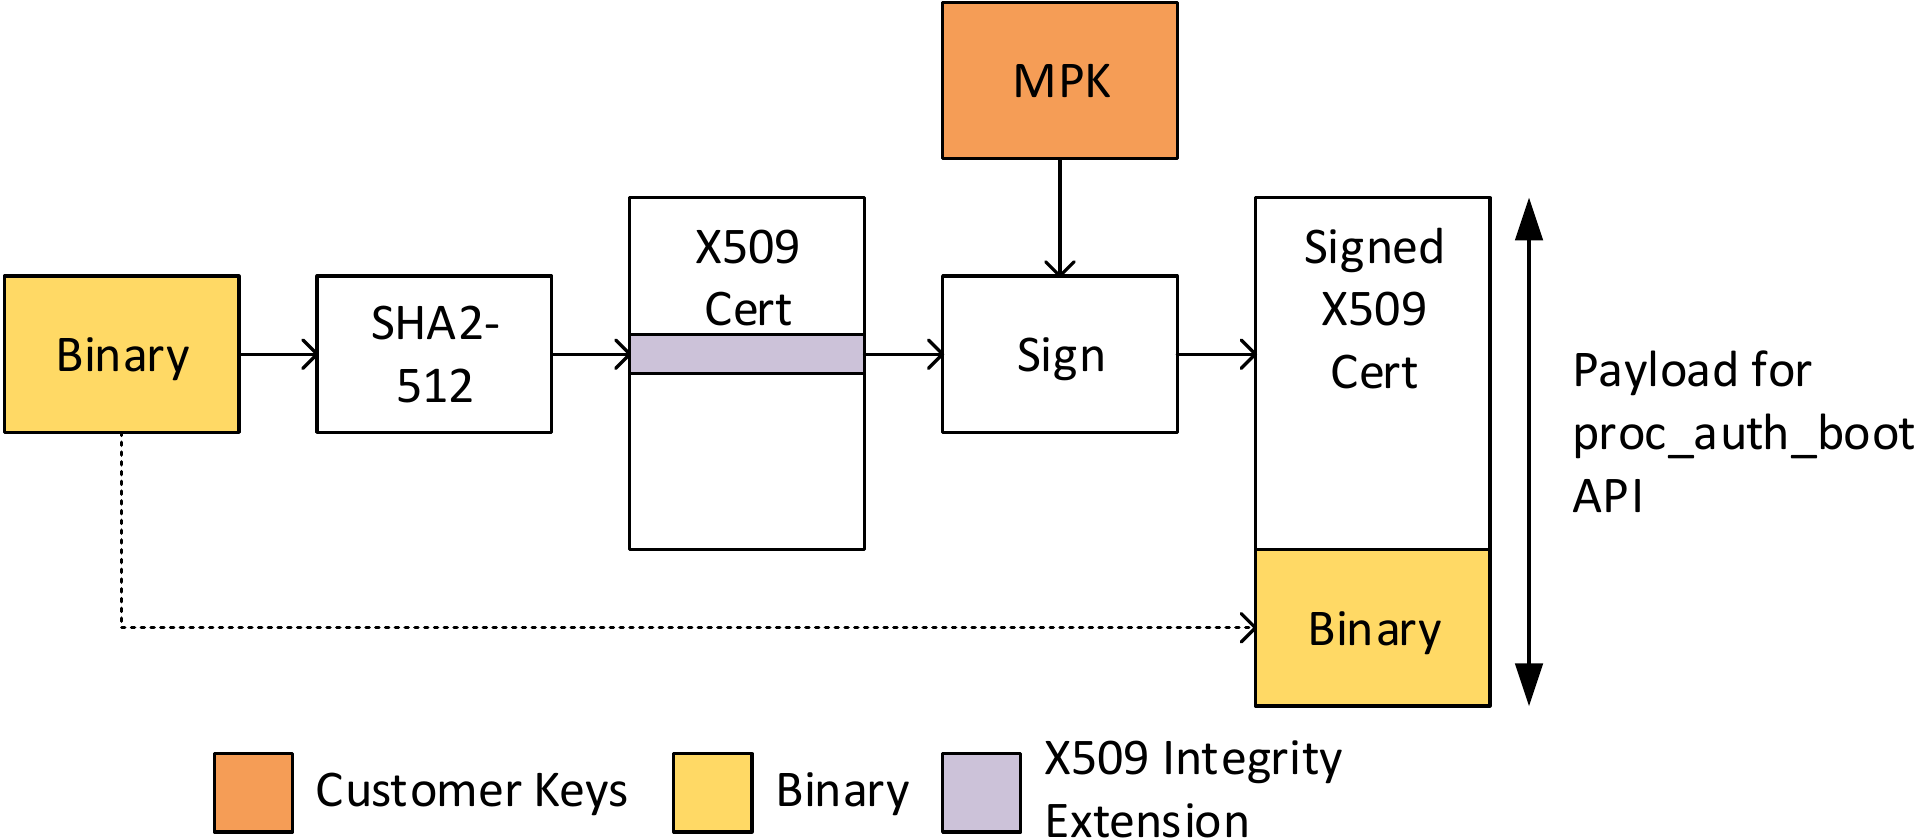
- Calculate SHA2-512 hash of the binary. Populate the System Firmware Image Integrity Extension with the calculated hash and the length of the binary.
- Determine where the image needs to be loaded at runtime and populate the System Firmware Load Extension.
- Populate the System Firmware Software Revision Extension with the software revision value for the binary. The software revision is used to enforce rollback protection.
- If the binary is to be used to bring a core out of reset, populate the System Firmware Boot Extension with the appropriate values.
- Choose a private key to the sign the certificate. System Firmware only supports signing a certificate with active MPK.
- Sign the X509 certificate populated in steps (1)-(4).
- Append the binary to the signed X509 certificate.
- On the target, load the output of step (7) to a memory location. Use the memory location as the payload of the TISCI_MSG_PROC_AUTH_BOOT TISCI message.
Signing an encrypted binary for secure boot
Using an encrypted binary for secure boot requires minor changes to the signing process described above. The binary needs to be encrypted first and used as an input to the signing process described above. Some of the values populated in X509 extensions are also modified. This section describes the encryption operation and changes in populating the X509 extensions. First, the steps to encrypt the binary are listed below.
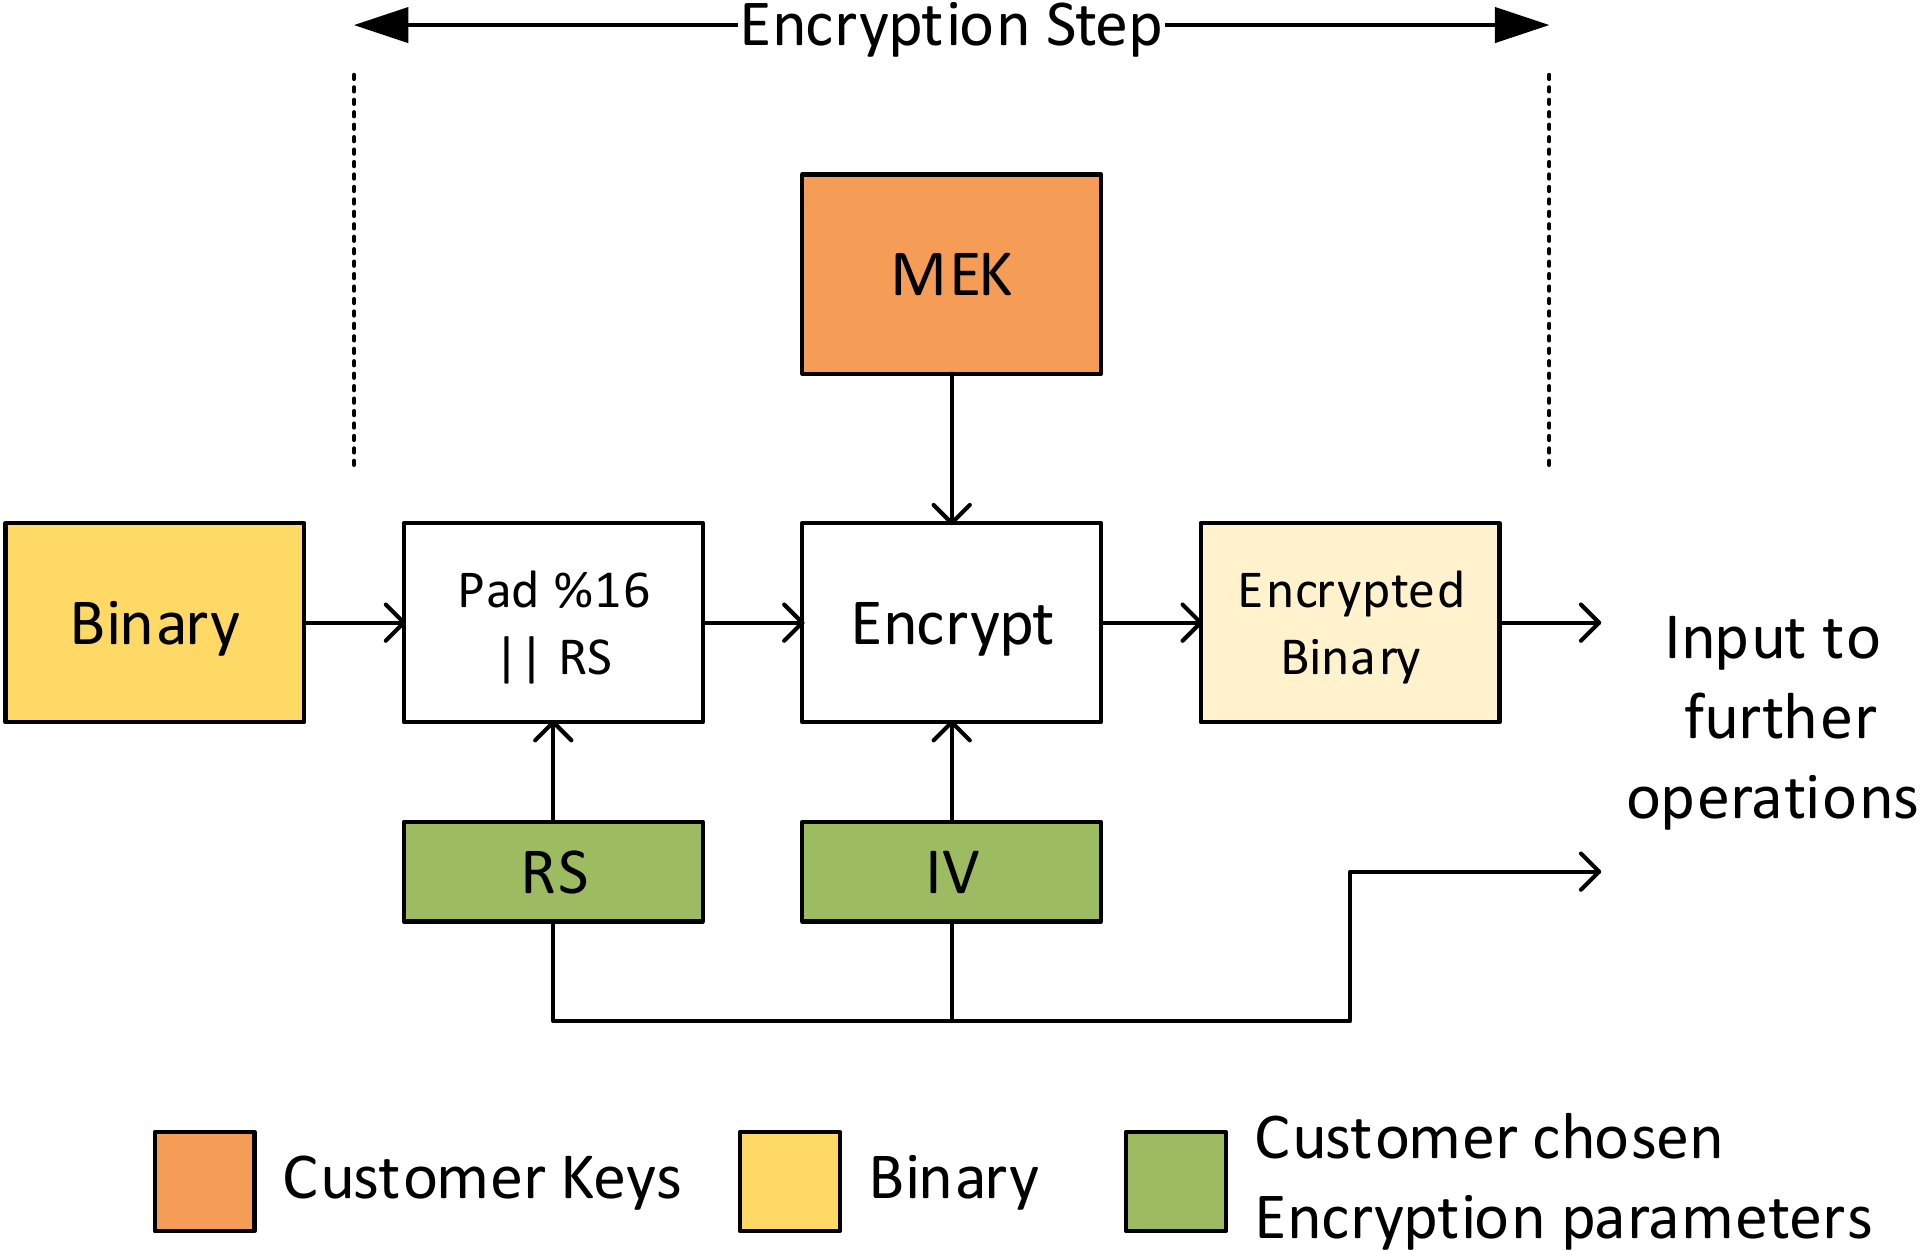
- Pad the binary with zeros until the length is a multiple of 16 bytes.
- Append a 32 byte long random string to the binary output in step (1). This random string is used by System Firmware to verify successful decryption. This string needs to be populated in the X509 certificate.
- Choose 16 byte long random string as the initialization vector(IV) for CBC encryption. This string also needs to be populated in the X509 certificate.
- Choose the key to encrypt the binary. System Firmware only supports encryption with the active MEK.
- Encrypt the binary output from step (2) with key chosen in step (4) in AES-256-CBC mode. Use the string chosen in step (3) as the initialization vector.
When using encryption, the X509 encryption extension needs to be populated in the certificate before signing. The following changes apply to the other extensions.
- The length of binary output in step (2) above needs to be populated in the X509 image integrity extension.
- The binary output of step (5) needs to be used when calculating the hash to be populated in the X509 image integrity extension.
- The binary output of step (5) must be appended to the signed X509 certificate instead of the unencrypted binary.
Please refer to System Firmware Image Integrity Extension and System Firmware Encryption Extension. The complete signing flow for an encrypted image is shown below.
