Amazon Sidewalk Quick Start Guide
This section serves as a road map for users developing applications and products using the TI SimpleLink CC13xx or CC26xx wireless MCU platform for Sidewalk applications. Whether a seasoned developer or just getting started, TI has created a variety of resources to simplify development on the CC13xx or CC26xx platform. These resources will enhance your experience with the Sidewalk stack from the out-of-the-box demo to production.
Figure 126. shows the suggested workflow for getting started with the Sidewalk development environment.
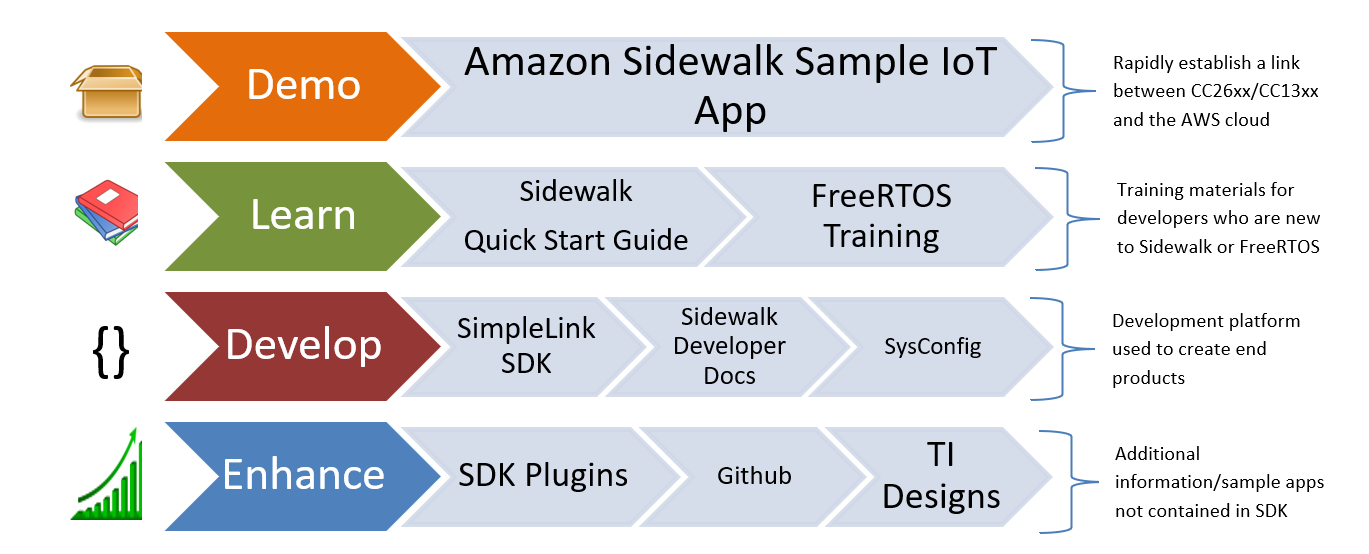
Figure 126. Suggested Workflow
If you have already evaluated Sidewalk in the past, you can skip most of the following section and skip directly to the Flashing the edge device section. If not, please read about Sidewalk on Amazon’s website and follow the guide thoroughly.
Prerequisites
Hardware
Echo (4th generation), or any of the other Sidewalk Bridges.
CC1352P7-1 LaunchPad (FSK or BLE) or CC2652R7 LaunchPad (BLE only)
Software
ARM GCC Compiler Tools, will be installed from Code Composer Studio.
Additional pre-requisites for developers based outside of the US
Danger
Amazon Sidewalk is available only in the United States of America. To the extent any Sidewalk gateway functionality might be used outside of the U.S., it should be used ONLY for Amazon Sidewalk endpoint development purposes. In addition, we recommend that you consult with your local regulatory bodies, and check if the gateway is allowed to operate its radio in your locale, as U.S. license-free band devices, only for development.
Sidewalk being only deployed in the USA as of today, it is required to use a VPN in order spoof the network location of your Echo device. This is needed in order to set up the Alexa app and make it think that we are based in the United States.
VPN Router. This is mandatory in order to enable Sidewalk on a non-US Echo device. We recommend using an OpenWRT-based router.
That can also be a computer being used as a hotspot.
A VPN service provider with decent bandwidth. This VPN will be used on the aforementioned router.
A GPS spoofing application. An Android smartphone is thus recommended.
A good way to make sure that the VPN setup is correct is to go on the following website: IPleak. If the website shows any other location than USAs, especially with regards to “DNS address”, it means your setup is not complete yet.
Moreover, if not already done, please set your Amazon Country account to United States, as shown in the following guide. The rest of the guide assumes that you have configured every Amazon/Ring account as an account located in the United States.
Attention
Ensure that the location information is consistent accross all apps. For instance, if your VPN endpoint is located in New-York, make sure that your location is configured as New York in the Ring, Alexa, and GPS spoofing application.
With the above work done, you can now follow the rest of the guide.
FreeRTOS installation
Download FreeRTOSv202104.00 from GitHub.
Copy the FreeRTOSv202104.00 folder contained in the archive to, for instance, C:/.
We now want to let Code Composer Studio where FreeRTOS is installed. To do so,
in Code Composer Studio, go to Window -> Preferences. Once the window
opens, on the left most menu, click on Code Composer Studio* -> **Build ->
Variables. Click on Add…. Now fill in the information as follows:
Variable FREERTOS_INSTALL_DIR
Type: Path
Value: path to the FreeRTOS folder you extracted

Figure 127. FREERTOS_INSTALL_DIR variable configuration.
FreeRTOS is now installed in Code Composer Studio.
Get started
Once you have gathered the required components, you can evaluate Sidewalk through the TI Amazon Sidewalk Sample IoT App. This app will provide you with prebuilt firmware so that you can focus on learning more about Sidewalk. It should take you around 1 hour to follow that tutorial. Please return to this quick start guide when it is time to flash the binaries you have generated, as it provides more in-depth instructions on how to flash the edge devices.
Flashing the edge device
The provisioning script should now have generated one folder containing binary personalisation data. Open Uniflash and create a new session. Now go to Settings & Utilities, and under Manual Erase, click on Erase Entire Flash. Once the mass erase is finished, it is now time to flash the following two binaries, in that order:
Under EdgeDeviceProvisioning/DeviceProfile_xxxxxx/WirelessDevice_xxxx, please select the
TI.binbinary. Check Binary and set Load Addr: to 0xAE000 (0x56000 for P1 devices).Under EdgeDeviceBinaries/ti/, please select either binary:
ble_sid_demo_cc1352p7_asl.hexis using the BLE (2.4 GHz frequency band).fsk_sid_demo_cc1352p7_asl.hexis using FSK (900 MHz frequency band)
Note
You can use both fsk and ble binaries for that demo. The Web app will display the medium used.
Here is a recapitulative of what your Uniflash window is supposed to look like.
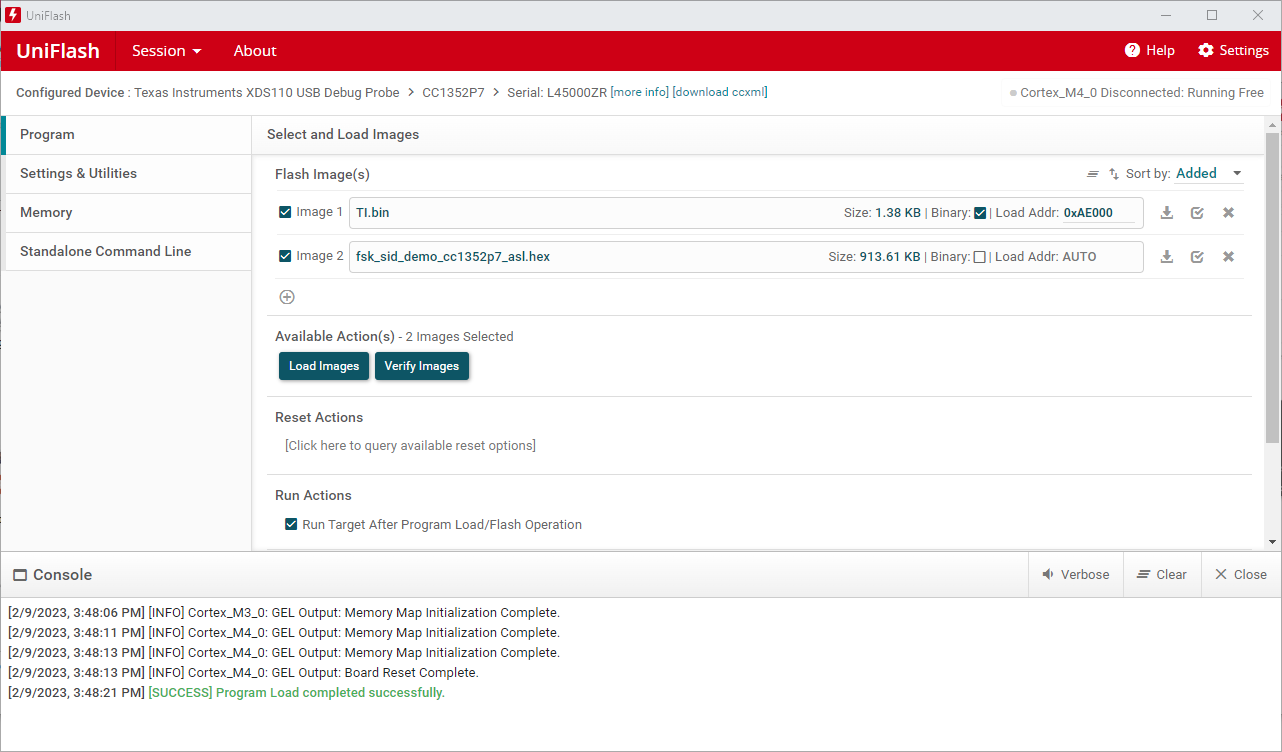
Figure 128. Uniflash window after the instructions have been followed correctly.
If it looks like that, click Load Images. Once the edge device has been flashed with the 2 aforementioned binary files, please proceed immediately to the next section.
Checking debug logs
Open a serial console, such as PuTTY with the following parameters:
UART Param
Default Values
Baud Rate
921600
Data length
8 bits
Parity
None
Stop bits
1 bit
Flow Control
None
Now, please reset your CC13xx or CC26xx LaunchPad. You should now see data logs in the console.
Learning More About Sidewalk
Now that your setup is functional, you can check out the sid_demo example, located in the SDK, and start building your application upon it using the SimpleLink CC13xx/CC26xx SDK.
Learning More About Sidewalk
Interact with your device through AWS: Boto3 Docs
Sidewalk API Reference