Get started with SysConfig
System Configuration Tool (SysConfig) is a graphical interface for configuring your SimpleLink CC13x2 / 26x2 SDK project. Configuration files, C source files and header files are generated based on the parameters configured in the SysConfig dashboard.
SysConfig can be used as a stand-alone tool, or as a plug-in to CCS.
Attention
SysConfig is currently in preview mode. Files and code generated by SysConfig should be thoroughly checked and reviewed.
Using Stand-Alone SysConfig
Open the System Configuration Tool, and select your device, part and package,
then press START.
When you have finished configuring your .syscfg file, save and generate
files. Export the generated files to your project, overwriting existing files if
necessary. Make any needed changes to your application for interfacing with the
SysConfig-generated files.
Note
Make sure you are using a SysConfig ready example project. These are found
in the examples/syscfg_preview folder in the SimpleLink CC13x2 / 26x2 SDK.
Using SysConfig with IAR Workbench
If you are using IAR, you can use SysConfig as a standalone desktop tool to generate the configuration files to be compiled and linked with your application.
These steps assume the TI Code Generation Tools are installed in the default location. The figures use the MSP432 SDK as an example, but other SimpleLink SDKs follow the same procedure.
Install SysConfig as a standalone tool within the default location (
C:\ti).Open IAR and follow these steps to configure it to use the correct viewer for
*.syscfgfiles:- Choose Tools > Configure Viewers from the menus, and then click New.
- Type
.syscfgin the File name extensions field. - Type
$SYSCONFIG_ROOT$\nw\nw.exe $SYSCONFIG_ROOT$ $FILE_PATH$with the Command line option selected.
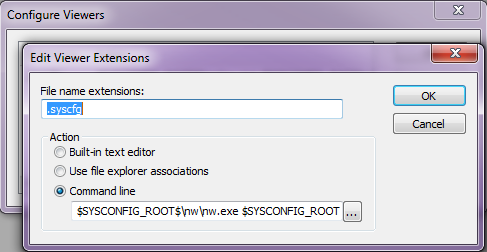
Figure 51. Editing Viewer Extensions
Follow these steps to import custom argument variables into IAR:
- Choose Tools > Configure Custom Argument Variables from the menus.
- Choose the Workspace or Global tab depending on how you want to apply the variables. (If you’re not sure, choose Workspace.)
- Click the Import button and browse to
\tools\iarwithin your SimpleLink CC13x2 / 26x2 SDK installation. Select the*.custom_argvarsfile provided there and click OK. - Click the Add Variable button and add
SYSCONFIG_ROOTas a variable with the valuec:/ti/sysconfig_1.0.414(where the version matches the location of your SysConfig installation).
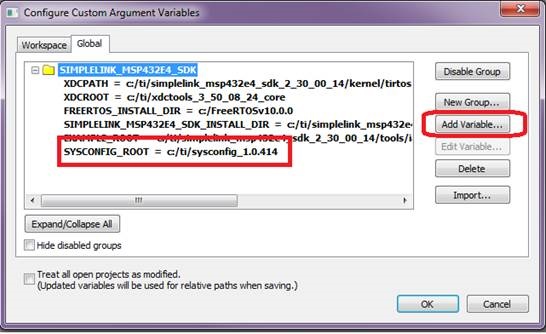
Figure 52. Configuring Custom Argument Variables
If you have not done so already, create a new IAR workspace.
Follow these steps to add a project from one of the examples in the SDK’s
\examples\sysconfig_previewfolder.- Choose Project > Add Existing Project from the menus.
- Within your SDK installation, browse to
\examples\syscfg_preview\rtos\
<board>\drivers\adcbufcontinuous\iar
or an other sysconfig preview example. - Add the
adcbufcontinous.ewpfile.
Rebuild the project to perform the custom build step, which uses SysConfig to generate additional files.
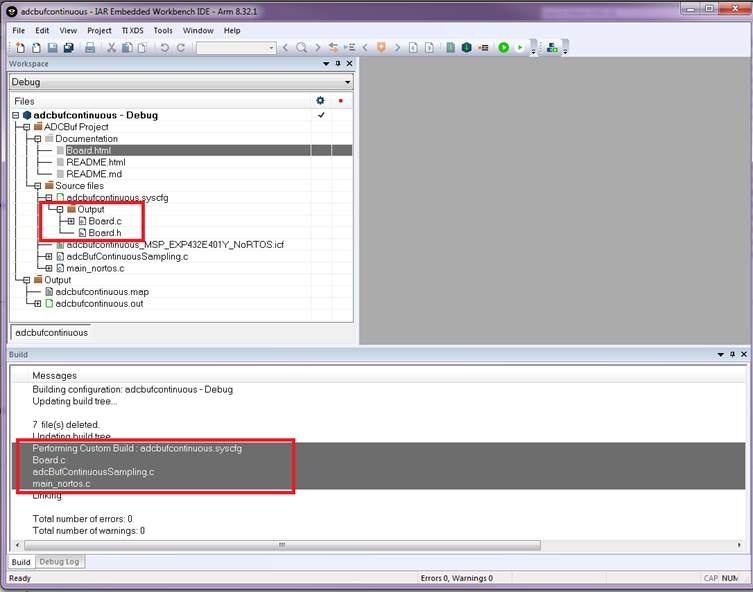
Figure 53. Building with SysConfig in IAR
You can view the custom build configuration by choosing Project > Options from the menus and selecting the Custom Build category.
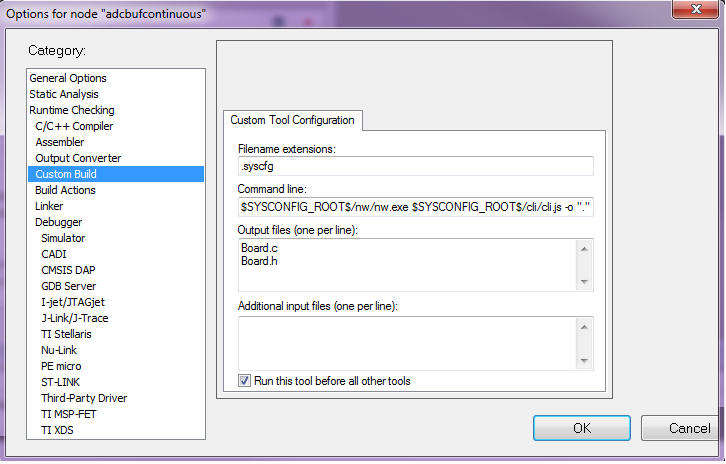
Figure 54. Custom Build Options
To open the SysConfig Standalone GUI, double-click on the
adcbufcontinuous.syscfg file in the IAR project wizard. (You may need to open
the *.syscfg file within the SysConfig GUI after it opens.)
Using SysConfig as a Plug-In to CCS
SysConfig requires CCS v. 8.3 or later. (Please use the version of CCS recommended for the SimpleLink CC13x2 / 26x2 SDK you are working with. You can find the recommended tool version numbers in the release notes.)
In CCS, import a SysConfig enabled project from the examples/syscfg_preview
folder.
In the project folder in CCS, you will see a .syscfg file. Open this file to
start the SysConfig graphical interface.
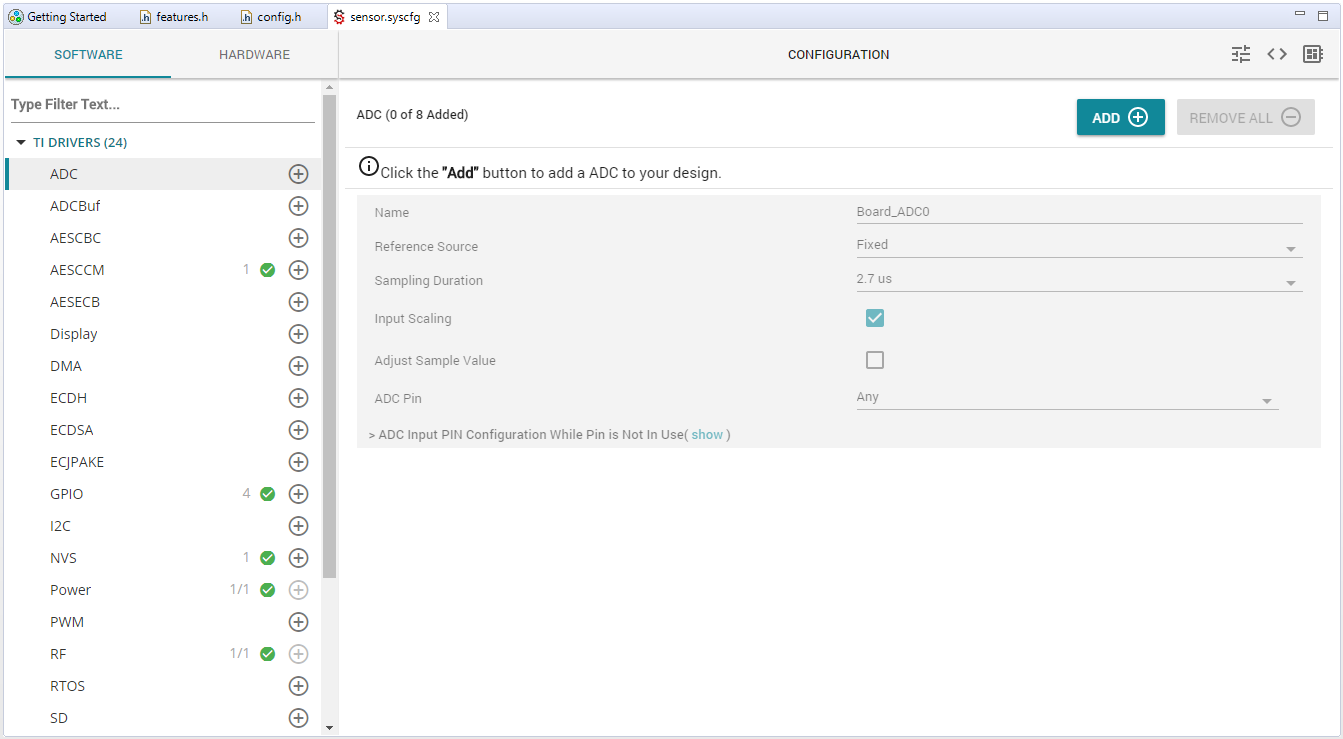
Configure The Board Files with SysConfig
The board view shows you what pins are available on your board, and what peripherals are assigned to what pins. Hover over each pin for more information.

Enabled and configured peripherals are displayed with a green symbols. To add a new peripheral, press the plus sign next to the peripheral type. The “Show generated files” tab lets you see the files generated based on SysConfig. Generated files are dynamically updated every time you make a change in SysConfig. When you build your project, the generated files are exported into the output folder of your project.
