4.2.1. AM62x SK EVM Hardware Setup
Description
TBD...
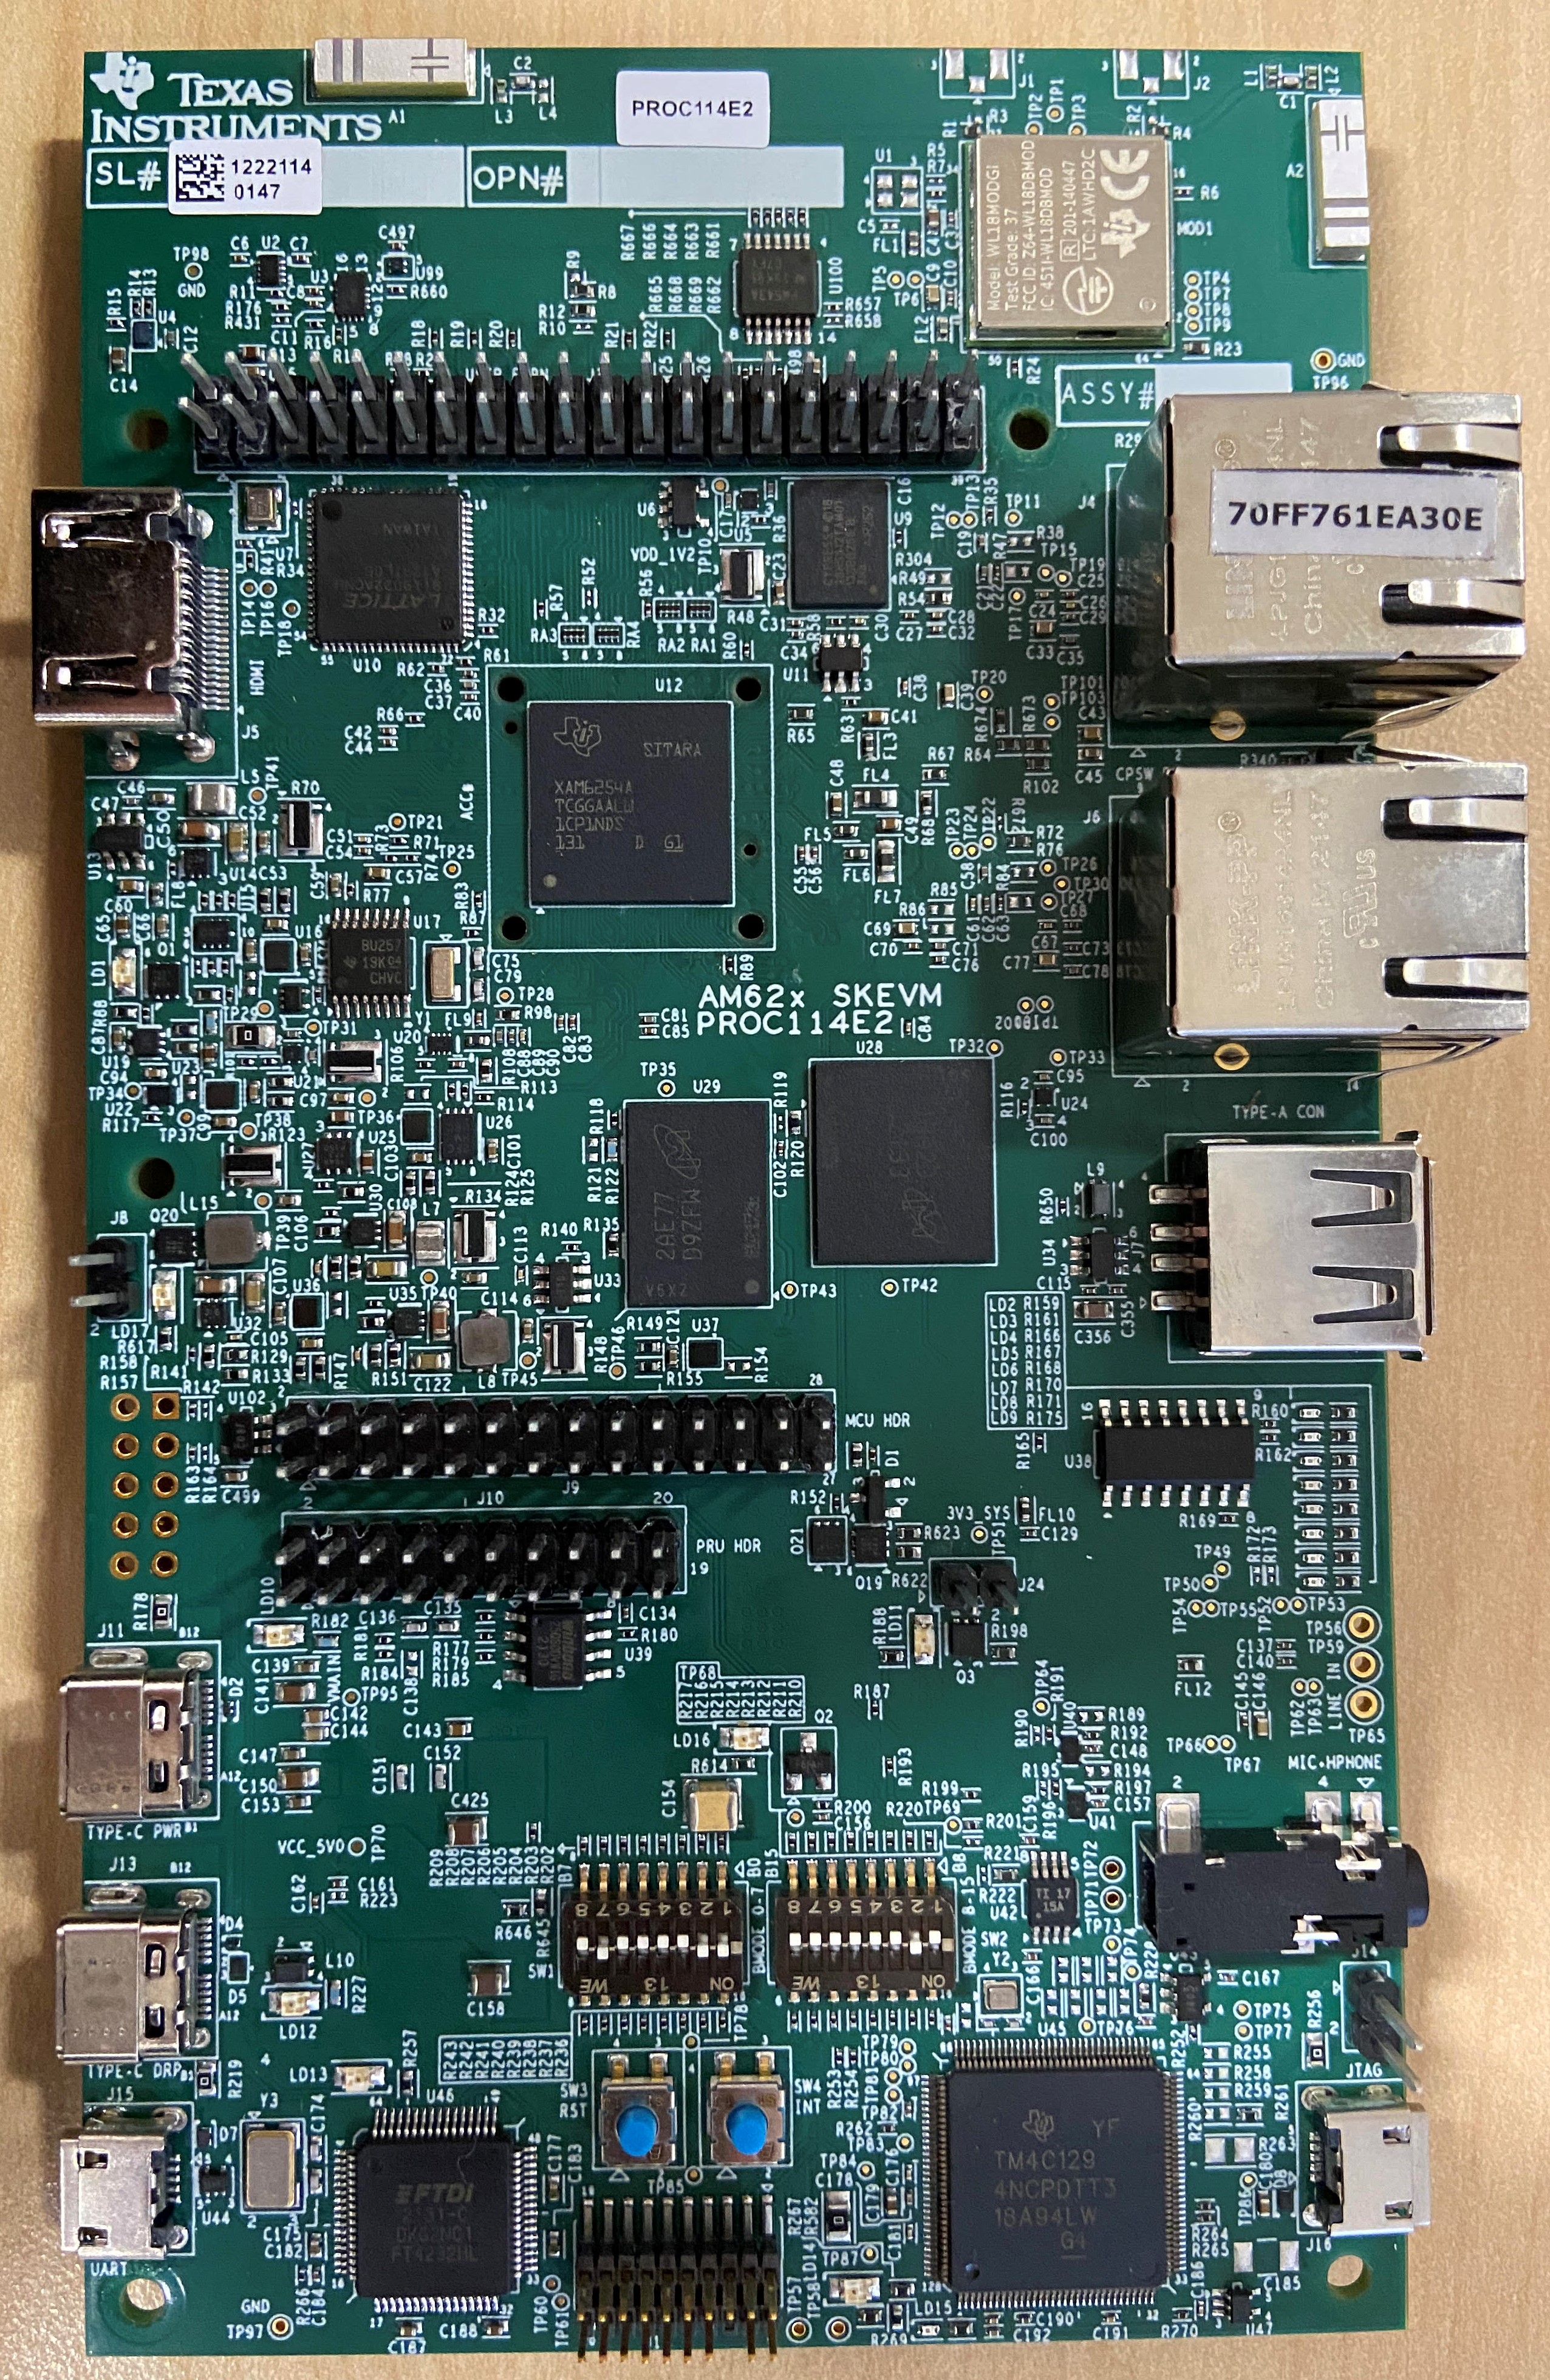
The following is the image of the AM62x EVM:

EVM Layout and Key Components
AM62 StarterKit (SK) board is a low cost, small form factor board designed for TI’s AM625 SoC. It supports the following interfaces:
- 2 GB DDR4 RAM
- x2 Gigabit Ethernet interfaces capable of working in Switch and MAC mode
- x1 HDMI Port with audio + x1 OLDI/LVDS Display interface for Dual Display
- x1 Headphone Jack
- x1 USB2.0 Hub with two Type A host and x1 USB Type-C DRP Port
- x1 UHS-1 capable µSD card slot
- 2.4/5 GHz WLAN + Bluetooth 4.2 through WL1837
- 512 Mbit OSPI flash
- x4 UART through UART-USB bridge
- XDS110 for onboard JTAG debug using USB
- Temperature sensors, user push buttons and LEDs
- 40-pin User Expansion Connector
- 24-pin header for peripherals in MCU island (I2C, UART, SPI, IO)
- 20-pin header for Programmable Realtime Unit (PRU) IO pins
- 15-pin CSI header
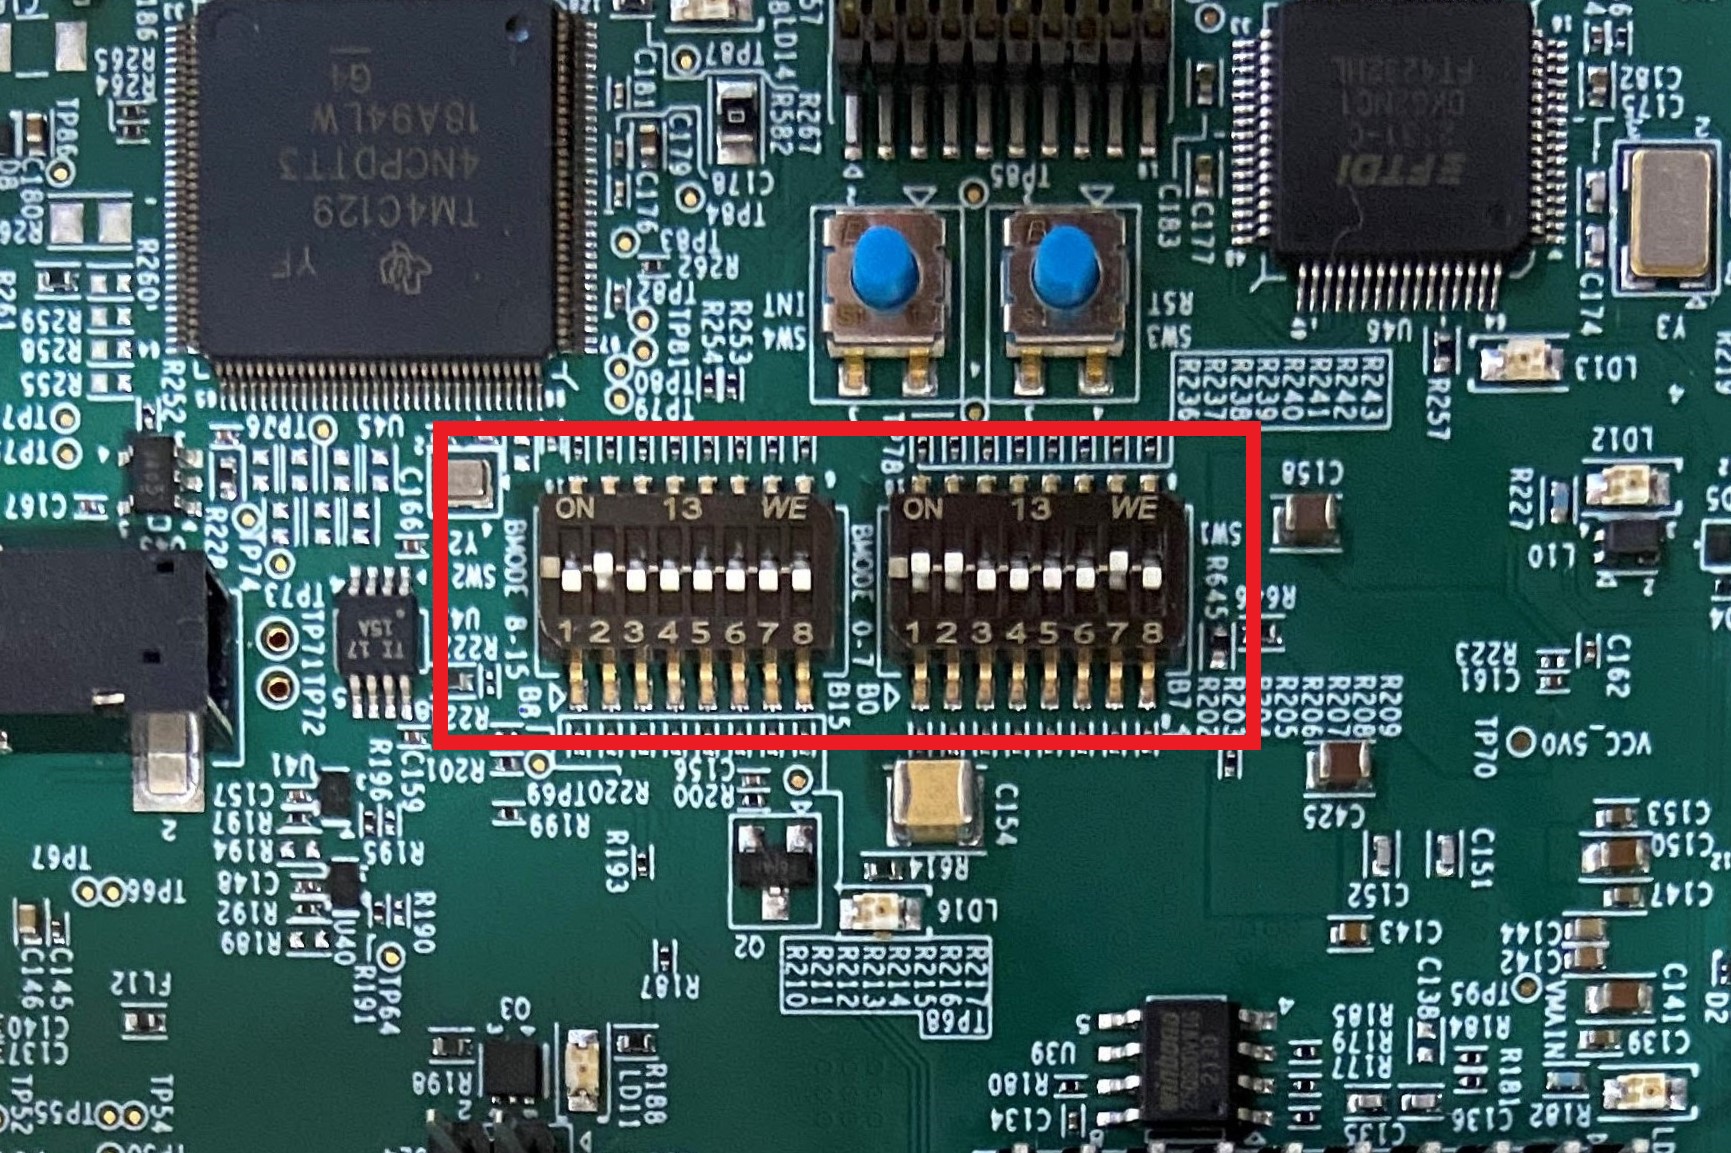
Switch settings
Note
For SW2 and SW1: (1 = ON = Pull up)
- Boot Mode=> SW2:12345678 SW1:12345678
- Linux SD: 01000000 11000010
- USB DFU: 00000000 11001010
The most common boot method is by SD card. The following shows the switch settings to set the boot mode to boot from SD card on the EVM.

EVM connections
Connect Following peripherals in order to work with the Processor SDK Linux:
1. Connect a micro USB cable from the UART1 port (j15) of the EVM and the host PC, this will register /dev/ttyUSB[0-3] in your Linux machine assuming no other USB device is plugged in. Connect to the first device ttyUSB0.
2. Open a serial console on the host PC, connect to the COM port in which the EVM UART port is connected (ttyUSB0), and set the following configuration.
- Baud rate: 115200
- Data length: 8 bit
- Parity: none
- Stop bits: 1
- Flow control: None
- Connect a 1080p monitor with HDMI port to the HDMI1 port (J5) of the EVM.
Note
Monitors with a preferred resolution up to and including 1080p could be used.
- Connect the ethernet cable to the PHY connector (J4 or J6) of the EVM board.
5. Insert the pre-formatted SD card in the micro SD card slot (J20) as was shown in Switch Settings.
6. Connect a USB-C cable at a USB-C connector (J11 or J13) to power on the board and connect the other end to the host PC. Alternatevly, a 65W+ power adapter with a USB-C type end could be used.
- Use SW3 () to reset the board.
