2. Getting Started with Debian
The SD card Image tisdk-debian-bookworm-<machine> provided on the AM64x-SDK-Download-page is all you need to get started and explore Debian on TI microprocessors.
The Debian Image provided has all the basic packages required to boot with weston as default window manager. The user can install any new package using inbuilt ‘apt’ utility and customize the filesystem as required.
Follow the steps mentioned in this page to create an SD Card.
2.1. Hardware Setup
In addition to the EVM itself, the following hardware is needed:
Barrel jack power supply
Micro-SD card reader
Micro-SD card (16GB or larger recommended)
USB Micro-B cable for UART serial communication
Ethernet cable (For network access)
2.2. Create SD Card using balenaEtcher
Download the default bootable SD card image (WIC file) available on the release page as tisdk-debian-bookworm-<machine>.wic.xz
Download and install the balenaEtcher tool:
Balena Etcher is an open-source utility that can be installed on both Linux and Windows. Download the tool from this link and install it.
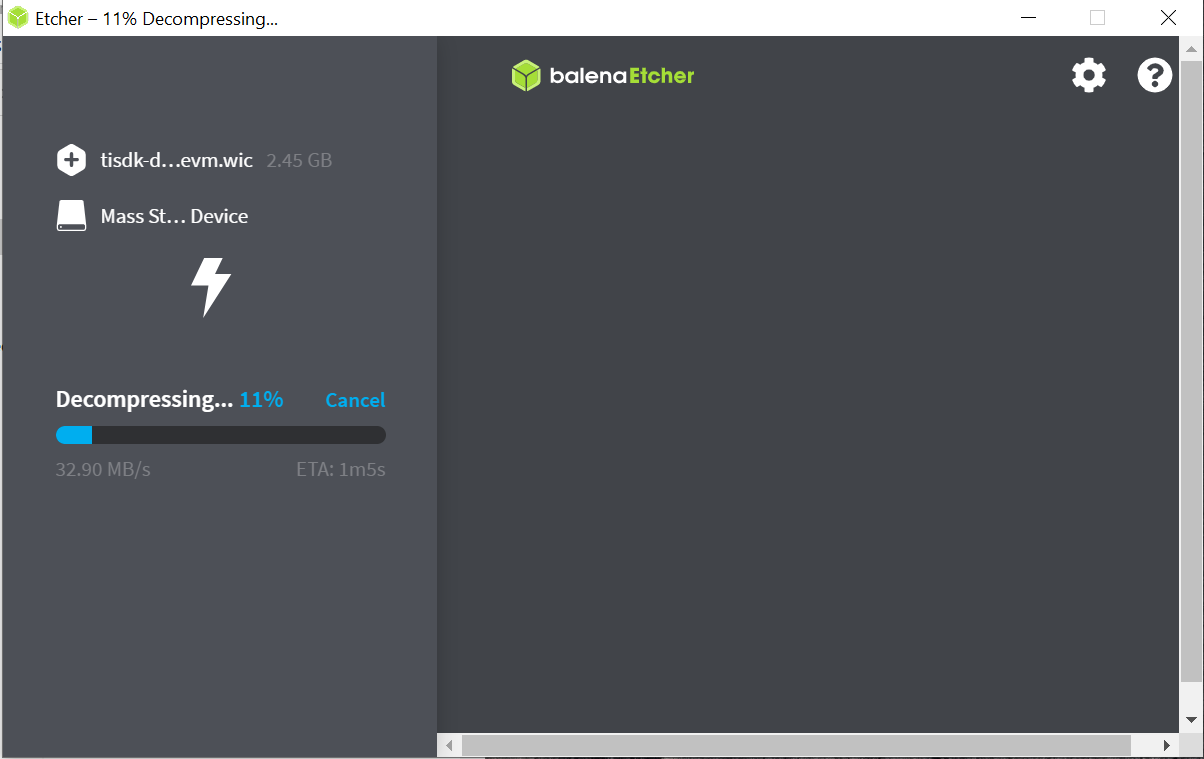
Flash the WIC image to the SD card:
Insert a micro SD card into the USB SD card reader and start Etcher. Choose the debian wic image to be flashed, choose the USB SD card reader as the target, and then click “Flash”. Etcher will decompress the image and write it to the SD card, as shown below:
2.3. Set the EVM to SD card Boot mode
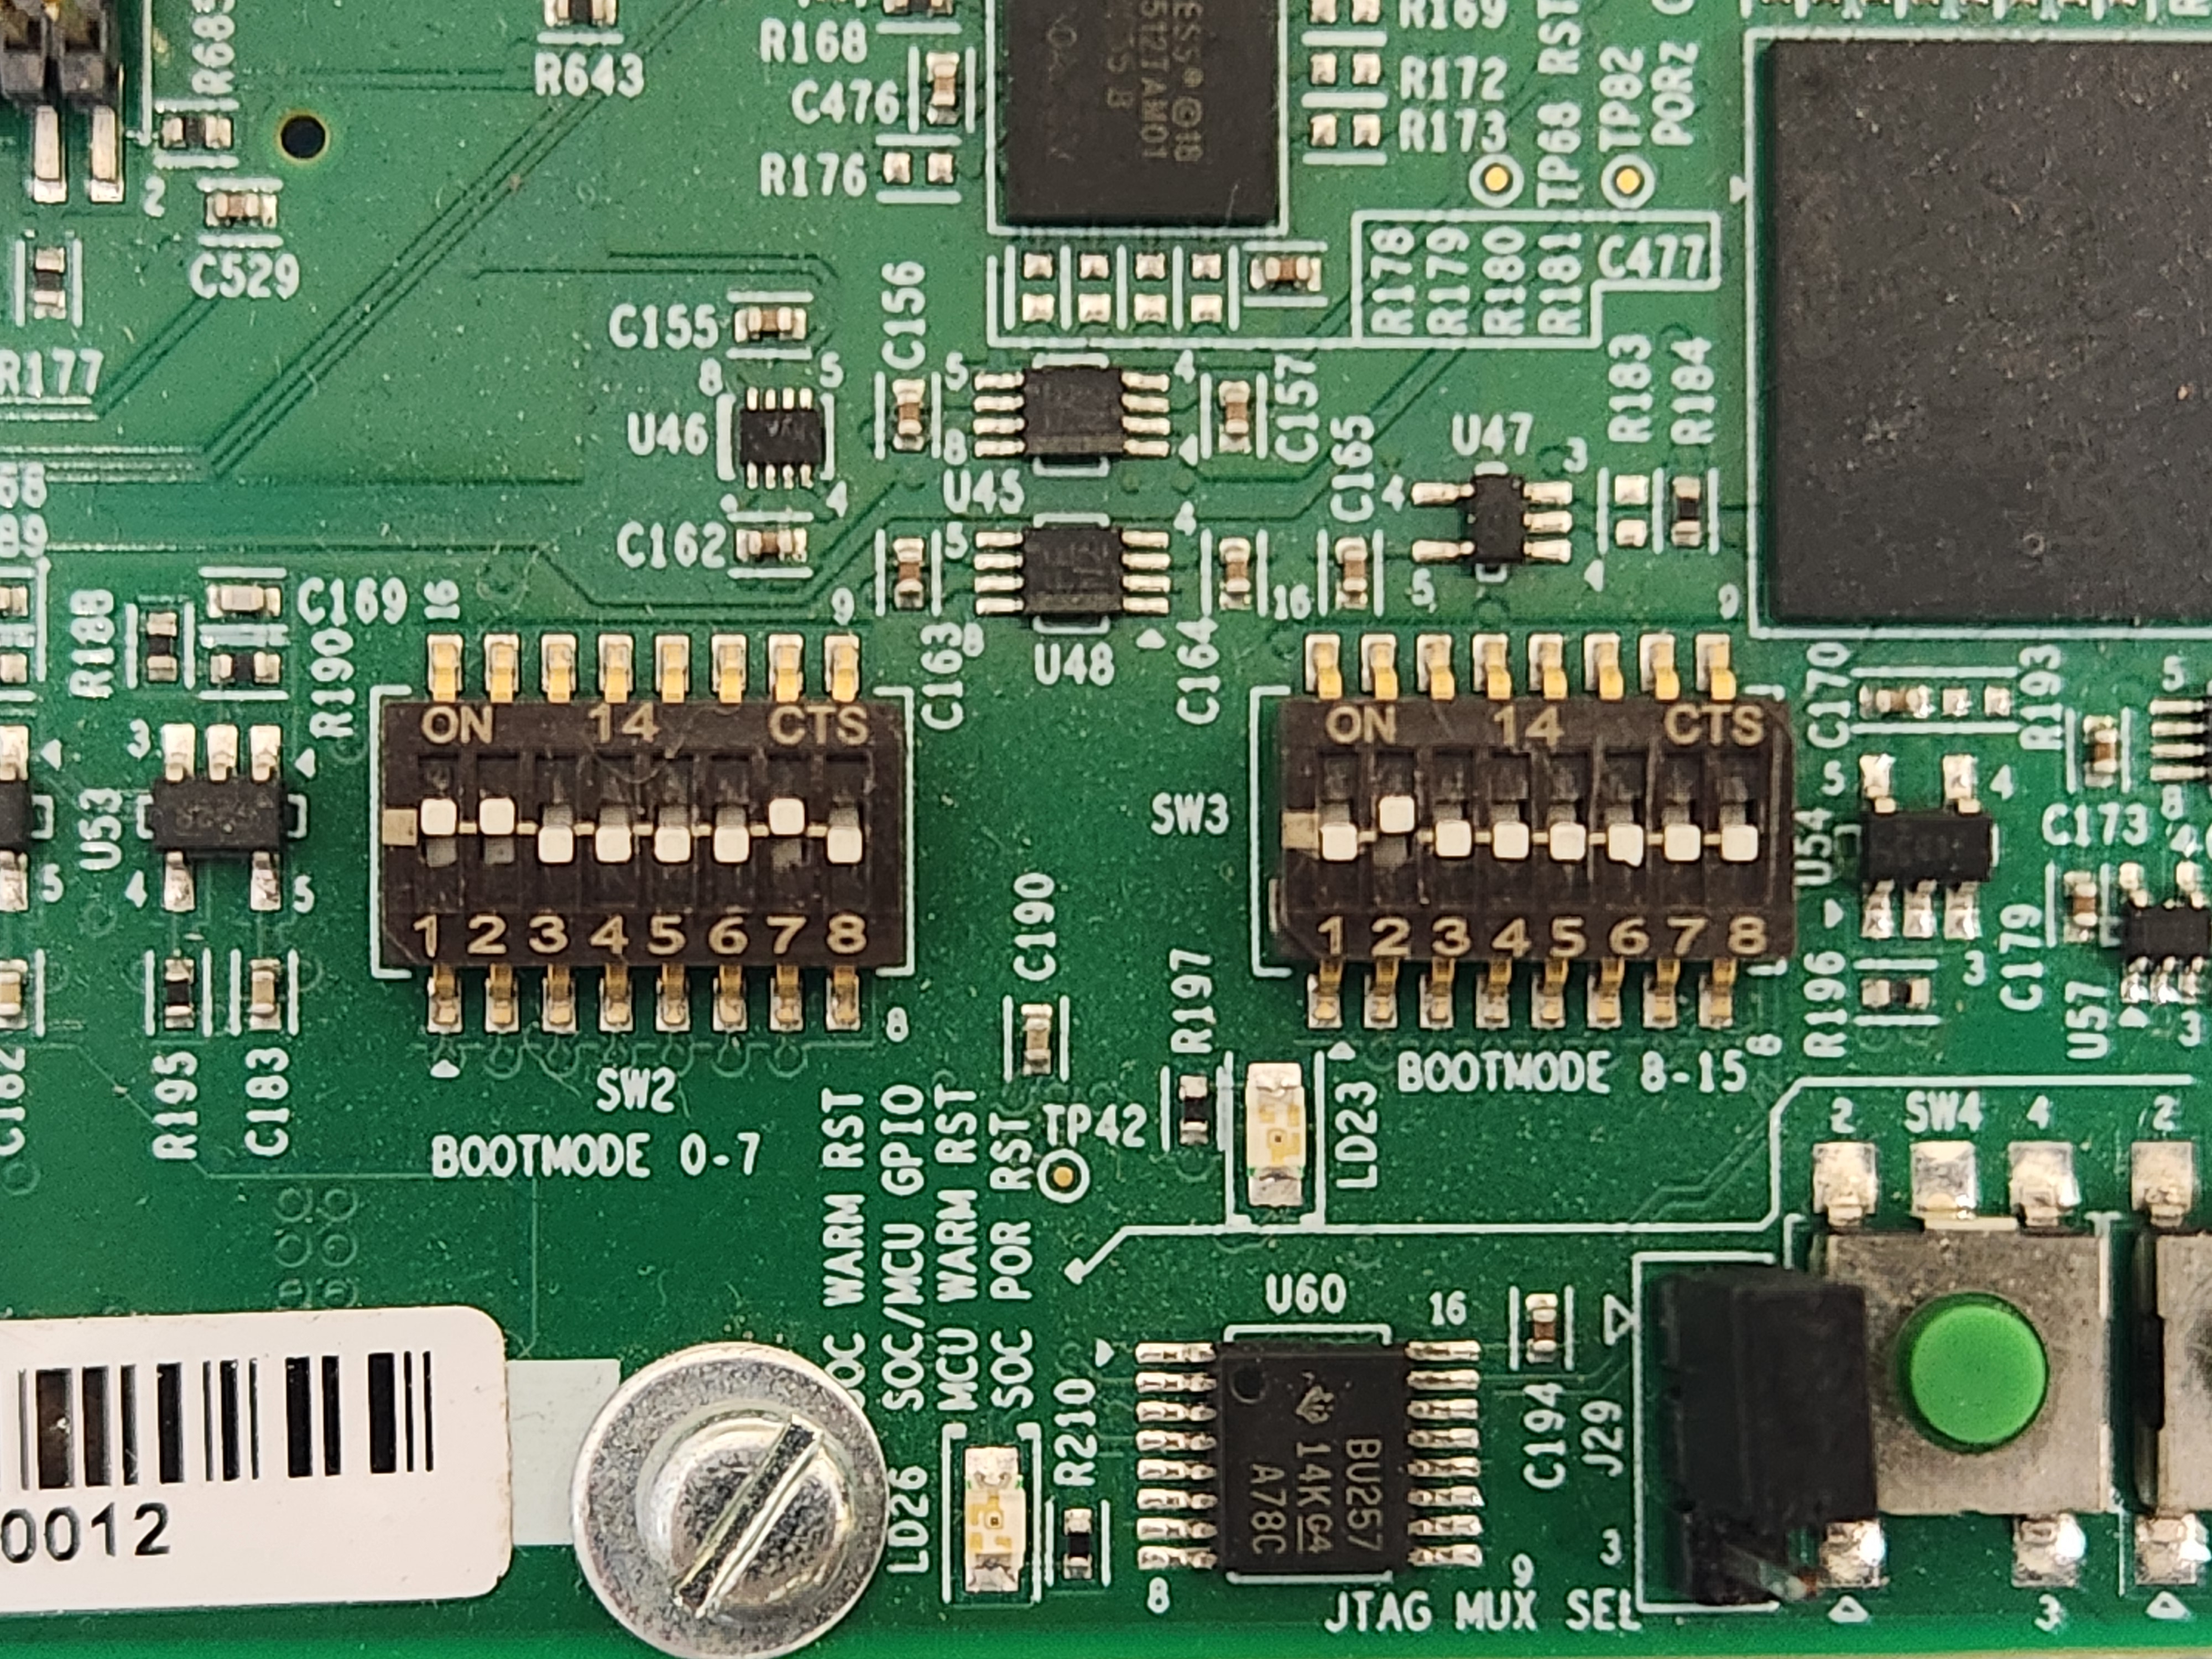
The simplest way to run Linux on the SK EVM is through an SD card. For that, the EVM will need to be configured for SD card boot. Refer to AM64x SK EVM User’s Guide for detailed information about boot mode configurations. For quick reference, the figure below shows the boot mode switch setting for SD card boot.
2.4. Boot and Validate Debian
Make sure to connect the UART and Ethernet cable to the EVM. Insert the SD Card in the board and Power ON the EVM.
After approximately 20 seconds, the board should boot and you should see the on-board LED glowing.
You’ve successfully booted Debian on AM64x.
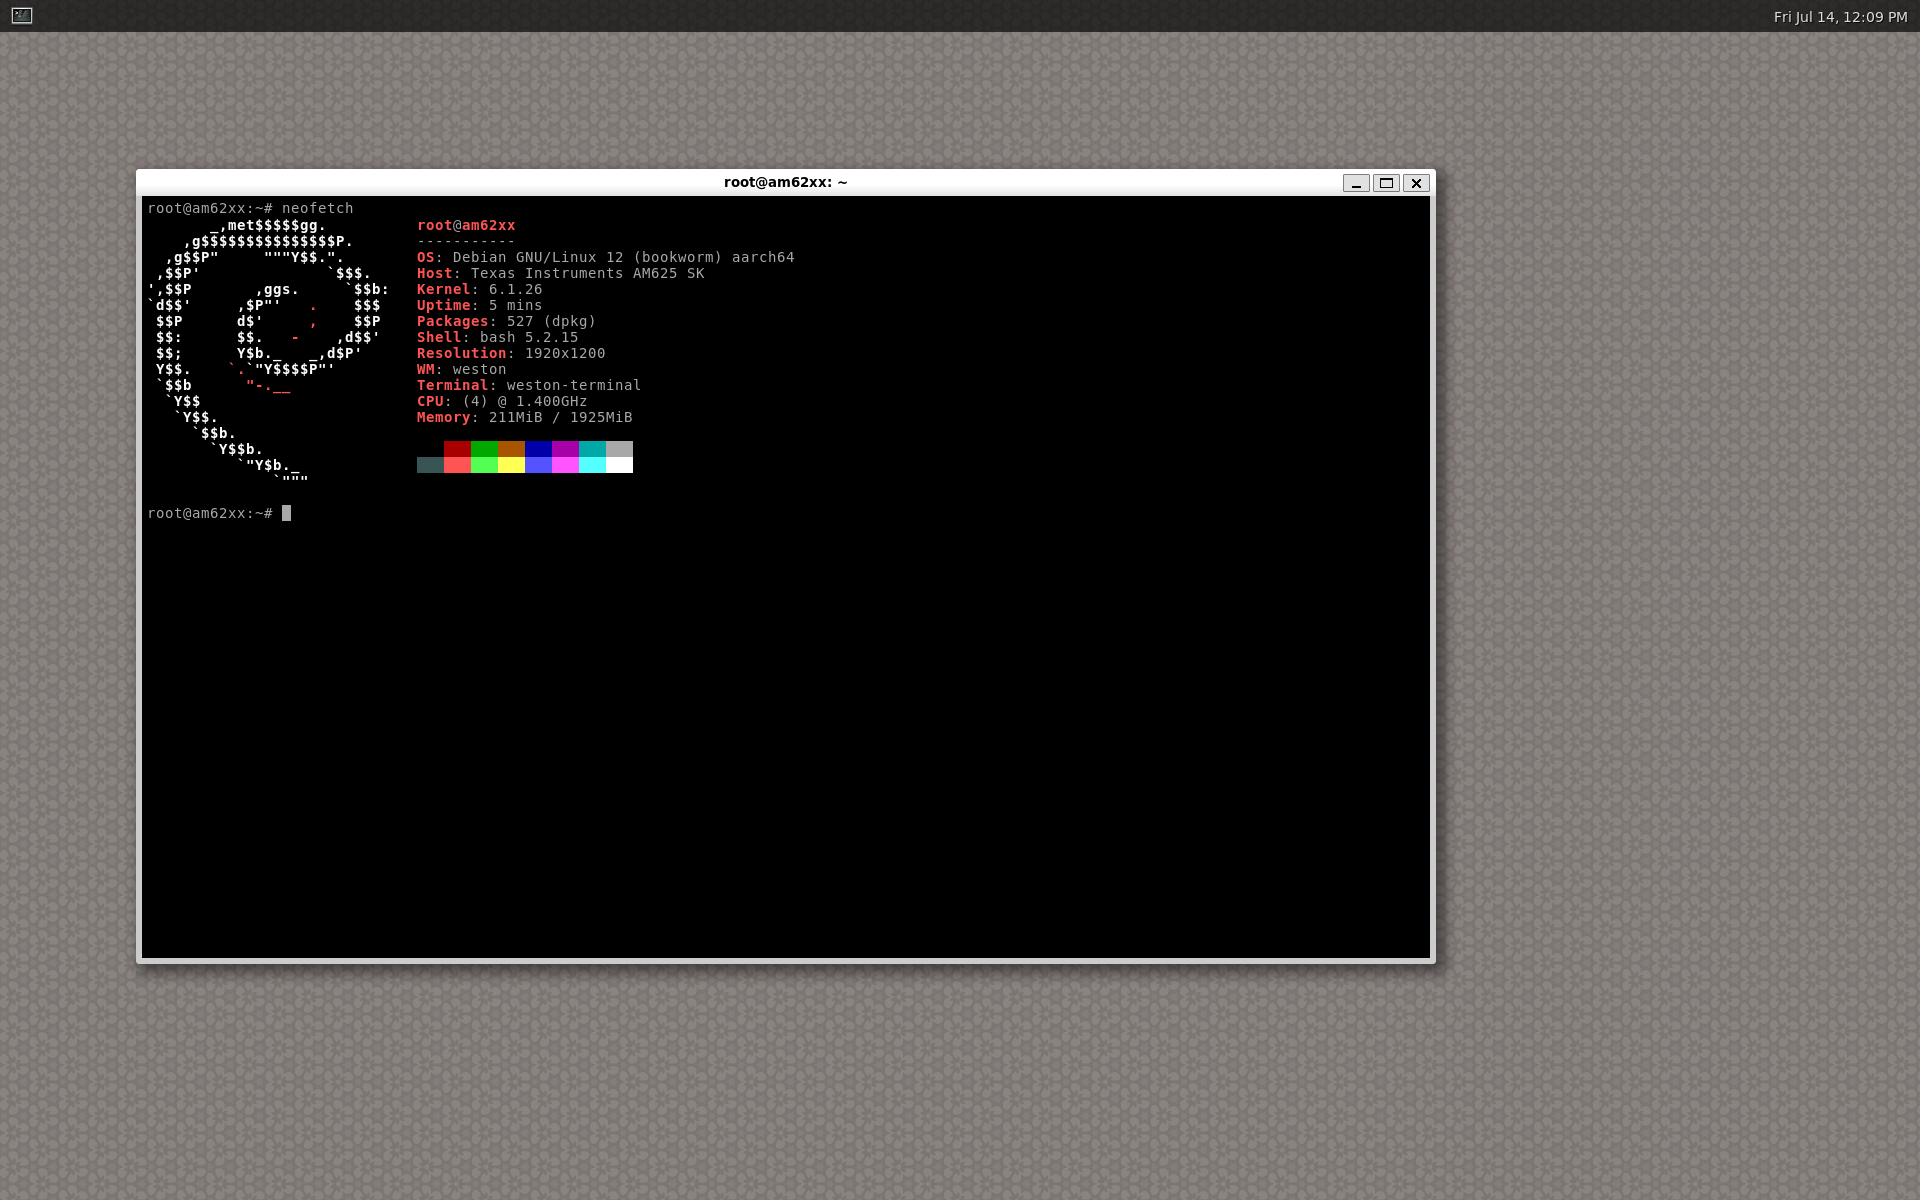
To verify the distro, connect via the UART console and try running neofetch on the terminal. The output of the command can be observed on the screen as shown below.
If the board is connected to a private network, setup the proxy to be able to access the Internet. For more info, refer to apt.conf(5) man page
Also export http_proxy, https_proxy, ftp_proxy and no_proxy with appropriate values if needed.
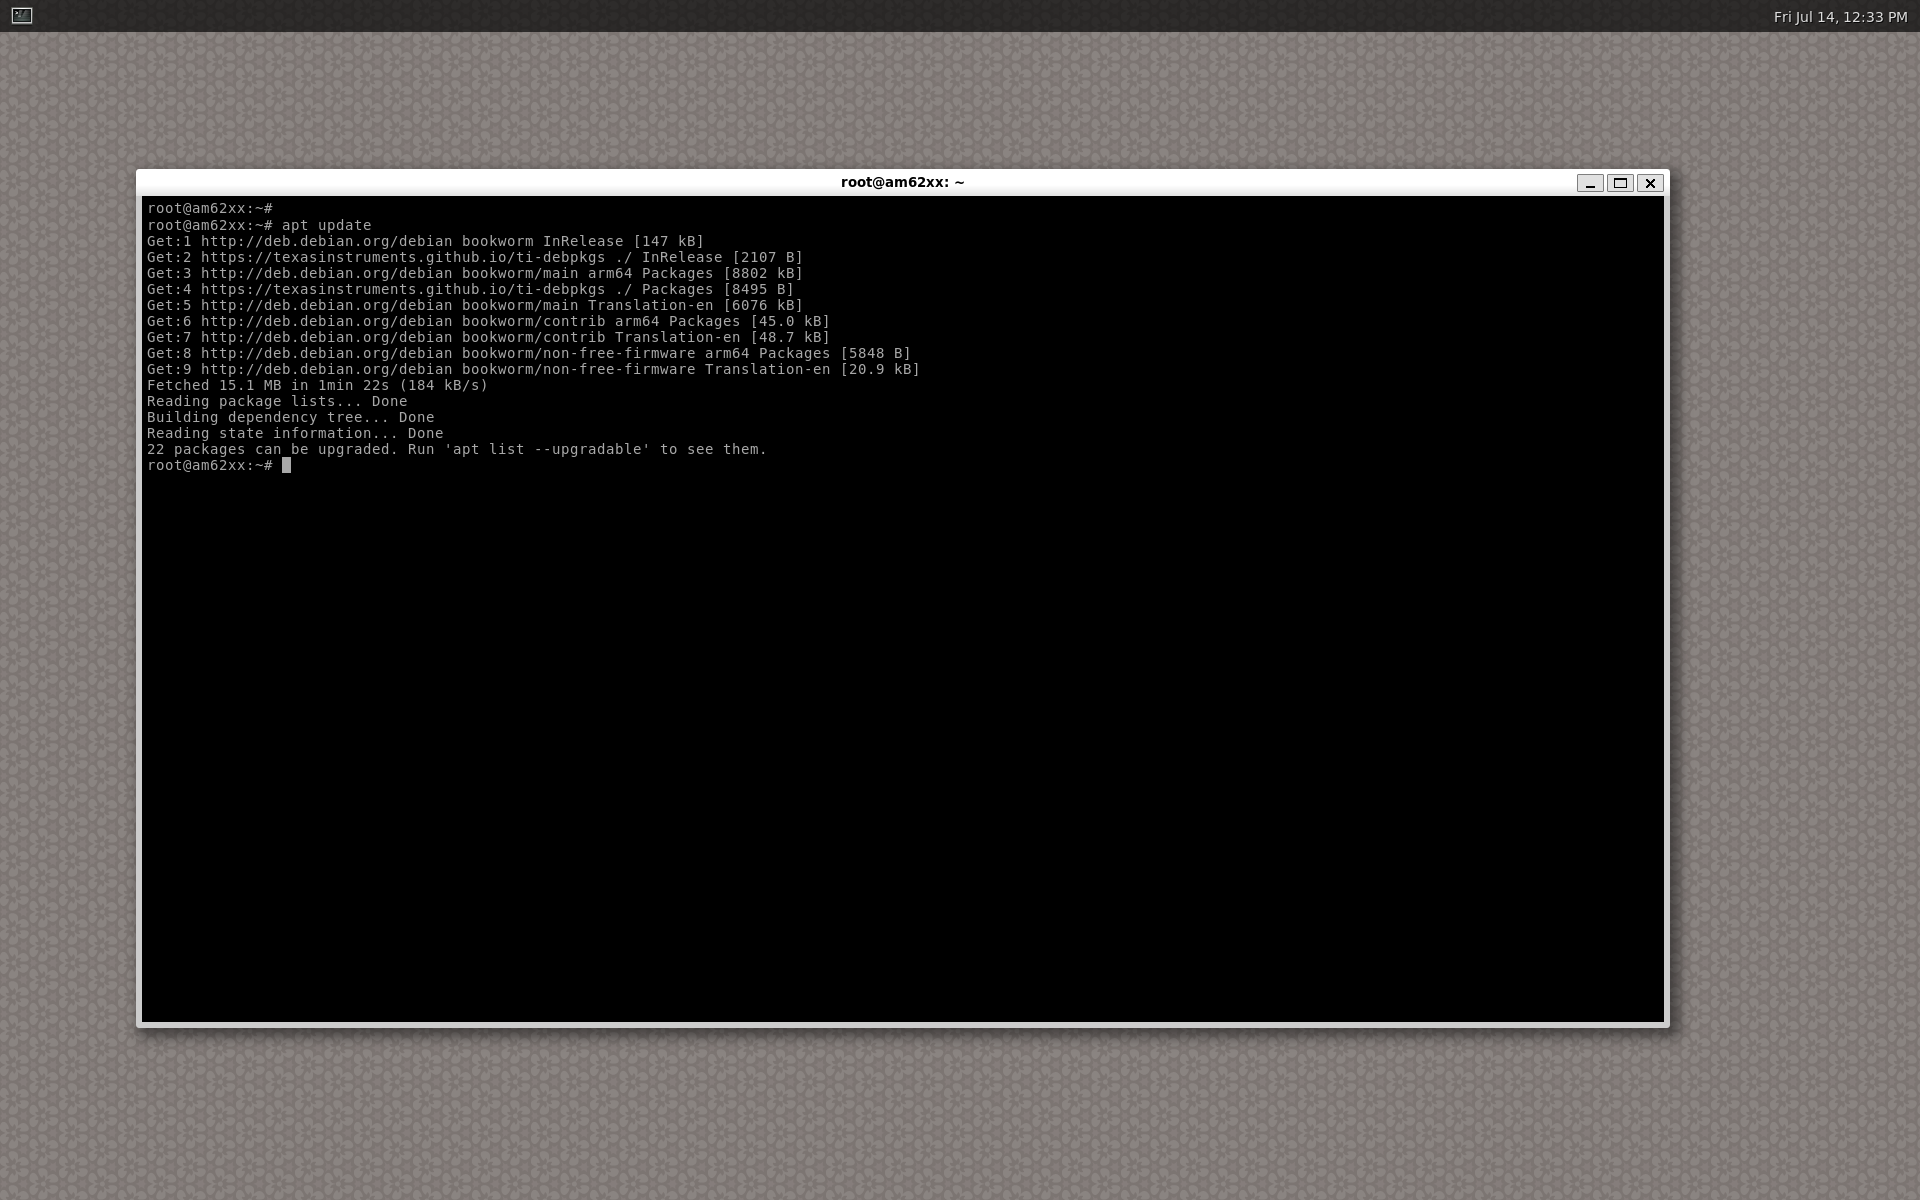
Do an apt update to make sure that the proxy is properly set and apt recognizes it. The sample output of the command is as shown below:.
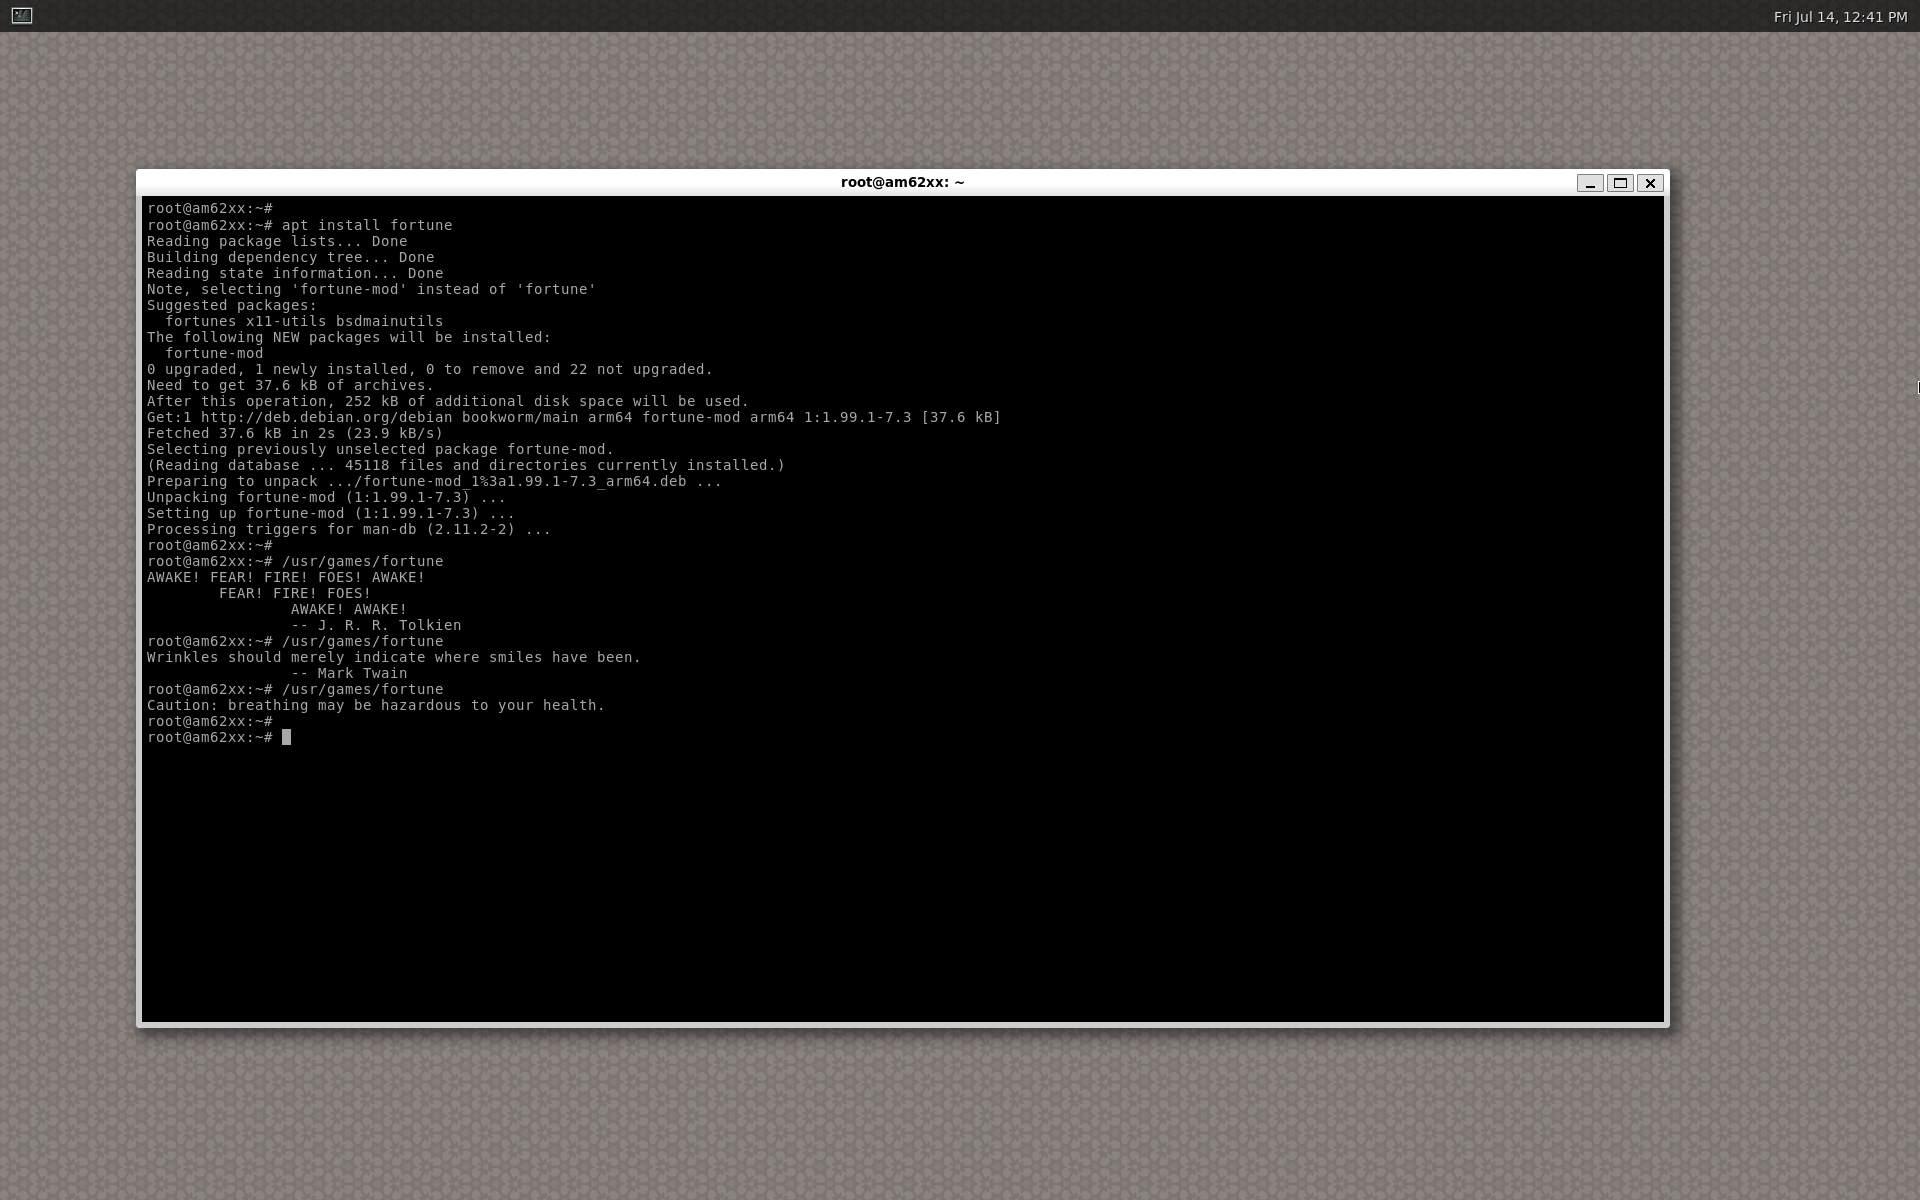
To install any package available on Debian Standard Package Archive and TI Package Archive use apt install.
As an example to install and run fortune package.
More packages can be installed at runtime following the instructions provided to help with the development work flow.