6.1.15. Program the eMMC on Beaglebone Black
6.1.15.1. Overview
This documentation provides the flow and scripts for programming the eMMC on a BeagleBone Black solely via CPSW Ethernet or USB Gadget Mode Ethernet connection to a Linux host PC. This solution will work with a completely blank board / EVM. This solution can be used as a base to create a custom production programming solution.
- In order to accomplish this goal, two main objectives need to happen:
- Modify the SDK to boot Linux from the eMMC. Most of this can be done using pre-built images provided with the SDK
- Use the SDK to build a separate “flasher” image which can be transferred from the host PC via Ethernet or USB to program the above image on to the eMMC

6.1.15.2. What is Needed
- The most current Processor SDK for Linux installed on an appropriate development system
- An image to flash. This can be derived from the SDK mentioned above
- A Linux Filesystem small enough to be peripheral booted, with the functionality needed to do the necessary flashing operation. This can be derived from the SDK mentioned above
- A Linux host PC to serve as a flashing server
- A Beaglebone Black
- A mini-USB or Ethernet cable to connect the Beaglebone Black to the host PC
- A 5V power supply compatible with the Beaglebone Black
- A Serial Debug Cable is recommended to monitor U-Boot outputs
- A configured TFTP Server
- The following files:
**fetcher.sh**script**flasher.sh**script**interfaces**file**tisdk_am335x-evm-flasher_defconfig**file
6.1.15.3. Preparing the Flasher Image
Before flashing the eMMC, we need to create the image that will run on the flash.
Populate pre-built U-Boot images from SDK into TFTP folder
Note
We can use the prebuilt U-Boot images as-is with no modifications needed
Note
A configured TFTP Server is necessary for this guide. Steps to properly configure a TFTP Server can be found here
- Copy u-boot-spl.bin-am335x-evm and u-boot-am335x-evm.img files from <Processor-SDK>/board-support/prebuilt-images/ into the root /tftpboot/ folder. /tftpboot/ is often located under /var/lib/
Prepare a rootfs to be used as a “flasher tool”
Navigate to <Processor-SDK>/filesystem
Extract SDK-provided “tiny” rootfs:
Create a directory called arago-tiny-image-am335x-evm under <Processsor-SDK>/filesystem/
Create a tarball from the arago-tiny-image-am335x-evm directory called arago-tiny-image-am335x-evm.tar.xz.
tar -C arago-tiny-image-am335x-evm -xvf arago-tiny-image-am335x-evm.tar.xz
Create an /init link pointing to /sbin/init. The Kernel requires this to boot from the initramfs:
ln -s /sbin/init arago-tiny-image-am335x-evm/init
Verify contents of initramfs root folder:
ls -l arago-tiny-image-am335x-evm/- init should now be linked to sbin/init
Copy provided fetcher.sh script into arago-tiny-image-am335x-evm/etc/init.d/ directory
Verify fetcher.sh script has been populated into rootfs:
ls -l arago-tiny-image-am335x-evm/etc/init.d/
Create a symlink to fetcher.sh into rc5 for automatic startup init runlevel 5:
ln -s -r arago-tiny-image-am335x-evm/etc/init.d/fetcher.sh
arago-tiny-image-am335x-evm/etc/rc5.d/S99fetcher.sh
Verify rc5 configuration for presence of symlink:
ls -l arago-tiny-image-am335x-evm/etc/rc5.d/- S99fetcher.sh should now be linked to /init.d/fetcher.sh
Copy provided interfaces file into arago-tiny-image-am335x-evm/etc/network/
Note
This Interfaces file disables the automatic bringup of the usb0 interface (i.e., ) and configures it for DHCP (‘iface usb0 inet dhcp’). We want to prevent the automatic bringup because we first want to populate a custom Ethernet HW address via ‘ip link set usb0 address ${MAC_ADDR}’ in fetcher.sh.
Prepare Kernel to be used as a “flasher tool” with baked-in initramfs
Note
You can choose to follow these steps, or use the provided tisdk_am335x-evm-flasher_defconfig and .config files. In this case, just make a backup copy of the SDK’s original .config file named .config.orig and use the provided .config instead.
Copy tisdk_am335x-evm-flasher_defconfig to <Processor-SDK>/board-support/linux-x.xx.xx+gitAUTOINC+be5389fd85-gbe5389fd85/arch/arm/configs/
Build device defconfig file
make ARCH=arm CROSS_COMPILE=arm-linux-gnueabihf- tisdk_am335x-evm-flasher_defconfig
Make a backup copy of .config called .config.orig
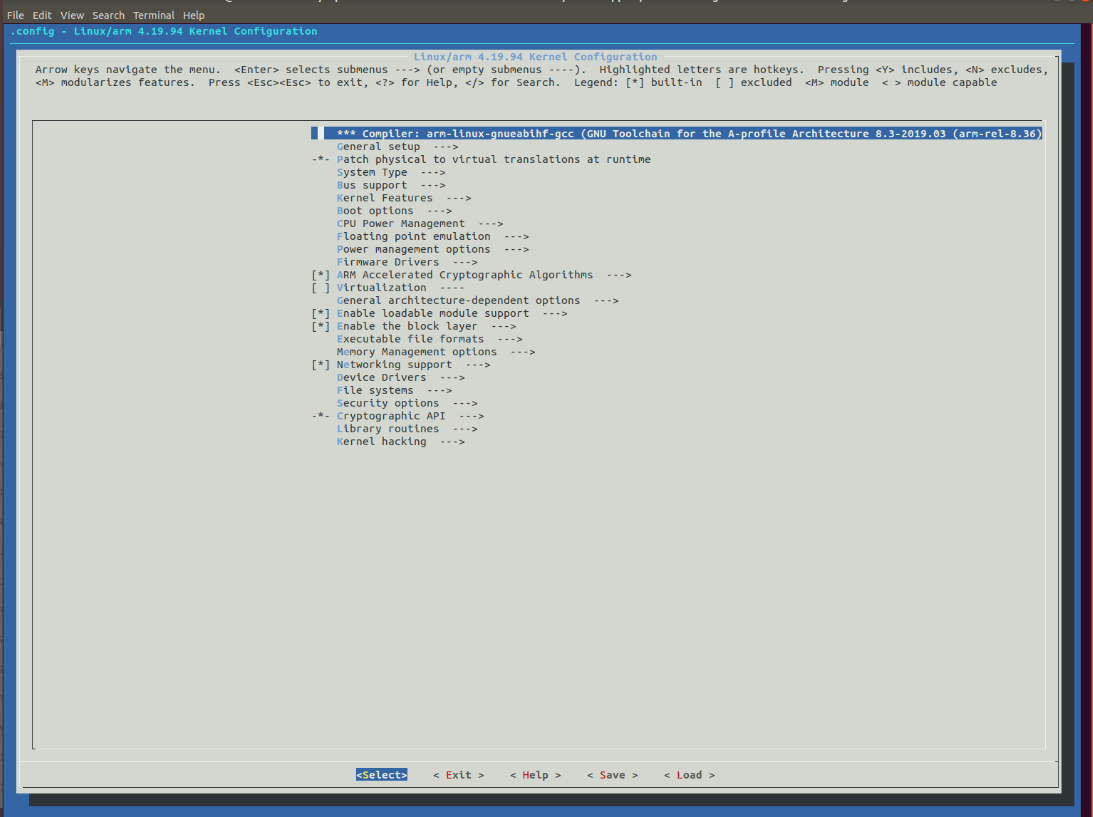
Edit the current Kernel config using menuconfig as follows:
make ARCH=arm CROSS_COMPILE=arm-linux-gnueabihf- menuconfig
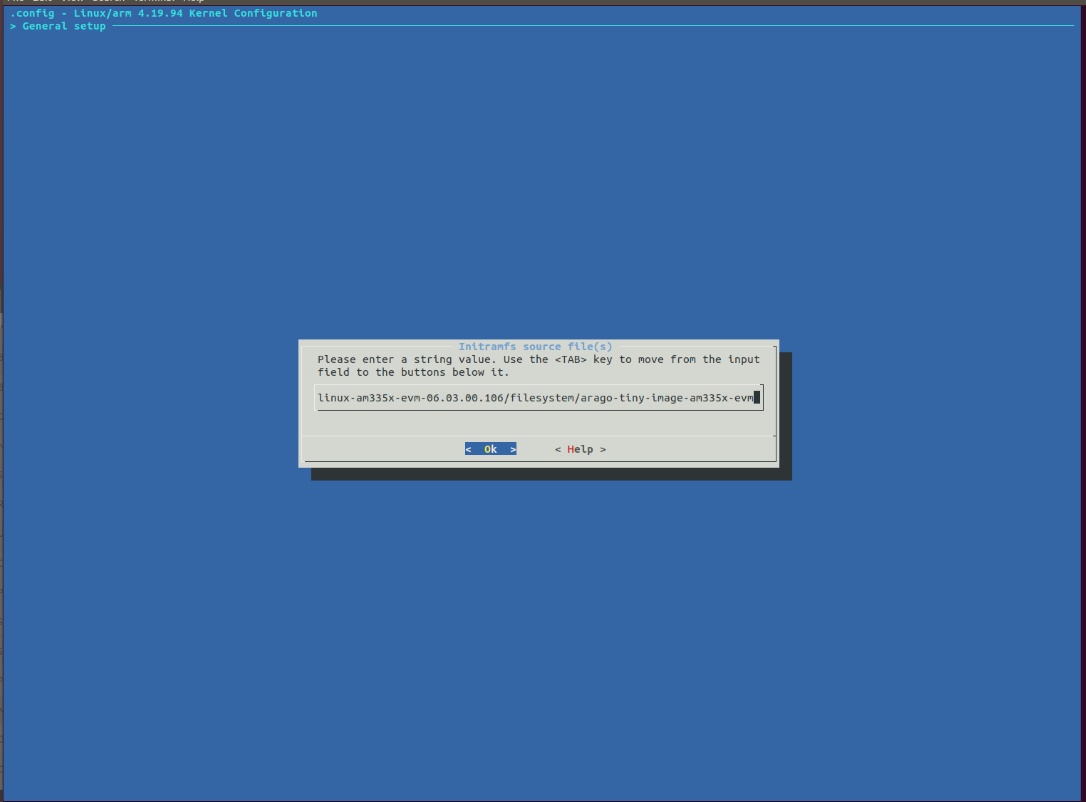
Set CONFIG_INITRAMFS_SOURCE = <Processor-SDK>/filesystem/arago-tiny-image-am335x-evm
Select General setup:
Scroll down to Initial RAM Filesystem and RAM Disk (initramfs/initrd) support and Select it:

Move down a line to Initramfs source file(s). Select it and fill in the location of the files:
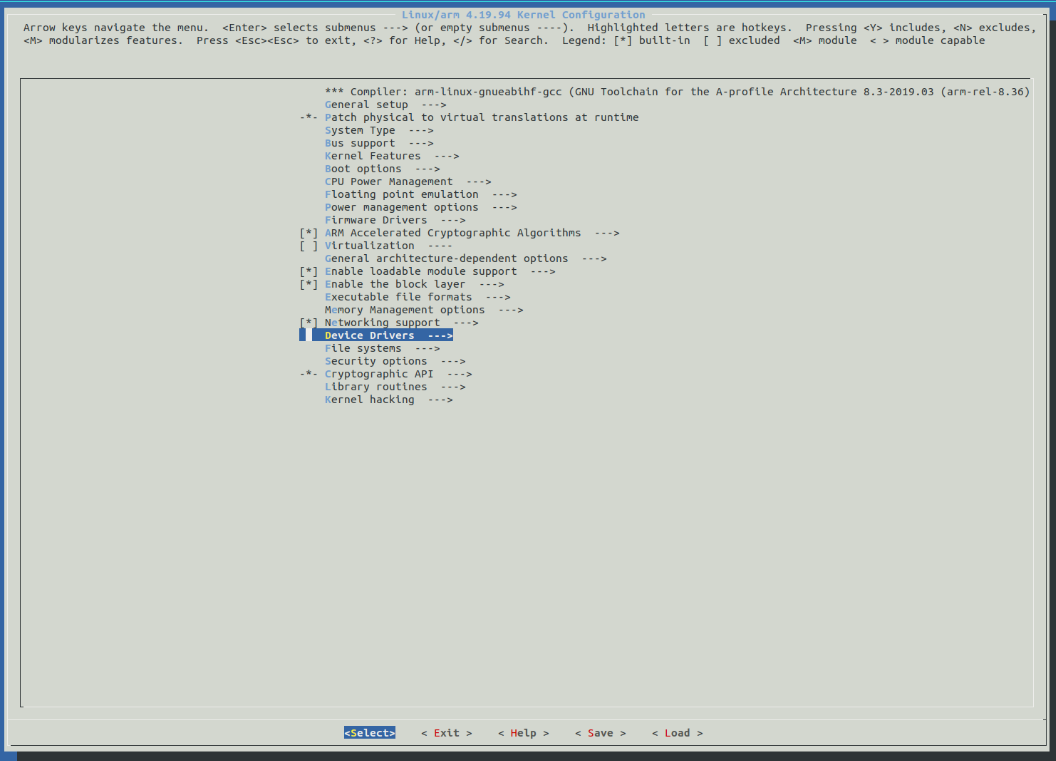
Bake USB gadget Ethernet driver into Kernel (optional, for Ethernet USB gadget mode)
Use Exit to get back to the beginning of menuconfig. Scroll down and find Device Drivers:
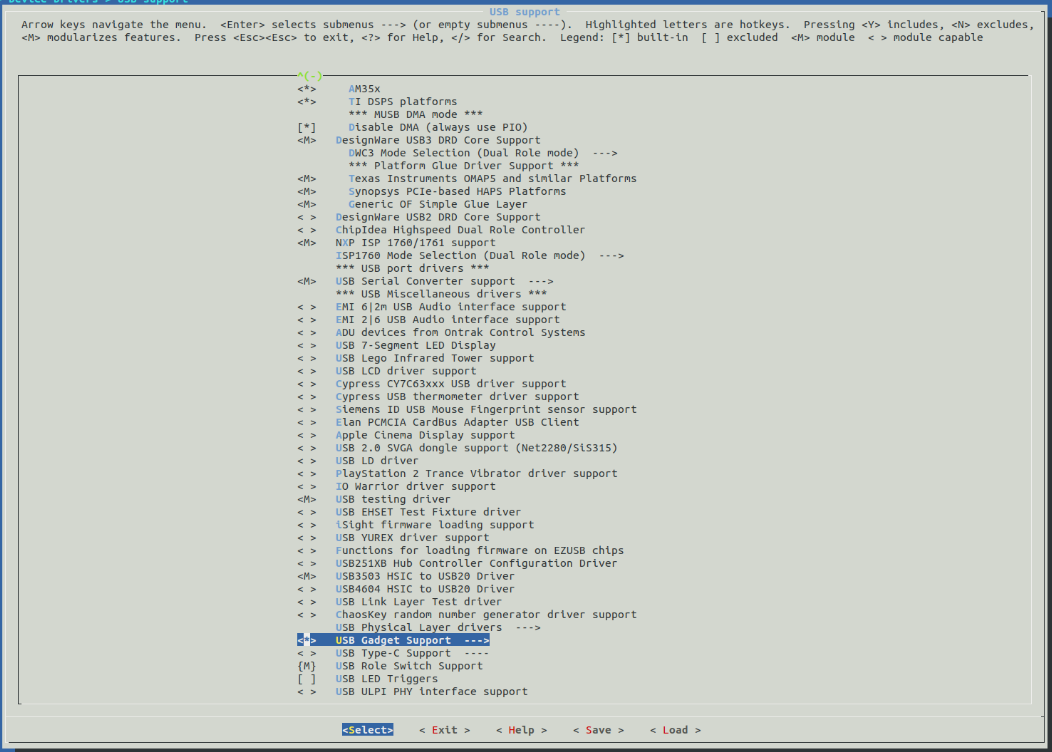
Scroll down and select USB support:
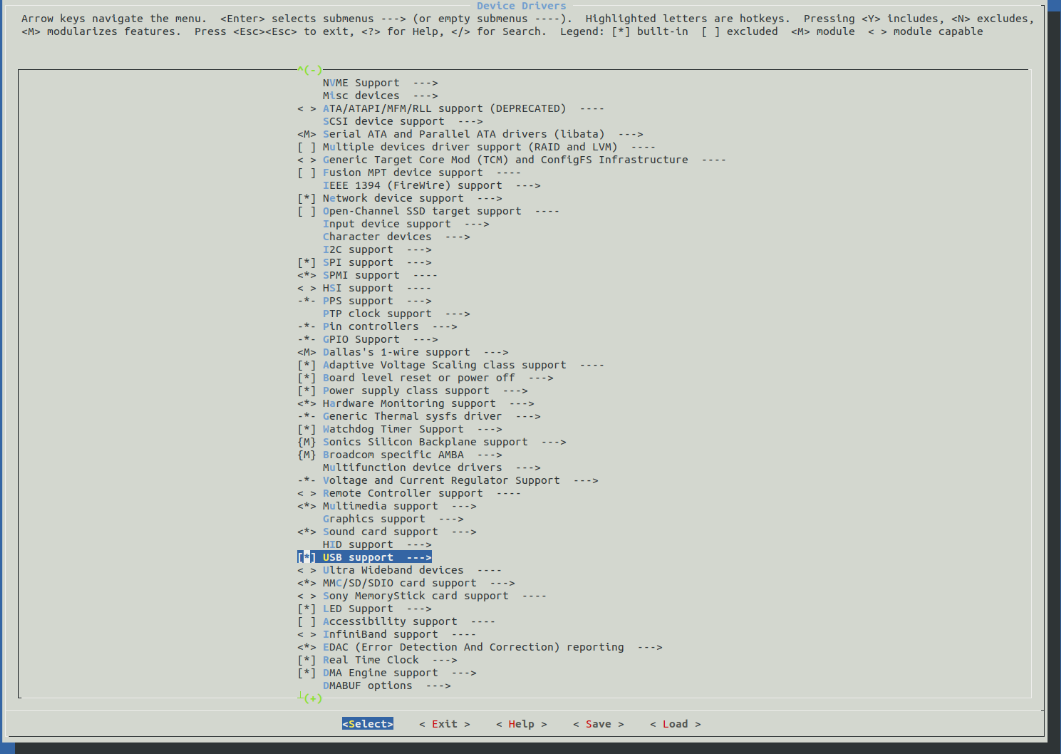
Scroll down to USB Gadget support and use the space bar to enable it:
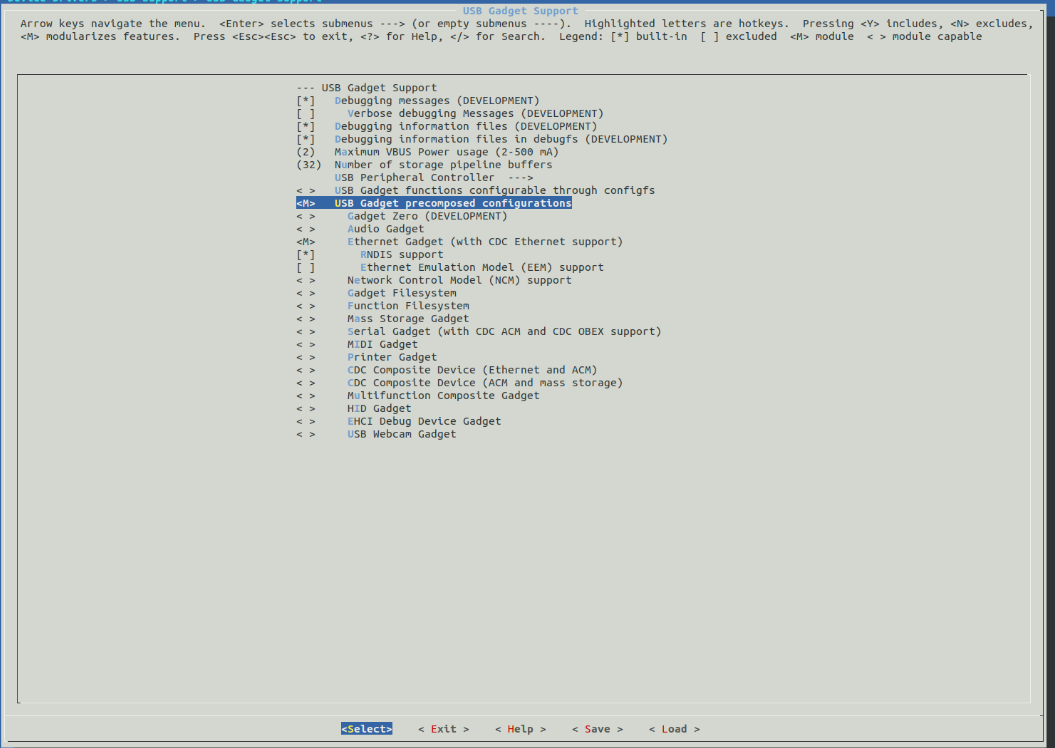
Use Enter to go further into USB Gadget support. Make sure everything below USB Gadget precomposed configurations is configured like this:
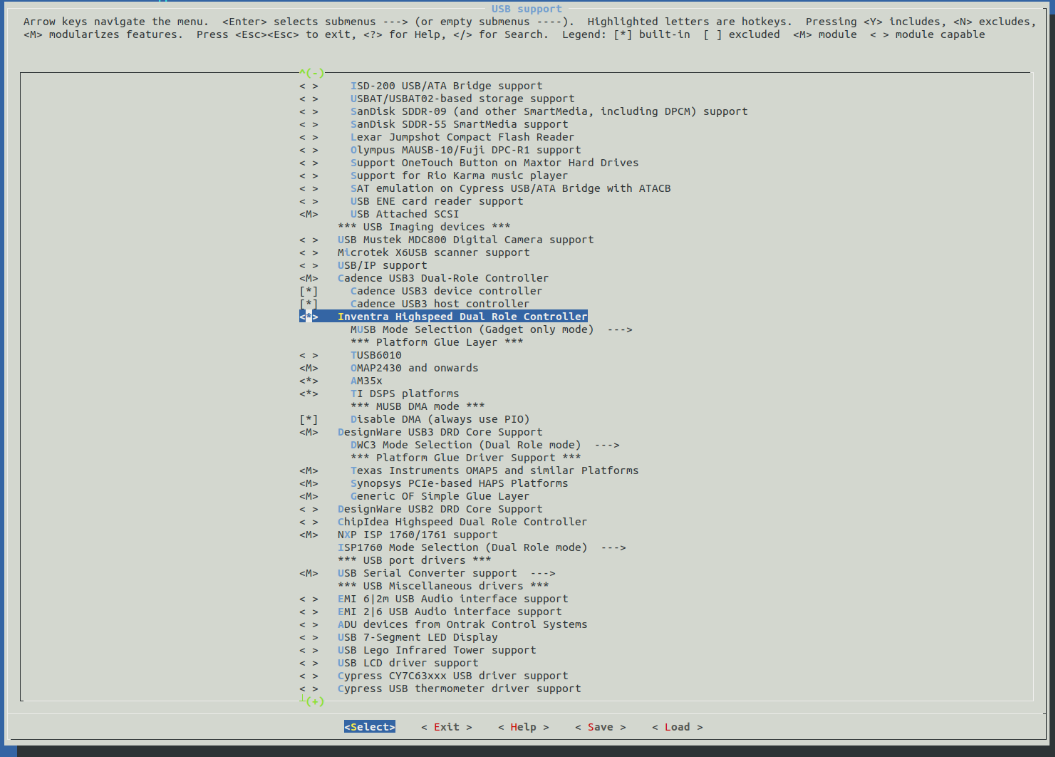
Bake MUSB drivers and anything related needed for AM335x USB into Kernel (optional, for Ethernet USB gadget mode)
Use Exit to move back to USB support. Use the sapcebar to enable Inventra Highspeed Dual Role Controller:
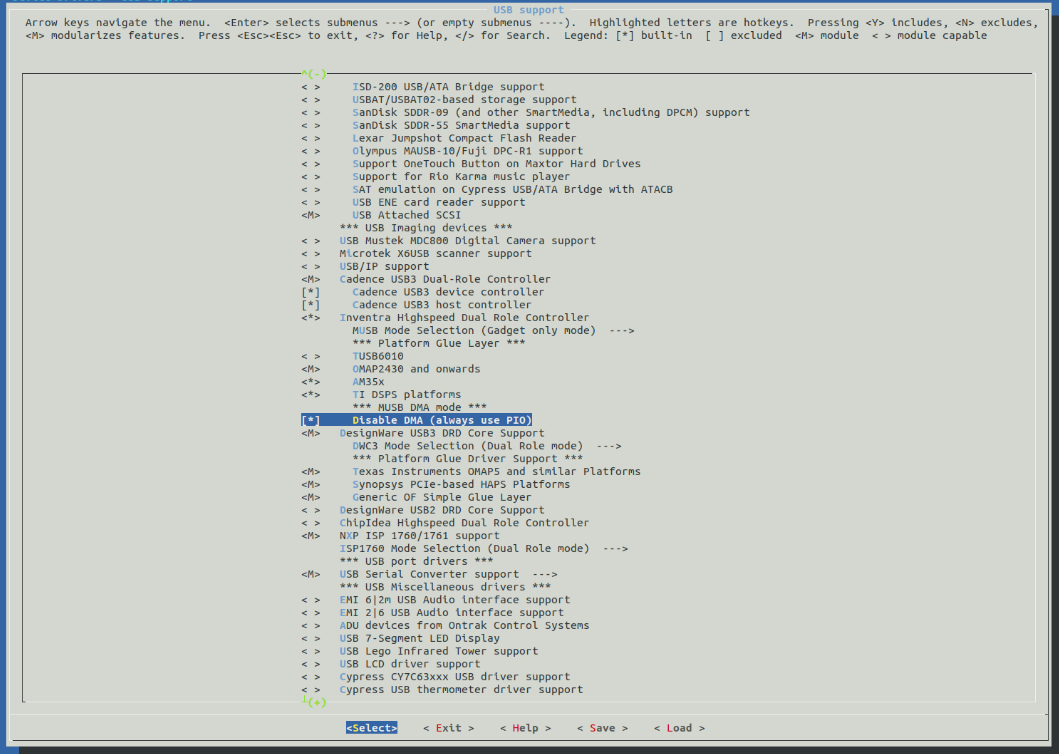
Set MUSB DMA Mode to “Disable DMA” (optional, for Ethernet USB gadget mode)
Scroll down to TI DSPS platforms and enable it:
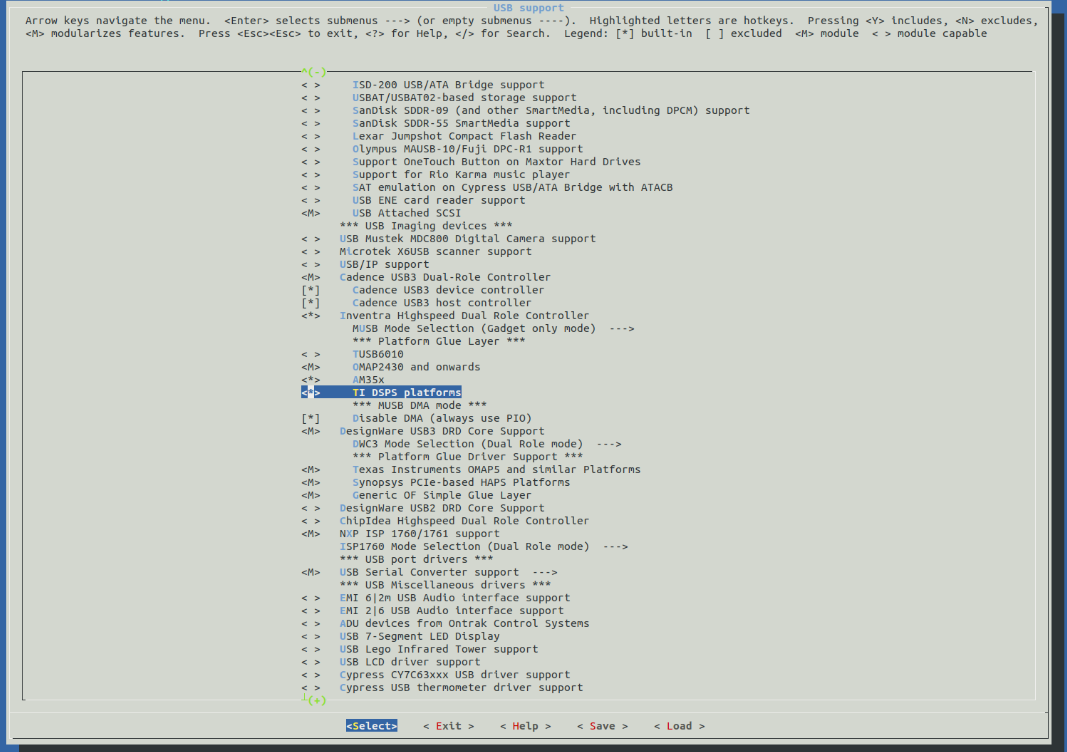
Scroll down to Disable DMA (always use PIO) and enable it:
- Exit menuconfig and save the new configuration
Build the Kernel
Compile the zImage
make ARCH=arm CROSS_COMPILE=arm-linux-gnueabihf- zImage
Compile the Device Tree Binary (.dtb)
make ARCH=arm CROSS_COMPILE=arm-linux-gnueabihf- am335x-boneblack.dtb
Copy <Processor-SDK>/filesystem/arch/arm/boot/zImage to /tftpboot/
Copy <Processor-SDK>/filesystem/arch/arm/boot/dts/am335x-boneblack.dtb to root /tftpboot/ directory
Copy provided flasher.sh script to root /tftpboot/ directory
Create eMMC boot partition contents archive boot_partition.tar.gz from SDK artifacts in a temporary folder and populate into the TFTP home directory
Create a temporary directory called ~/tmp/
Copy MLO-am335x-evm and u-boot-am335x-evm.img from <Processor-SDK>/board-support/prebuilt-images/ to the ~/tmp/ directory
Rename MLO-am335x-evm to MLO
Rename u-boot-am335x-evm.img to u-boot.uimg
Create tarball from these files
tar -cvf boot_partition.tar.gz MLO u-boot.img
Copy boot_partition.tar.gz to root directory /tftpboot/
Populate the “base” TI SDK rootfs image for populating the eMMC rootfs into the TFTP gome directory
- Copy <Processor-SDK>/filesystem/tisdk-base-image-am335x-evm.tar.xz to root /tftpboot/ directory
6.1.15.4. Program the Flash
Now that the flash image has been created we can now flash the EVM
Note
The EVM must be configured properly to boot via Ethernet and a TFTP server must be properly configured to transfer the flash image.
Connect EVM to Linux host machine via Ethernet/USB and Serial Debugging Cable
Open an active console window to monitor bootup messages
Power on EVM and “strike andy key” to halt U-Boot at prompt
Enter command to boot from TFTP server
dhcp && tftp ${fdtaddr} am335x-boneblack.dtb && env set bootargs
console=${console} && bootz ${loadaddr} - ${fdtaddr}
The flasher image should boot, run the fetcher.sh script, copy the flasher.sh file, and run it. You should see “Sitara Example Flash Script is complete” if the eMMC was successfully programmed.
Now reboot the board and verify that it boots successfully
6.1.15.5. Troubleshooting
Here are some things to do to debug setup:
- The flasher.sh script expects to receive files from a TFTP server with IP address 192.168.1.1. Ensure the host has been manually configured to this address.
- Ensure Toolchain Path has been set before any build commands.
- Utilize Wireshark to monitor network when things go wrong.
- If Wireshark is not returning a “BOOTP” request, it is likely the Beaglebone Black has not bee configured to boot via Ethernet or USB. Set SYSBOOT[4:0]=01000b for Ethernet, and SYSBOOT[4:0]=01011b for USB.