- Note
- The steps on this page show screen shots and description based on Windows. However the steps in Linux would remain the same, unless mentioned otherwise.
-
In Linux, use
make instead of gmake
-
The screen shots shown on this page are for AM64x MCU+ SDK v7.3.0. You would see your specific SOC and SDK version that is installed. However the instructions and steps mentioned remain the same, unless mentioned otherwise.
-
SysConfig core tool follows TI baseline quality development process. This means that there are no automotive or functional safety claims that can be made on code that is generated using SysConfig. The expectation is that it is the customer’s responsibility to perform standard qualification on generated code according to requirements of a particular standard.
- Attention
- Refer Sysconfig Application note available on this link https://www.ti.com/lit/an/sdaa194/sdaa194.pdf for more details
Introduction
All the SDK examples can be configured using a GUI tool called SysConfig. Users can choose and configure various modules using this tool. The SysConfig tool will generate the boilerplate code for initializing these modules. Each example will have an example.syscfg file to which the configuration will be saved to. When creating an example for the first time, this can be an empty file.
SysConfig Features used in the SDK
In this SDK, SysConfig is used to:
- Generate configurations for driver modules, board modules and networking modules
- Generate clock and power configurations
- Generate pinmux for various peripherals
Opening SysConfig GUI from CCS
- To open the Sysconfig GUI from CCS, import the CCS project for the example and simply double click on the example.syscfg in the project explorer window

Opening SysConfig GUI from CCS
- You can see that the GUI can be docked as one of the tabs in the CCS window and be placed in any of the panes just like any other tab.

SysConfig GUI when opened from command line
Opening SysConfig GUI from command line and makefiles
- You can also open the Syscfg GUI from the command line. You can refer to Building examples with makefiles to do this.
- For example, if you wanted to configure the dpl hello_world example for r5fss0-0 from the command line, you can run the below commands to do so:
cd ${SDK_INSTALL_PATH}
gmake -s -C examples/hello_world/{board}/r5fss0-0_freertos/ti-arm-clang syscfg-gui
- Running the command should open a GUI like below:
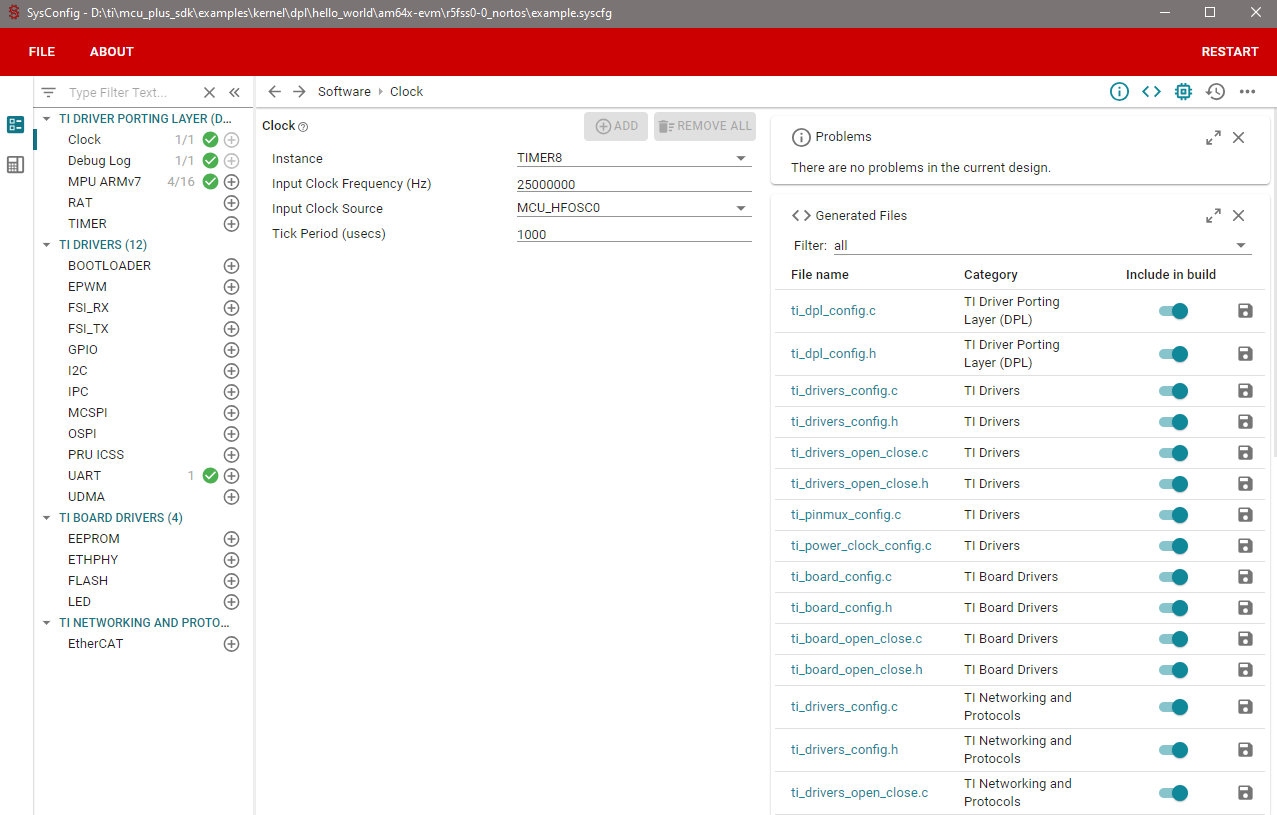
SysConfig GUI when opened from command line
Using the SysConfig GUI
- The SysConfig GUI is majorly divided into three parts
- A left column (this is hideable) shows a list of modules which can be selected from
- A main column shows the description and various configurable parameters available with the selected module
- A right column showing the generated files (this is also hideable)
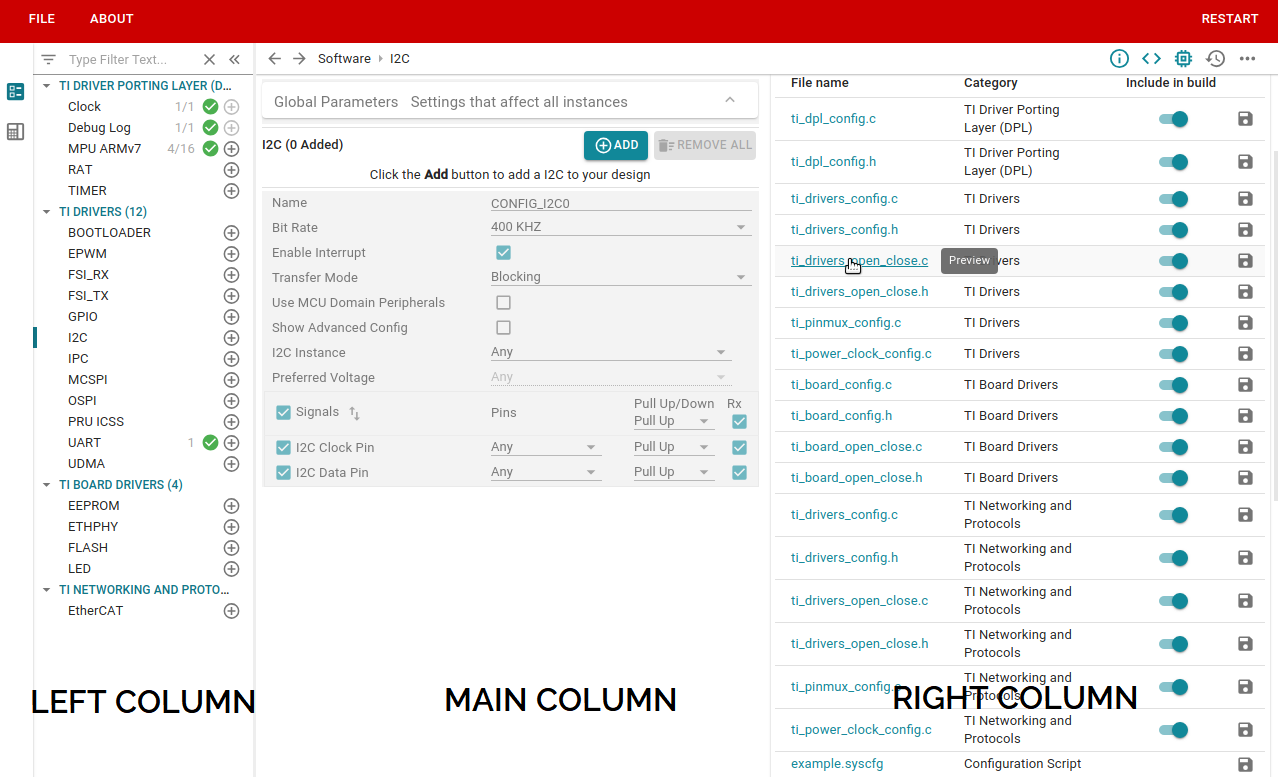
SysConfig GUI Columns
- If you are seeing only left and main column and right column (generated files) is hidden. You can unhide it by clicking on "<>" menu on main column. Below is snapshot to do this when SysConfig is launched in CCS.

SysConfig GUI Columns
- To add an instance of a module, click the (+) sign next to the module name in the left pane. Alternatively, once the module is clicked, a greyed out details show up on the main right column along with an "ADD(+)" button. This can also be clicked to add an instance of a module. You can add more than one instance of a module if that is permitted for the module in the same way
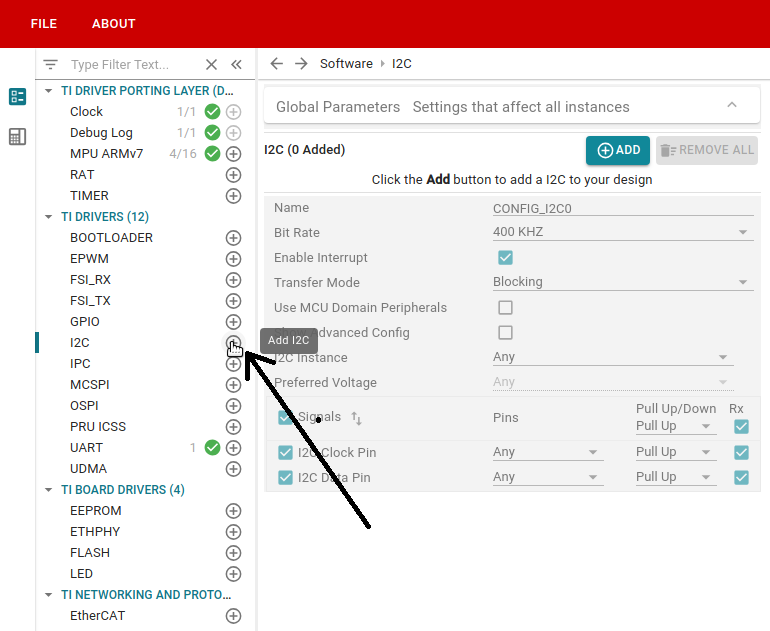
Adding module instance from left column
|
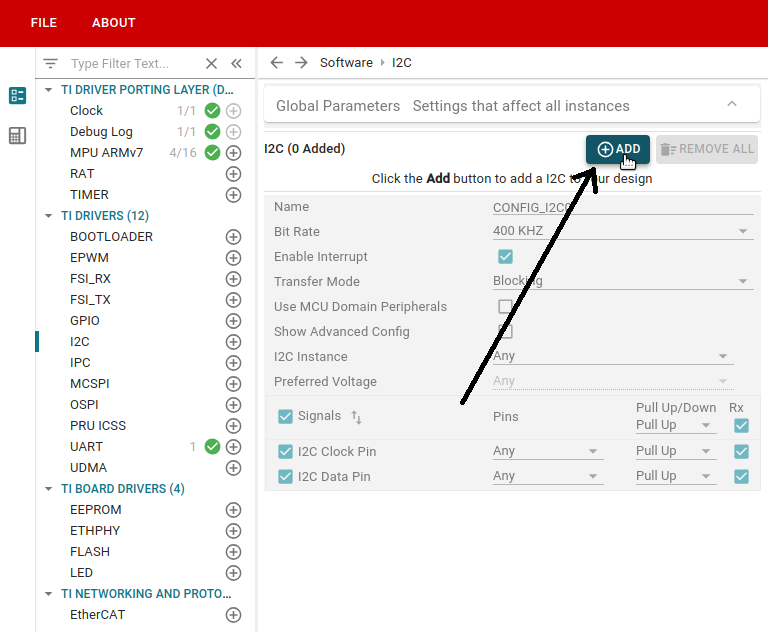
Adding module instance from main column
|
- Once a module instance is added, you can configure the various attributes shown. If multiple instances are permitted for a module, there will be a "Name" attribute which will be needed later in the application code to identify and distinguish between module instances.
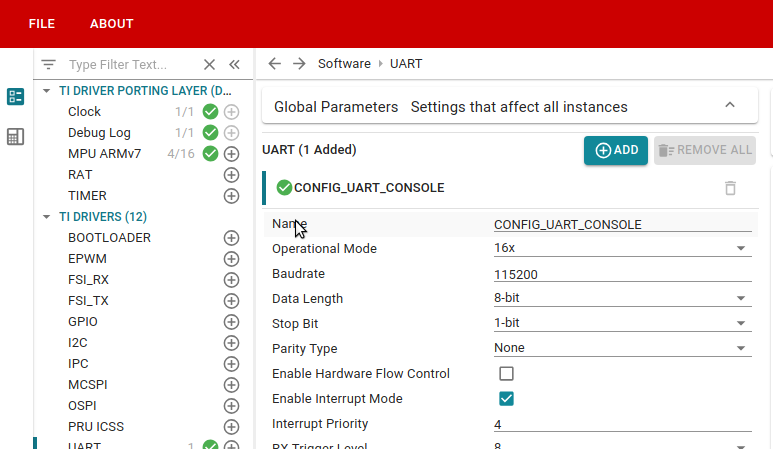
Name Attribute
- While configuring the instance using the attributes shown, the C code which corresponds to the configurations is generated in real time. You can see the file list on the right most column, and clicking on a file will open it in the right column.
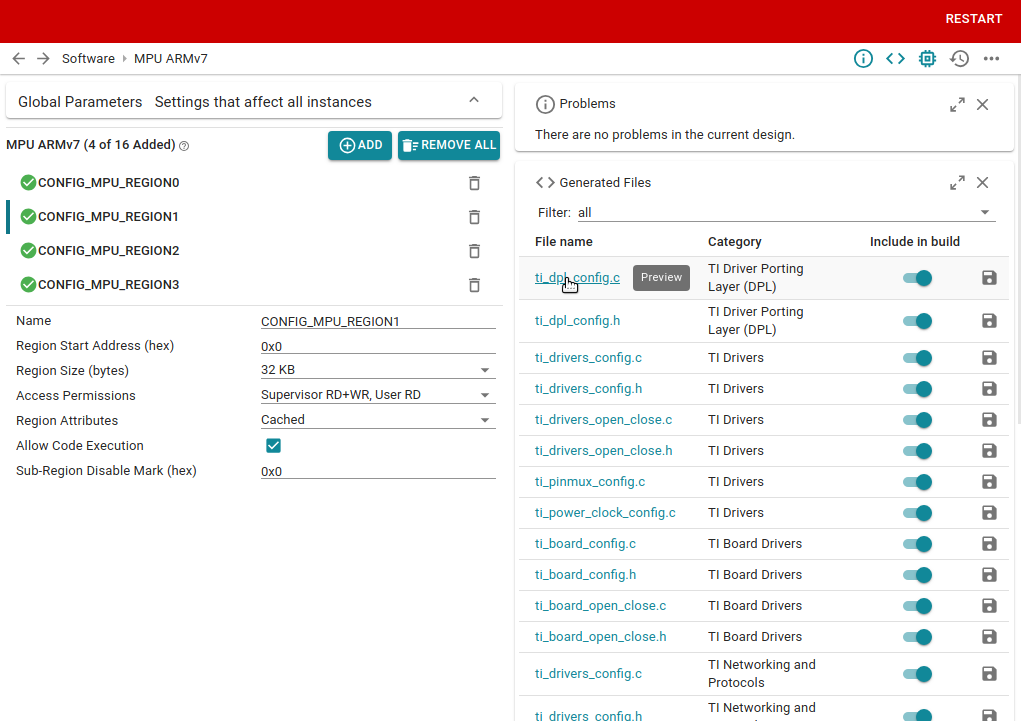
Files generated by SysConfig
|
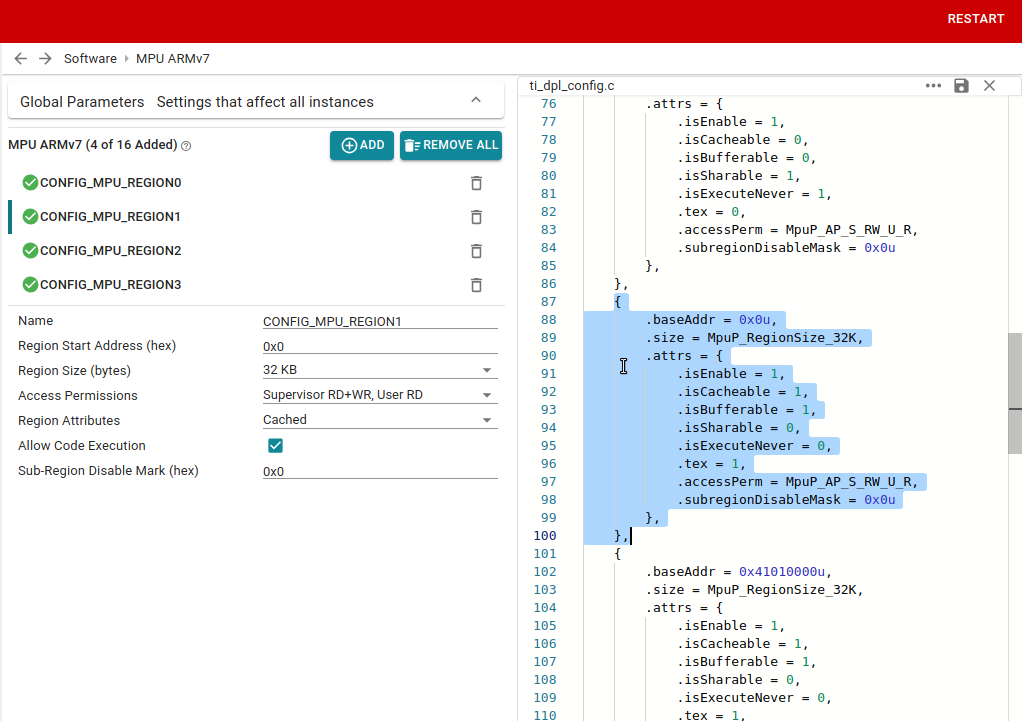
Generated file contents
|
- You can also use the SysConfig GUI to select the PINMUX for a particular module. There will be a default pinmuxing scheme chosen when you add a module, but you can change this according to your needs.
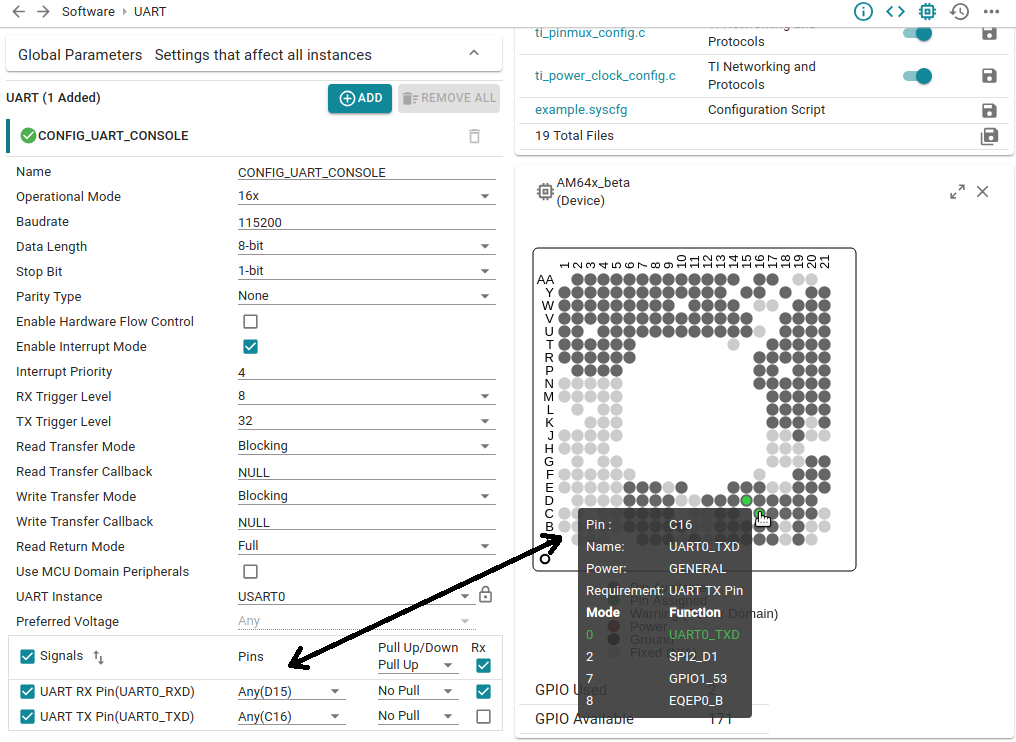
Pinmux in SysConfig
- Once all the changes has been done, you can choose File->Save or Ctrl-S if the GUI was invoked from the command line or simply save the example.syscfg file if opened via CCS.
Generating Files using SysConfig
- The files are generated using SysConfig whenever we build the example using command line and makefiles or from CCS.
- In CCS, you can just right click the project and select "Build Project" option

Building from CCS
- If using command line and makefiles, you can follow Building examples with makefiles to do this.
Understanding Generated Files
| Generated file | Description |
| ti_dpl_config.c | Source file containing the configurations of various DPL modules like the AddrTranslate, MPU, Clock, Timer etc. This will also contain definitions of Dpl_init() and Dpl_deinit() functions |
| ti_dpl_config.h | Header file containing declarations of Dpl_init() and Dpl_deinit() functions. This will also include the dpl interface header file, so that the application need not explicitly include that |
| ti_drivers_config.c | Source file containing the configurations of various driver modules like UART, I2C, OSPI etc. This will also contain definitions of System_init() and System_deinit() functions. These functions will internally call init and deinit functions of respective drivers |
| ti_drivers_config.h | Header file containing definitions of various macros related to the configuration of driver modules and declarations of System_init() and System_deinit() functions. This will also include the interface header files for the driver modules applicable, so that the application need not explicitly include that |
| ti_drivers_open_close.c | Source file containing the open parameters of various driver modules like UART, I2C, OSPI etc. This will also contain definitions of Drivers_open() and Drivers_close() functions. These functions will internally call open and close functions of respective drivers. This file will also have the definitions of the handles of respective driver modules |
| ti_drivers_open_close.h | Header file containing externs of handles and open params related to the configuration of driver modules and declarations of Drivers_open() and Drivers_close() functions |
| ti_pinmux_config.c | Source file containing pinmux configuration data structures |
| ti_power_clock_config.c | Source file containing power and clock configuration data for all the modules in the example and definition of PowerClock_init() and PowerClock_deinit() functions and other internal functions required to configure power and clock for the modules |
| ti_board_config.c | Source file containing the configurations of various board modules like Flash, EEPROM, LED etc. This will also contain definitions of Board_init() and Board_deinit() functions. These functions will internally call init and deinit functions of respective board modules |
| ti_board_config.h | Header file containing definitions of varios macros related to configurations of various board modules and declarations of Board_init() and Board_deinit() functions |
| ti_board_open_close.c | Source file containing the open parameters of various board modules like Flash, EEPROM, LED etc. This will also contain definitions of Board_driversOpen() and Board_driversClose() functions. These functions will internally call open and close functions of respective modules. This file will also have the definitions of the handles of respective board modules |
| ti_board_open_close.h | Header file containing externs of handles and open params related to the configuration of board modules and declarations of Board_driversOpen() and Board_driversClose() functions |
| example.syscfg | Configuration file to which all the changes made in the GUI is saved |
Tips and Tricks for SysConfig
- Changes made on SysConfig GUI will be saved in the example.syscfg file. If you need to quickly check what was the value configured for some parameter, you can open this file in an editor instead of opening the GUI.


