- Attention
- Flashing a application will overwrite the SOC init application that was flashed earlier. So if you want to load and run from CCS again, you will need to do the SOC init steps again. See SOC Initialization for more details.
- Note
- See also Flashing Tools for more details on the flashing tools.
Introduction
In this step we will flash the application that we have build and run using CCS to the EVM flash. We can then boot this application without being connected to CCS via JTAG.
Getting ready to flash the application
- A quick recap of steps done so far that are needed for the flashing to work
- Make sure the UART port used for terminal is identified as mentioned in Setup UART Terminal
- Make sure python3 is installed as mentioned in Python3
- Make sure you have the EVM power cable and UART cable connected as shown in Cable Connections
- Build the hello world application as mentioned in Build a Hello World example
- As part of the build process in the final step a file with extension
.appimage
is generated. This is the file we need to flash.
- When building with makefiles and single-core projects, this file can be found here (shown for hello world example),
${SDK_INSTALL_PATH}/examples/hello_world/{board}/r5fss0-0_freertos/ti-arm-clang/hello_world.release.appimage
- When building with CCS and single-core projects, this file can be found here (shown for hello world example),
${CCS_WORKSPACE_PATH}/hello_world_{board}_r5fss0-0_freertos_ti-arm-clang/Release/hello_world_{board}_r5fss0-0_freertos_ti-arm-clang.appimage
- When building with makefiles and multi-core system projects, this file can be found here (shown for IPC Notify example),
${SDK_INSTALL_PATH}/examples/drivers/ipc/ipc_notify_echo/{board}/system_freertos_nortos/ipc_notify_echo_system.release.appimage
- When building with CCS and multi-core system projects, this file can be found here (shown for IPC Notify example),
${CCS_WORKSPACE_PATH}/ipc_notify_echo_{board}_system_freertos_nortos/Release/ipc_notify_echo_system.appimage
- NOTE: The folder name and file name in path can have "release", "Release" or "debug", "Debug" based on the profile that the application is built with.
- Next, we need to list the files to flash in a flash configuration file. A default configuration file can be found at below path. You can edit this file directly or take a copy and edit this file.
${SDK_INSTALL_PATH}/tools/boot/sbl_prebuilt/{board}/default_sbl_qspi.cfg
Flashing the application
- POWER-OFF the EVM
- The boot mode should be UART BOOT MODE
- POWER-ON the EVM
- You should see character "C" getting printed on the UART terminal every 1-2 seconds as shown below
UART output in UART BOOT MODE
- Close the UART terminal as shown below. This is important, else the UART script in next step wont be able to connect to the UART port.
Close UART terminal
Flash in progress
- After all the flashing is done, you will see something like below
Flashing successful
Running the flashed application
- POWER-OFF the EVM
- Change the boot mode to QSPI BOOT MODE
- POWER-ON the EVM
- Re-connect the UART terminal in CCS window as shown in Setup UART Terminal
- Press the reset button on the board as shown in Cable Connections
- You should see output like below on the UART terminal
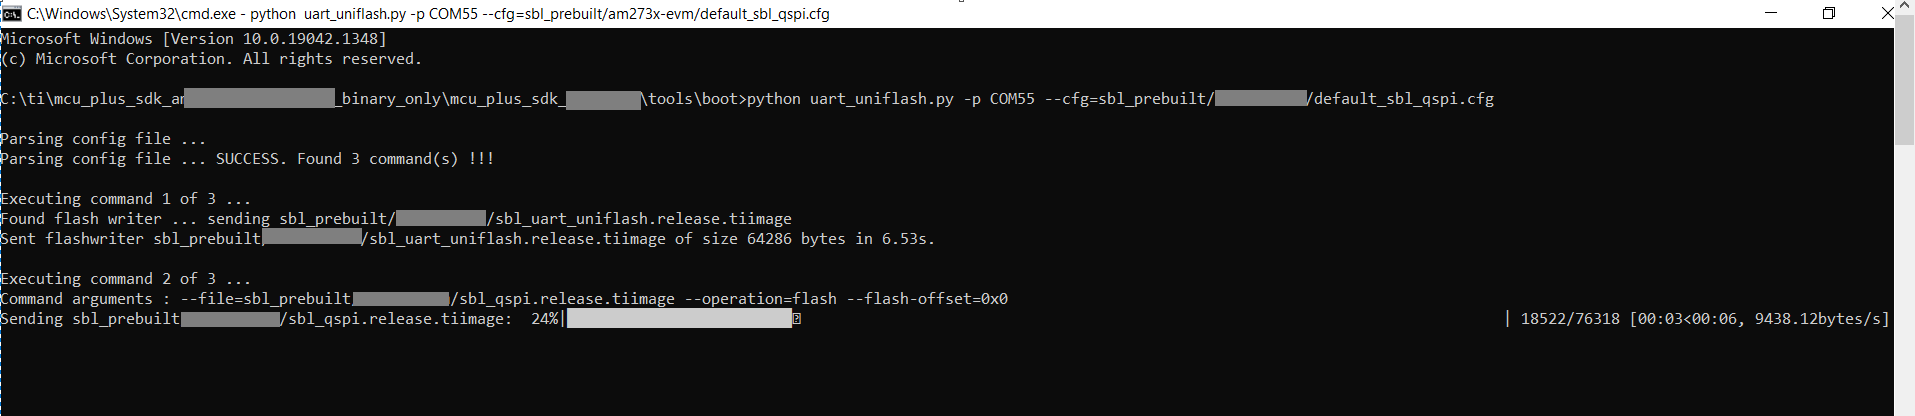
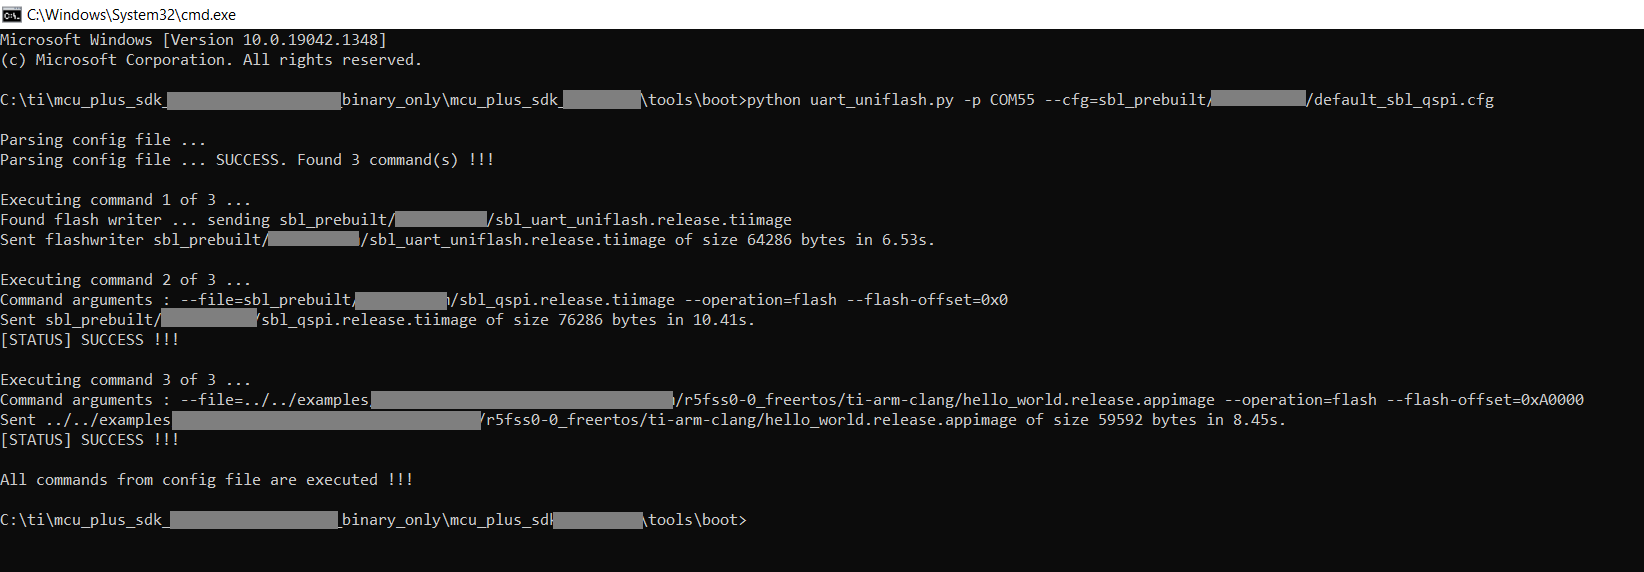
Starting QSPI Bootloader ...
[BOOTLOADER PROFILE] System_init : 162us
[BOOTLOADER PROFILE] Drivers_open : 28us
[BOOTLOADER PROFILE] Board_driversOpen : 193us
[BOOTLOADER PROFILE] CPU load : 26252us
[BOOTLOADER_PROFILE] SBL Total Time Taken : 26637us
Image loading done, switching to application ...
Hello World!
- Congratulations now the AM263X-CC is flashed with your application and you dont need CCS anymore to run the application.