F29H85x-SDK
26.00.00
Multi Core Example Build and Run
Table of Contents
Build
Load
Run
Load and Run SSU multi core example
Build
Import the multi core example
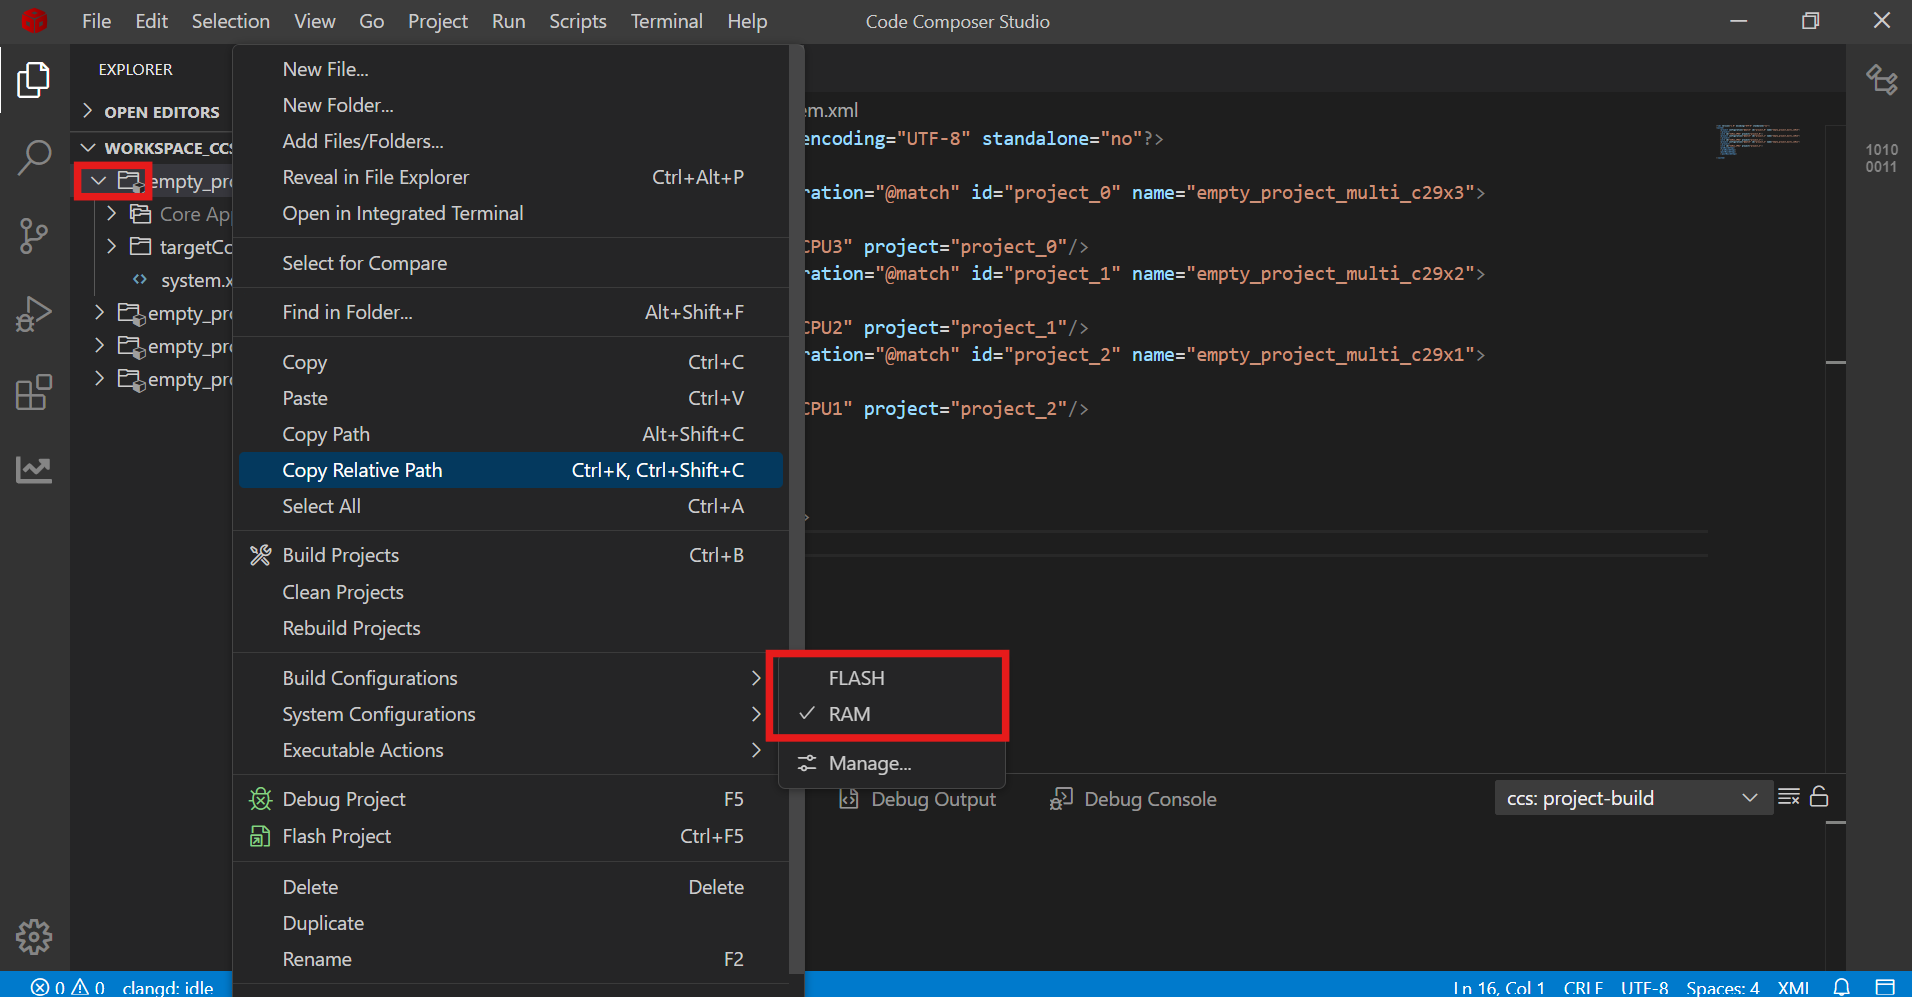
Modify the build configuration for the master project as required
Build Configuration
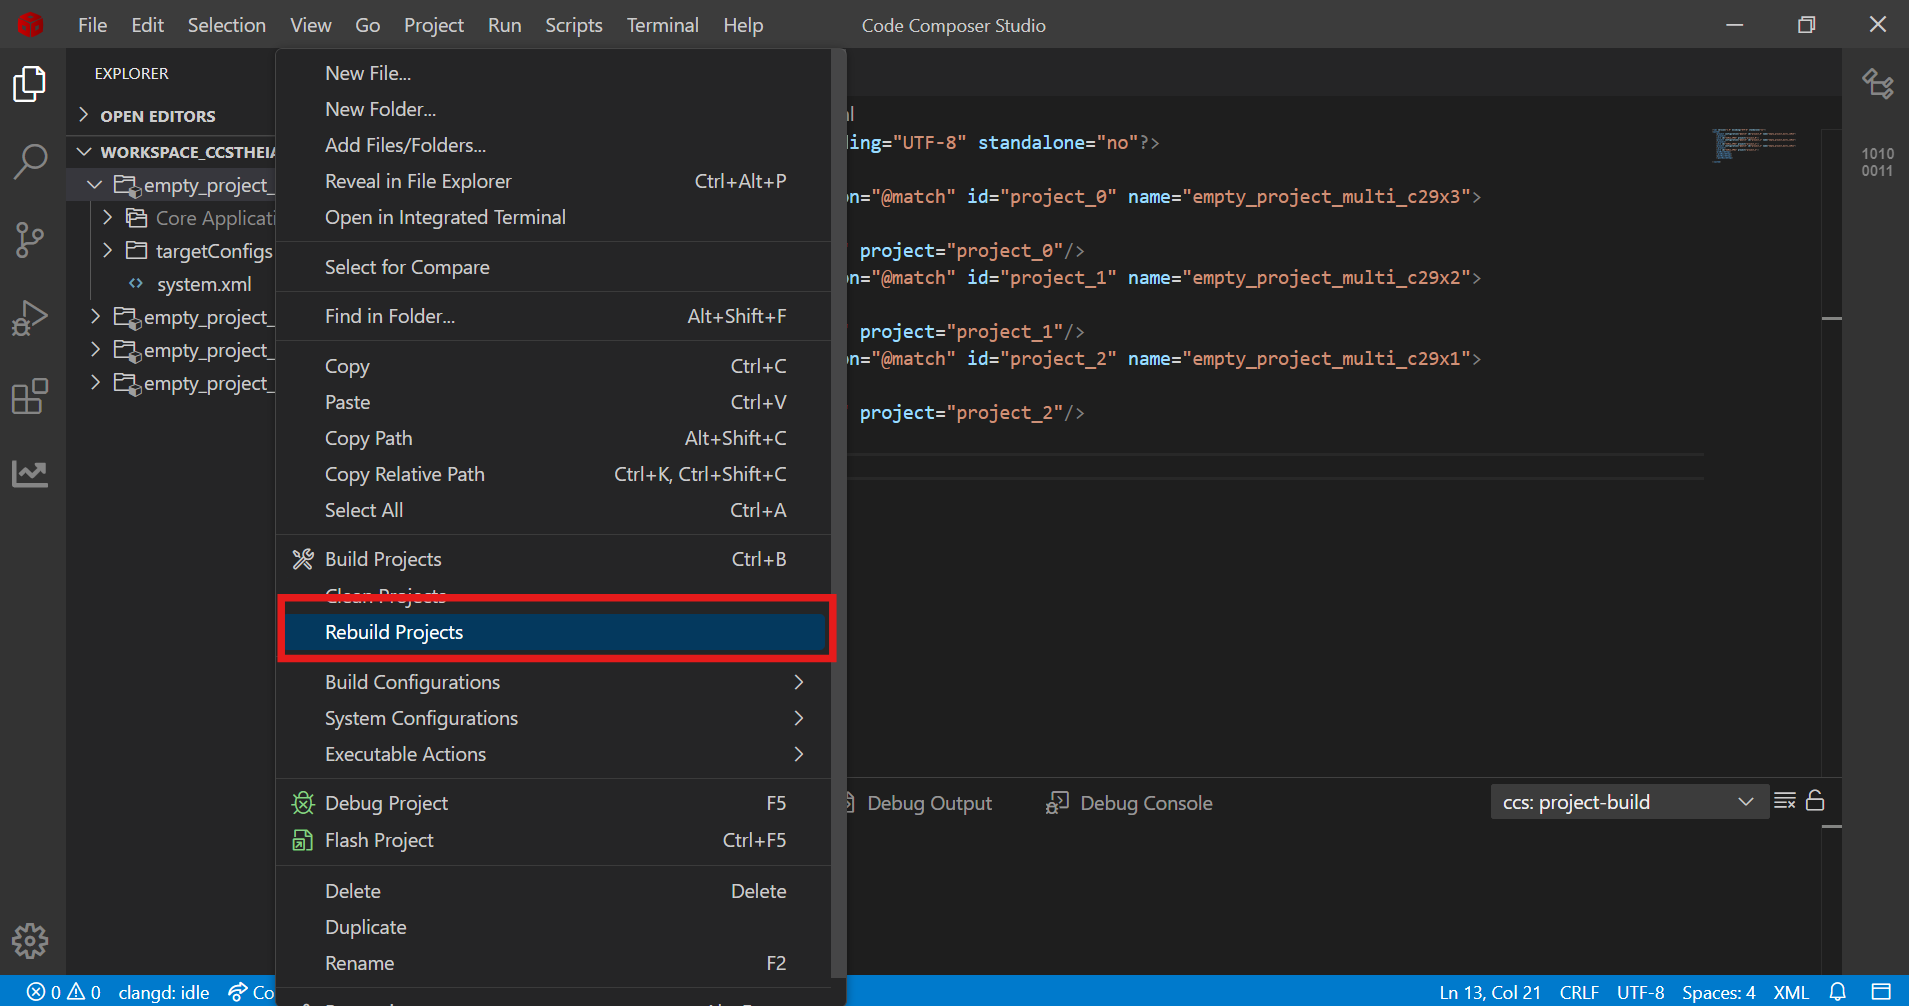
Build the master project
Click on either 'Build Projects' or 'Rebuild Projects'
Build Master Project
Load
Launch the target connection
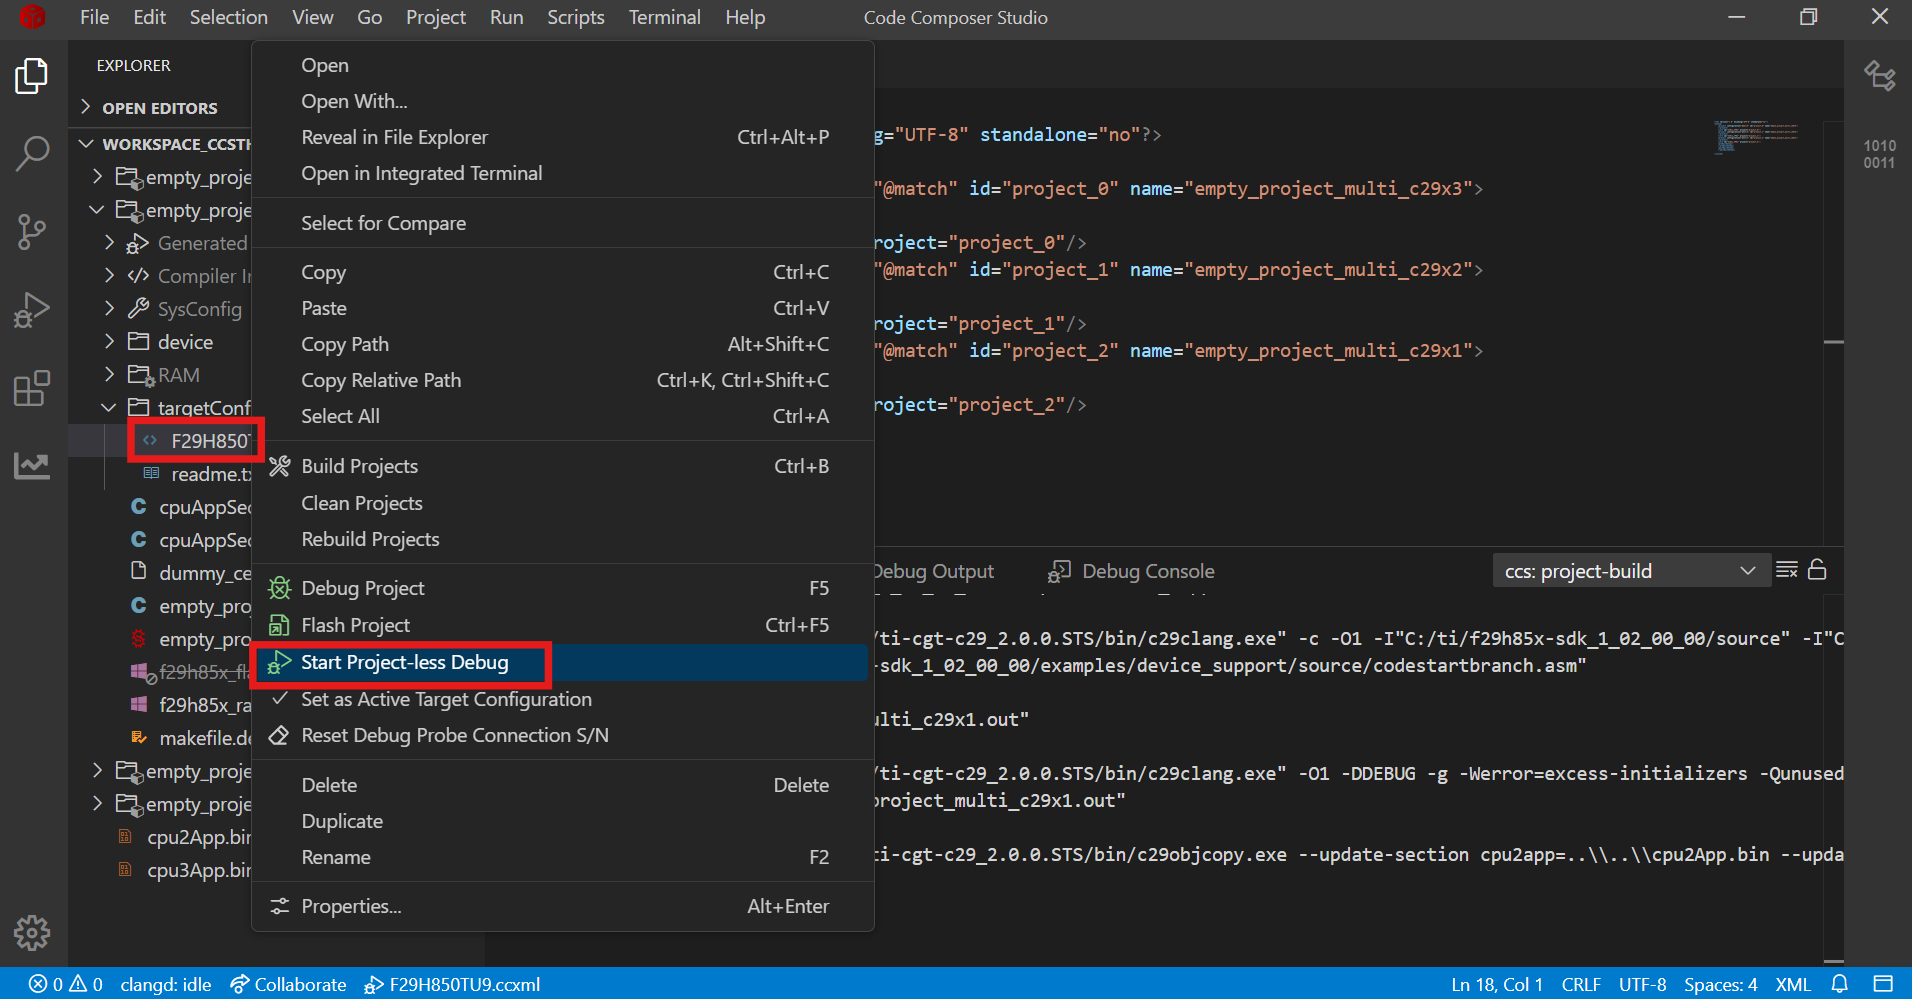
Navigate to CPU1 project -> targetConfigs
Right click on 'F29H850TU9.ccxml'
Click on 'Start Project-less Debug'
Launch Target
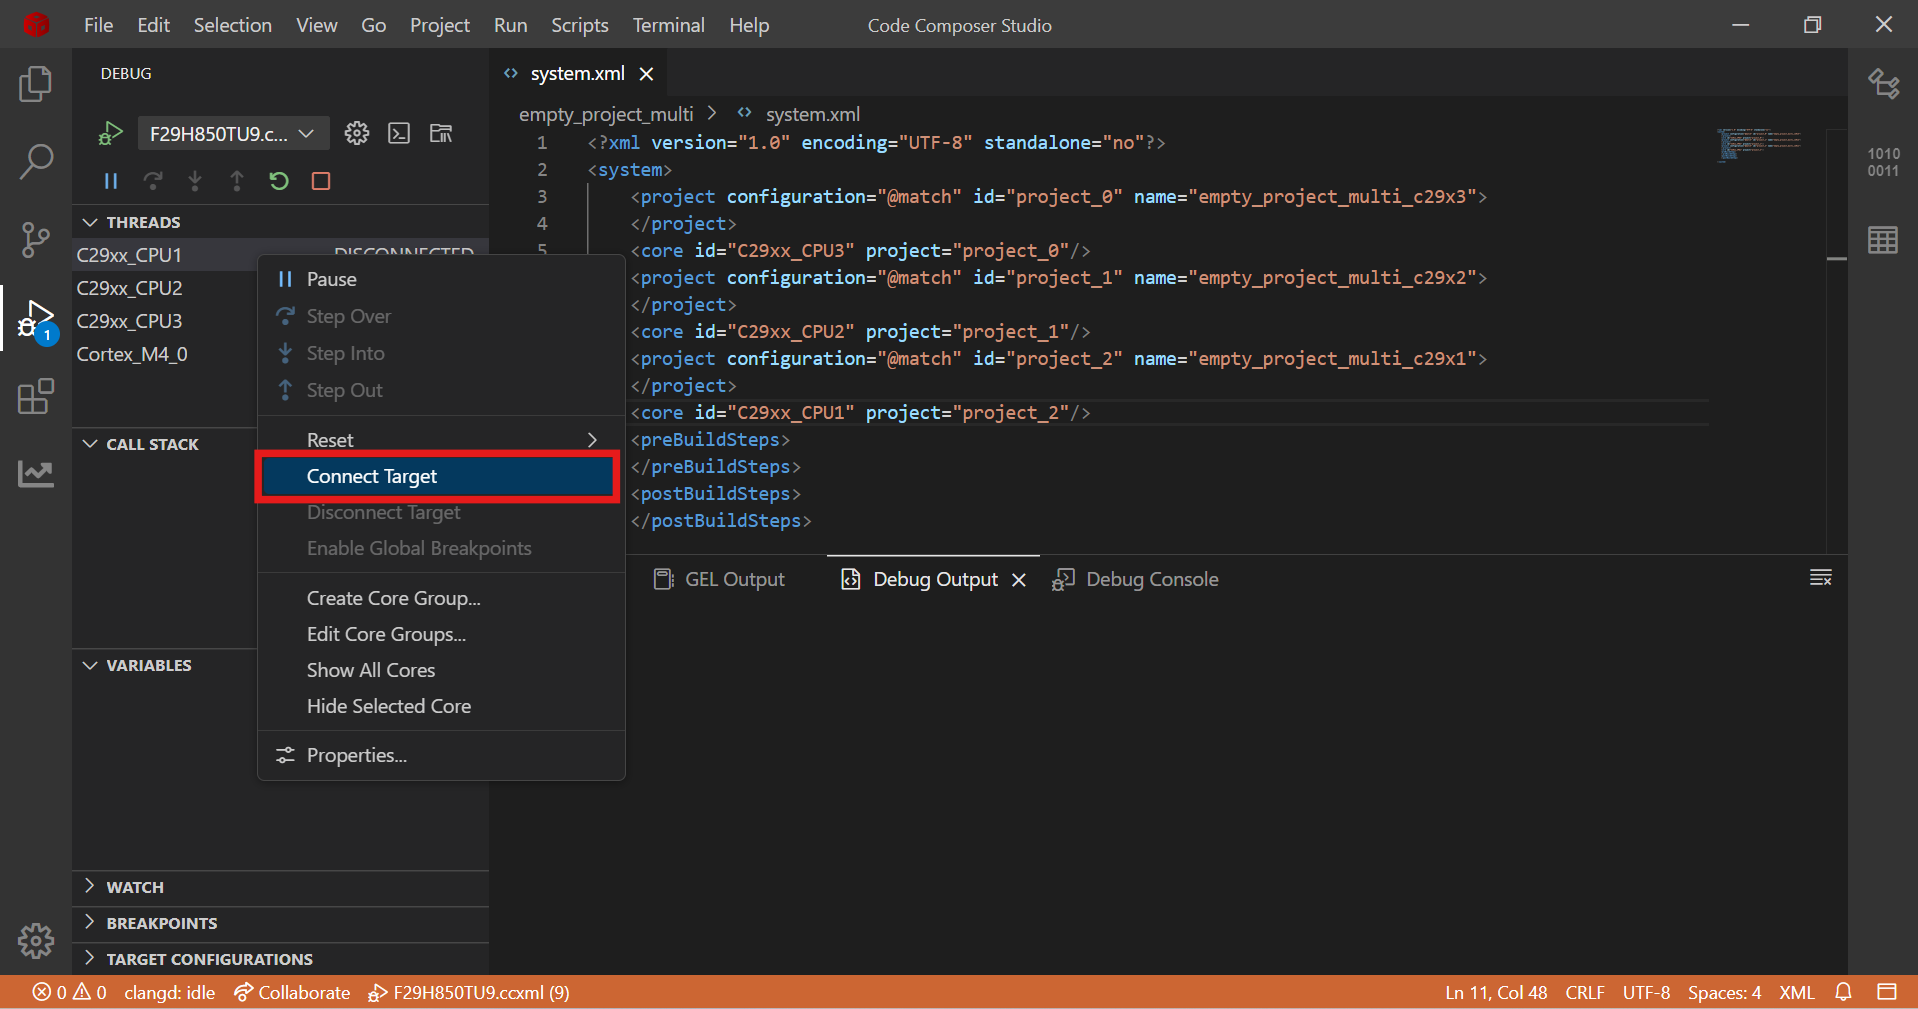
Connect to CPU1
Right click on the CPU and select 'Connect Target' option
CPU1 Connect
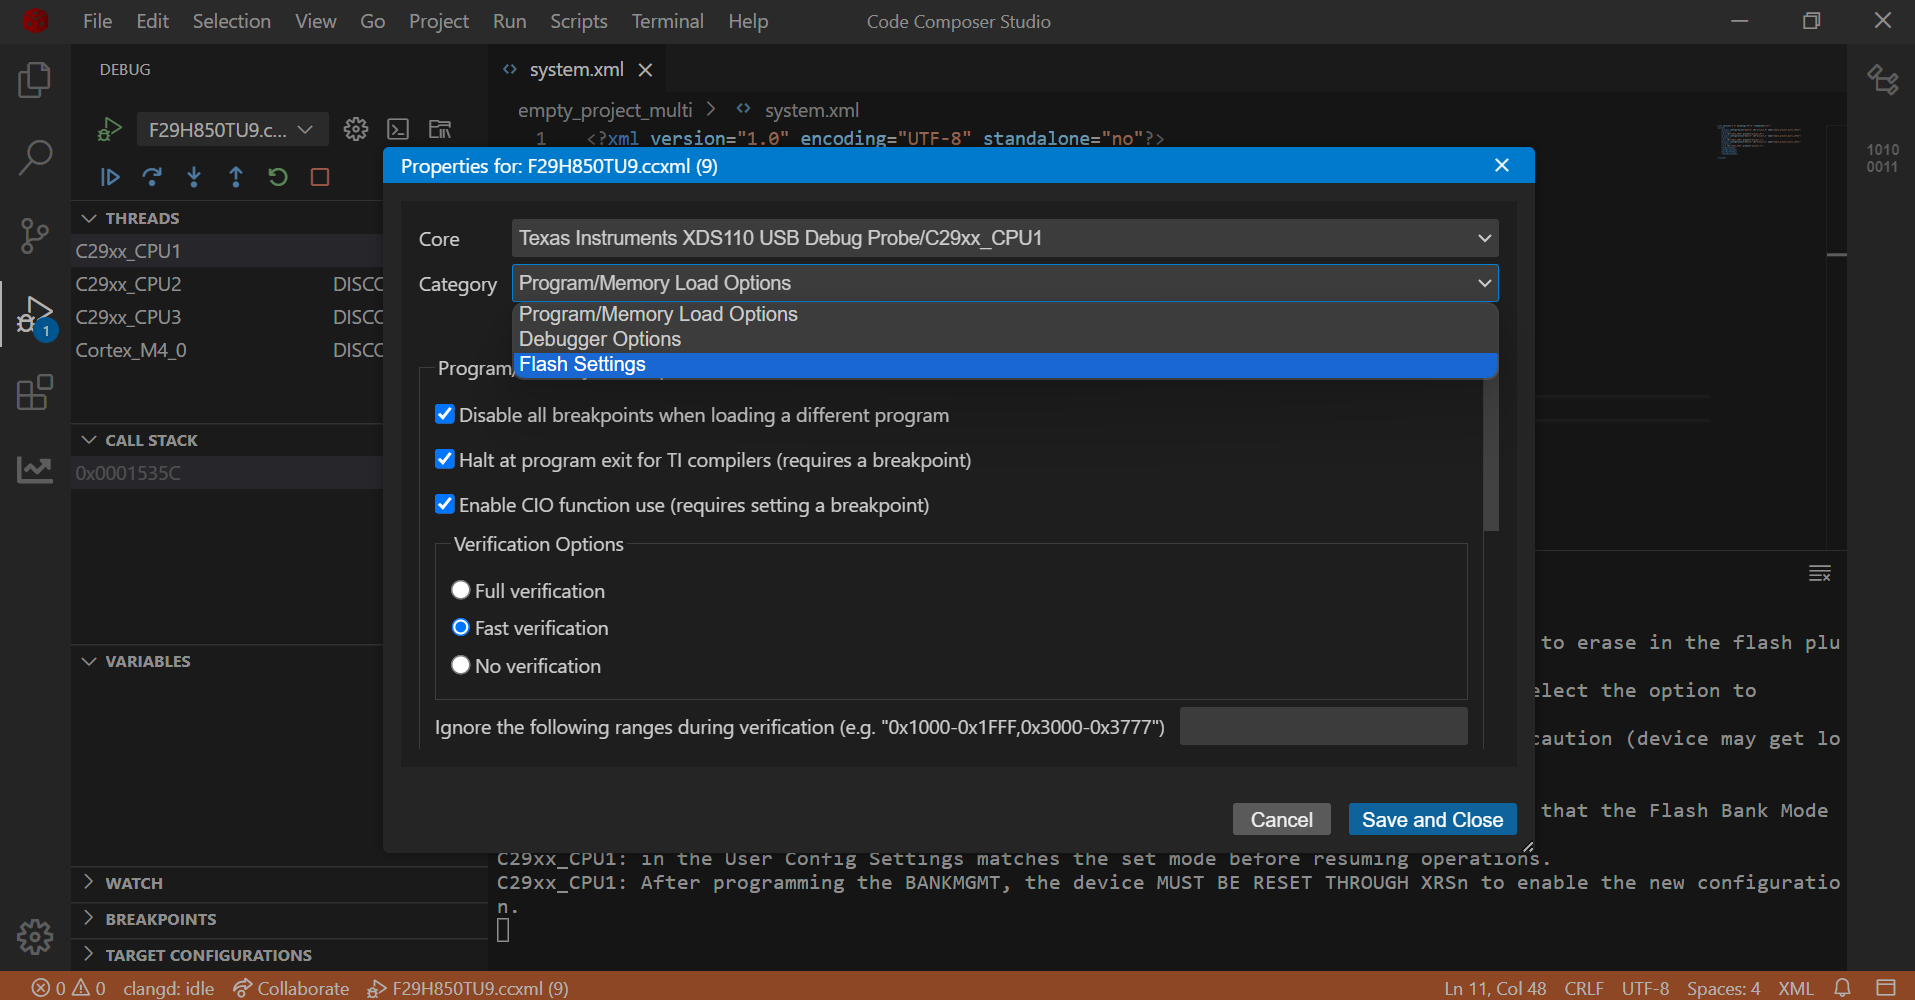
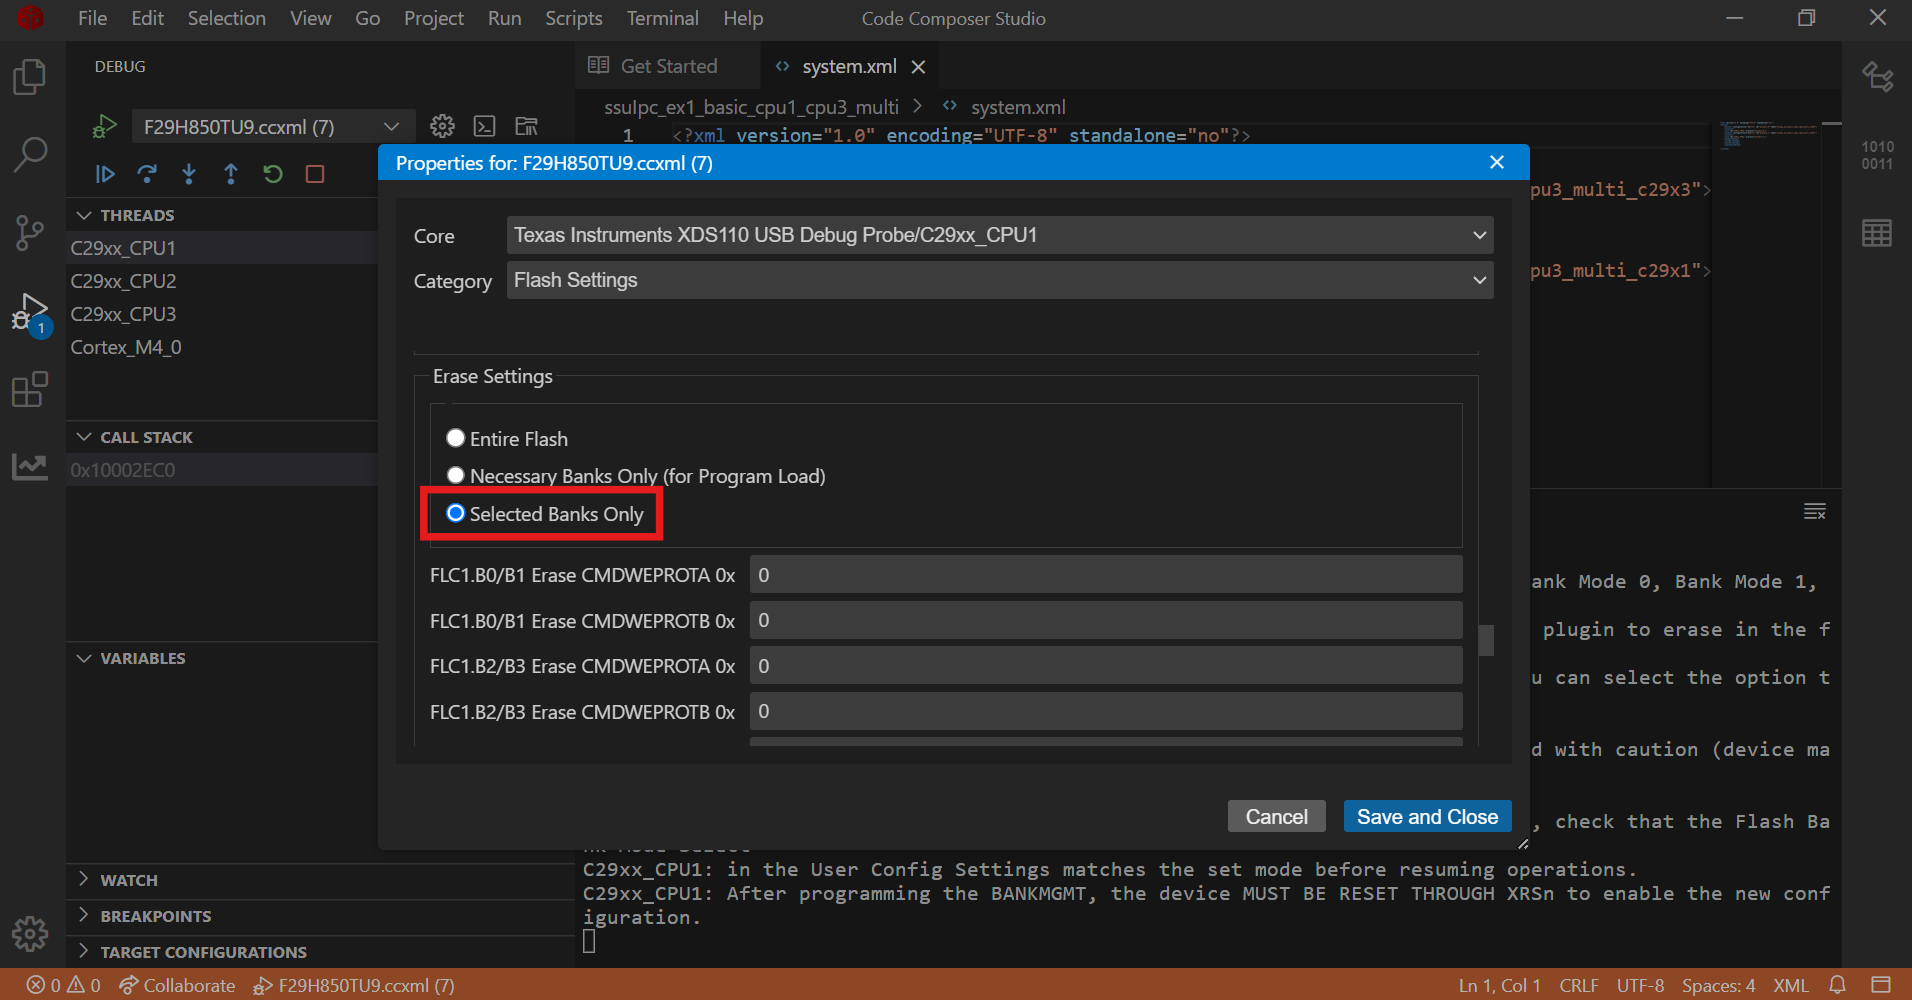
If the build configuraton is 'RAM' make sure flash is erased before loading (Not required for every load)
Right click on connected CPU
Navigate to Properties and select 'Flash Settings' under 'Category' drop down menu
Flash Settings
Select 'Selected Banks Only' under 'Erase Settings'
Click on 'Erase Flash' button
Flash Erase
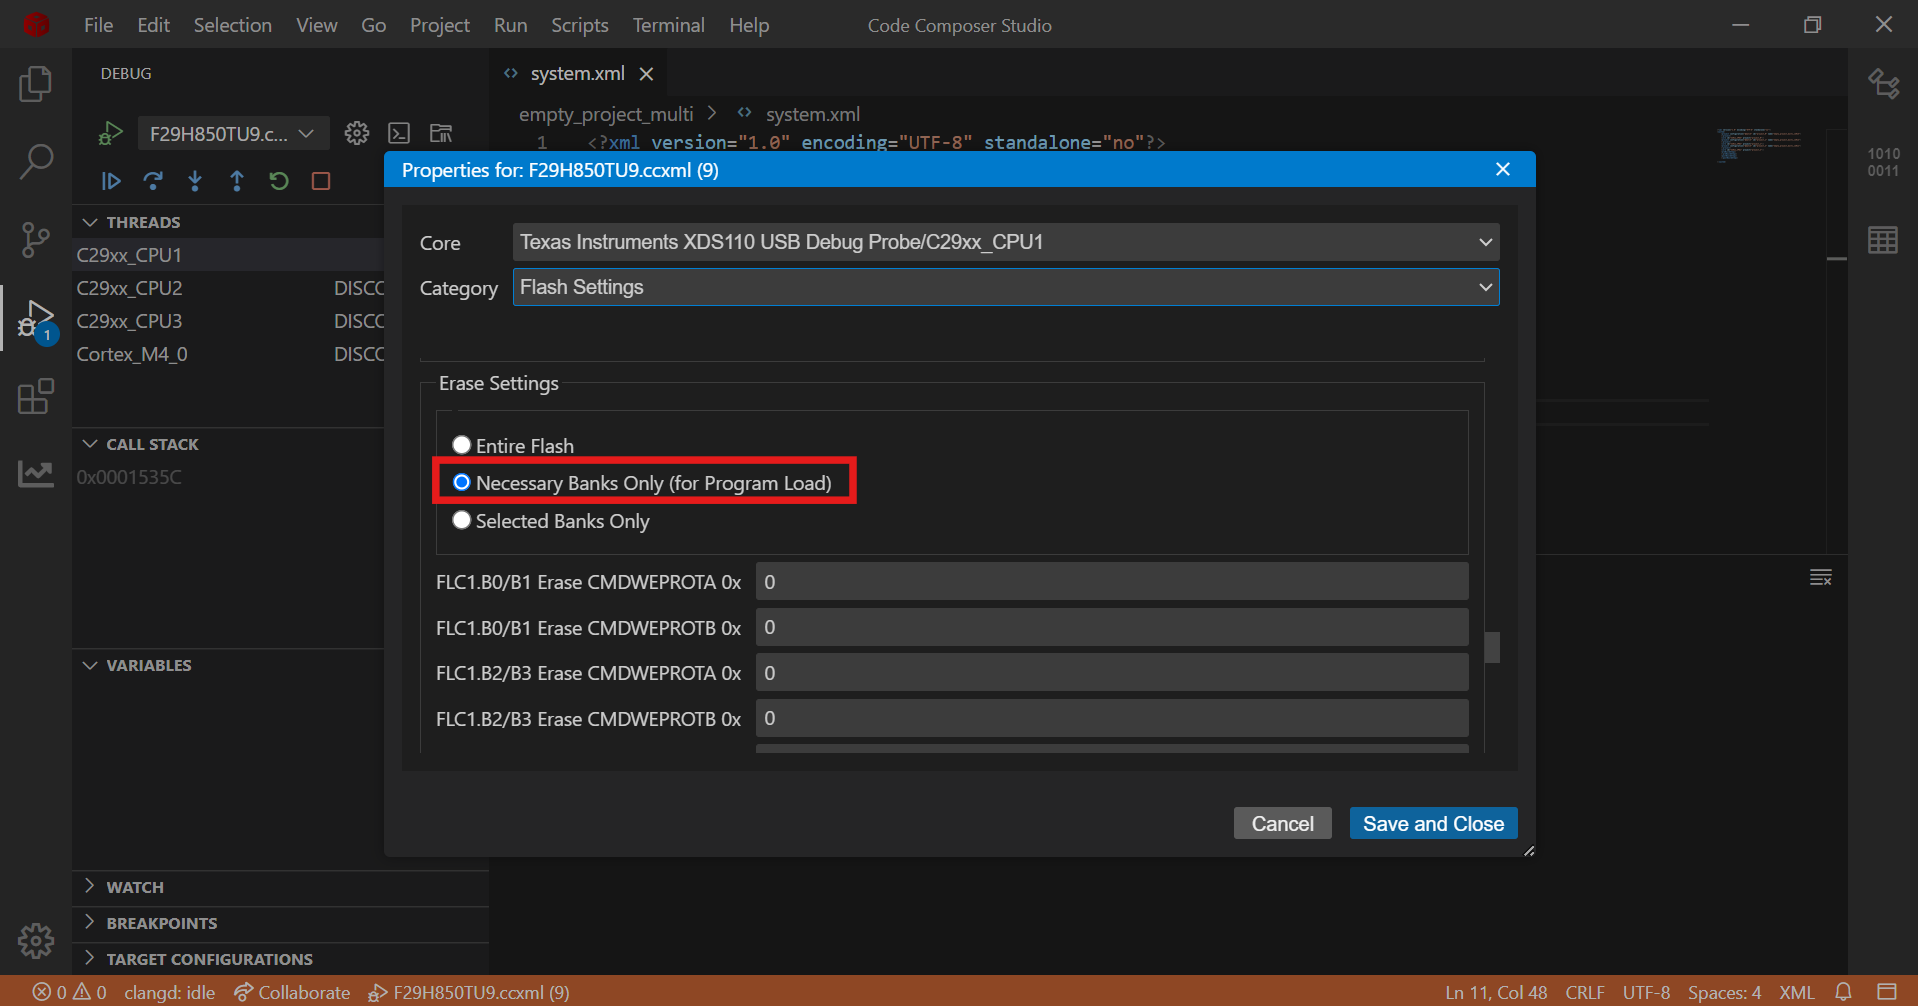
If the build configuration selected is 'FLASH':
Right click on connected CPU
Navigate to Properties and select 'Flash Settings' under 'Category' drop down menu
Flash Settings
Check the below option from 'Erase Settings'
Necessary Banks Only(for Program Load)
Erase Settings
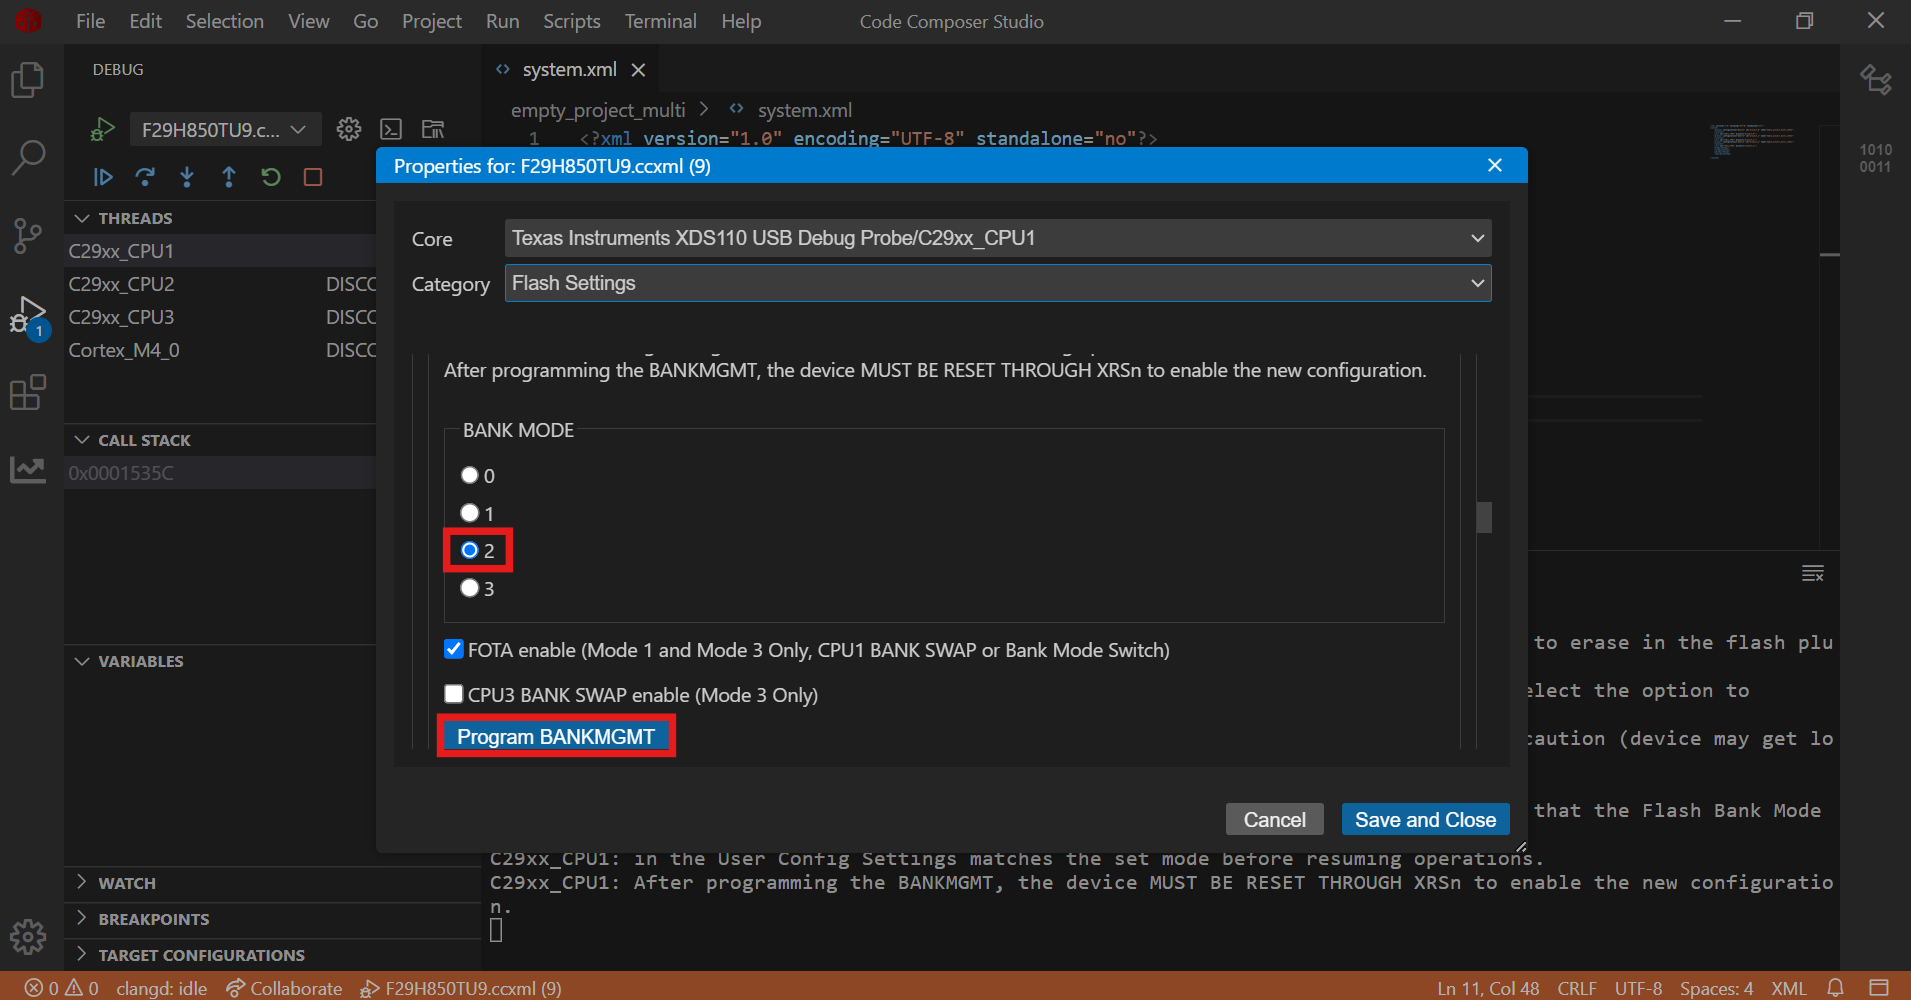
If CPU3 is part of the multi core examples then Flash BANKMODE should be set to '2', follow below steps to change the Flash BANKMODE
Select 'BANK MODE' to '2' and click on 'Program BANKMGMT' button
Bankmode Setting
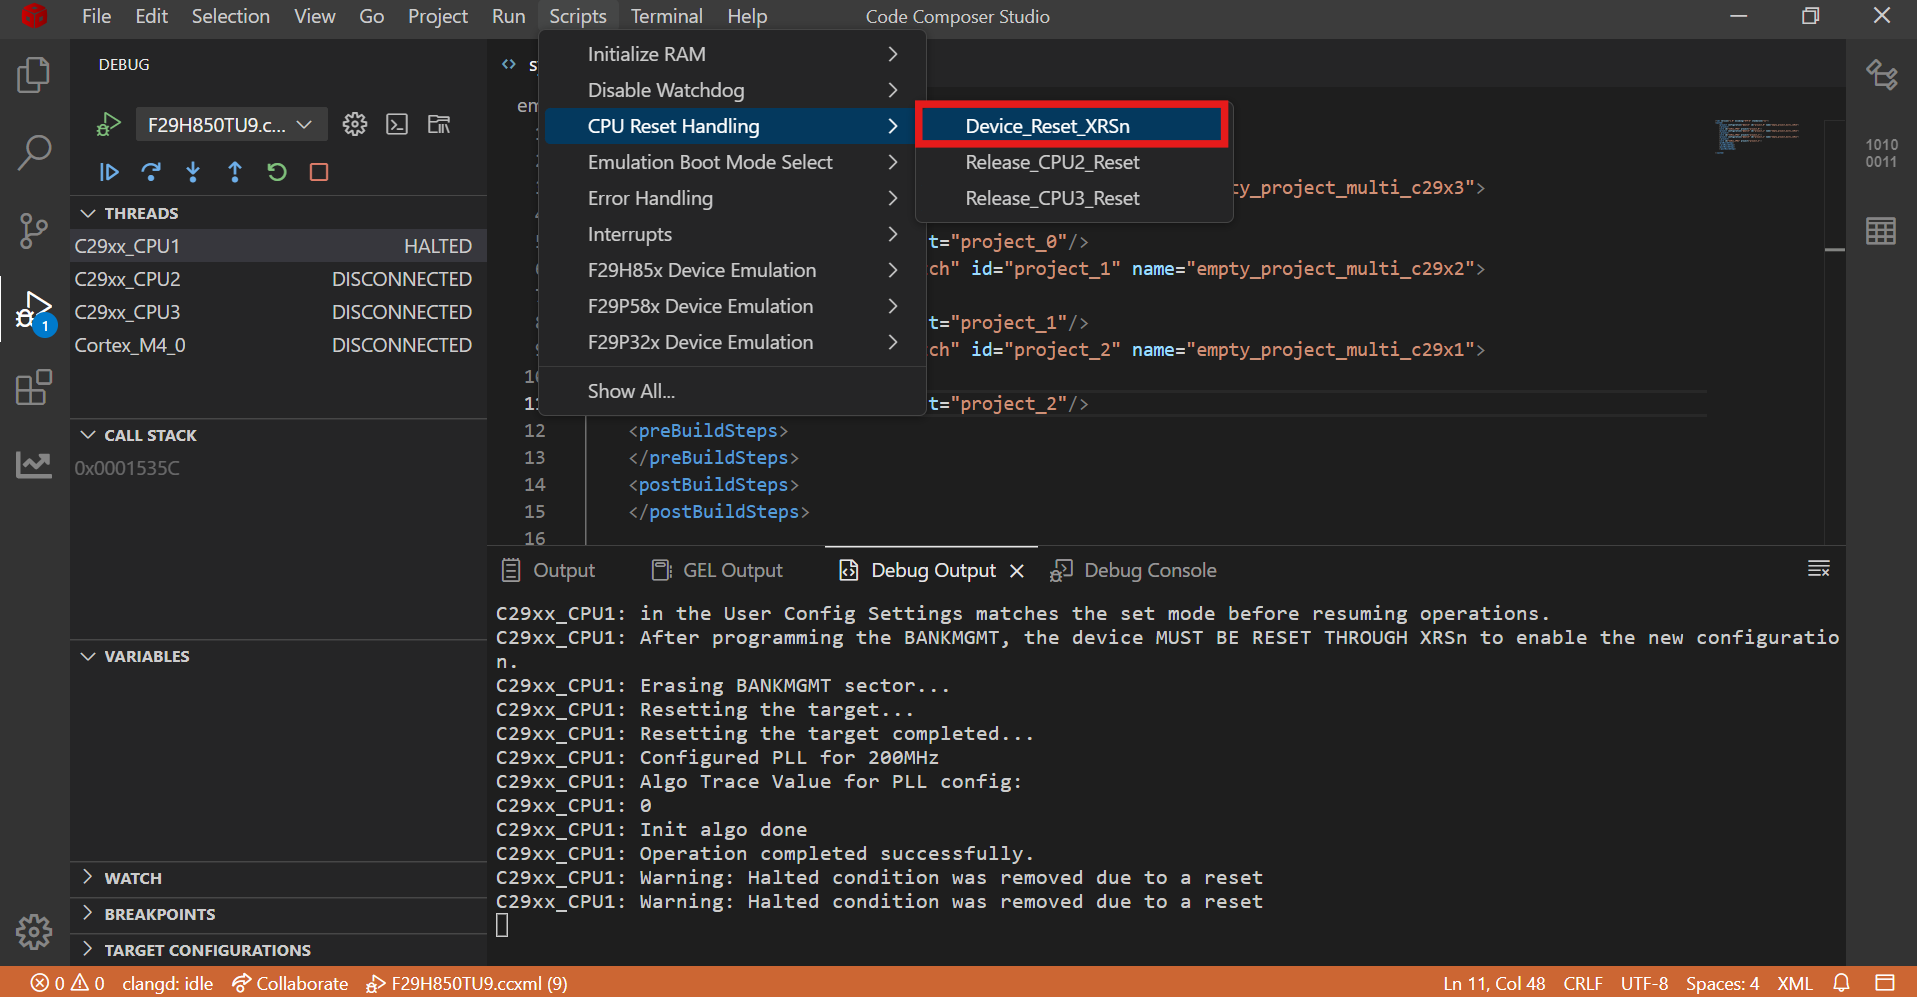
Issue XRSn to make new BANKMODE effective
Navigate to 'Scripts -> CPU Reset Handling' and select 'Device_Reset_XRSn'
Issue XRSn
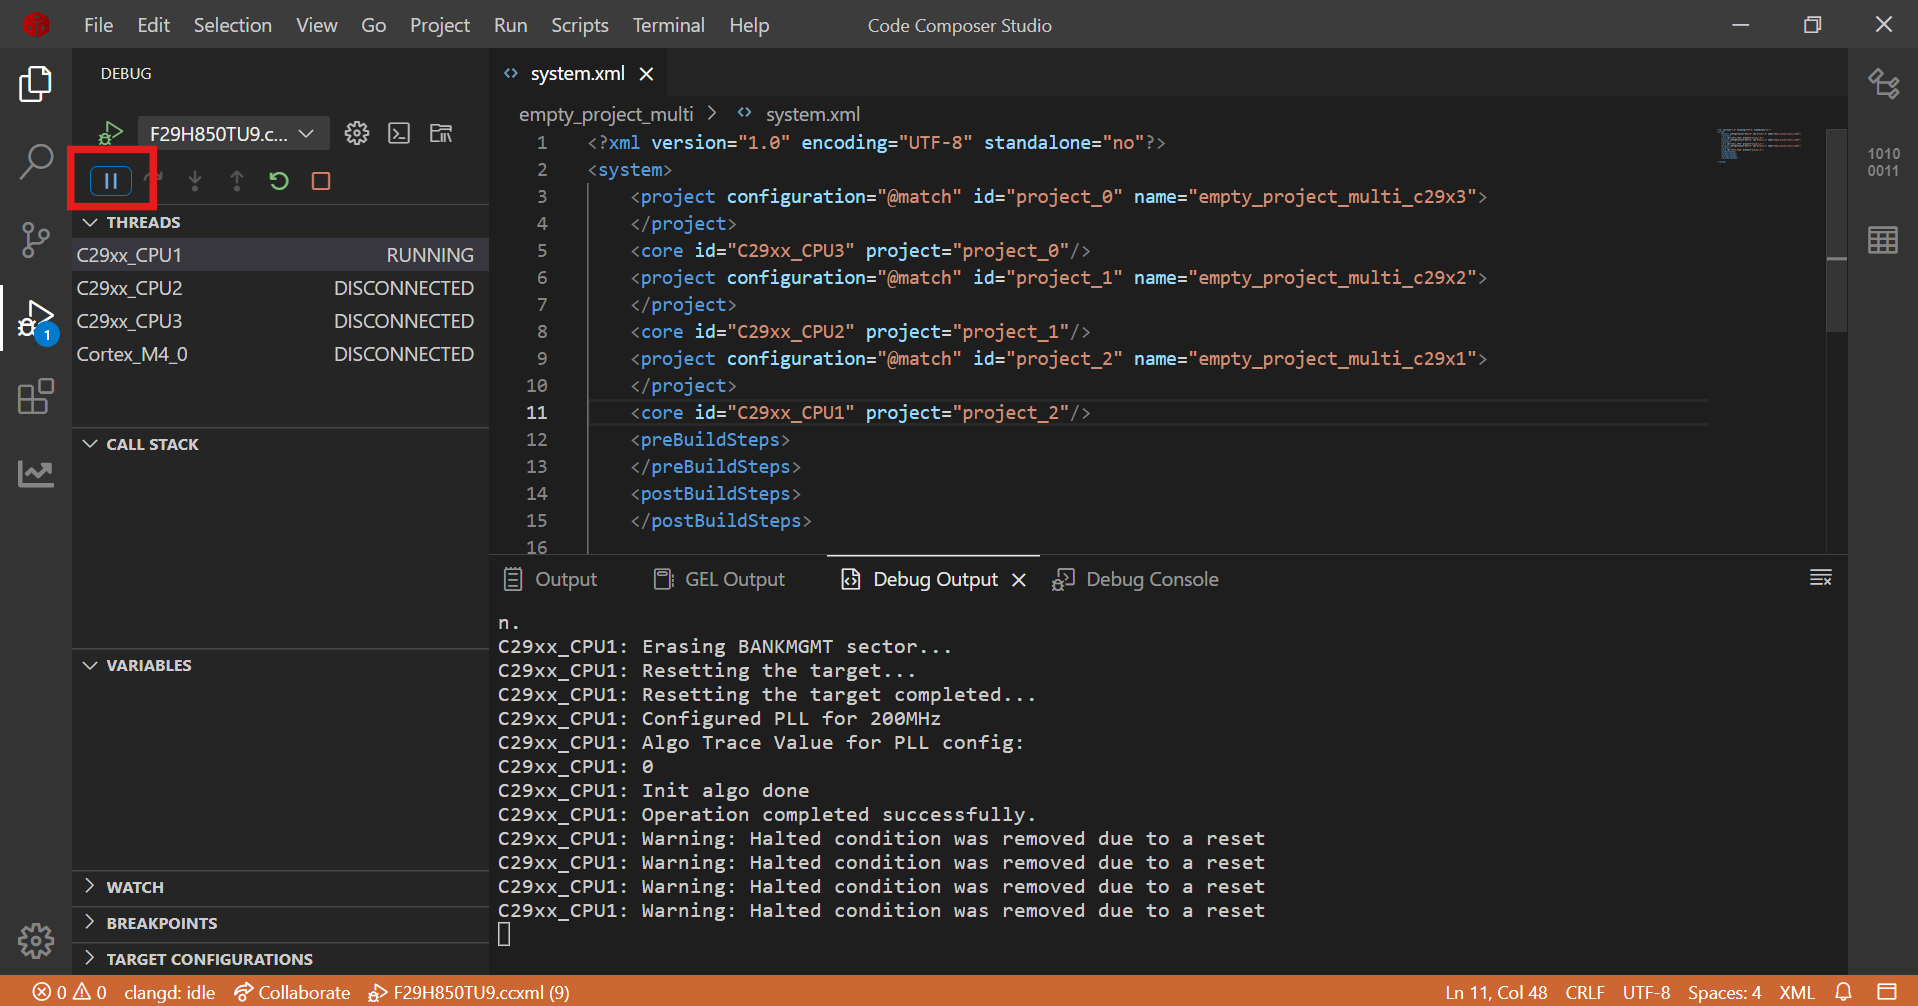
Halt the CPU1
Halt CPU1
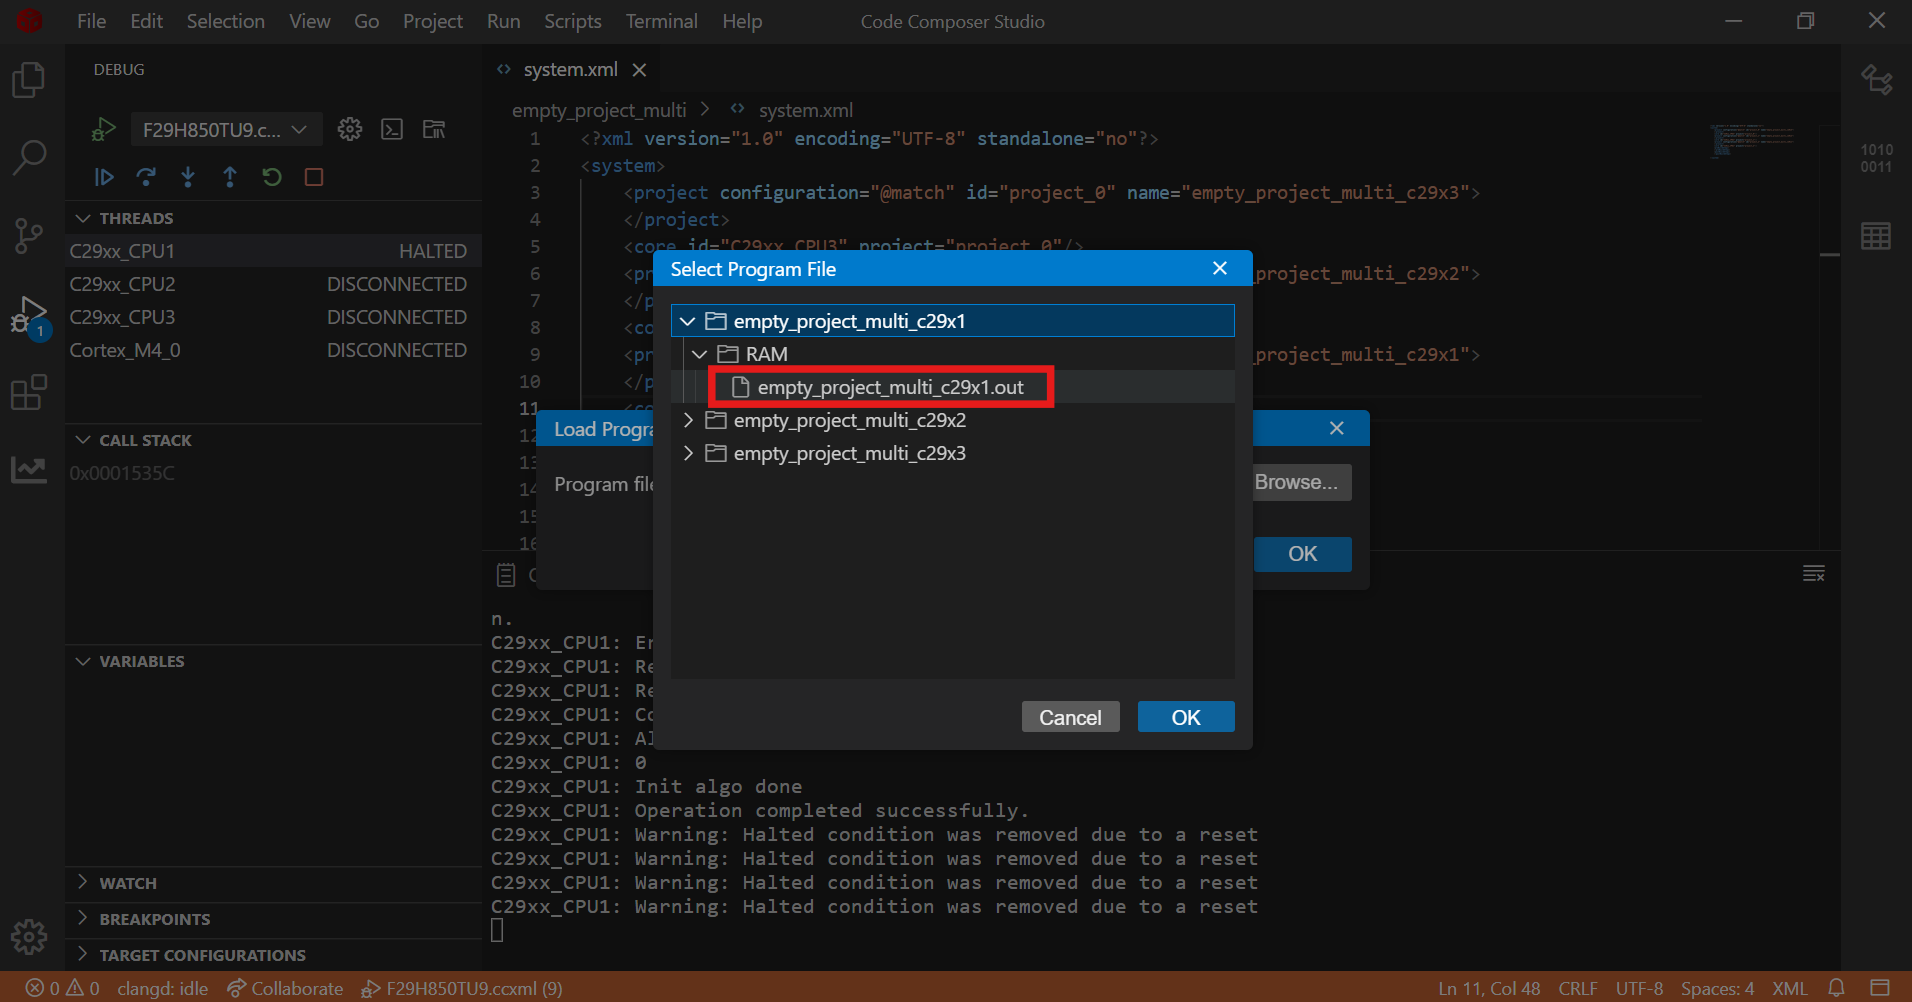
Load only CPU1 out file
Navigate to 'Run -> Load -> Load Program'
Click on Workspace and select CPU1 project out file
Click on OK
Halt CPU1
Run
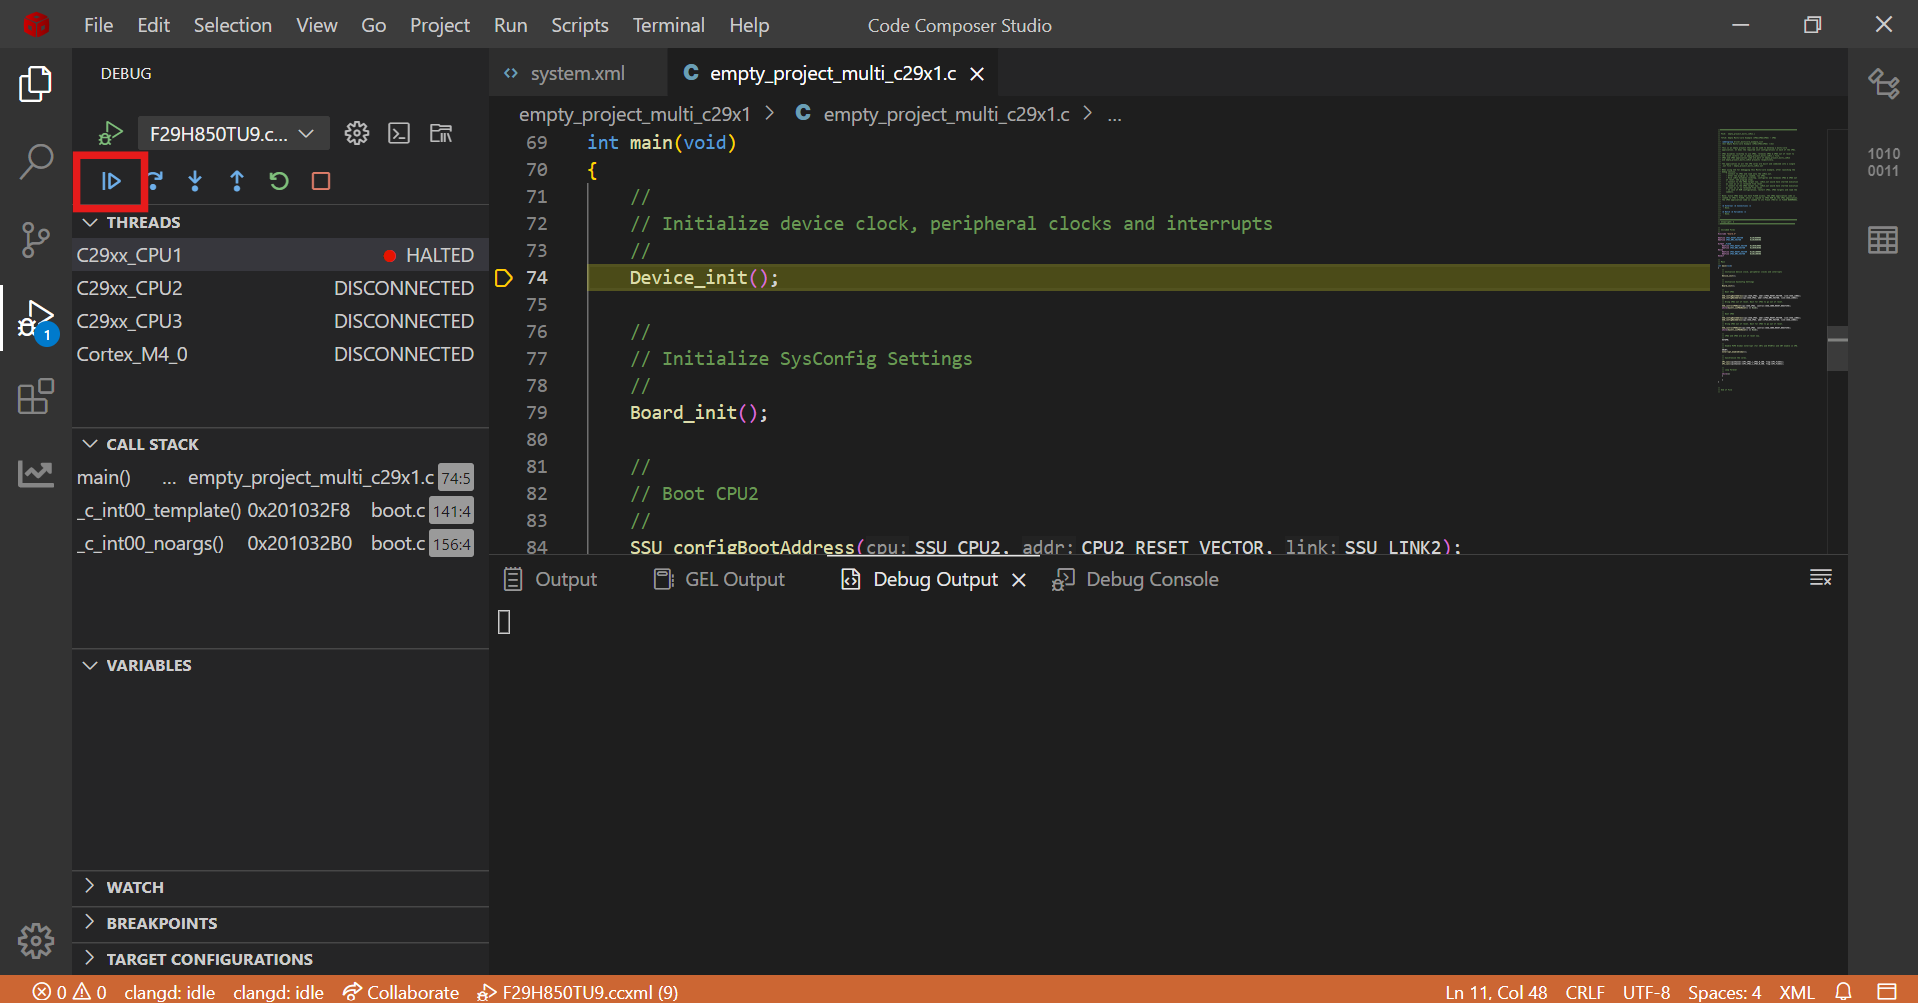
If the build configuration is 'RAM' then run the CPU1 program immediately after loading in the above step
Run CPU1
If the build configuration is 'FLASH' below run options are possible
Run CPU1 program immediately after loading as explained in above step
Run after one of the below reset cycle
Issue XRSn
Issue Power On Reset
Disconnect CPU1
Power OFF and ON EVM
Connect CPU1
Load and Run SSU multi core example
Apart from the above mentioned Load and Run instructions below mentioned additional steps should be followed for SSU multi core examples
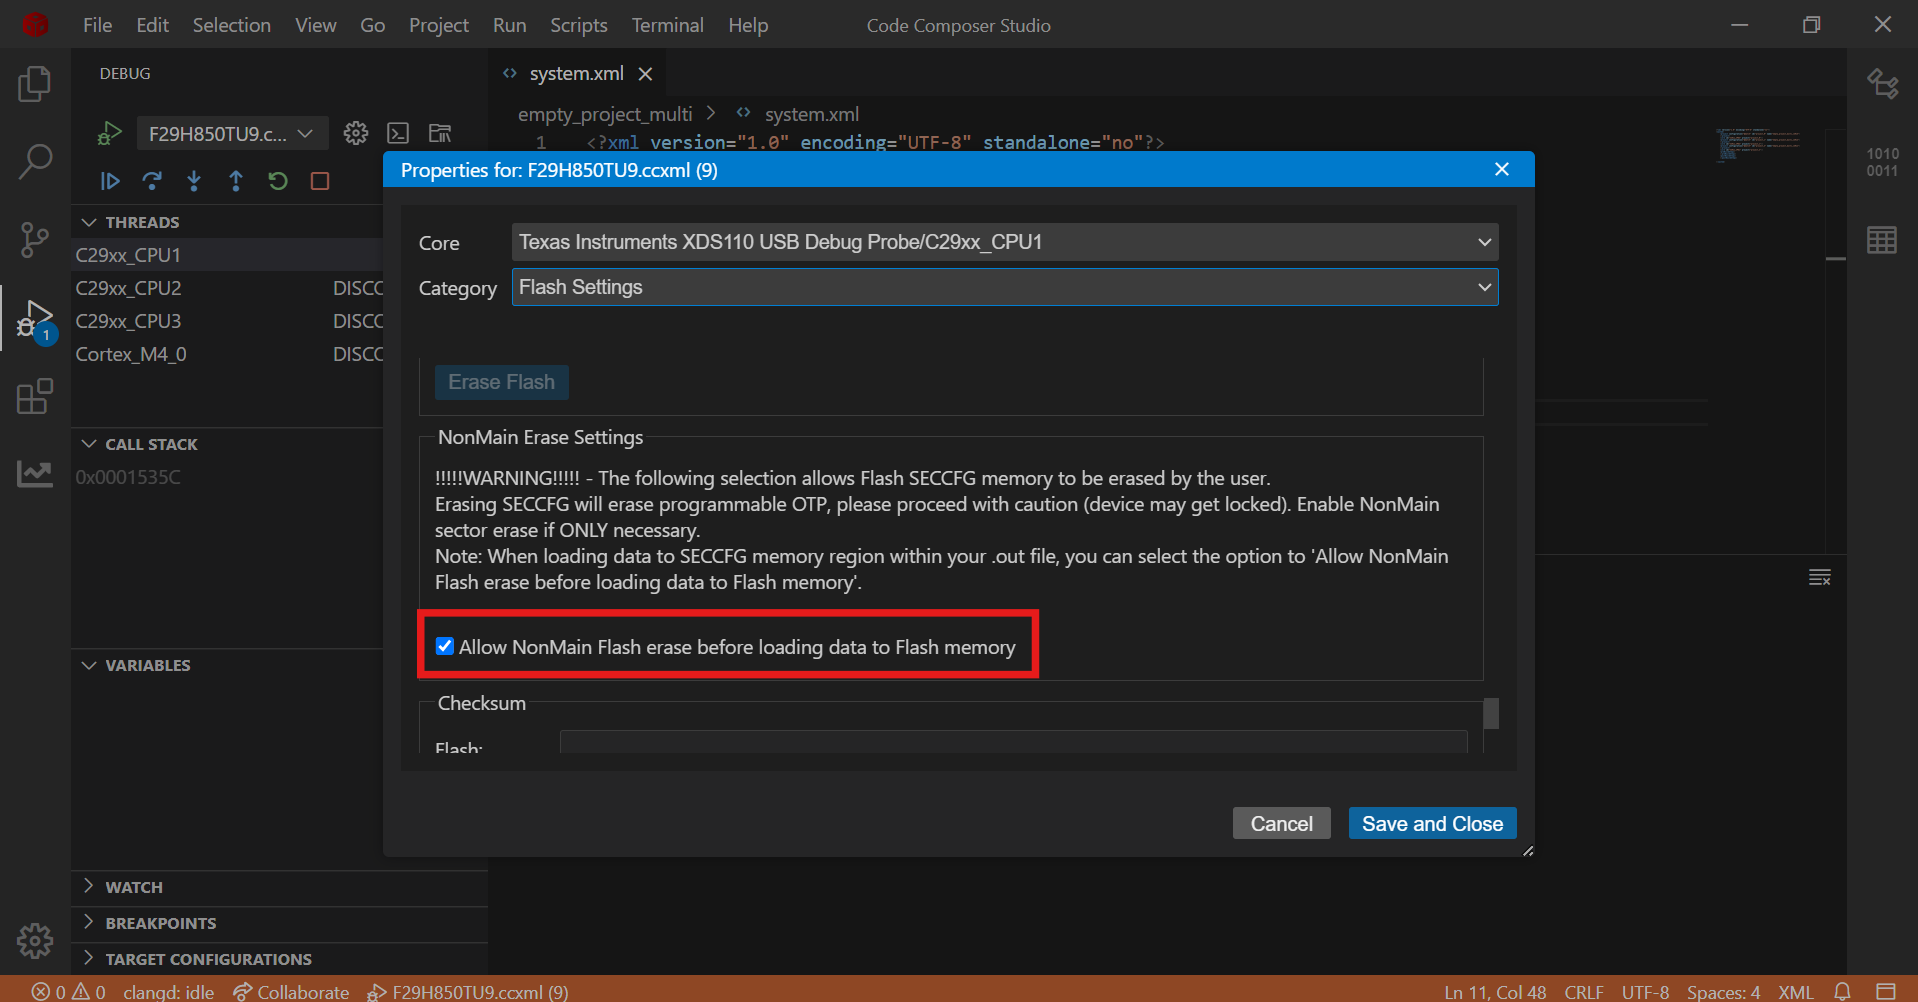
Load
Make sure below check box is enabled
Nonmain Erase Settings
Run
Always select one of the below reset cycle after loading so that the 'Security Configurations' loaded gets applied and then run the CPU1 program
Issue XRSn
Issue Power On Reset
Disconnect CPU1
Power OFF and ON EVM
Connect CPU1
While loading an another SSU multi core example below extra steps should be followed
Load default 'Security Configurations' based on the current BANKMODE provided under 'C:\ti\f29h85x-sdk_1_03_00_00\source\defseccfgbin' folder
Sl. No
BANKMODE
Default program
1
0
default_seccfg_bankmode_0_ssumode1.out
2
1/3
default_seccfg_bankmode_1_3_ssumode1.out
3
2
default_seccfg_bankmode_2_ssumode1.out
Select one of the below reset cycle
Issue XRSn
Issue Power On Reset
Disconnect CPU1
Power OFF and ON EVM
Connect CPU1
Build and Load the new CPU1 program
generated by
1.11.0