1. Custom Board Support
1.1. Overview
SysConfig provides extensive support for working with a board. In the context of SysConfig, a board consists of the various components on the board such as LEDs, Buttons, headers, etc. In particular, it indicates the pin connections from components and headers to the device package. This is useful when configuring software such as peripheral drivers because, amongst other things, the drivers manage PinMux configuration. The pin connection information ensures pin/peripheral assignments set in the driver configuration match how the board is wired. It is currently not possible to easily define a custom board using SysConfig, but TI provides board information for standard development boards such as LaunchPads which can serve as a reference. This document outlines how to use SysConfig to leverage existing board information when designing a custom board with small differences from a standard development board. It also explains how to migrate from a prototype created on a standard development board to a significantly different custom board by working at the device package level.
1.2. Overriding board constraints when small differences exist from a standard development board
Board information will usually affect pin assignment selections. When software is configured to manage a specific hardware component on the board via the “Use Hardware” drop down, the pin selections are limited to a single option matching the connection specified for that hardware in the board information.
If the custom board differs from a standard development board such that
pin connections have been changed to different device package pins
a new component has been added to the board
then the “Use Hardware” selection can be set to “None” to enable additional pin selections.
When “Use Hardware’ is set to “None”, any free and compatible header pins are automatically assigned, instead of only the pins connected to a specific component. In addition, all other compatible assignments on the underlying device package will also become available for selection. Such as
Other compatible pins on the header
Compatible pins available on the package but not pinned out to any components or headers
Compatible pins specified to be connected to a component
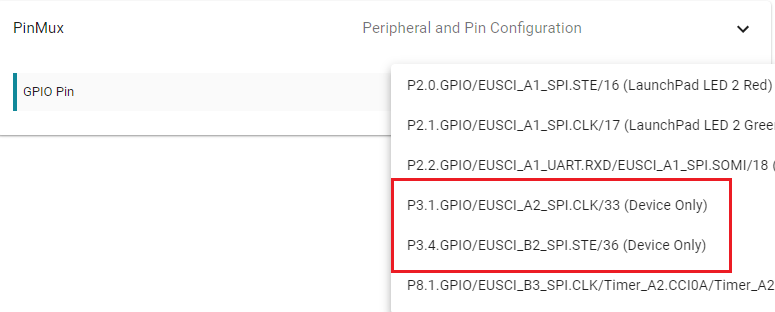

In the case of a non-header pin selection, warnings will appear to indicate the assignment is incompatible with the board.


These warnings are safe to ignore as long as they were made specifically to account for differences in the custom board.
1.3. Completely eliminating board constraints and working at the device package level
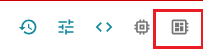
After starting with an existing board it is also possible at any point to remove all board constraints and work at the device package level. This helps with migration from an existing prototype board to a custom board. It will also help deal with the abundance of warnings that could occur with the “Overriding board constraints” approach outlined in the previous section. This feature is accessible from the board view. Begin by ensuring the board view is visible by clicking on the board icon in the top right corner to toggle view visibility.
It may also be accessed from a compatibility warning.

Pay close attention to the dialog after starting this action.
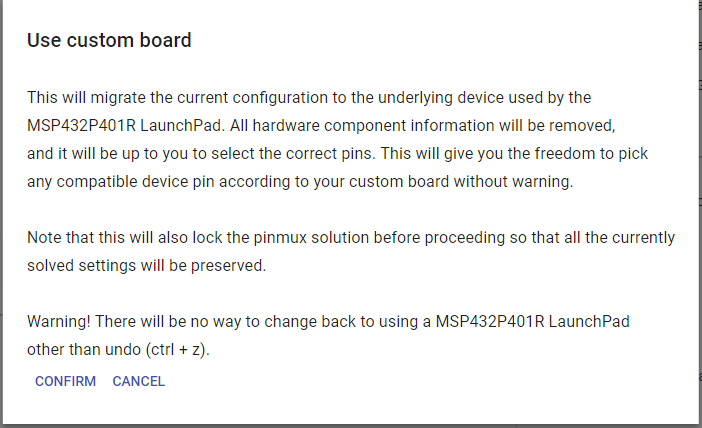
As noted in the dialog, this action will remove all board information and migrate the current configuration to the underlying device package. It will preserve the current configuration. In particular, the pin and peripheral assignments are preserved and only the board specific name decorations are removed from the selection. Thus, if there are no other changes, the generated code should not differ and will still run on the existing standard board.
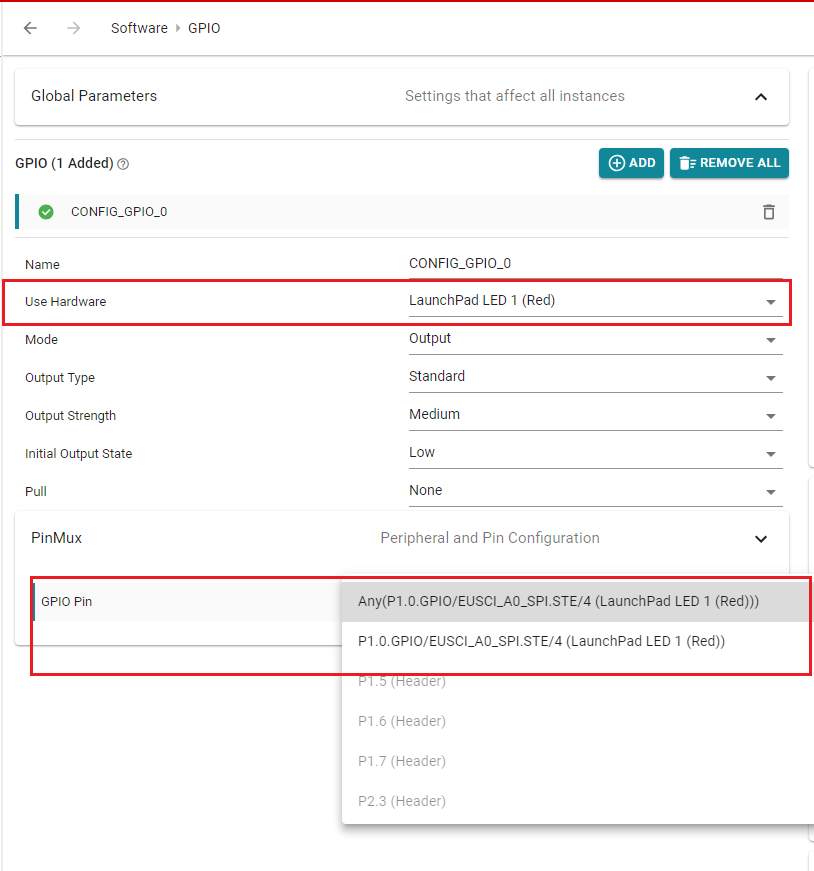
Pin assignment before migration

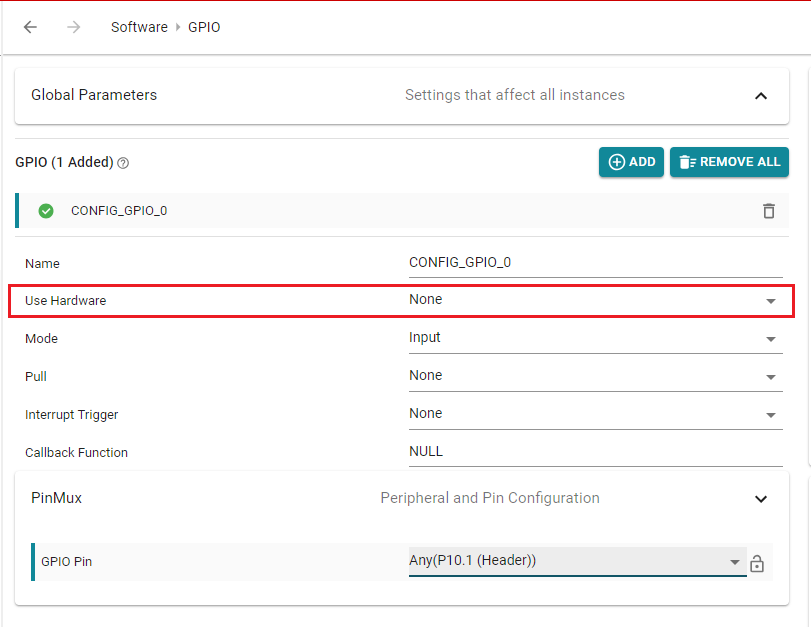
Pin assignment after migration

Note that any free header pins that were automatically solved for will now be locked down as well. This ensures that any pins assigned prior to the migration are not available for selection going forward unless specifically unlocked by setting to “Any”.
Pin assignment before migration

Pin assignment after migration

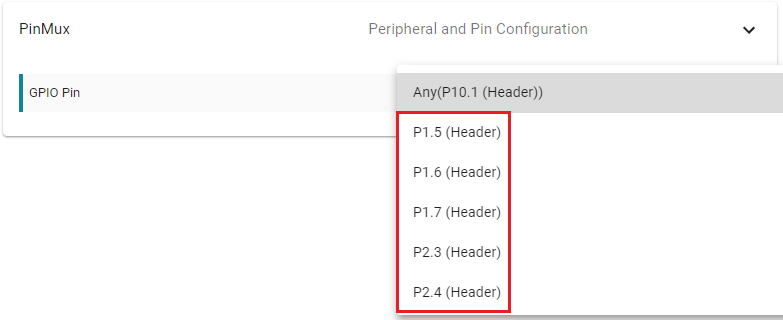
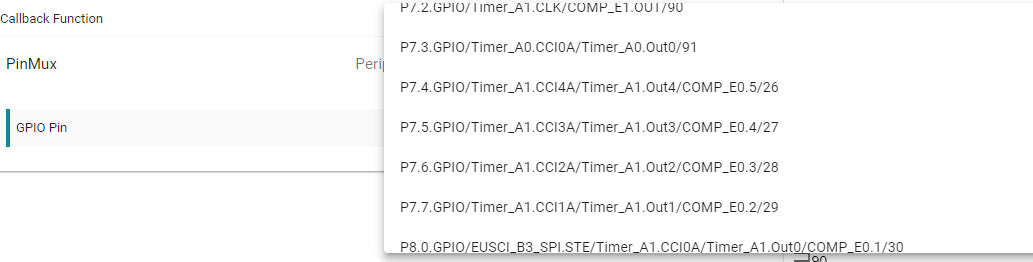
After the action is complete, compatible pins on the device will be available for pin assignments; either manually or automatically.
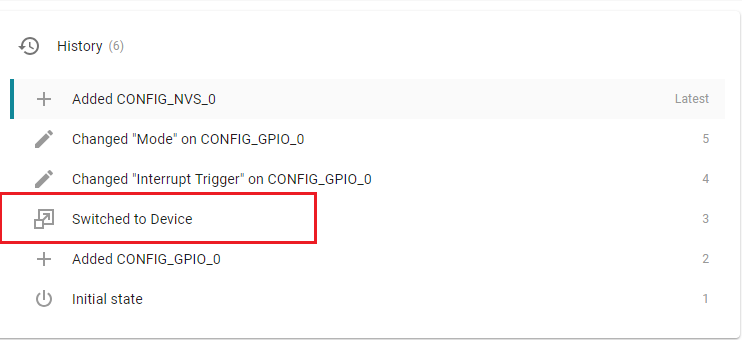
It is important to understand that this is a one way operation. Any additional changes made after the operation cannot be ported back to the board. It is possible to utilize the history (undo) feature to go back to the point before the action is clicked. Undo could be performed using the standard CTRL+Z keyboard binding or through the history view. To utilize the history view, ensure it is visible by toggling the visibility via the icon in the top right hand corner.
Directly pick the prior point in history.